Harvest Season has arrived in a Colorful Bomb of Inspiration…

This amazing photo was taken by my mom from her house in Idaho. It’s a view of Henry’s Lake from their driveway. Gorgeous!

My wonderful Aunt Katie came to visit with my mom for 3 days. It’s so fun and special to see her and have a chance to spend time together without all the kids and grand kids. She’s a positive and vibrant spirit and I’m grateful to have the time with her!
The first time entertaining in my new kitchen.
This little foot stool has been in one of the rentals for several years and the burlap, recycled from when I was in the rug industry, is showing signs of wear.
It’s simple to recover it, but I want to make it feel European to match the style of the rental.
I had some extra burlap and this fun French style stencil, which I used to create interest and give it a French flair.
Cute enough! And the fabric is less distressed. Voila’!
A good friend of mine is in the long process of Chemotherapy and I am helping her out with some cooking.
We settled on Lasagna, Baked Penne and Enchilada’s!
While I’m cooking, I might as well make some for my house too!
After the 1 week remodel that turned into a month long remodel, I needed a break from it all and found my way up to Gunnison to see some fall colors and the family. Preston relaxing on the patio, overlooking Blue Mesa!
My beautiful sister, taking in the gorgeous view of the Reservoir.
This is how to find peace and relax! The weather was perfect and the colors in full spectacle!
I drove the dogs past Gothic toward Schofield Pass and found a good place to stop and walk around. They were most interested in the cow pies, so I put them in the back of the truck for a scenic pic of the colors.
There were many people in the area taking pics and walking around. I was fortunate to find this place away from the crowds to enjoy the day.
Once I returned home, I started cleaning and working on the details from the remodel. I had David put up some shelving above the fridge for more storage.
He cut down the pantry doors to fit the cabinet. I Love the texture they add to the space!
Some of the details include shelves and cool brackets, barn wood and ceramic Brick tile.
Before the doors…
These were found at Habitat for Humanity for $10! Super great find! However, they were dirty and needed cleaning. I use TSP cleaning solution with a brush to remove the dust and spills on the wood.
This is my set up to refinish cabinets. Cleaning and prep is the biggest part of the project! Clean with TSP, then a coat of sanding sealer, light sanding, paint (maybe 2 coats), more sanding to distress, glaze to highlight any imperfections and give it patina, then 2 coats of finishing wax. This process must be re imagined with each project. I’ve learned that it takes a few try’s to get the look I want, then I go forward with that process to finish all the cabinets to match.
This is the pantry cabinet David built for me. I took it outside to begin the treatment, looking for the right technique. The outside panel is done and ready to mount the pantry doors again.
I also wanted to try the technique on a small part of the door. I’ll finish it later, but needed to see how it looks with paint and some glaze.
When we cut the door down to size, we exposed some joints in the wood. No worries! Luckily, my style is rustic farmhouse, so I feel comfortable having imperfections in my cabinets and doors. I do need door latches.
My door latch solution is magnetized brackets. Simple!
Before I left Gunnison, Susie gave me fresh produce from the farmer’s market on Saturday morning in town. How cute are these baby carrots?
I feel better having taken a break from my remodel project! It’s always great to get up the the mountains and especially when the fall colors are in full display!

Authentic Details make this old Kitchen Fantastic

An updated walk through.
Butcher block counter tops are in. The wall behind the stove still needs to be prepped before tile.
I’m reusing the upper cabinets doors on a new cabinet that David will build under this side of the peninsula.
He’s literally building it to the half wall for support. The small panel of wood on the floor is covering the old vent and next to that, you can see the light area on the floor where we took out a cabinet at the end of the peninsula. The hardwood will need to be filled in and patched to match the rest of the kitchen.
1 long shelf will go down the middle of this cabinet, horizontally.
The work area outside.
He’s adding doors, then the face plate divider, one at a time…
David installing doors...
And taking a pic of his work.
This is much needed space and I’ll put small appliances here for easy access.
The upper cabinets without all the doors. I was able to give away all but one of these before trash day!
The peninsula with the butcher block already oiled. I used Mineral Oil to protect and condition the butcher block wood. I’ll add another layer of oil after we get the project done.
My electrician came in and installed can lights, outlets and moved my thermostat.
Butcher block oiled and prepped for marble back splash.
David is reinforcing the wall behind the stove to mount the hood before he hangs backer board.
I laid out the tile in the order I want to use. He’ll install it in a simple brick pattern.
First marble going up. So fancy!
Meanwhile, the back porch is temporary storage.
Marble back splash done.
Marble back splash goes up 6″, then changes to ceramic tile that looks kinda like white washed brick.
This is a cabinet I refinished a couple years ago. It started out very similar to what I have now, but see how great it looks after distressing, paint and glaze? Very authentic, using a simple style door.
The mess is ongoing and I clean every night when they leave. I can’t wait until this is done!
Ugh!
I have family coming into town this week, so we took a break. I did a lot of cleaning, found new homes for my kitchen items in my new cabinets and set it up to use while I had visitors. It’s the first look at how this space will be used going forward.
From the kitchen side of the peninsula.
I spent some time this week looking for some doors for my pantry. I found these at Habitat for Humanity for $10! They will need a slight modification, cutting them down, but I’ll paint them and they’ll be a great focal point in the kitchen while hiding all the food and keeping the dogs out of the soup!

Rolling with the Punches for Desired Results

Here’s where we’re at this morning.
This is how the kitchen started before we began this remodel. I’ve already taken the cabinet doors off and cleared the space for demo!
The goal is to remove this wall and open up the kitchen to the living room.
This is the tiny doorway between the rooms. See how dark the living room is compared to the kitchen? I want to make this whole space brighter and welcoming.
This is the same wall that will be coming down, from the living room view.
Once the plastic is up, David built temporary supporting walls so the existing wall can be replaced with a thick support beam.
These old houses have lathe and plaster walls instead of drywall. It’s super dusty and hard to remove. Makes a huge mess!
The plaster is gone and the original support beams and being assisted with the temporary walls until we get the new support beams in place..
It’s highly recommended NOT to live in your house while you remodel, for many obvious reasons. However, I’ve done this many times and while I agree with that strategy, I still do exactly that! It’s my hobby and each time, it makes me crazy and swear off any more projects. I always come back for more.
I’m nervous when the house is being torn apart and rebuilt. Especially when the support beams are compromised. This part of the project is tricky, but David has experience and now they’re lifting the new beam into place.
And securing the supporting post for the new beam going across the room.
Lucy, my emotional support dog through the project! “It’s ok, my human”
Now that the beam is in place, the temporary walls come down, plastic goes away and I can see the whole room opened up for the first time! Love it!
I’ve never used marble before, but I’m excited to mix it with a more rustic tile to make the wall behind the stove a focal point.
During the project, I’m basically home bound. It’s tough to sit here all day and hear the banging, breathe the dust and have my space being invaded by contractors. The weather is hot this time of year, so I alternate between the crowded back porch at 98 degrees and the A/C inside with the construction going on. And try to be pleasant to everyone all the while.
These guys work all day and don’t complain. Even as I make changes throughout the process. They’re troupers and I am grateful to have such a good team for my project!
After demo, I have a big pile of debris for trash day.
My regular trash guy is awesome and I give him some cash to pick up the excess. This week however, my regular guy was replaced with another crew who weren’t as accommodating. I gave them $20 to take the debris and got a 7 minute monologue about how they need more money to pick up the trash as they loaded it into the dump truck and they would only take half of the pile. What? Is this extortion? Luckily another trash truck pulled up 15 minutes later and took the rest for another $20. Must be good karma.
And the dust is everywhere. The sanding took place outside and got on everything!
This back porch has already seen many cycles of storage and clean up. So glad to have a covered area to put things when I need the extra space.
This is where I sit during the day while the construction zone is happening inside. Not very relaxing, but temporary and you already know how much time I spend out here normally. It’s a small sacrifice.
David building and installing the butcher block counter tops.
In my mind, the dogs are stressed out with all the noise, men and chaos. In reality I’m being anthropomorphic and it’s me who actually feels that way, not them.
Finally, things are beginning to take shape.
OMG! I love how open and airy this already is, minus the dust, of course!
This isn’t sexy now, but I can imagine how cool this wall will be with the stove hood mounted, the marble back splash and whitewashed brick tile above the counter. I can’t wait!
Literally 10:00 PM, trying to get water in the kitchen before a 4 day break. Everyone is tired.
DUST! All in all, a good week! Glad to be past the demo and support beam installation. I now have an open living space and an awesome large peninsula island with a slab of wood on top. I’m happy and looking forward to giving you an update as we get the new base cabinet installed and tile hung!

Fearless Lucy- Overcoming Scary Odds in a Remarkable Tale

After thinking long and hard, I finally added a new member to the household, Lucy. Formally known as Puzzle (?), Lucy is learning her way around her new house and getting to know her new family members. She is estimated to be around 1 year old, 14 lbs, a Chihuahua/Daschund mix and very sweet personality.
This is the afternoon we brought her home. She had a bath and is exploring her new yard with Rocco. They look a lot alike, same size and color, but her tail is curled and she has some White patches on her body. And because she’s younger, she has more energy.
Look at her cute face!
She is trying to get closer and closer to Rocco. He was first trying to hump her, then ignore her.
Inching closer…
Almost touching, but Rocco moved out of the way.
Everything new to her. The next morning, we showed her where we sit to have tea and watch the day unfold.
Lucy was found on May 20th in a field, near a road with a broken pelvis. It’s speculated that she was hit by a car. Her little body is similar to Rocco, but she’s is thicker, longer fur, shorter legs. He’s more willowy.
Lucy still looks to Rocco for guidance. She follows him around and does what he does. He is tolerating her, but I see him warming up and letting her act more familiar with him.
She’s starting to feel more comfortable and confident.
As the summer is nearing the latter part, I’m finding time to finish up my yard and storage areas. My bone yard has been holding outdoor tools and garden equipment. I’ve been picking away at items here, and today will rearrange and organized it.
This project took 45 minutes, so much smaller than I made it out to be in my mind! I should have done this months ago! Now, cleaner and I can find things faster.
And I’ve scheduled this wall to come out next week. This is the first big project I’ve done inside this house, so far. Before winter arrives, I want to open this space up for more light, make the it feel bigger and inclusive. During the colder months, this space IS the living space for the house and can feel claustrophobic over the long cold snowy season.
My contractor, David built this cabinet for me. I’m challenged with storage in this house. And when I take out the wall between the kitchen and living room, I’ll have even less cabinet space. This will be interesting, but I specialize in this problem, after working in all these 1930’s bungalows!
David built this base cabinet for me a couple months ago, and the two match. I’m doing this kitchen remodel on a budget and plan to refinish the cabinets myself, use rustic and inexpensive materials and still make it look farmhouse chic in the end. This exterior wall will be the focal point of the whole kitchen/ living room once the wall comes down. I have a couple vintage looking panel doors that may help dress up the tall cabinet. Once the work is done, I’ll decide on the details.
The new cabinet sits adjacent to the back patio door. I had it built to be only 9″ deep so walking into the kitchen doesn’t feel like a hallway.
These sunflowers arrived unplanned and they are spectacular! The soil we dug up from one of the old garden boxes and moved to this raised garden in the front yard had sunflower seeds within and they surprised me and the neighborhood when they grew taller than the windmill. My neighbors tell me they love to watch the windmill spinning, moving and entertaining them. So much fun!

I Had A Delightful Dream To Restore This Relic…

It’s been a crazy fun year and I’m grateful for and proud of the project I’ve been working on!
One Year later, after a great summer season, my house looks fresh, bright and welcoming!
This poor house was so overgrown!
The new landscape is much cleaner and easier to maintain!
The Aspen Tree is still here but,
the front looks otherwise pretty different.
The side yard between my neighbor and I…
looks better with a cedar fence and gate, Breeze material and filled in grass.
It’s hard to see the cedar garden boxes on the right. And impossible to see the gate behind the volunteer tree the contractor is walking through.
Ah, there’s the gate! And a nice clean walkway under the cedar arbor.
And the front door must have been original! Weeds were growing through the concrete step under the door and into the house.
More welcoming! And interesting to look at, from the street.
The back door was also in poor shape.
The new slider is more open, let’s light into the house and is so much prettier.
This is the back porch, but this pic was taken around 2011, before the garage came down. It had plywood paneling on the bottom and screen on the top.
No more plywood! I replaced only the necessary supports with Cedar posts and opened it all up. And a new shed shares the original garage space with a courtyard seating area.
I liked the garage, which had cool original wood siding, but it was so old! The back yard was neglected and overgrown. (pic taken around 2008)
Ahhhh…. Cleaner and low maintenance! Perfect for me!
Straight view of the original back patio.
Today, an Oasis in the City!
Amazing how different it looks now!
I want to hang out here!
The far side of the back patio had 2 different types of fencing between the neighbor and I. Redwood, which turned into chainlink. My neighbor also looked right into my patio from their back door. Awkward for everyone!
I added taller Cedar fencing from the alley to the front sidewalk and everyone is happier! Plus, I hung some outdoor curtains all the way around the patio, giving both of us privacy that can be adjusted.
The back patio concrete was poured with an angle on the left side, starting at the house and ending at the tree.
I extended the concrete to square up the patio which added extra square footage.
One of the best parts of this 893 square foot house is the patio and outdoor living space. I knew this space should be the heart of the house when I first saw it in 2005. I didn’t however, think I would live here 14 years later and make it into what I imagined it could be!
This space is so comfortable and serene. The breeze flows through the patio, keeping it cool. Ceiling fans move the air and the curtains float. Mmmm.
This is what my life looked like in August 2018, 1 year ago.
This is what it looks like today! Rocco is comfortable here too!
The old garage concrete pad with weeds growing out of the cracks.
Same spot, but now it supports my shed! Clean gravel walkway, courtyard and cedar arbor overhead.
I love how organized garden boxes can make your yard. After some clean up and a new irrigation system…
First year gardens. It’s hard the 1st year trying things out and making adjustments as needed. I’ve read that gardening teaches patience and my the case, it’s true! Every year after, becomes a game of what will come back again and eventually you have a mature garden.
Walking through the side gate, this is what you’d see ahead. This is my main entrance. Lovely!
Now this looks like a place I need to explore more!
Same view, to the left, Ugh!
I even got some extra shade from the shed, making the patio more protected. And honestly, the shed is such a focal point, it makes the whole yard seem like a stage set.
I haven’t done as much in the inside, but I’ve done some things and I have plans for more.
I added A/C, fresh paint, lots of cleaning and a new front door.
The arch on the left goes into the kitchen. I replaced the kitchen windows that you see on the left, with a slider door into the courtyard.
It really opened up the kitchen, brought light into the house and now, I walk right onto the courtyard from the kitchen. This was a huge change that made this house feel more updated.
This fun corner of the living room gives the occupant a nice view of the front yard.
I made a cozy seating area with a thick shag rug to give it texture.
A closer view of the arched wall between the kitchen and living area, where I added a new slider door.
I’m planning to take this wall down between the living room and kitchen. This space is the main living space in the house and during the winter, where I spend most of my time.
I’ll lose the upper cabinets and keep the base cabinets. I want to open up the room so it feels bigger, brighter and warmer having the living and cooking space connected.
I’ll remove the weird soffit above the cabinets to open the room up, refinish the existing base cabinets, add rustic support beams, new tile backsplash, new countertops and I’m having a shelf cabinet built…
to match the cabinet you see here, below the windows. As you can see, I need more storage space and I’ll put the new cabinet to the right of the windows. It’s tall and fits the space between the windows and the back door.
Me, happy to be at this point of my project and enjoying my simple life.
I love my newly remodeled space! This project has been so fun because I get to do what works for my lifestyle today. It’s customized for me. And I’m so happy living here.
Happy Anniversary, house!

The Simple Farmhouse Cabin that Exposed my Hidden Courage

Late Fall of 2000, I bought my first house in Gunnison, CO. Palisades rock formation in the far right background.
More of a farmhouse cabin, really. It had Yellow painted log siding, cinder block and brick exterior base walls, screened in porch, mud room, 3 bed 1 bath.
Dreary looking when I first got my hands on it. But it had some good potential and I was aching to fix it up!
The house sat on 2 lots, giving me some out buildings, stables and corral, a detached garage, a large garden area and tons of extra space.
Corral and stables beyond the yard.
The detached garage had a couple small windows, which I later enlarged and turned the garage into a studio. I rented out all the rooms in the house and moved myself into the studio.
Next door is a historic old school house.
The interior had Oak floors. My 2 cats Dutch (Tabby) and Camille (calico), were given to me by Susie as a house warming gift.
Pine tongue and groove paneling throughout, a wood burning fireplace.
Original built in cabinets. The ceiling was some kind of paneling without the standard aluminum grid.
Living area near the front door.
Largest bedroom
The kitchen and bathroom were outdated, so my then-boyfriend, Kurt helped me do a very basic remodel on a very limited budget.
Apparently, I had enough wine corks to do a back splash behind the original farmhouse sink.
I tiled the counter top, painted over the residual adhesive on the bottom half of the back splash, added some shelves, painted the original cabinets and added Black hardware to make this old kitchen feel brighter and cleaner.
Super rustic and super inexpensive to do!
I painted the foundation rustic Red, added a rooster weather vane, took down old metal fencing around the house, cut down weeds and took the screen off the porch to open it up.
1 year after moving in, I got a new puppy, Foxy Girl. My roommate got one of Foxy’s sister’s at the same time and named her Mariposa. This is THAT day and we are both so happy!
Spring time in Gunnison is potentially more exciting than in other places. When you live in an area that gets as cold as 30 below zero and snows crazy amounts that sticks around until June, a reprieve is so very welcome! The city turns on a water ditch that flow through the town, but until it’s turned on late May or June, we hand water.
Green begins to show up. This deck was already there and gets used through out the whole year.
Mature trees and gardens appear.
A simple sitting area against the house, protected from wind and out of view from the street.
Colorado summers are the best!
I set up some seating spots in the yard for entertaining friends when they stop by.
Beautiful old Aspen tree with flowers in the garden below.
With the city ditch turned on, Poppies bloom in a cluster. I also added some trees for privacy and shade. The rock to the right of the pic is a piece of petrified wood.
Foxy Girl enjoying the beautiful summer day on the grass
After taking the screen off the upper part of the porch, its seems breezy and welcoming. A perfect place to park your bicycle.
A Progressive Bicycle Party, ending at my house. All my girlfriends gathered to celebrate another summer in Colorado!

Go confidently in the direction of your dreams. Live the life you’ve imagined. -H.D. Thoreau

Taking a break and sitting in the sun on the back patio! This is Nice!
Rocco has his own sofa, of course.
So exciting! I got a delivery on Saturday morning. My new outdoor furniture!
Although I know I’m putting this thing together, I look a bit tentative in this pic.
Rocco is also checking things out, very closely.
OK! I can do this!
Here’s my station, under the umbrella, on my new patio!
It only took 4.5 hours, but I got it done and think it’s perfect! There are sure to be more moves, but the pieces are modular so I can move them around, how they best fit for different uses.
Plus, I love looking at this from the kitchen!
Yesterday, while assembling the group, I learned how valuable the umbrella is in this space. I almost feel like a Cedar arbor overheard would be nice. But for now, I’ll try it this way.
This is the view from the new sitting area. Not to bad!
This space is also more private and protected with the shed, fence and house surrounding it. It feels intimate and It’s the first space you see when you walk into the back yard.
The shed provides shade in the afternoon, but the umbrella keeps the space usable all day.
This is the accent pillow fabric I bought for all the outdoor furniture. It adds some fun color to an otherwise pretty neutral palette. The pattern is sophisticated, bright and casual.
In order to move this behemoth, I had to take most of the dirt out and roll it. It’s big and heavy empty! It’ll go in the back yard once the landscapers finish the Breeze.
I used up all the materials that were being stored in the middle of the yard. Now you can see straight through to the back of the yard when you walk into the back. This is your view.
My landscaper will be back for the last visit (I hope) to finish up the irrigation and some details. The border around the back patio and around the whole back yard will be gone, with a few steppers along the patio and walkways. I’ll lose 2 of these 4×8 Cedar planters, leaving me more space to move around. I so appreciate a clean, low maintenance yard!
There are 2 shrubs that I planted several years ago, growing along the back patio. They’ve been abused over the years and especially during this project but are showing signs they will be back.
I love the deep Burgundy leaves they produce. I’ve trimmed them back and look forward to seeing how they evolve this year.
This project has been healing and energizing for me. This being the first house I bought when I moved to Denver, I can’t help but think about my life then, now, and all the years in between. I’m grateful everyday, that I can wake up, hear the birds chirp and smell the earth begin to wake up and grow again. This is my therapy and I’m so glad to be able to share it with you!
Happy Easter!

Spring is welcome to visit me anyday!

Susie was in town last week to help me get my yard cleaned up for spring! It’s a tradition we look forward to, celebrating all the tiny miracles that happen, this time of year. We took my brother, Michael to lunch for his birthday.
I got my outdoor curtains up and the patio furniture rearranged. Luckily, I have plenty of rugs to use on the concrete pad. I’m thinking abut tiling the whole patio to clean it up and add some fun style to the space.
The curtains add a lot of charm and privacy to the space. I can open or close them to create more intimate sitting areas.
Here, I’m using a curtain to create a backdrop for the floating chair. And we finally moved all the garden tools from the outside of the shed. Now I can use this door to access the shed.
Susie dug all the volunteer grass out of the planter and we raked up old tree branches and leaves on the Breeze, leaving the yard cleaner, but aching for some foliage.
This vintage paned glass door was recycled from the cottage on the back of the lot. I love it as a decorative focal point and practical door to the shed. All the windows were also recycled from another house which I had the original windows replaced.
This tree and shrub were salvaged during the remodel. The shrub isn’t looking so good, but I hope they both survive the project. Shade and foliage is what this house is missing right now.
This is what you see when you come in the side gate, which has become my actual entry to the house. At this point, every pic I post has a lingering project that I need to address. In this pic, it’s the Blue tarp covering mulch, potting soil and bulbs from last fall. I just need to do it!
The side yard is clean with Breeze. Although this isn’t a part of the yard people see, I love how clean and low maintenance it is! These curtains give me and my neighbor privacy while I’m on the back patio, which is more and more often!
The pile of flagstone behind the door will be used in the front and back yards for steppers near the sliding patio door and as you walk off the patio slab of the back porch.
The garden boxes are overgrown with only a couple plants worth saving. Susie dug out clumps of grass and found a healthy Chive and a Strawberry plant! More proof that miracles happen everyday in the garden!
Susie and I moved this rustic garden bench to this area to accommodate all the pots that will come in handy in a month, or so.  This valuable space is now the gardening area.  A place to work and store my outdoor projects!  The 4×4 planter will be removed.
I‘m meeting with my landscaper to discuss removing a couple of these planters. I’ll have 2 large and 1 small planter to use.  That’ll give me more room for my fire pit, on this end, and the garden work space at the other end. Sprinklers will get turned on for the season at the end of April.
I’ve been shopping for outdoor patio furniture for this space. Now that I use it for my entrance everyday, I need to make it welcoming and comfortable. So far, I hung a window planter with metal shudders, added a couple chaise lounge chairs and I moved an outdoor bakers/garden rack near the shed door. The pots will get moved after I dig some of the dirt out of them to make them lighter. 2 part project! I still need more foliage and soft cushioned furniture!
More window planters on this side. I also have some metal art I’ll add to this side of the shed.
This cluttered corner will be a focal point of the yard. Motivation to do what I need to do! Nice extension cord leading to the heat tape on the shed roof!
I added a couple hanging baskets on the front arbor and have a couple smaller projects planned for the front yard. I’ll make the garden with the Aspen tree a bit bigger and taller- like a burm, with some perennial flowers. Also add a second burm style garden on the other piece of grass near the driveway with the windmill, shrub or tree and perennial flowers too!
My fabulous sister, Susie! Loving the early vegetation at O’Toole’s garden shop! I find my way here throughout the winter, when it’s cold and snowy outside and spring is only a distant memory. See how happy she is?
Spring is such an inspiring time for everyone! The anticipation of each pastey white face as we visit the garden shop to see what treasures are just in!
Even the yard cat in the video below is inspired, although cats don’t really show emotion, I can see she’s happy to have the fresh adventure!

This is actually ready to spotlight now!

The siding crew got all the siding done and are waiting for the new patio door to arrive before they finish this area.
Finally, the slider came in and David is installing it today!
This is the inside wall where the new door is going.
The plastic will help keep everything cleaner.

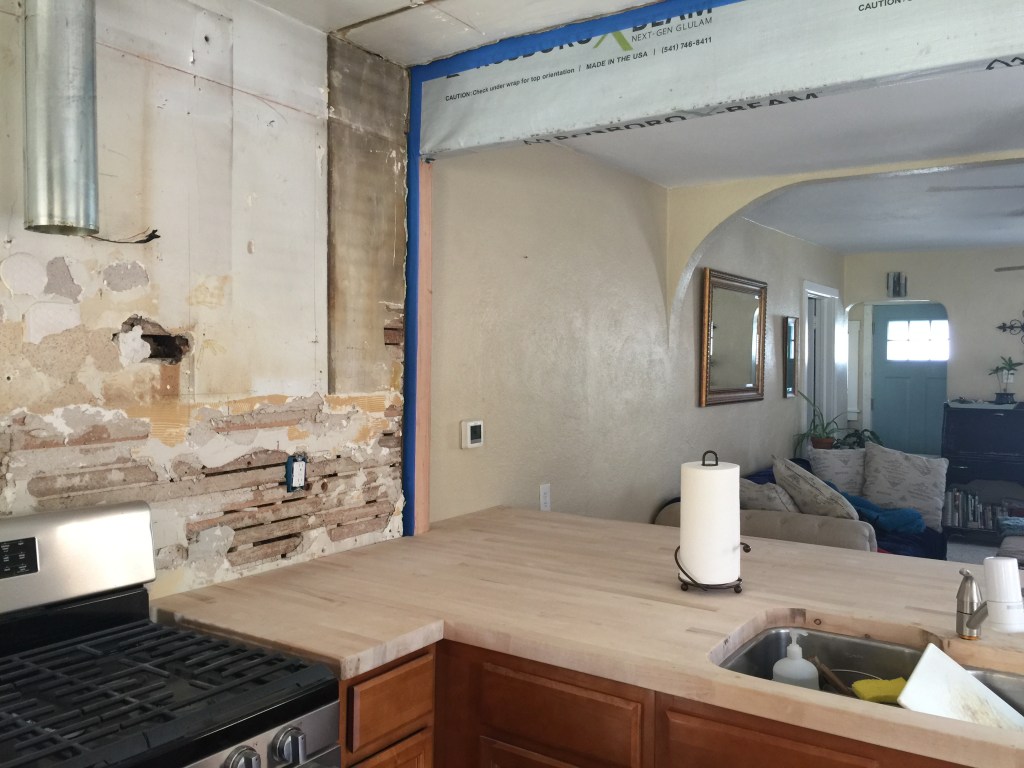
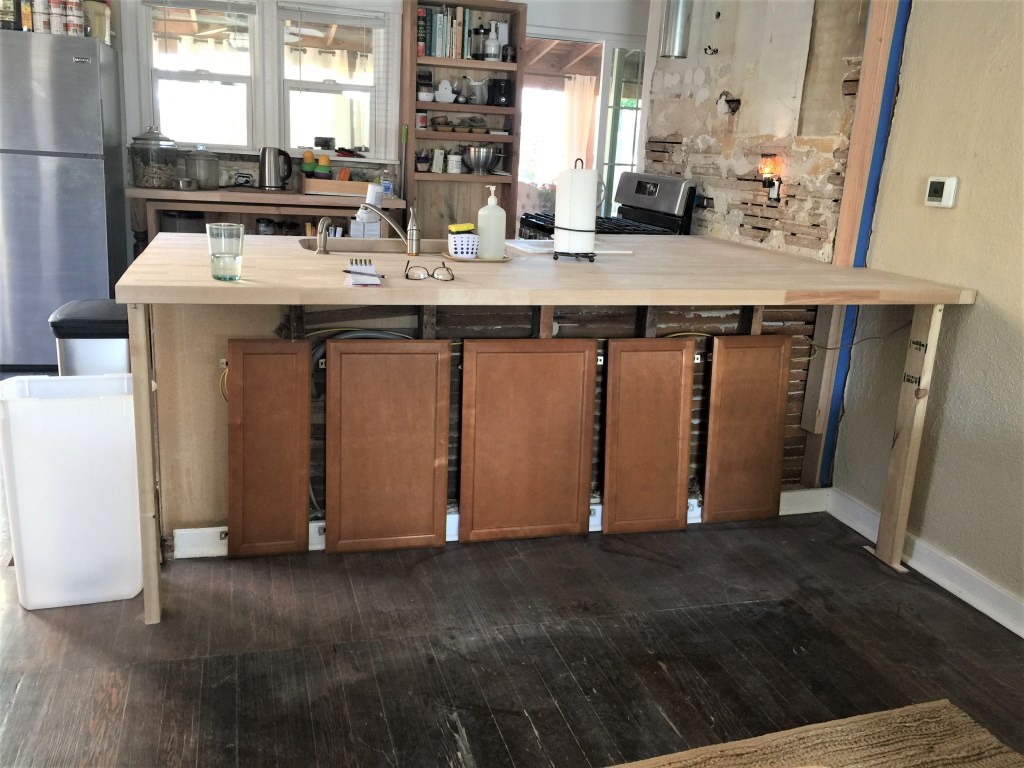
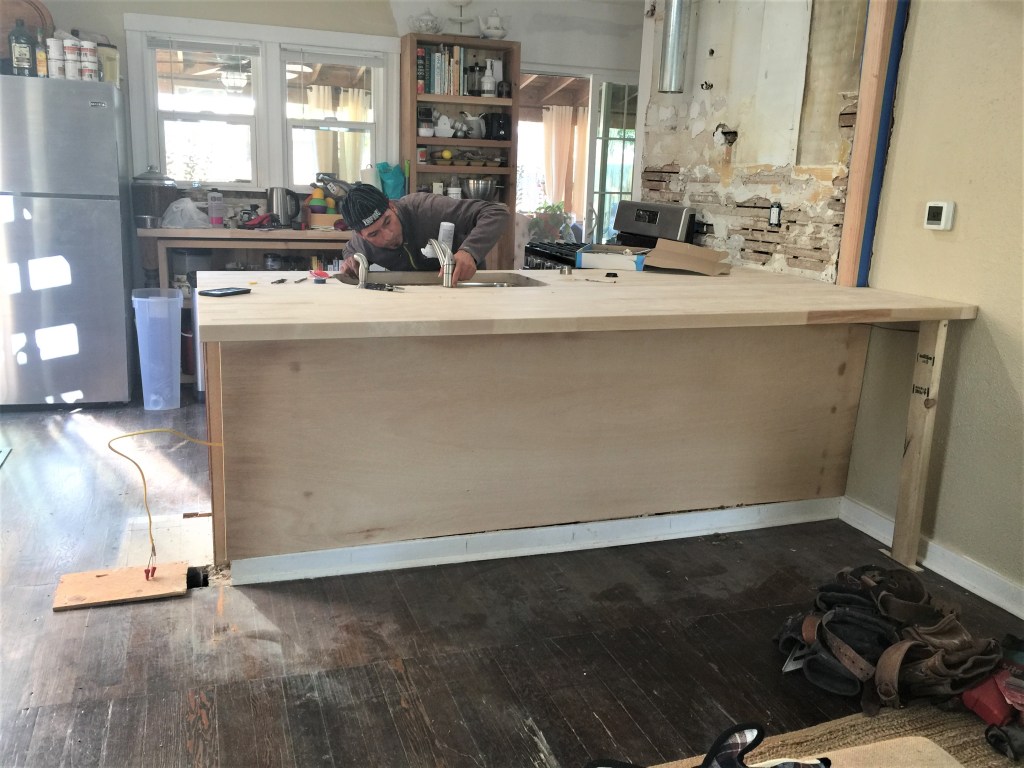
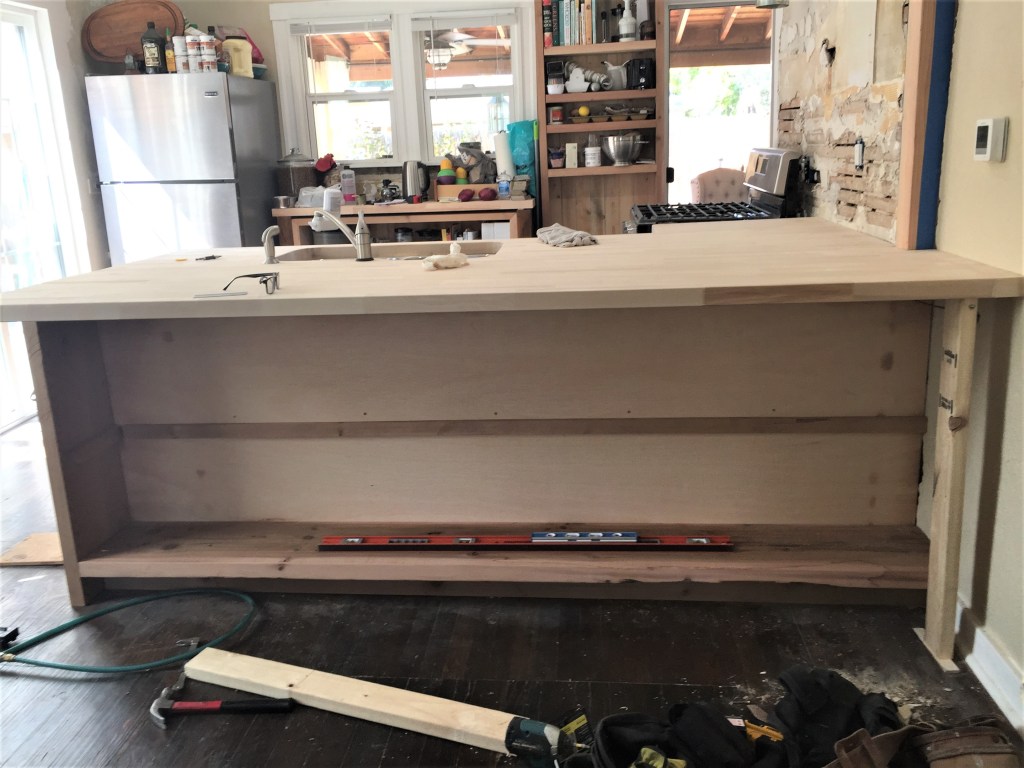
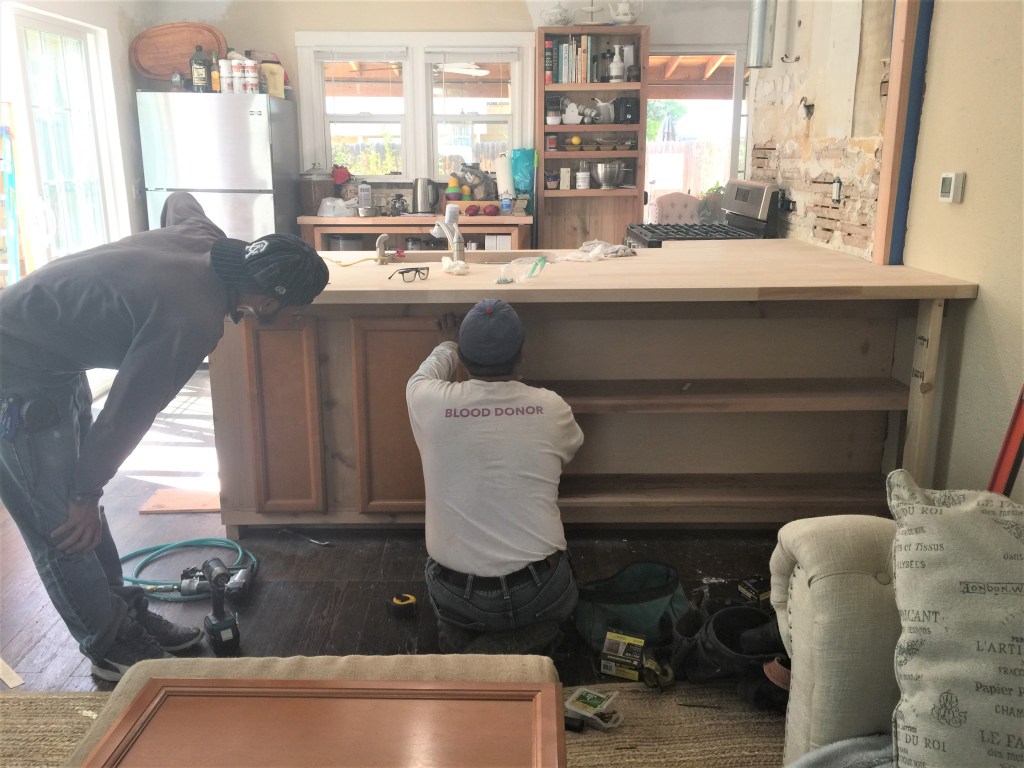
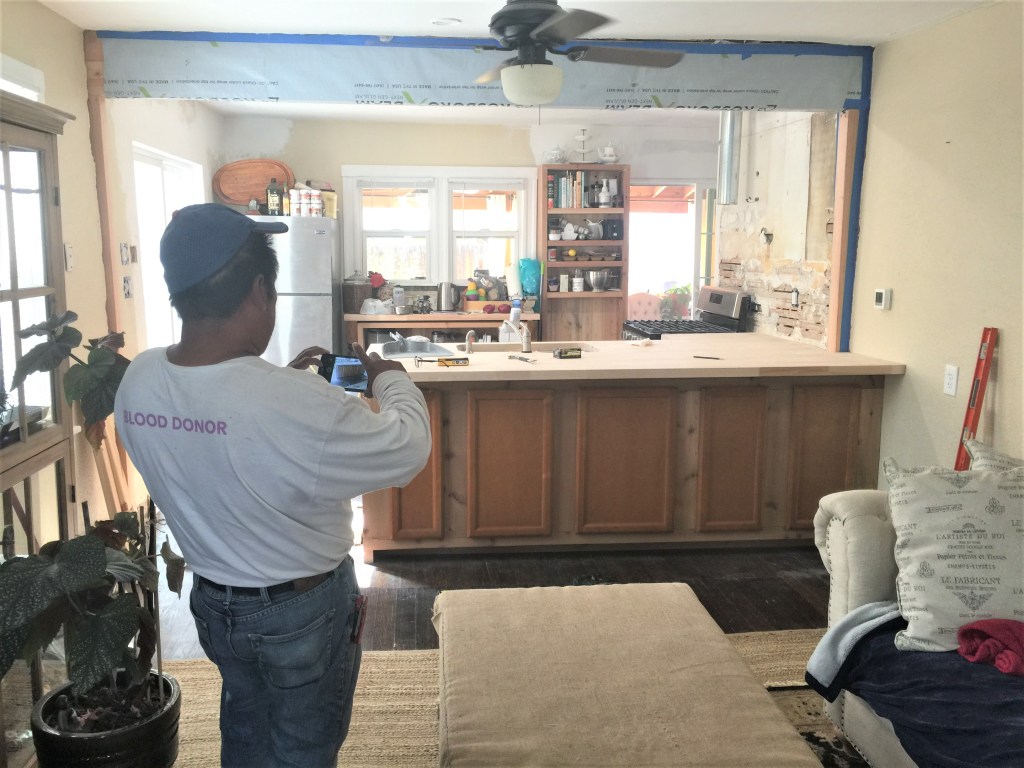
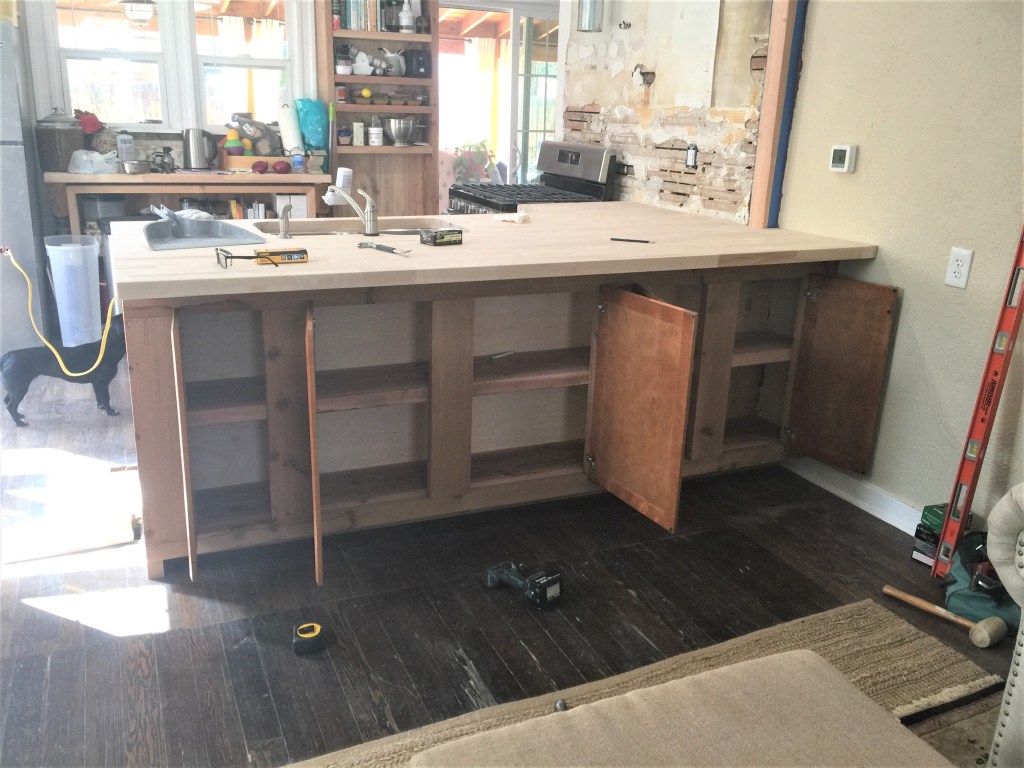
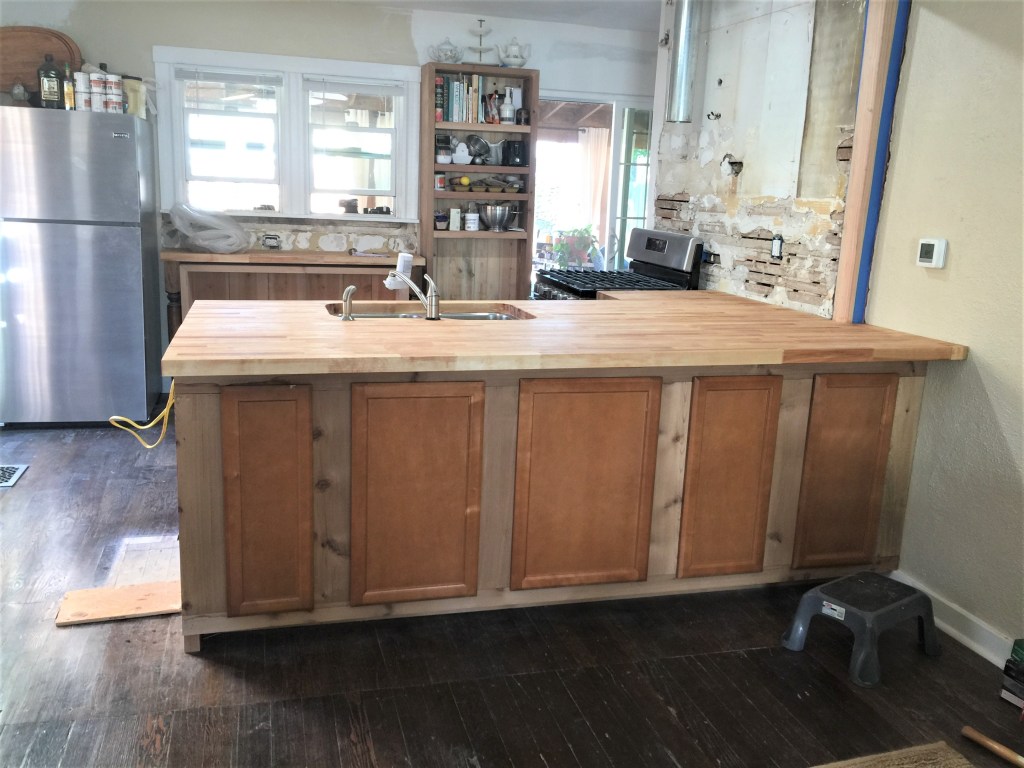
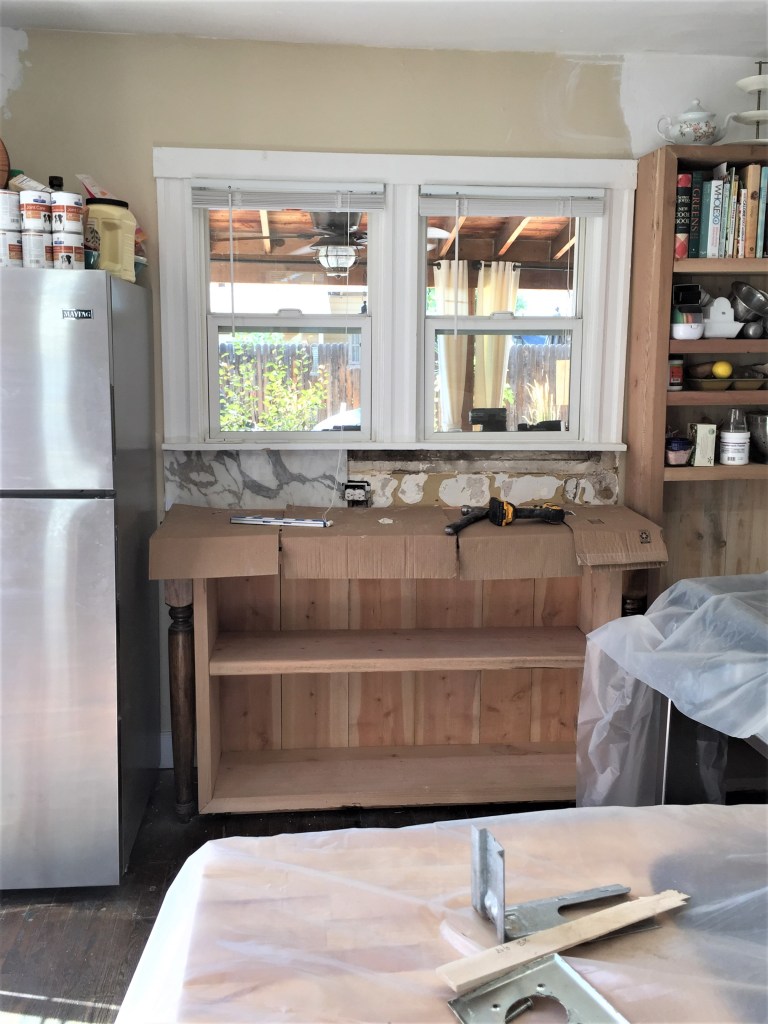
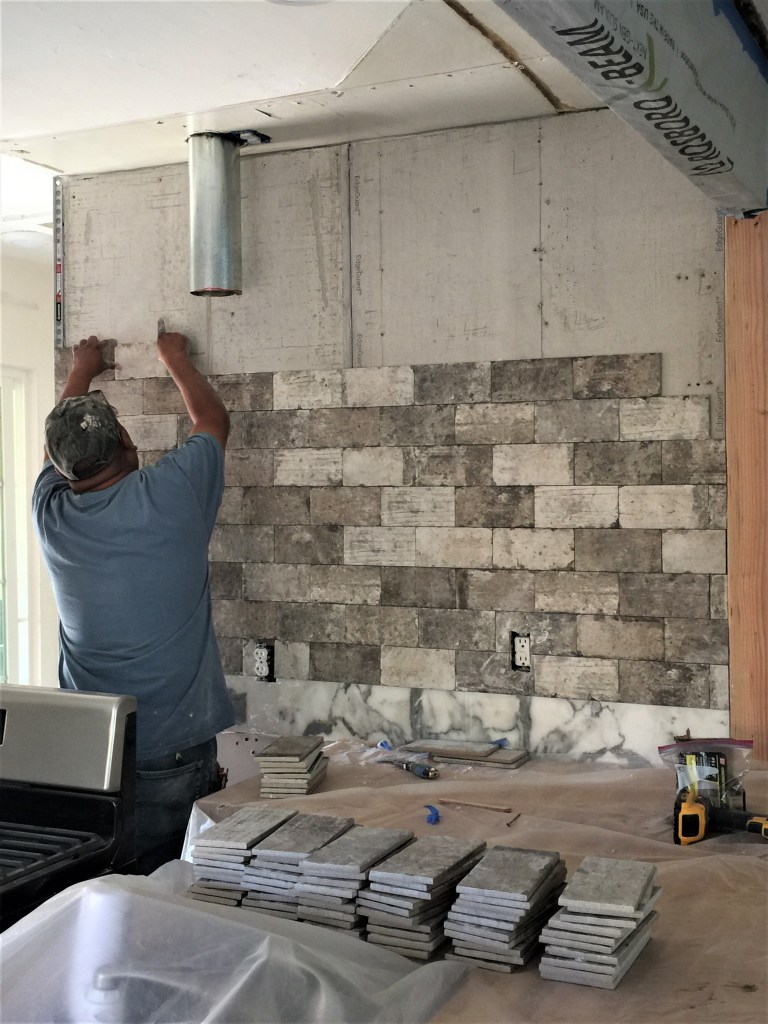
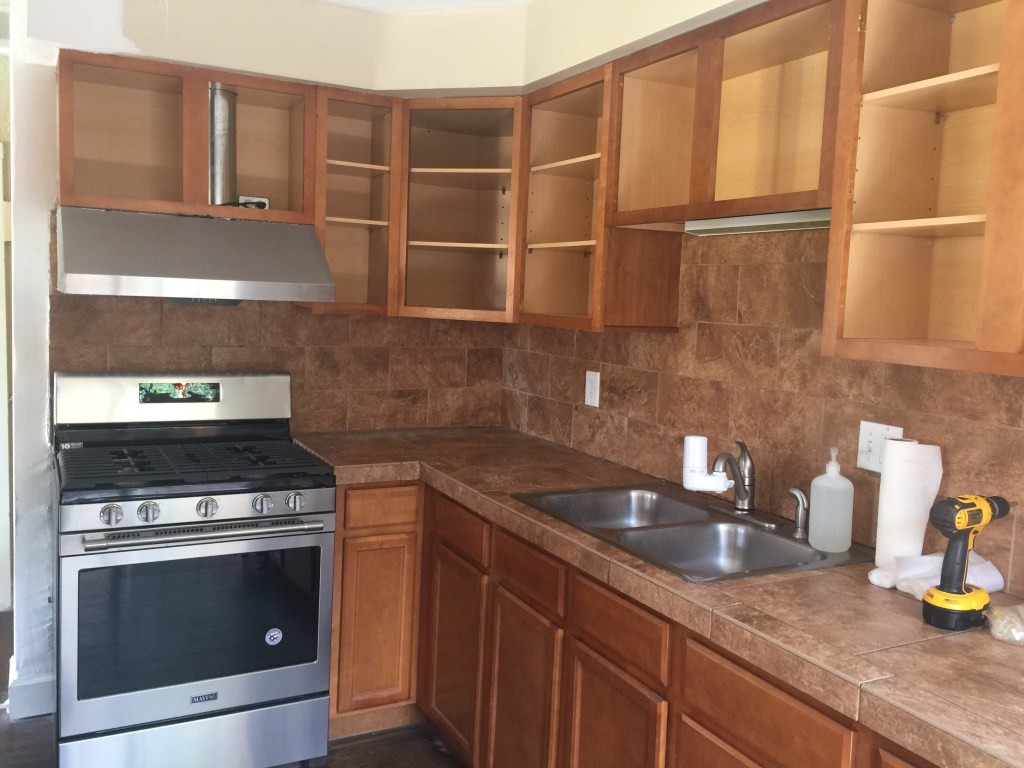
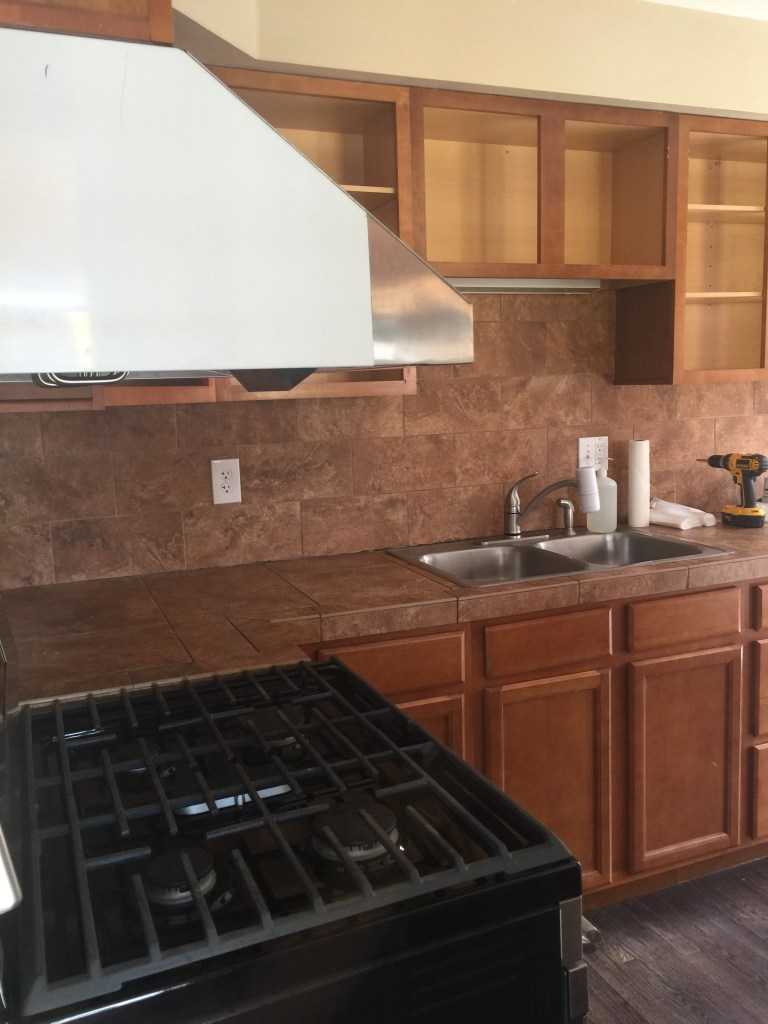
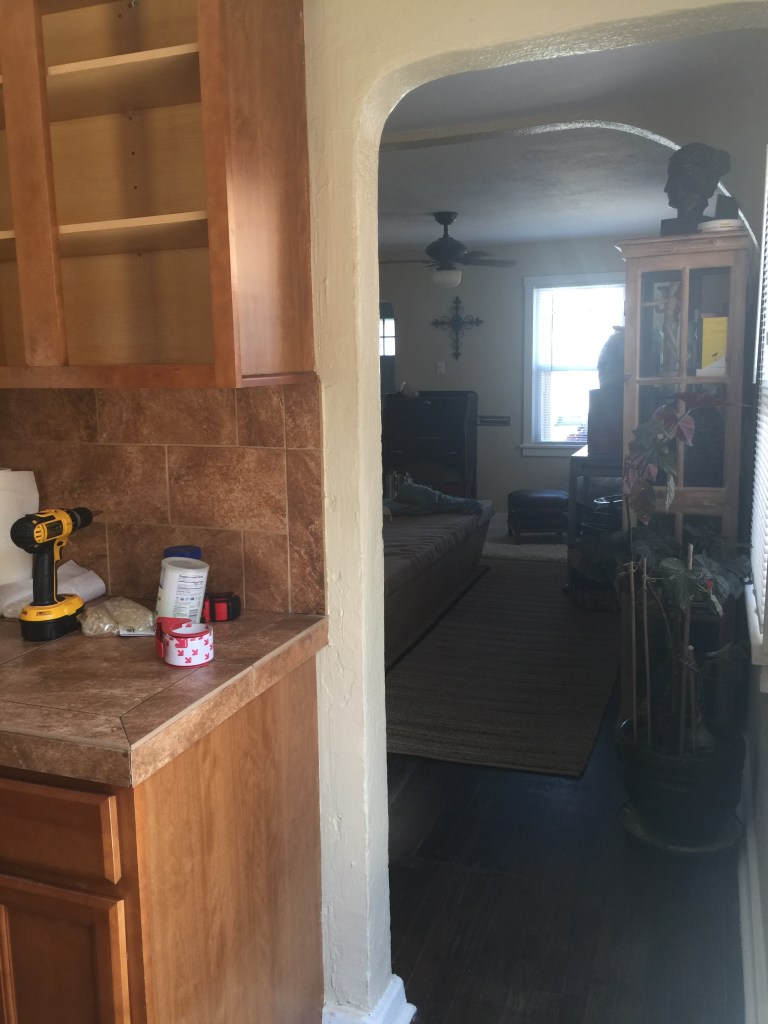
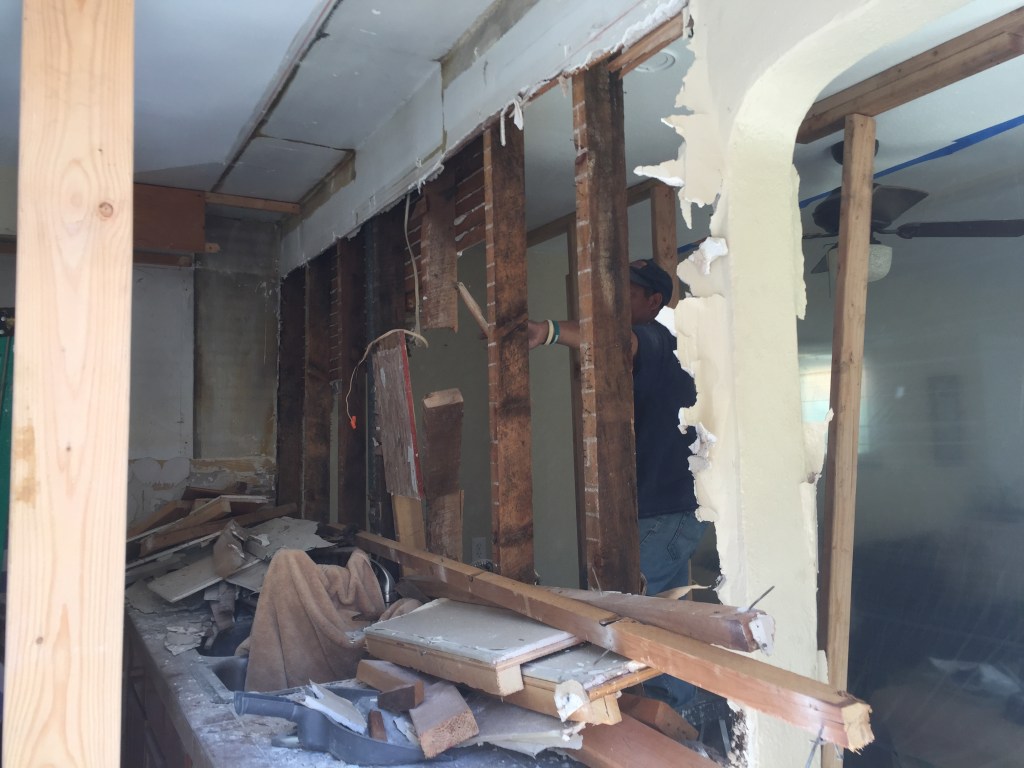
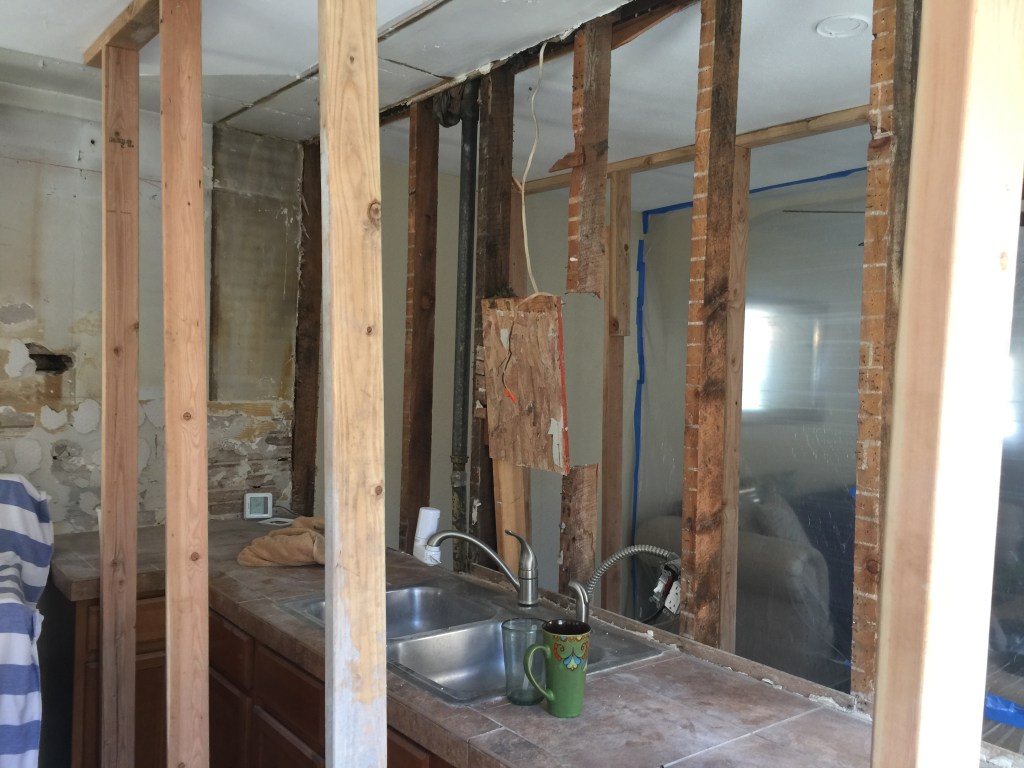
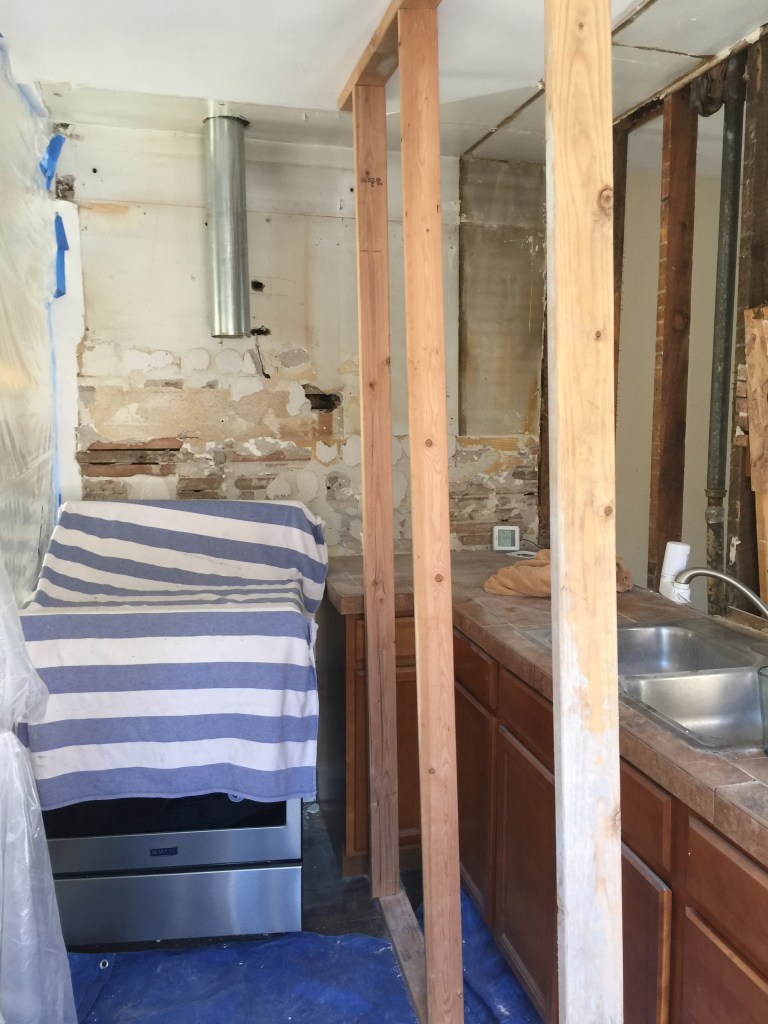
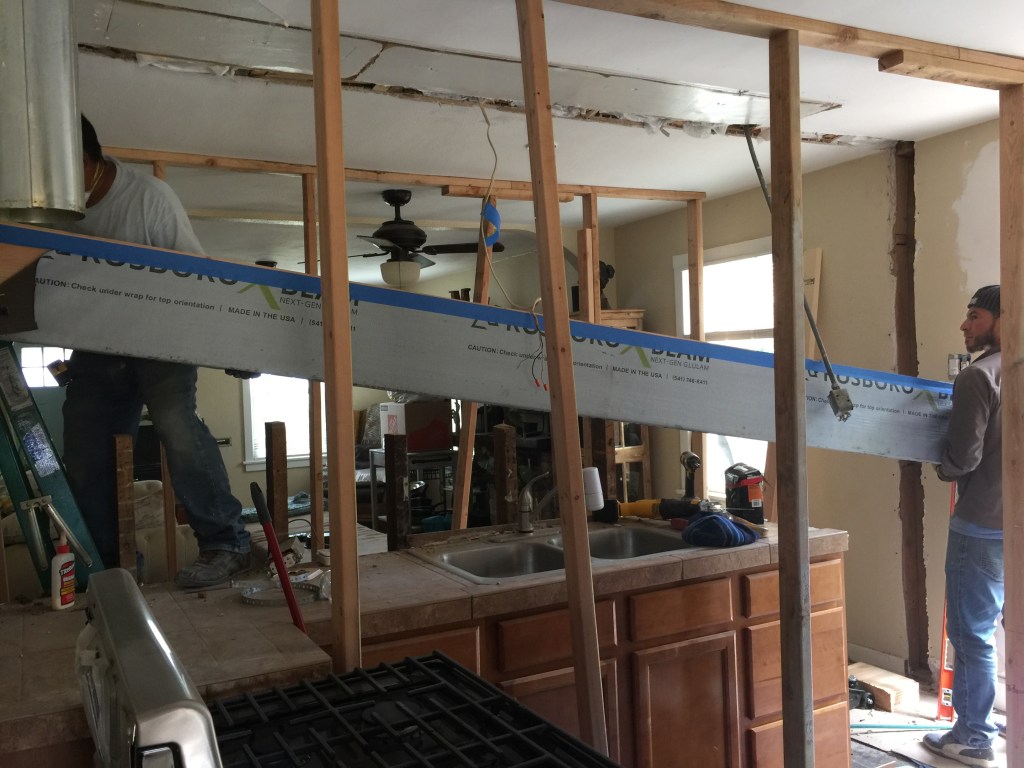
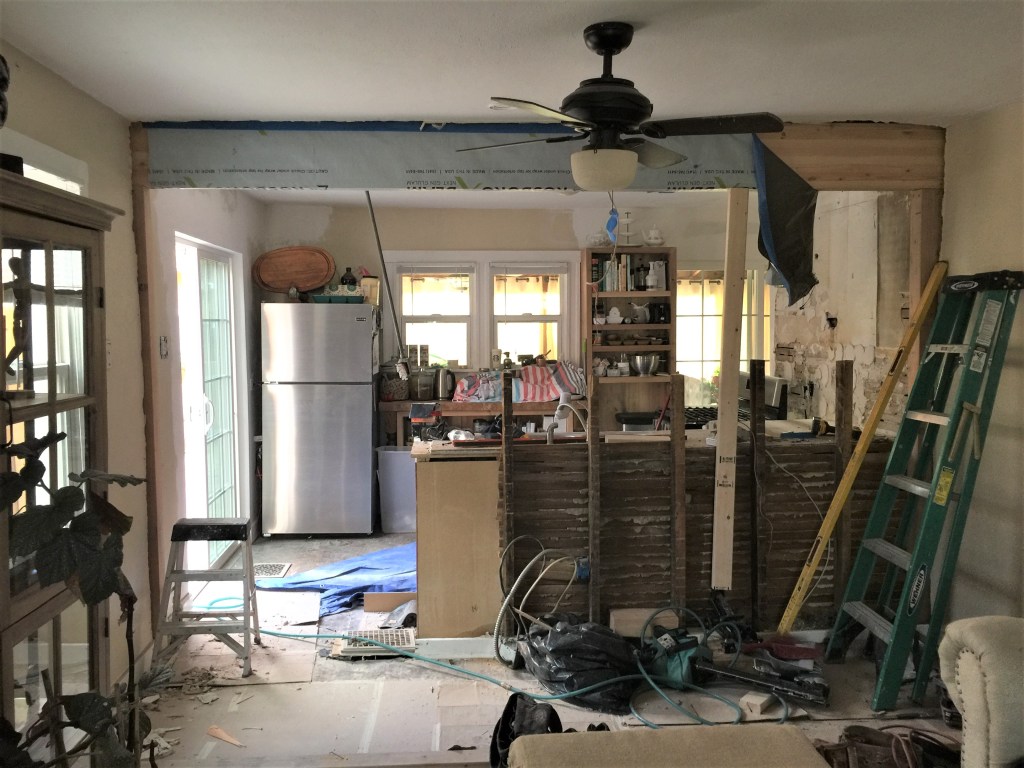
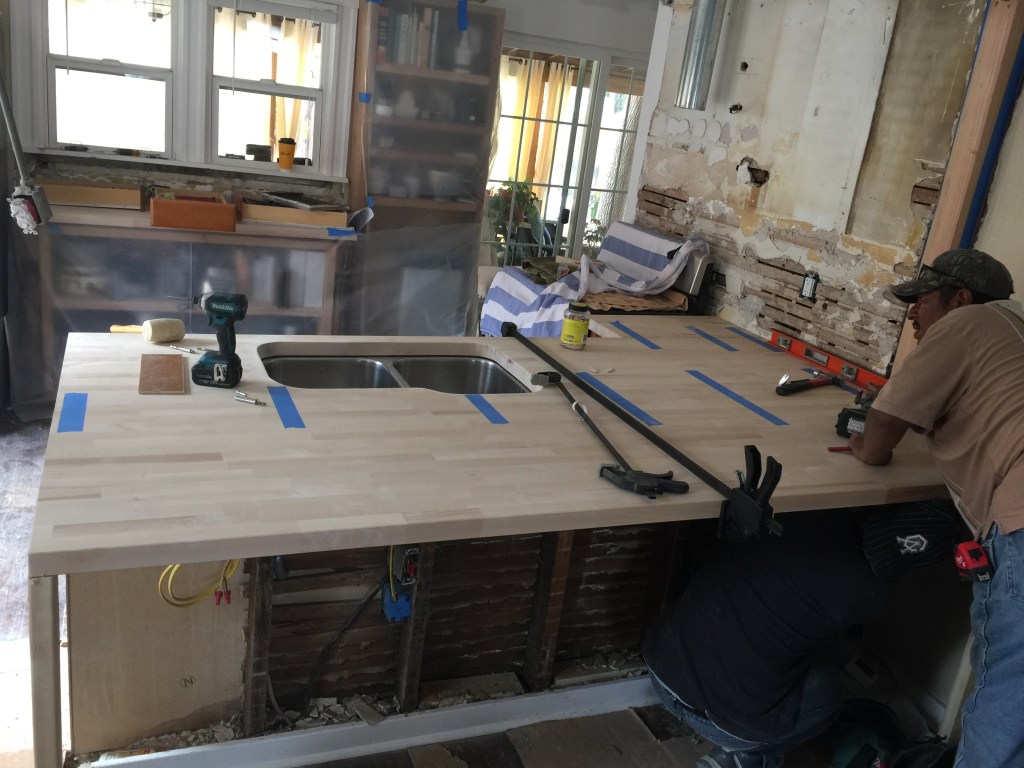
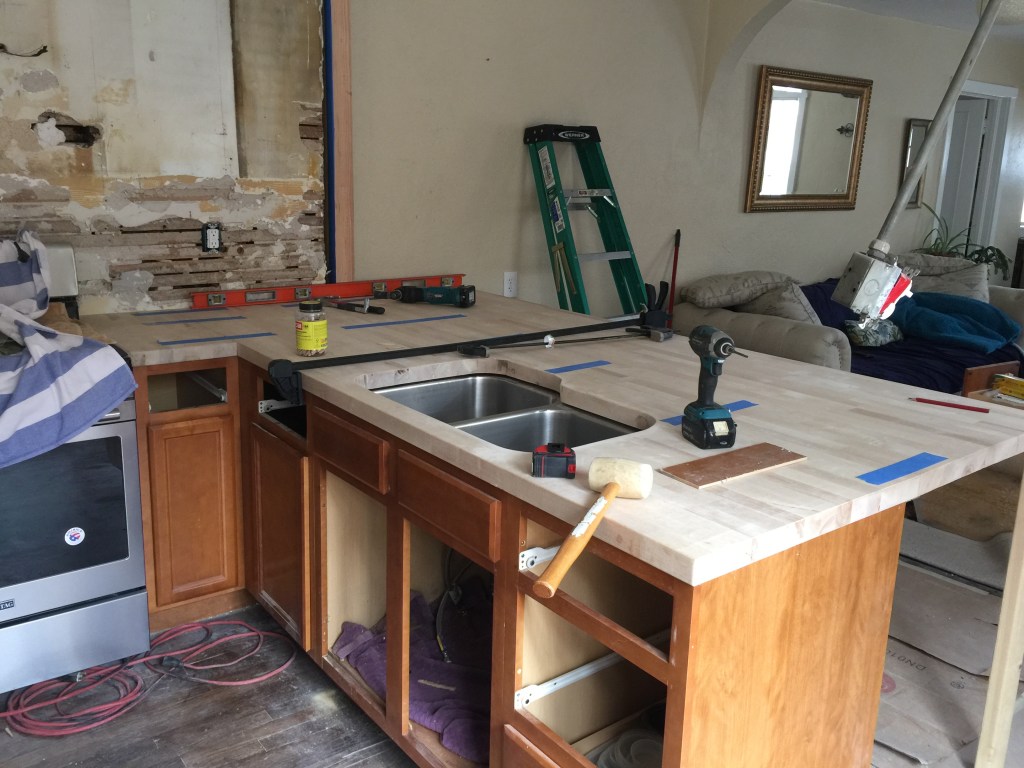
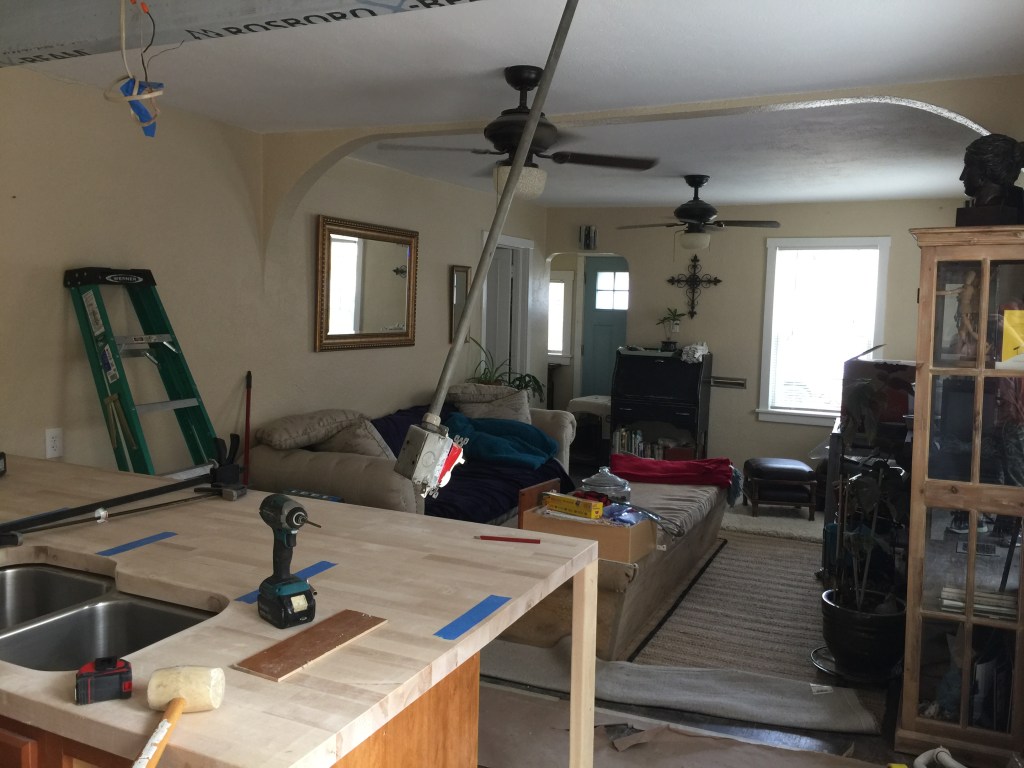
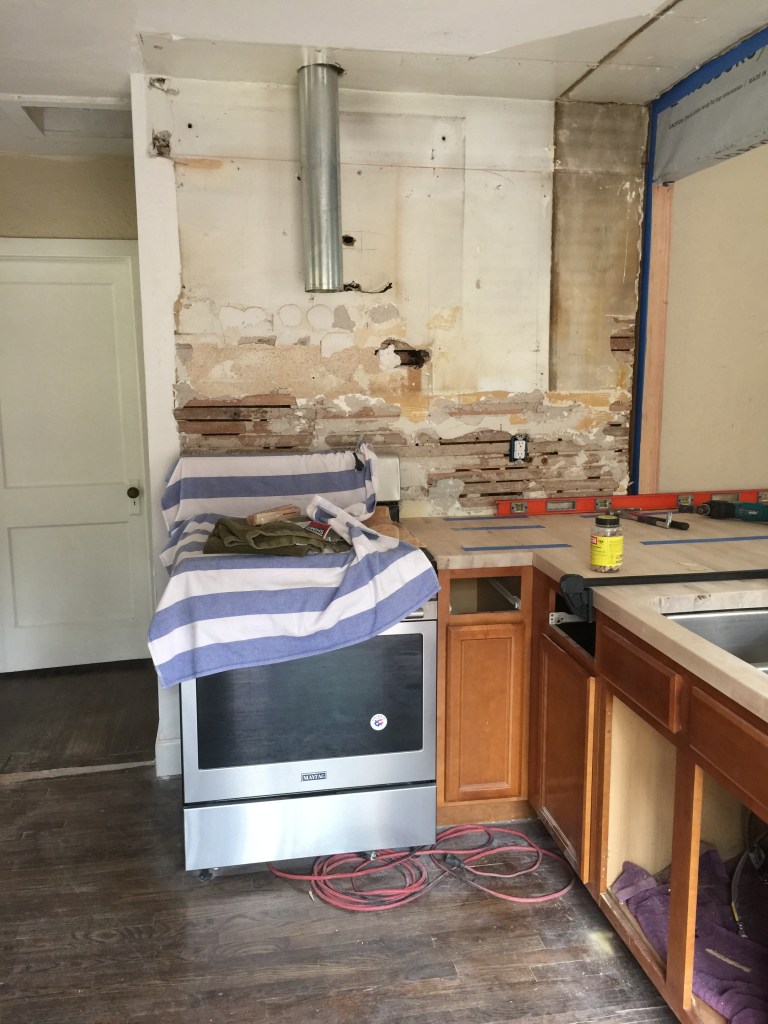
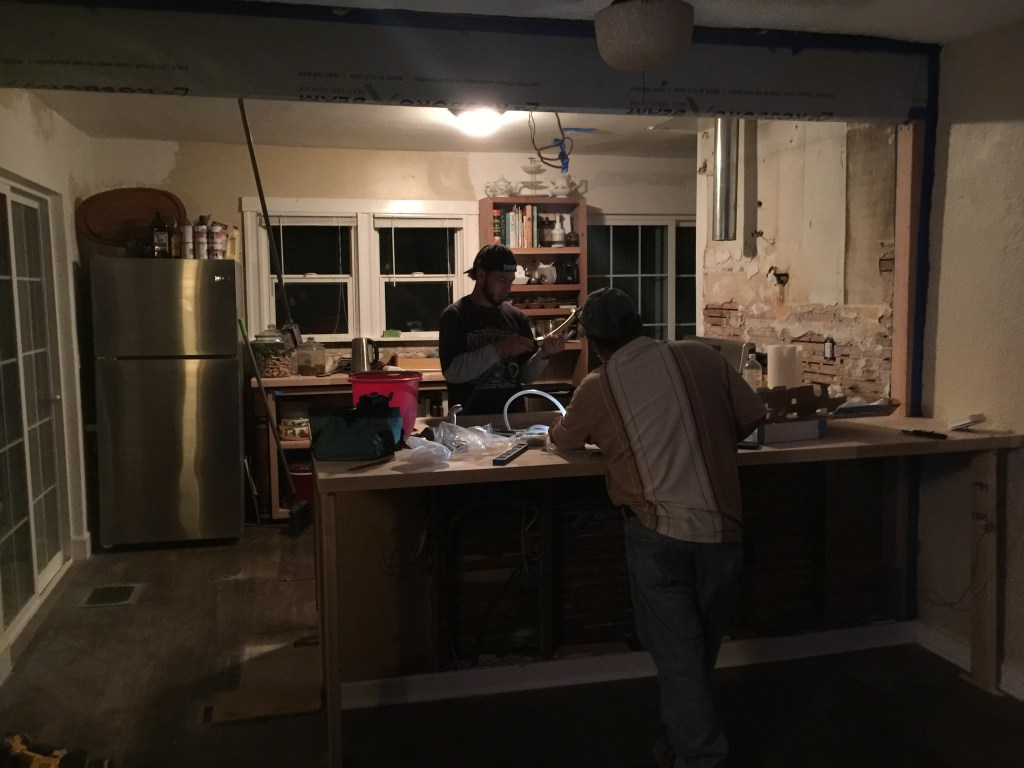
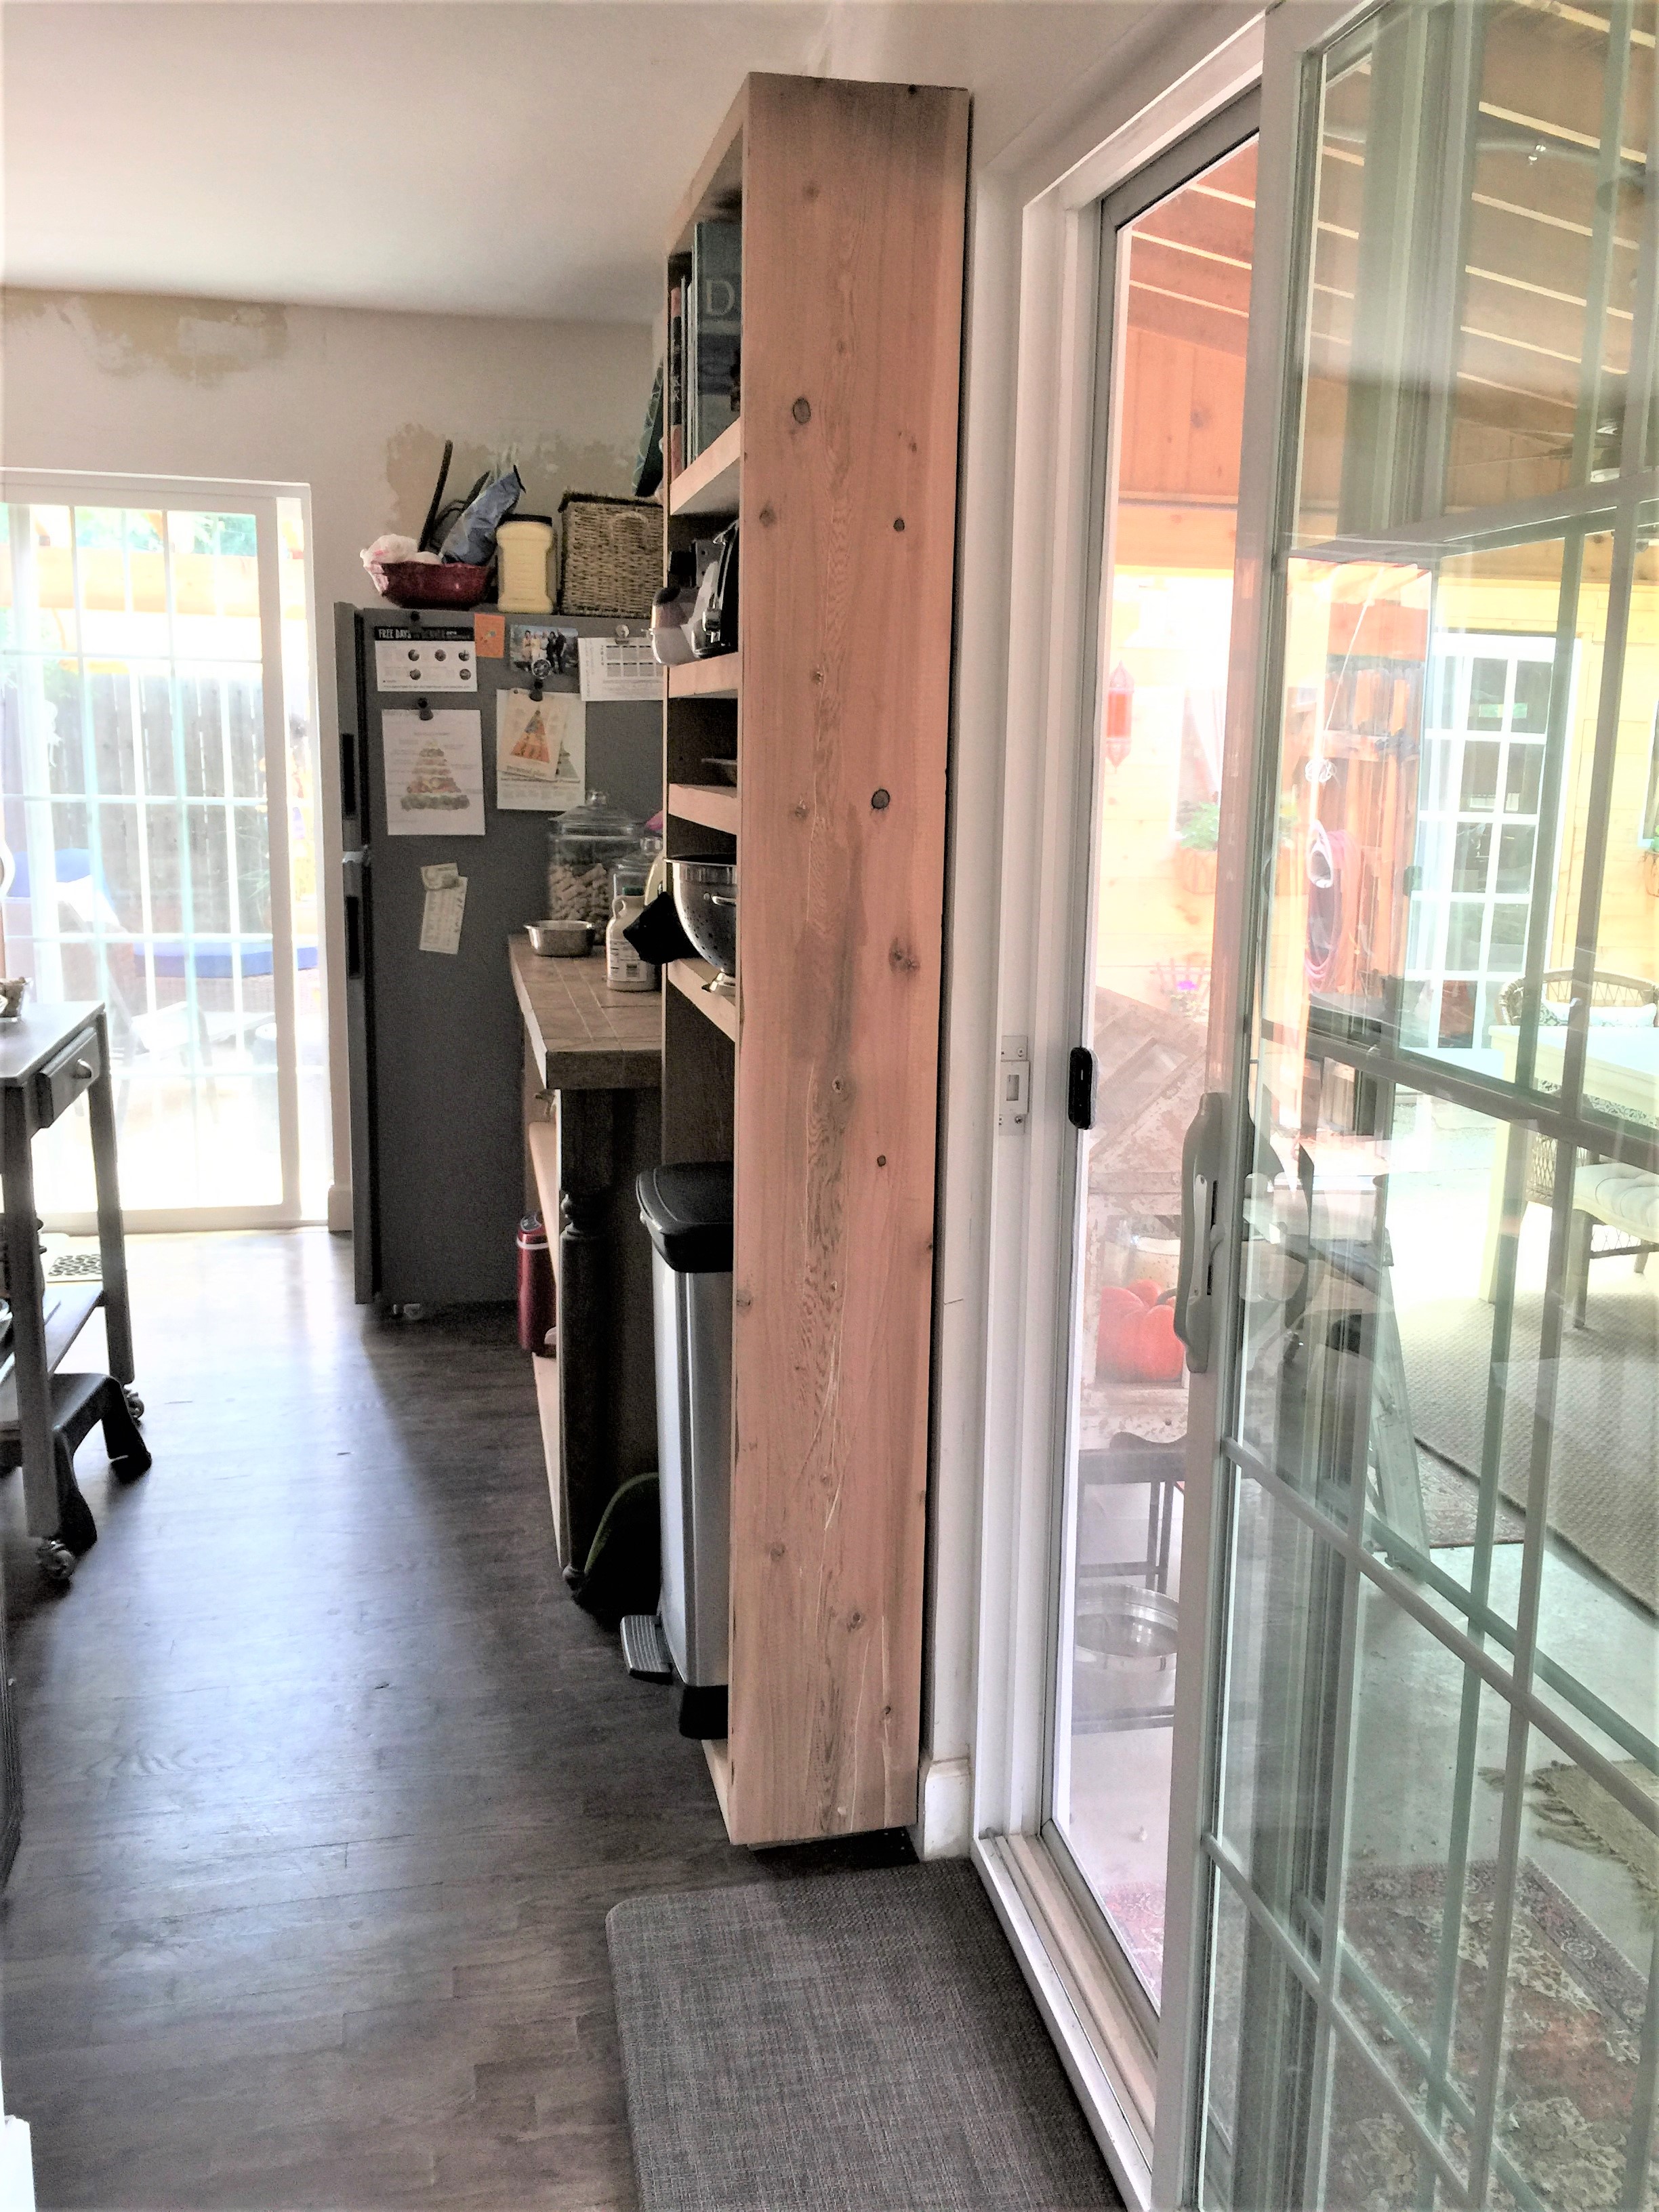
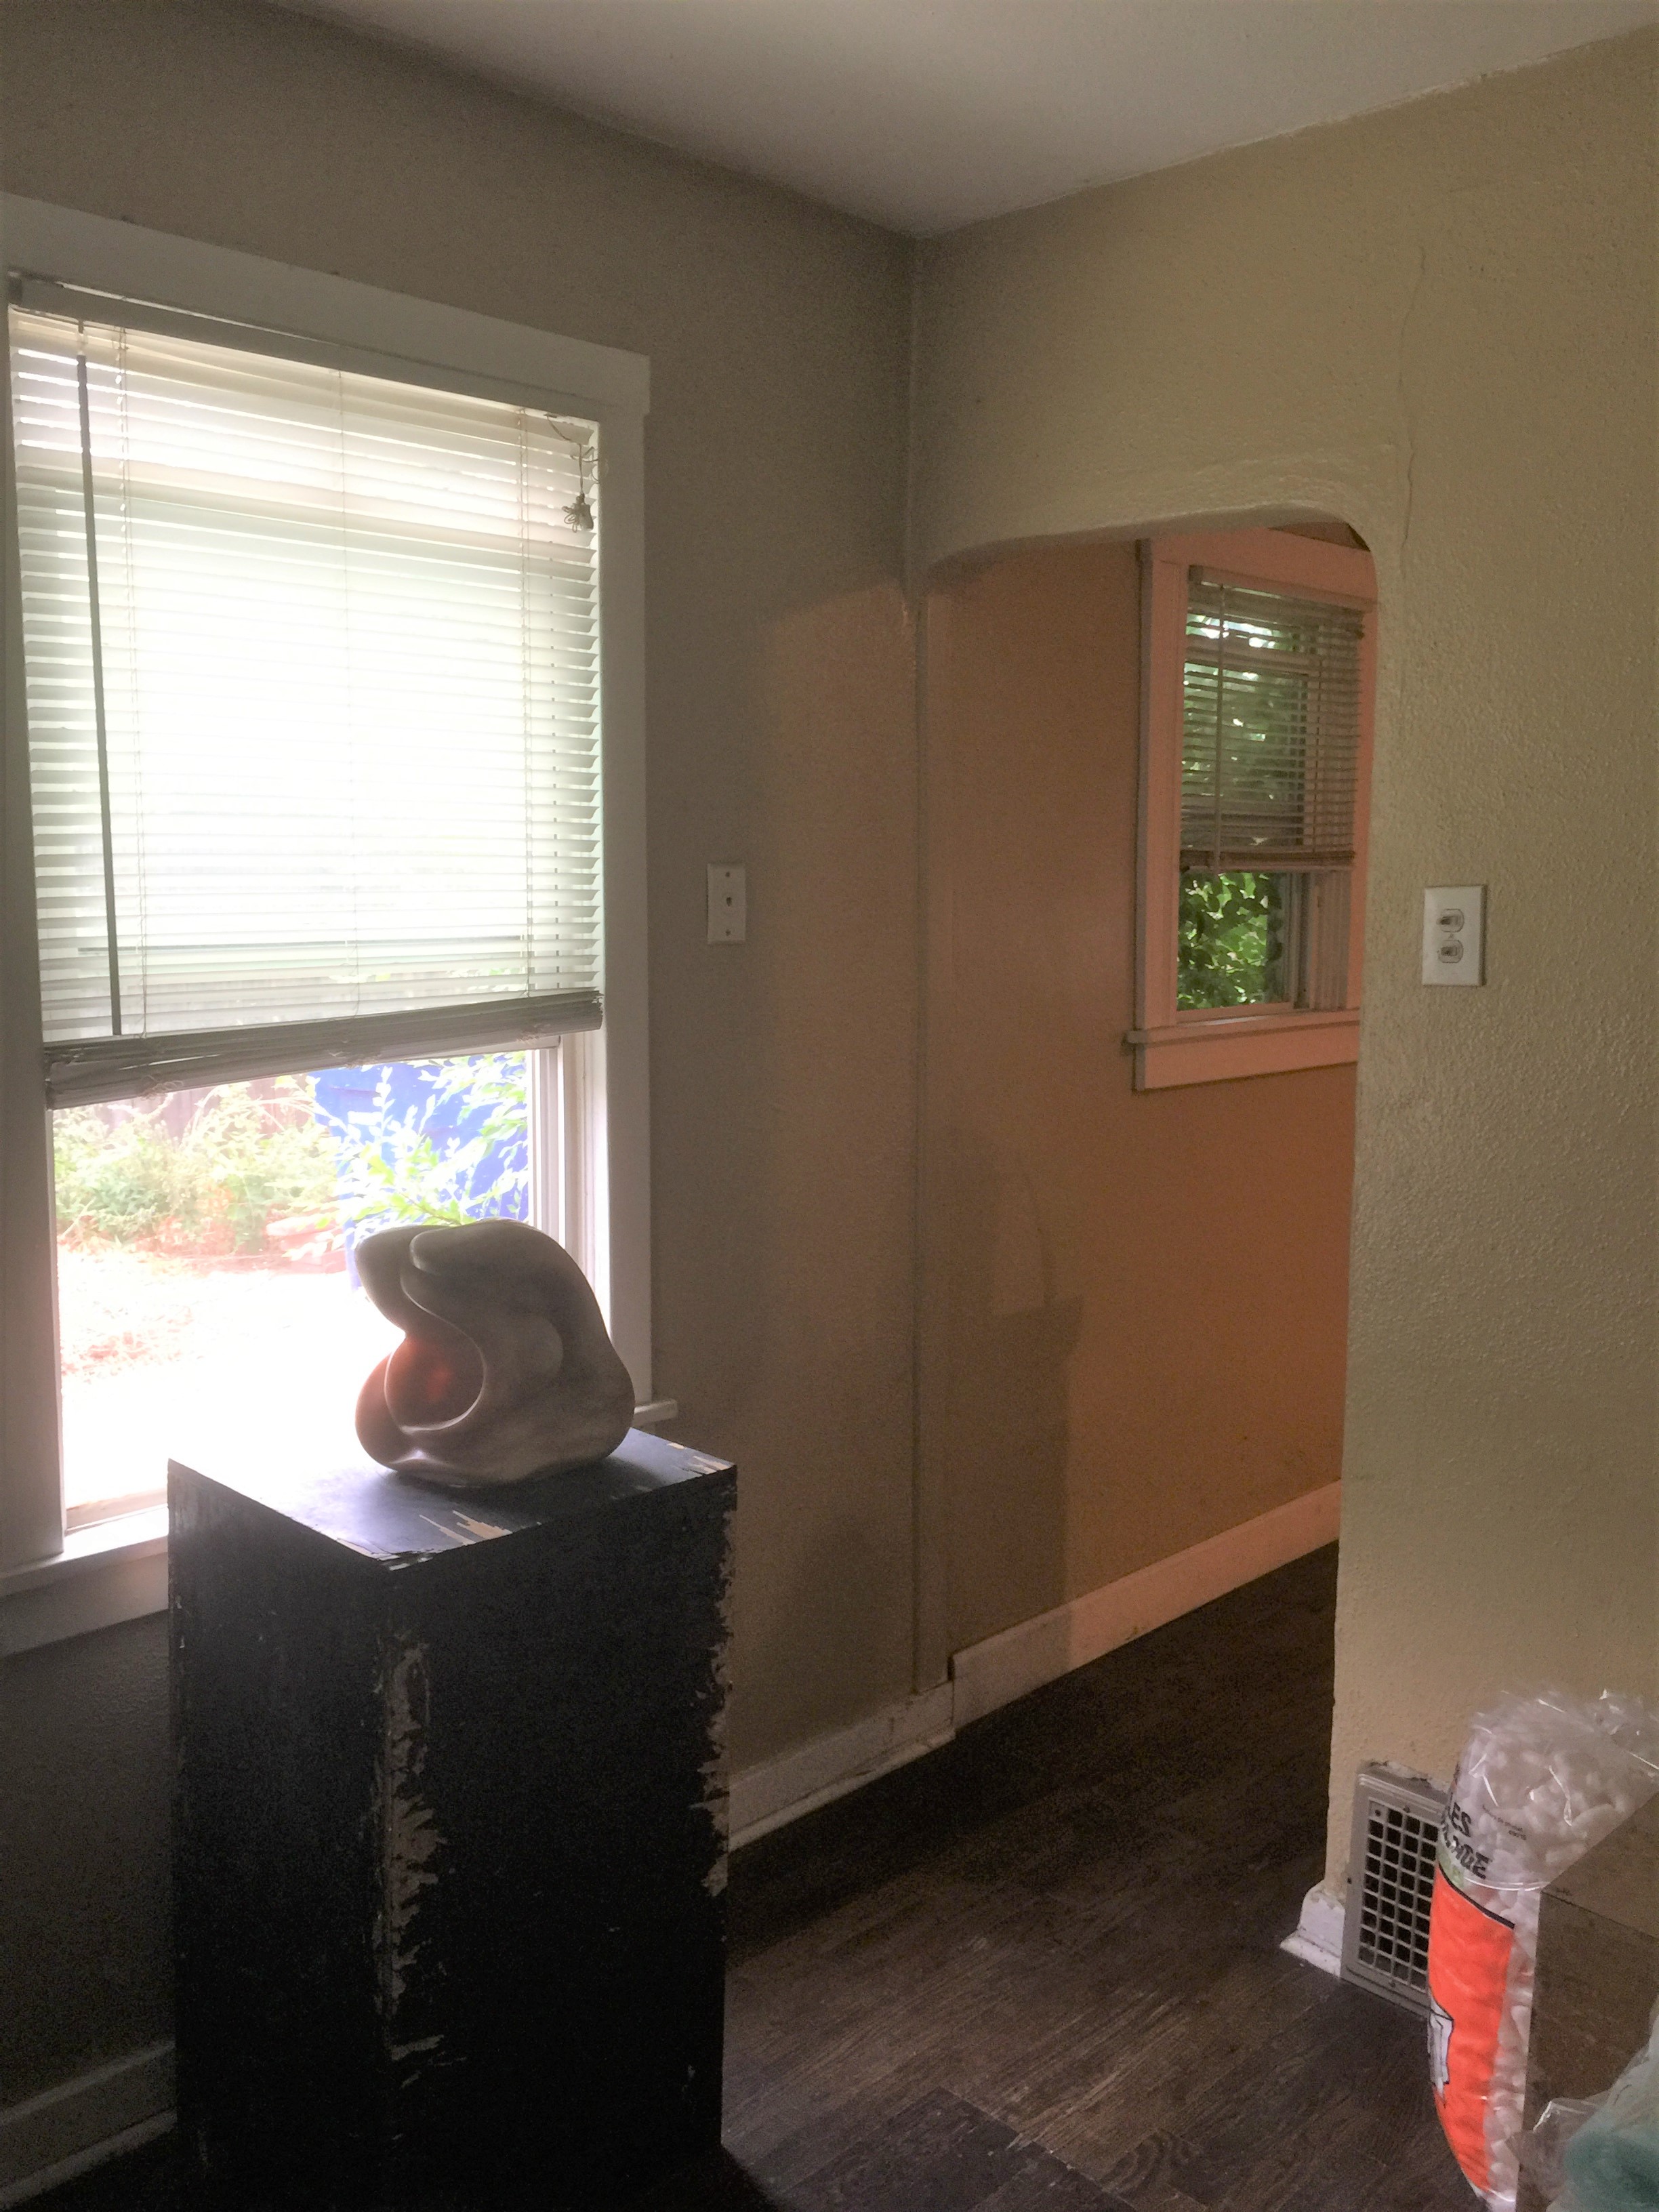
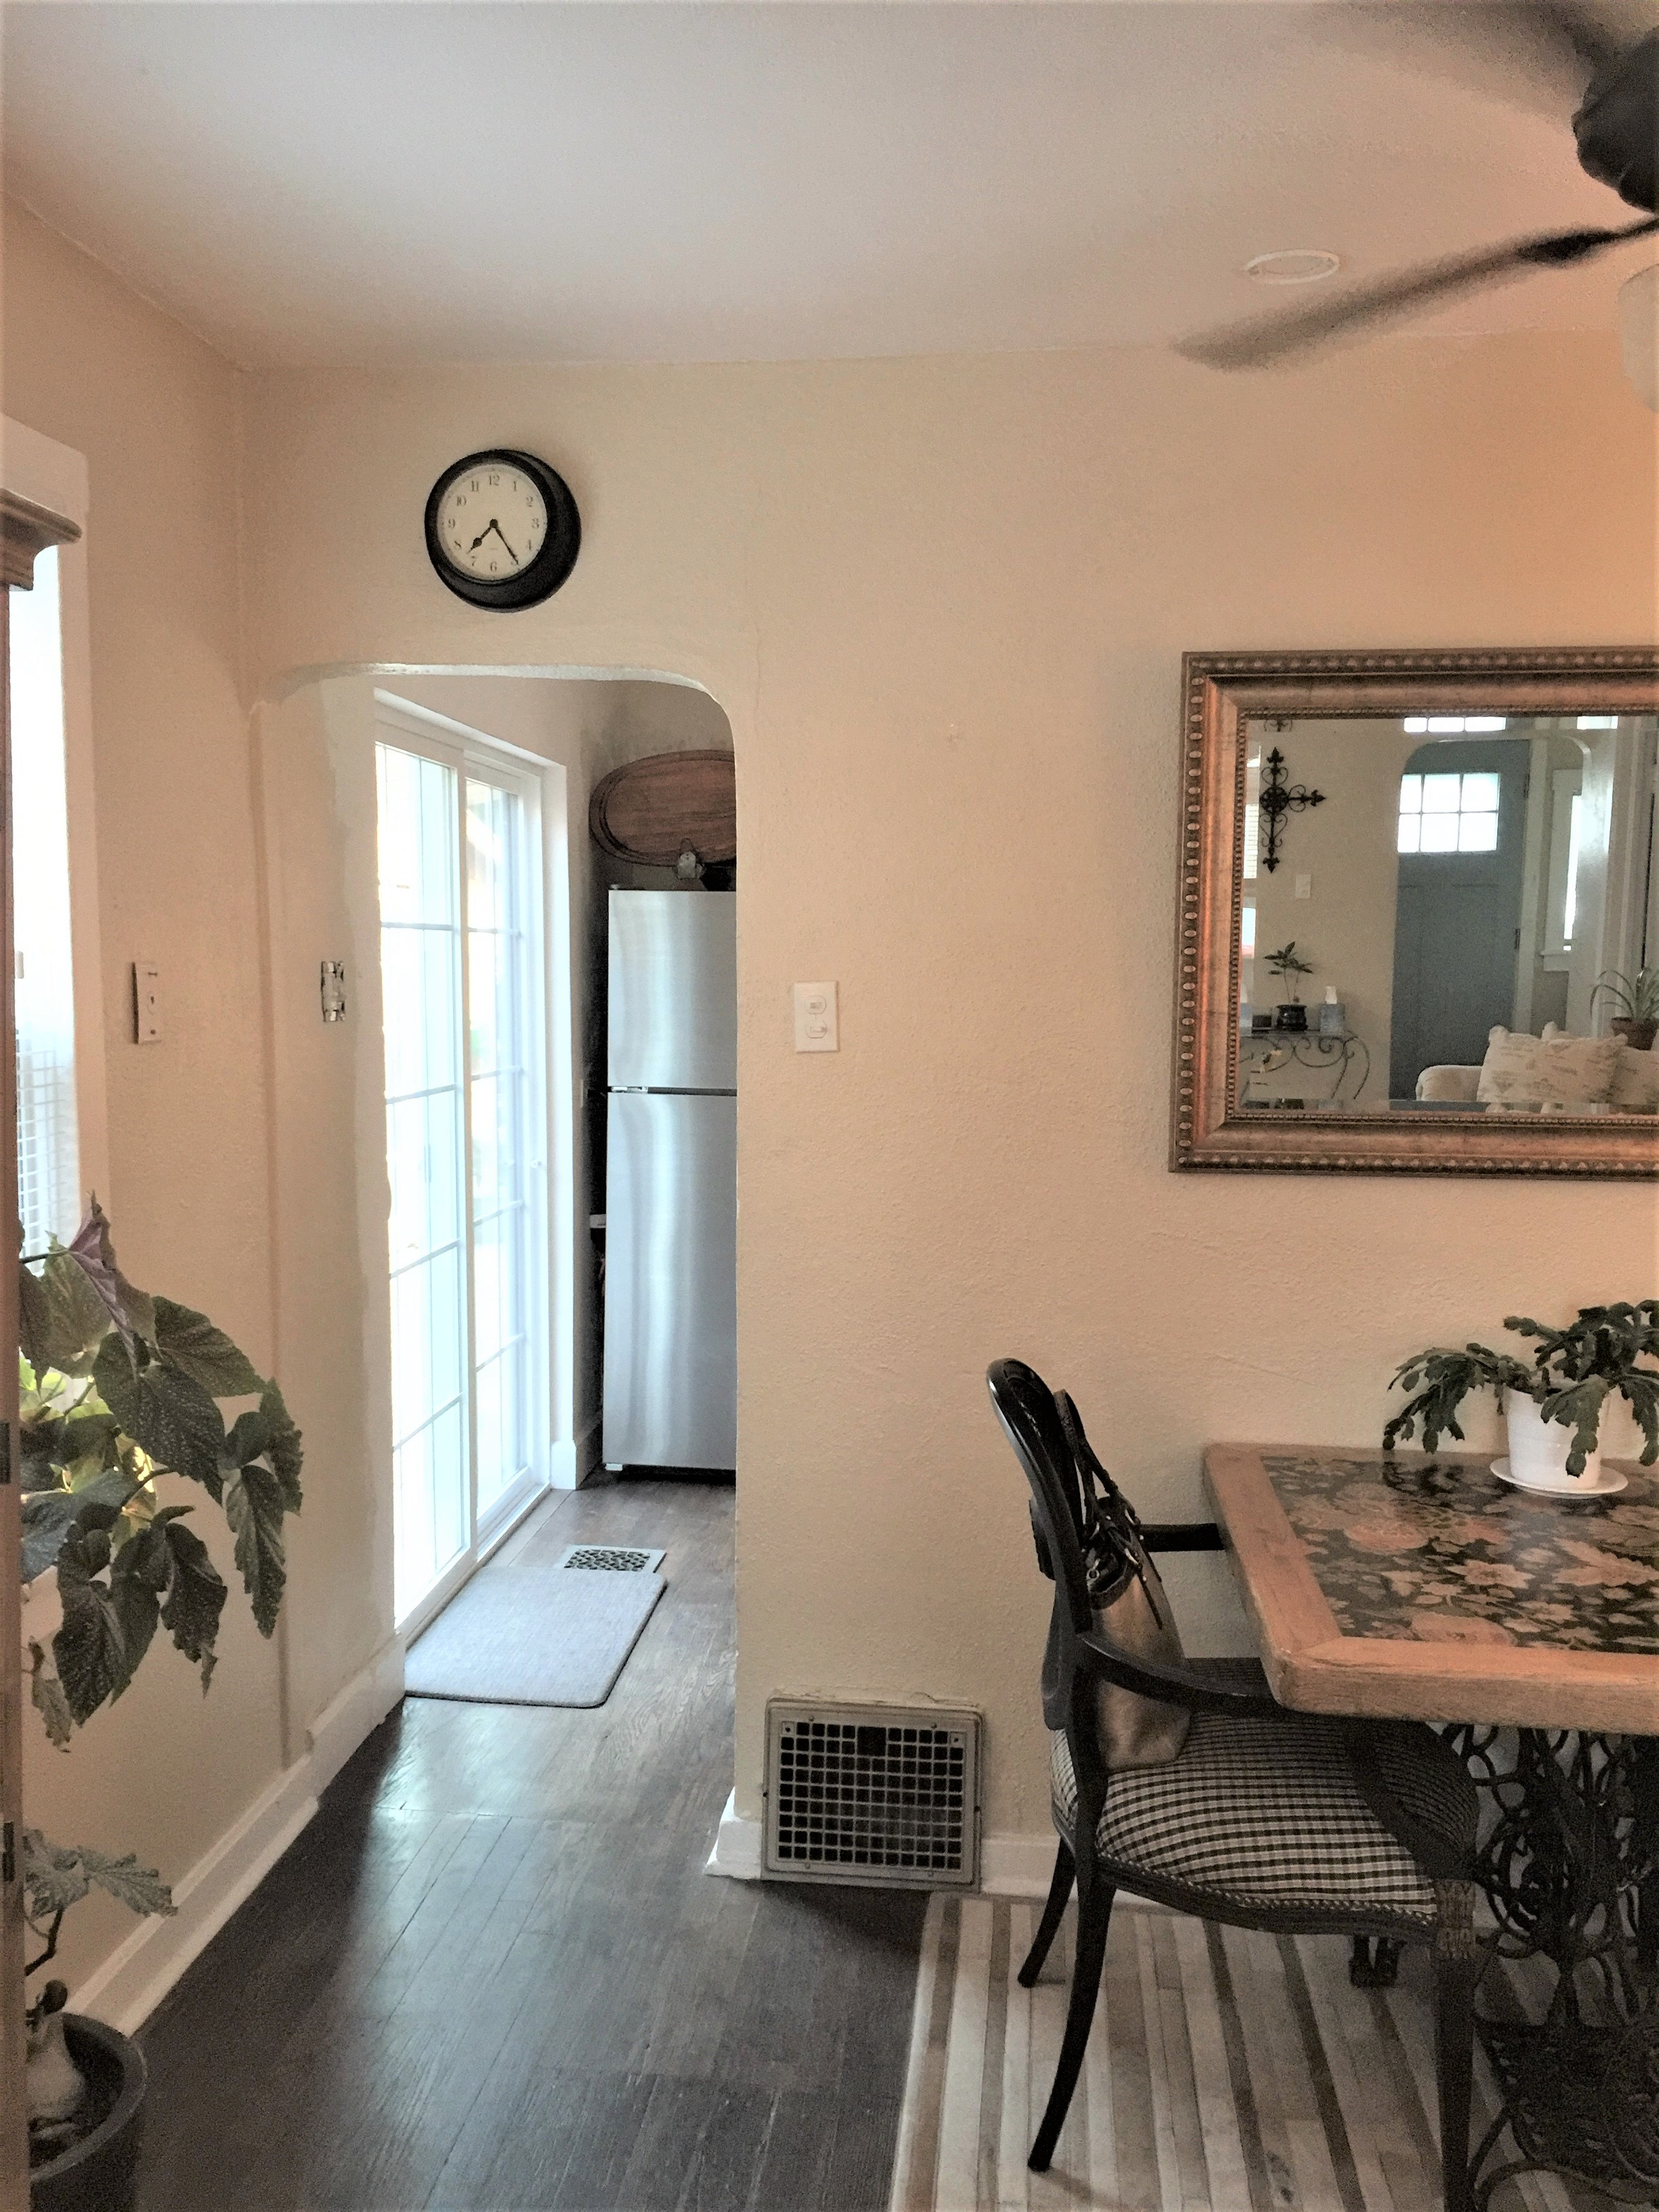
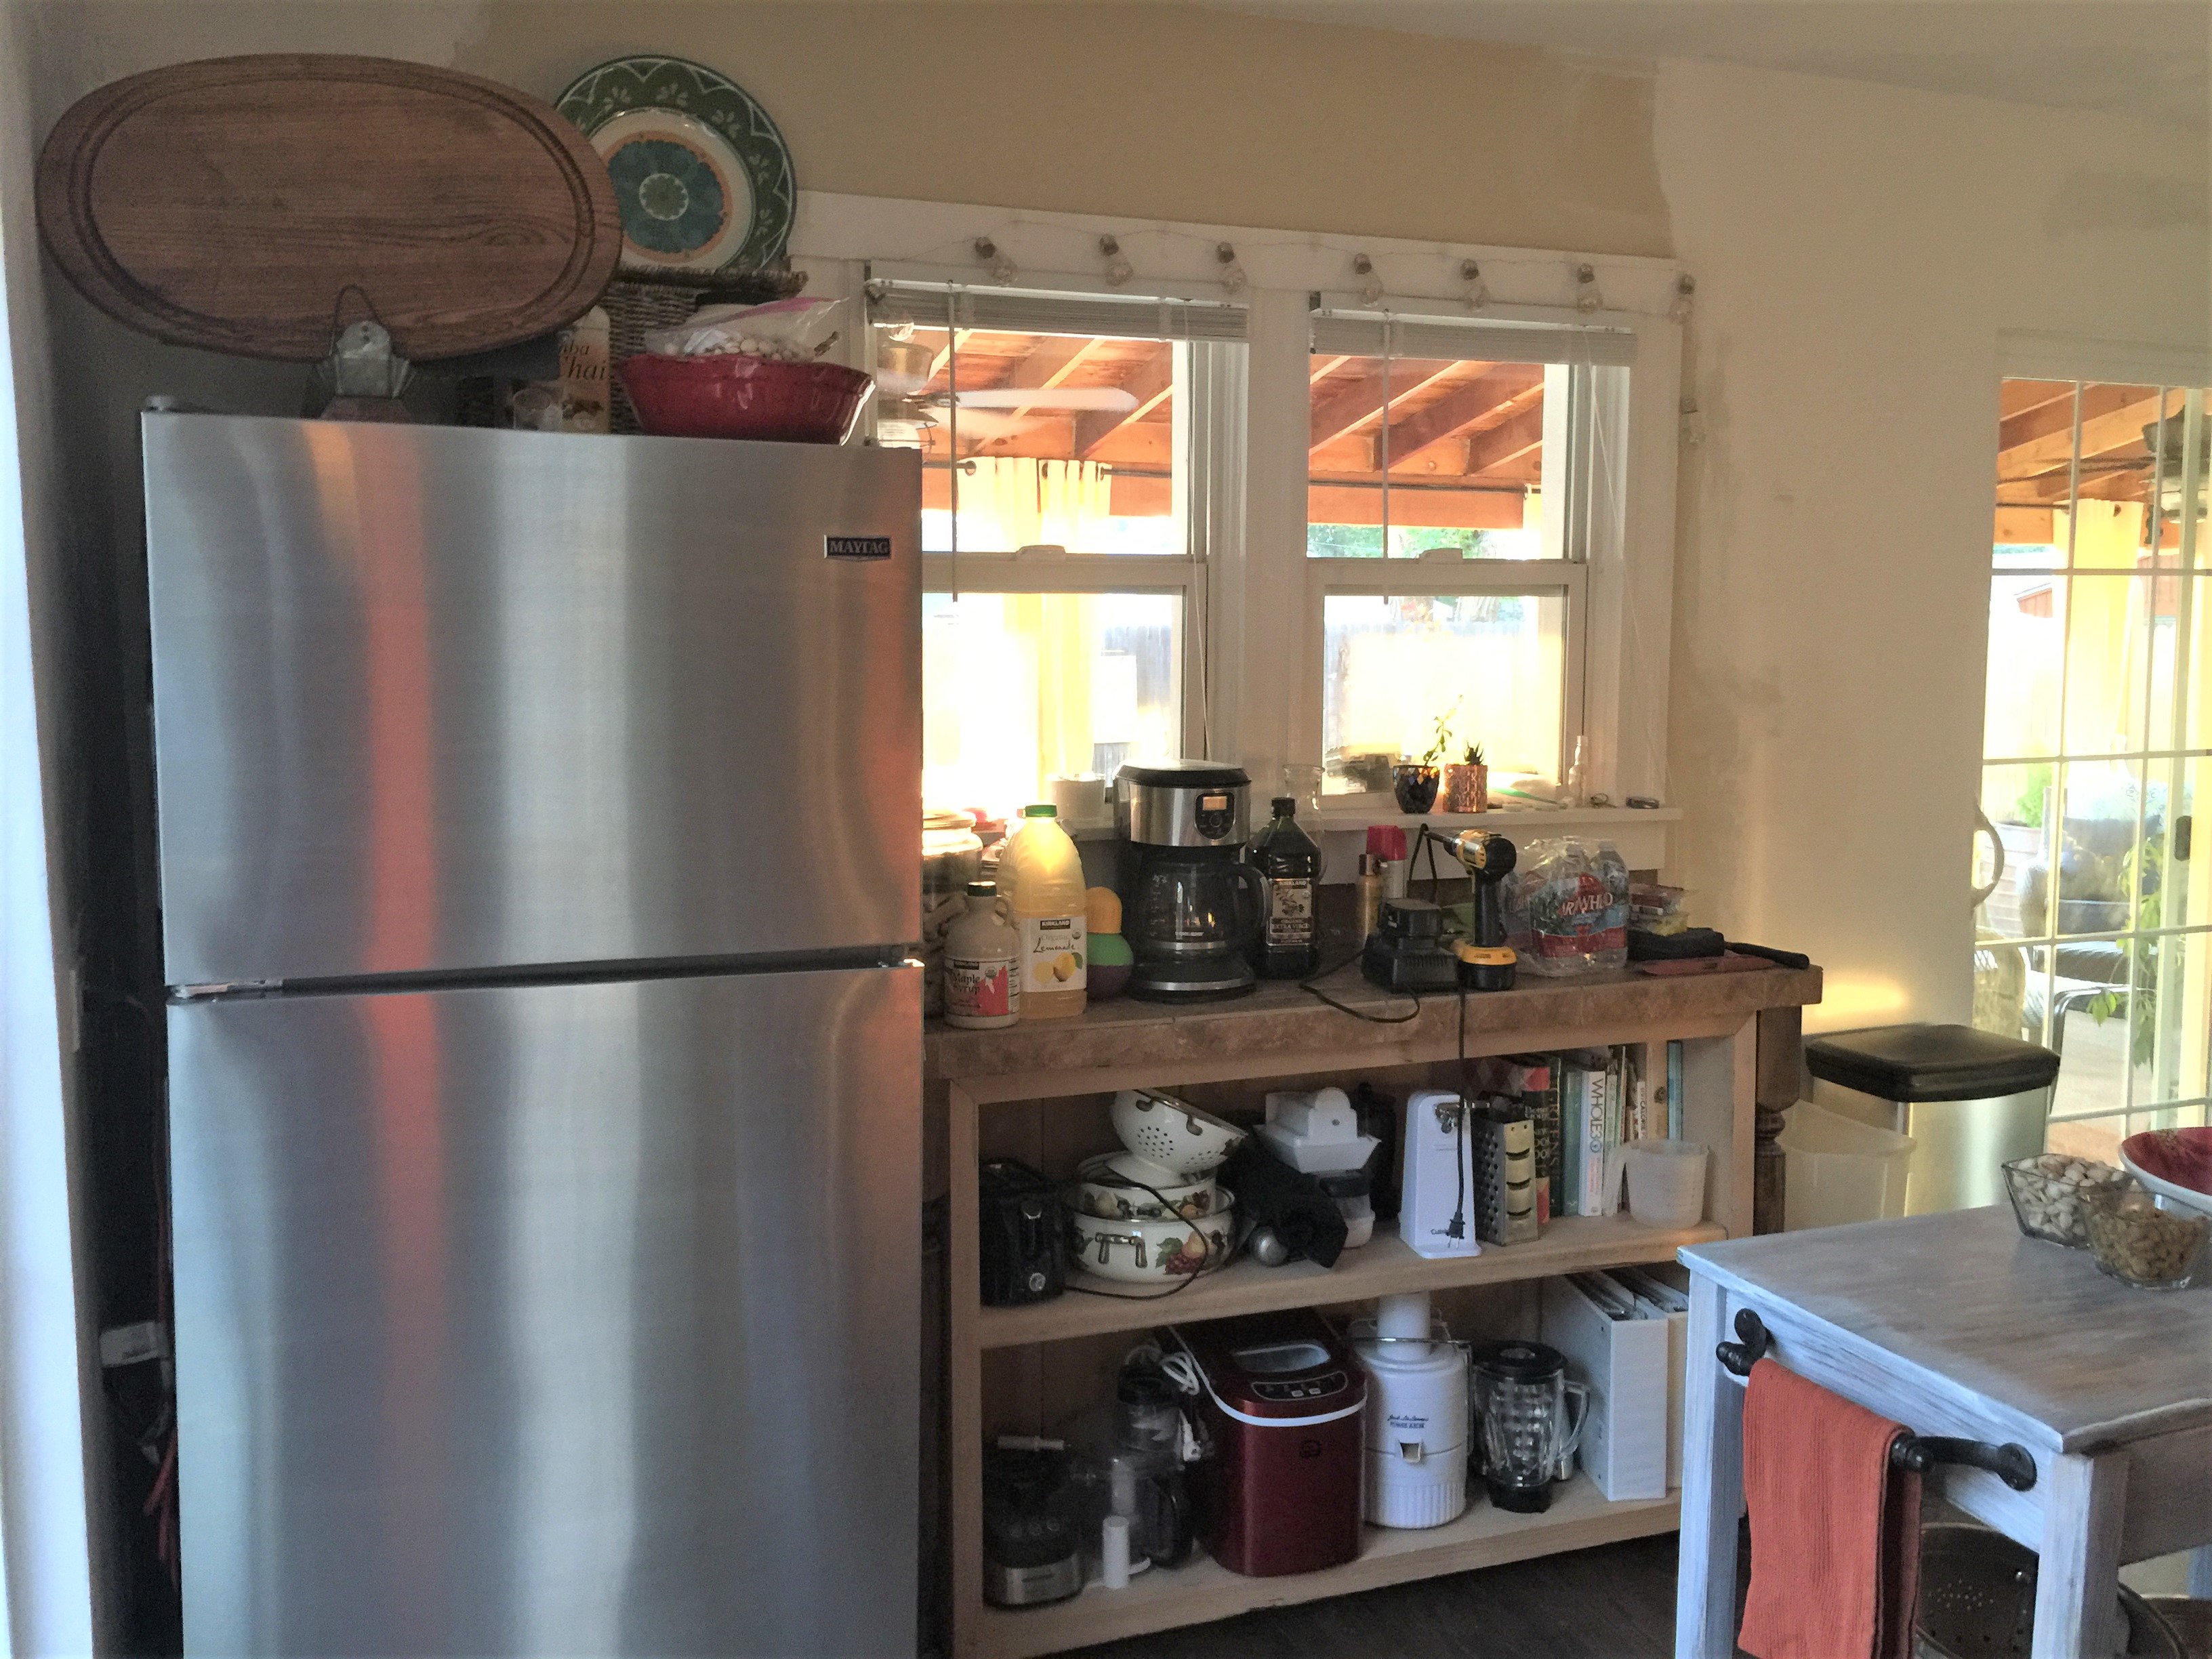
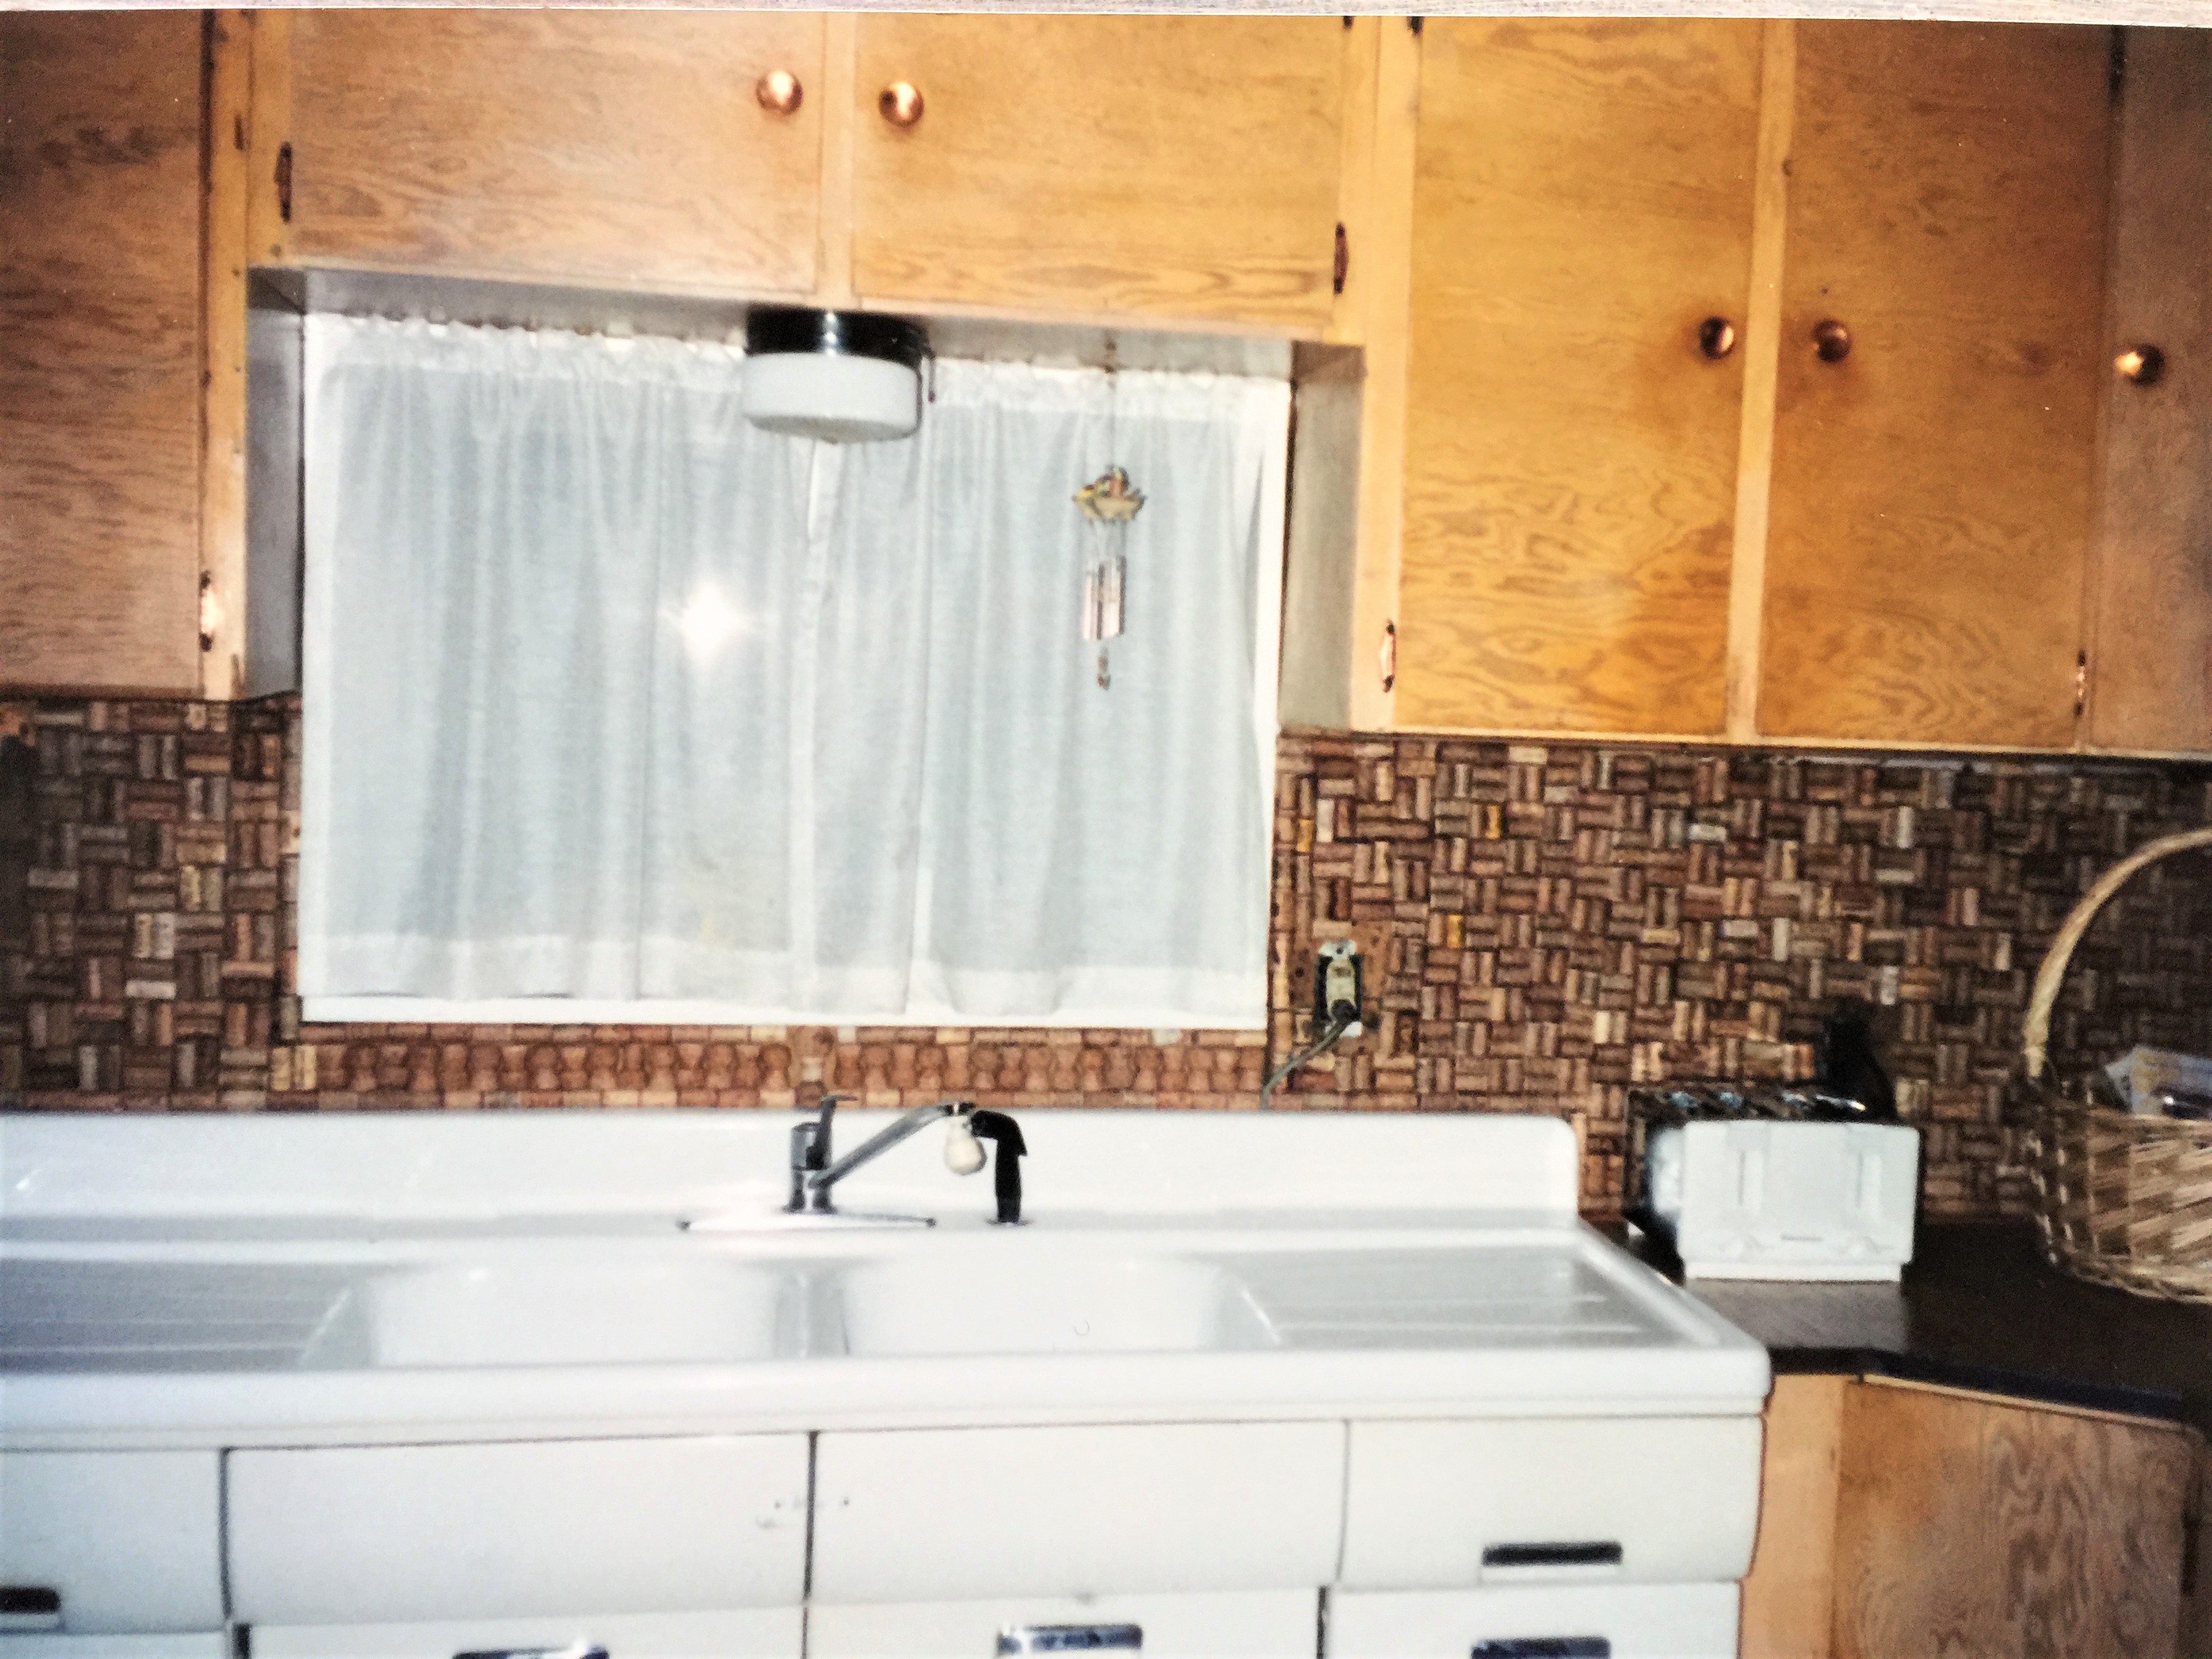
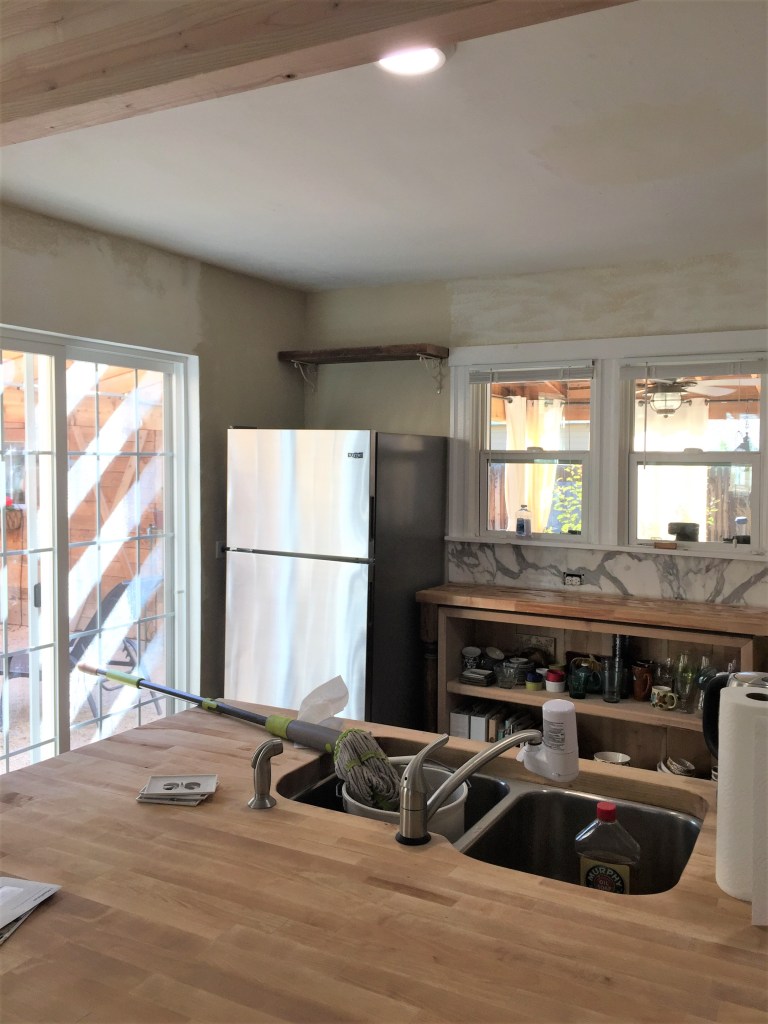
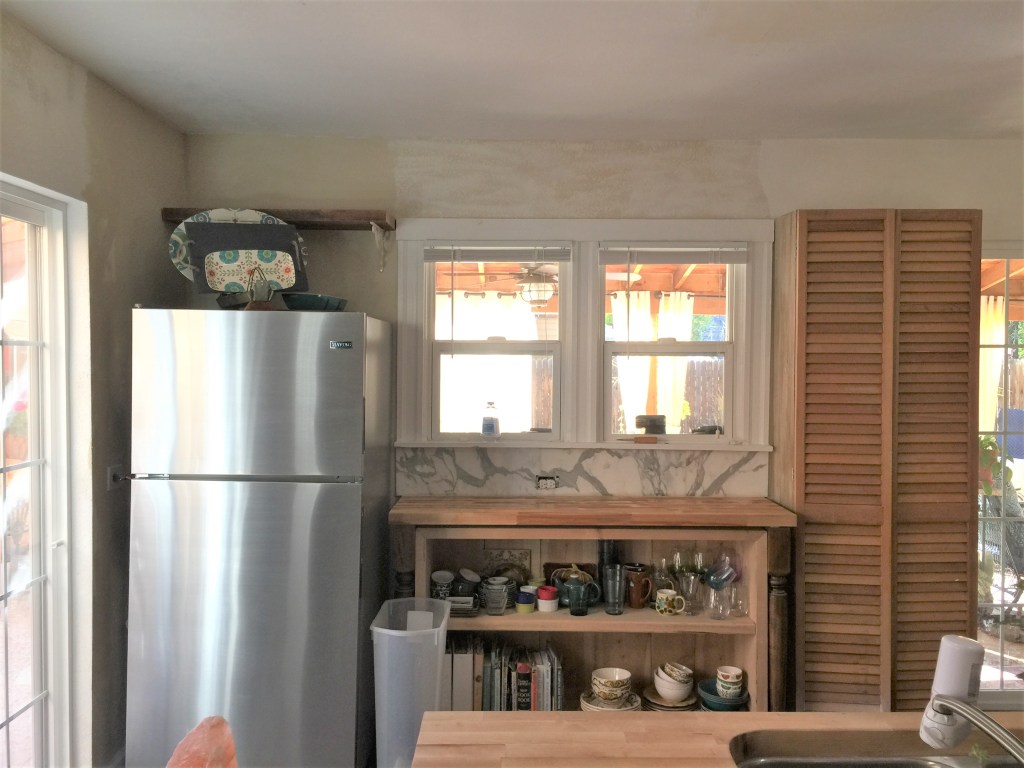
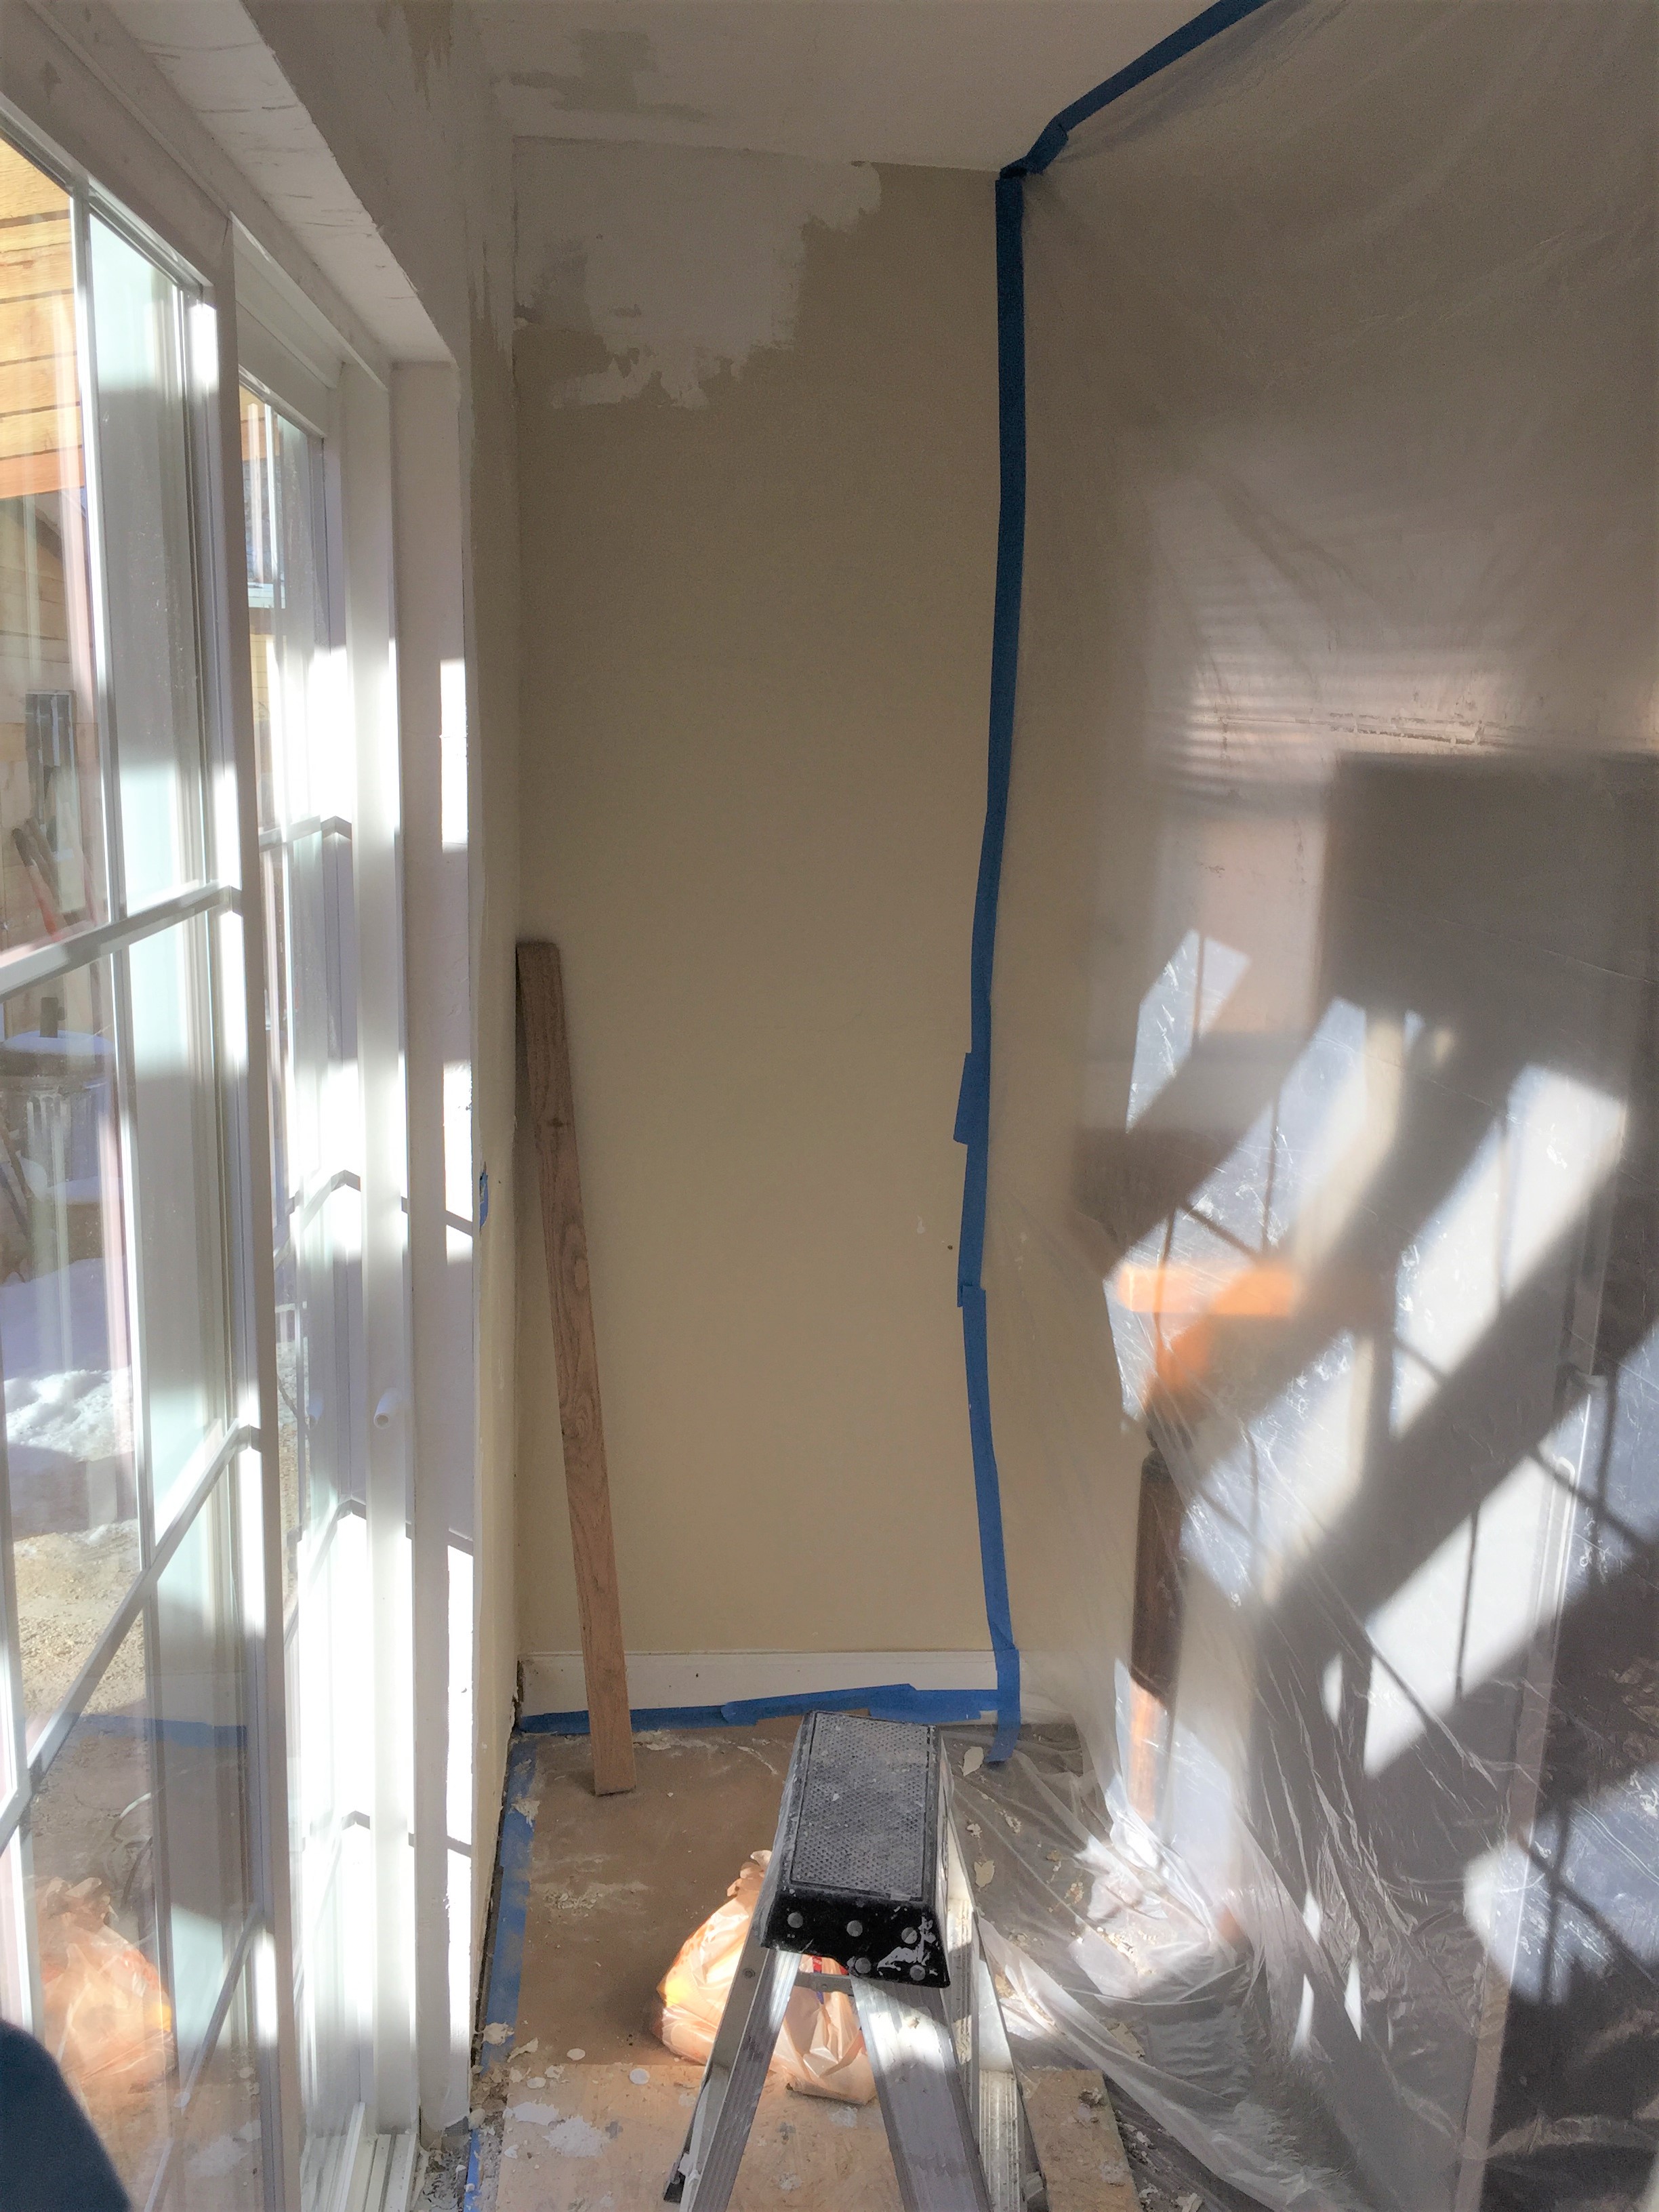
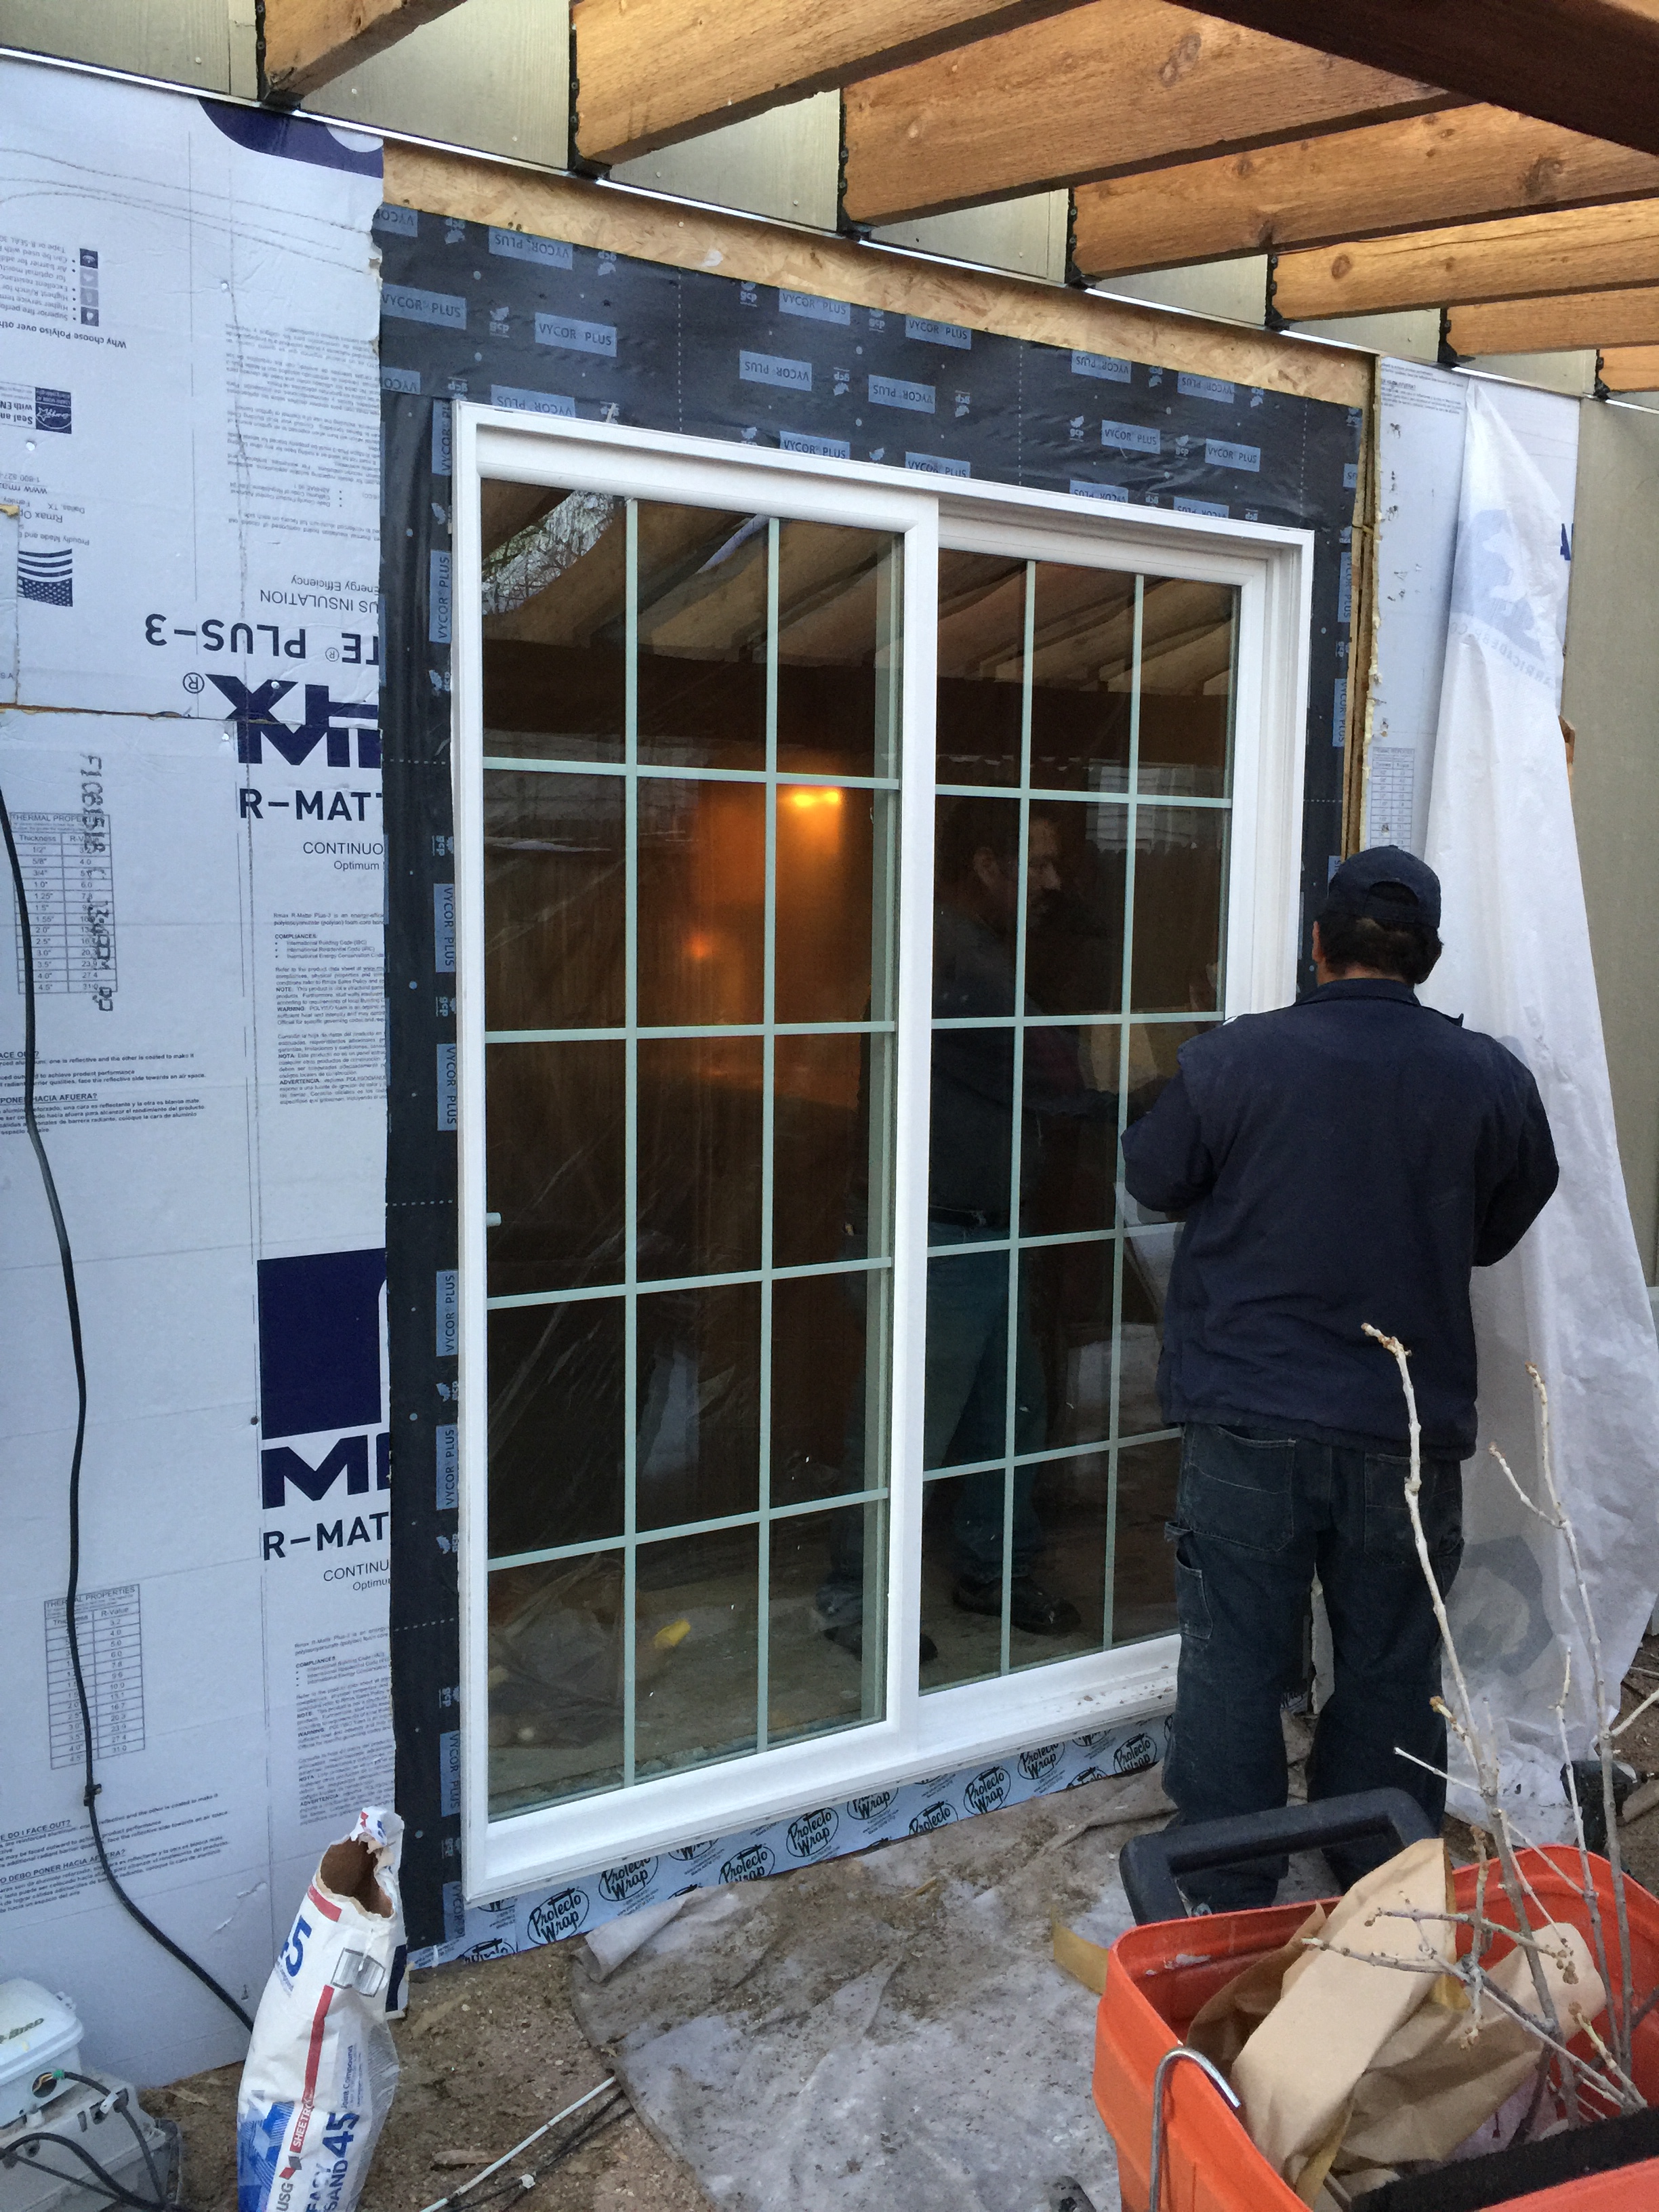
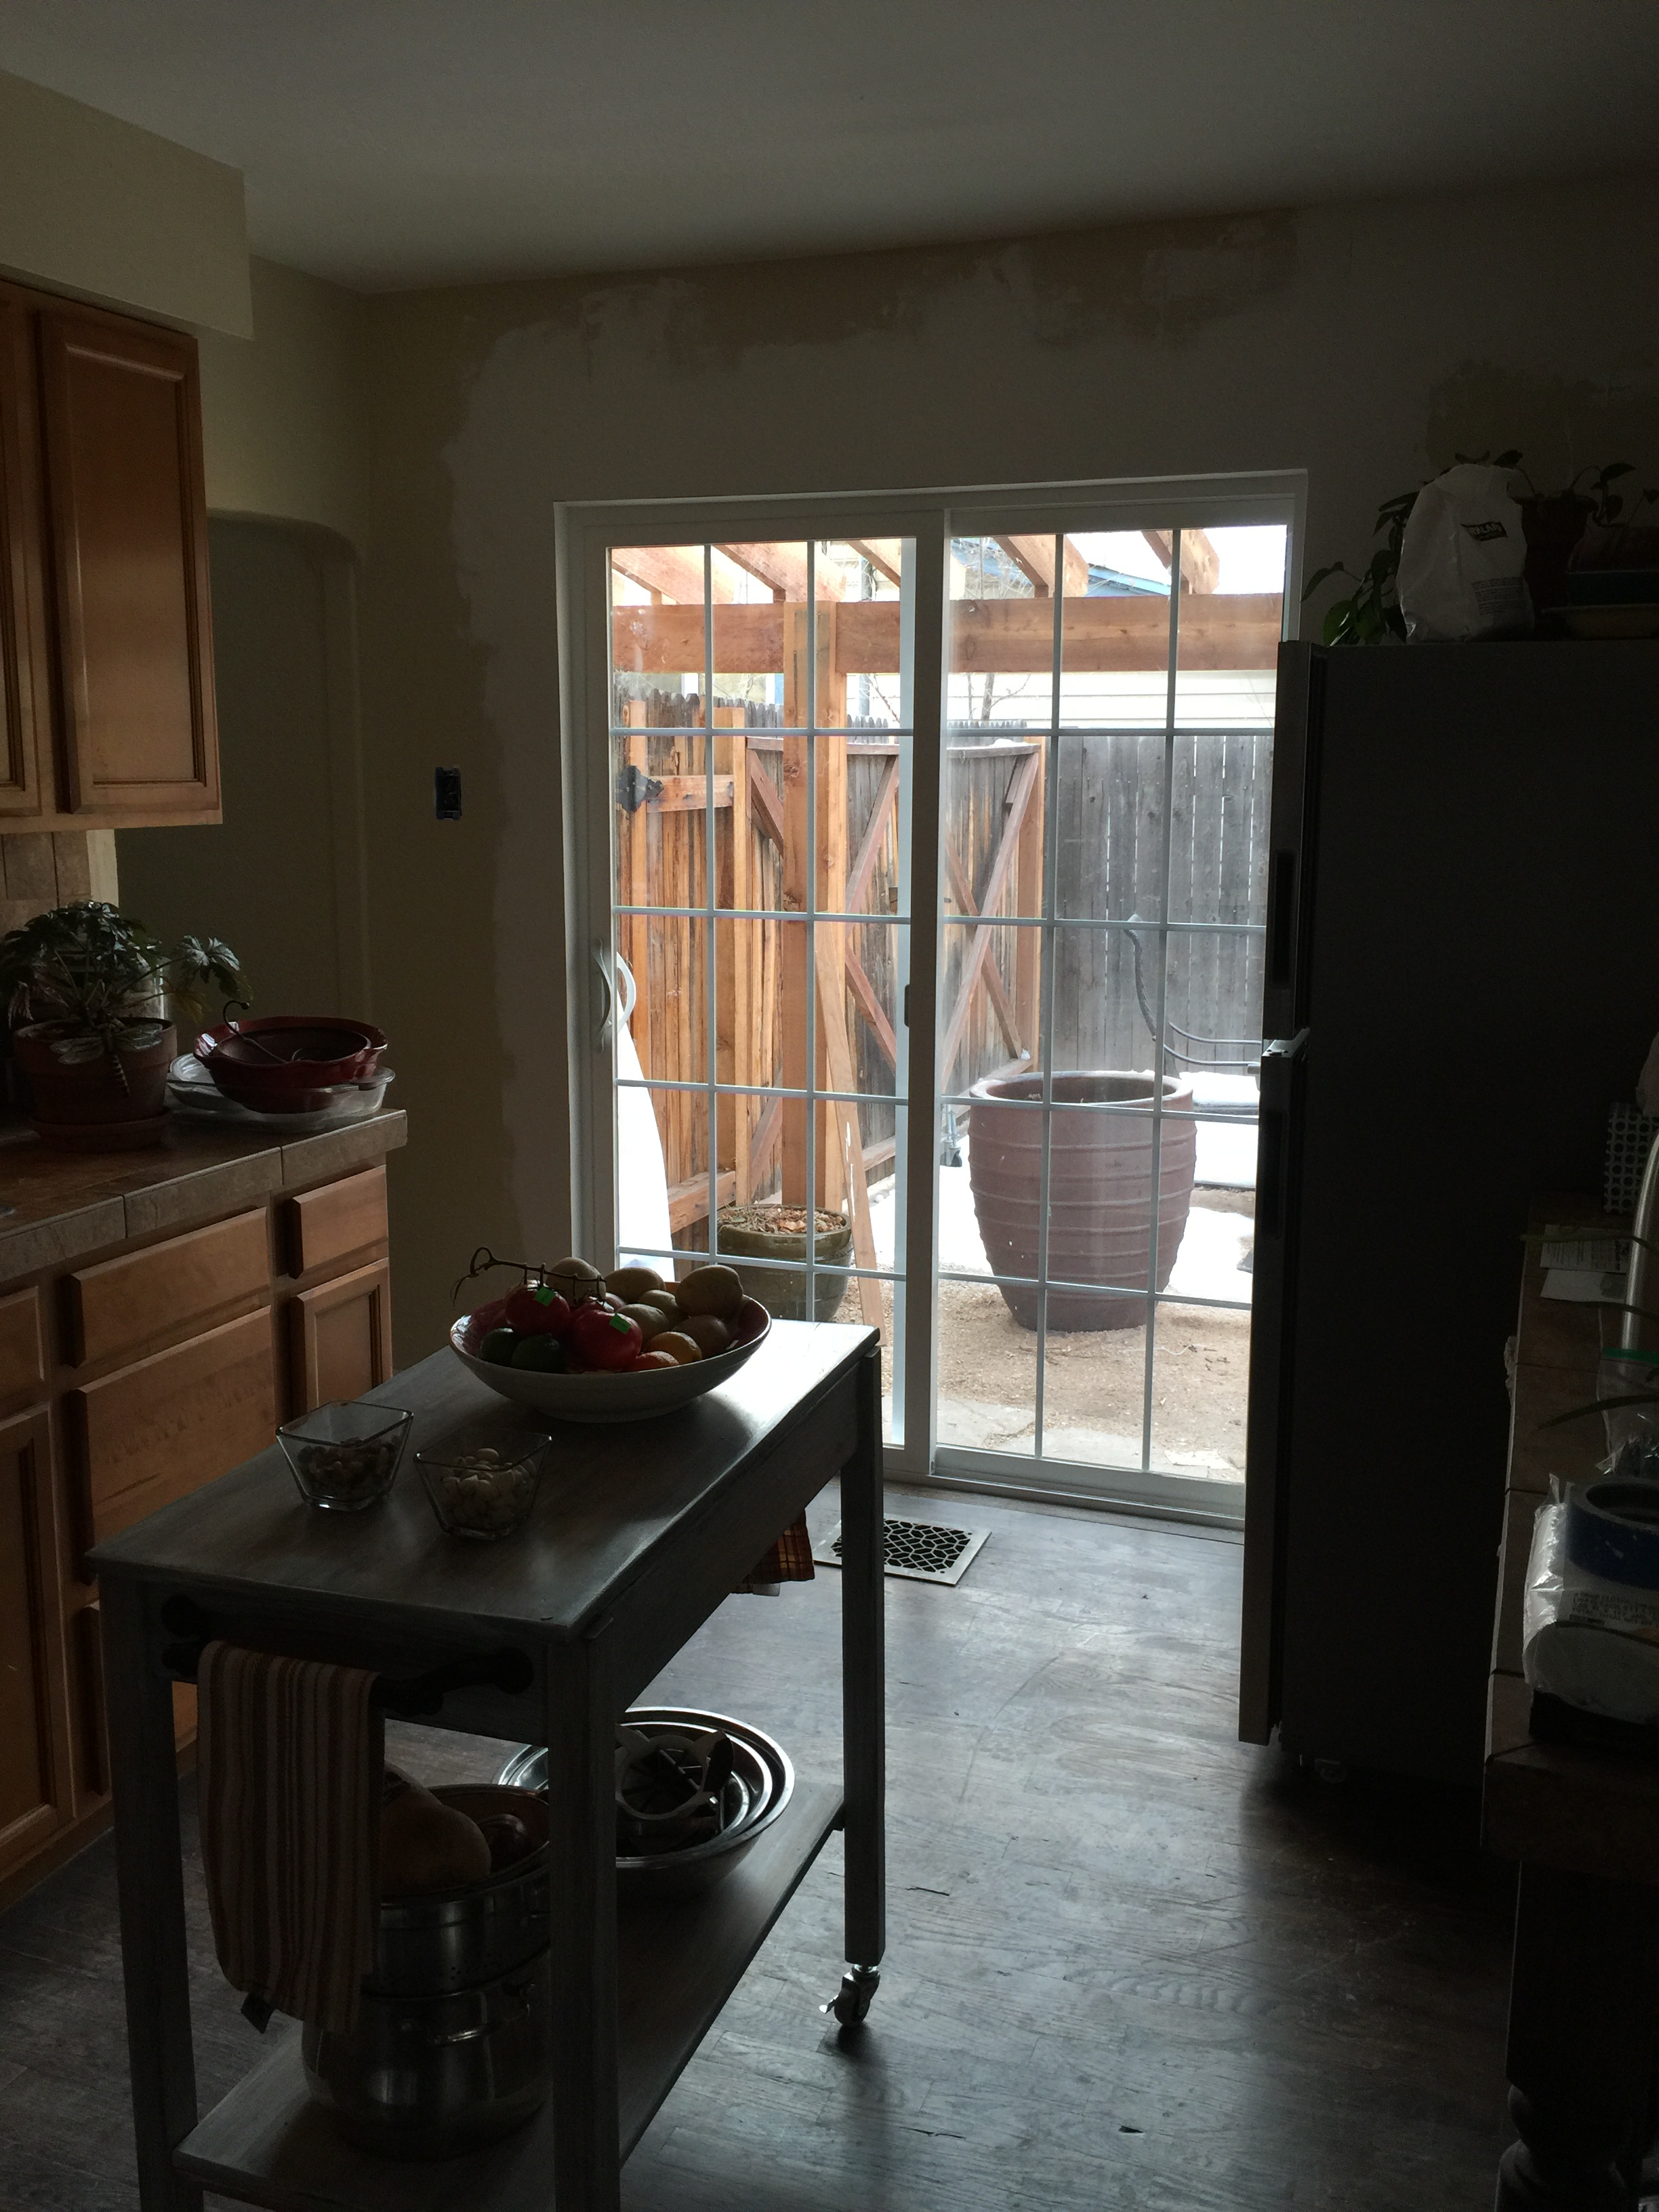
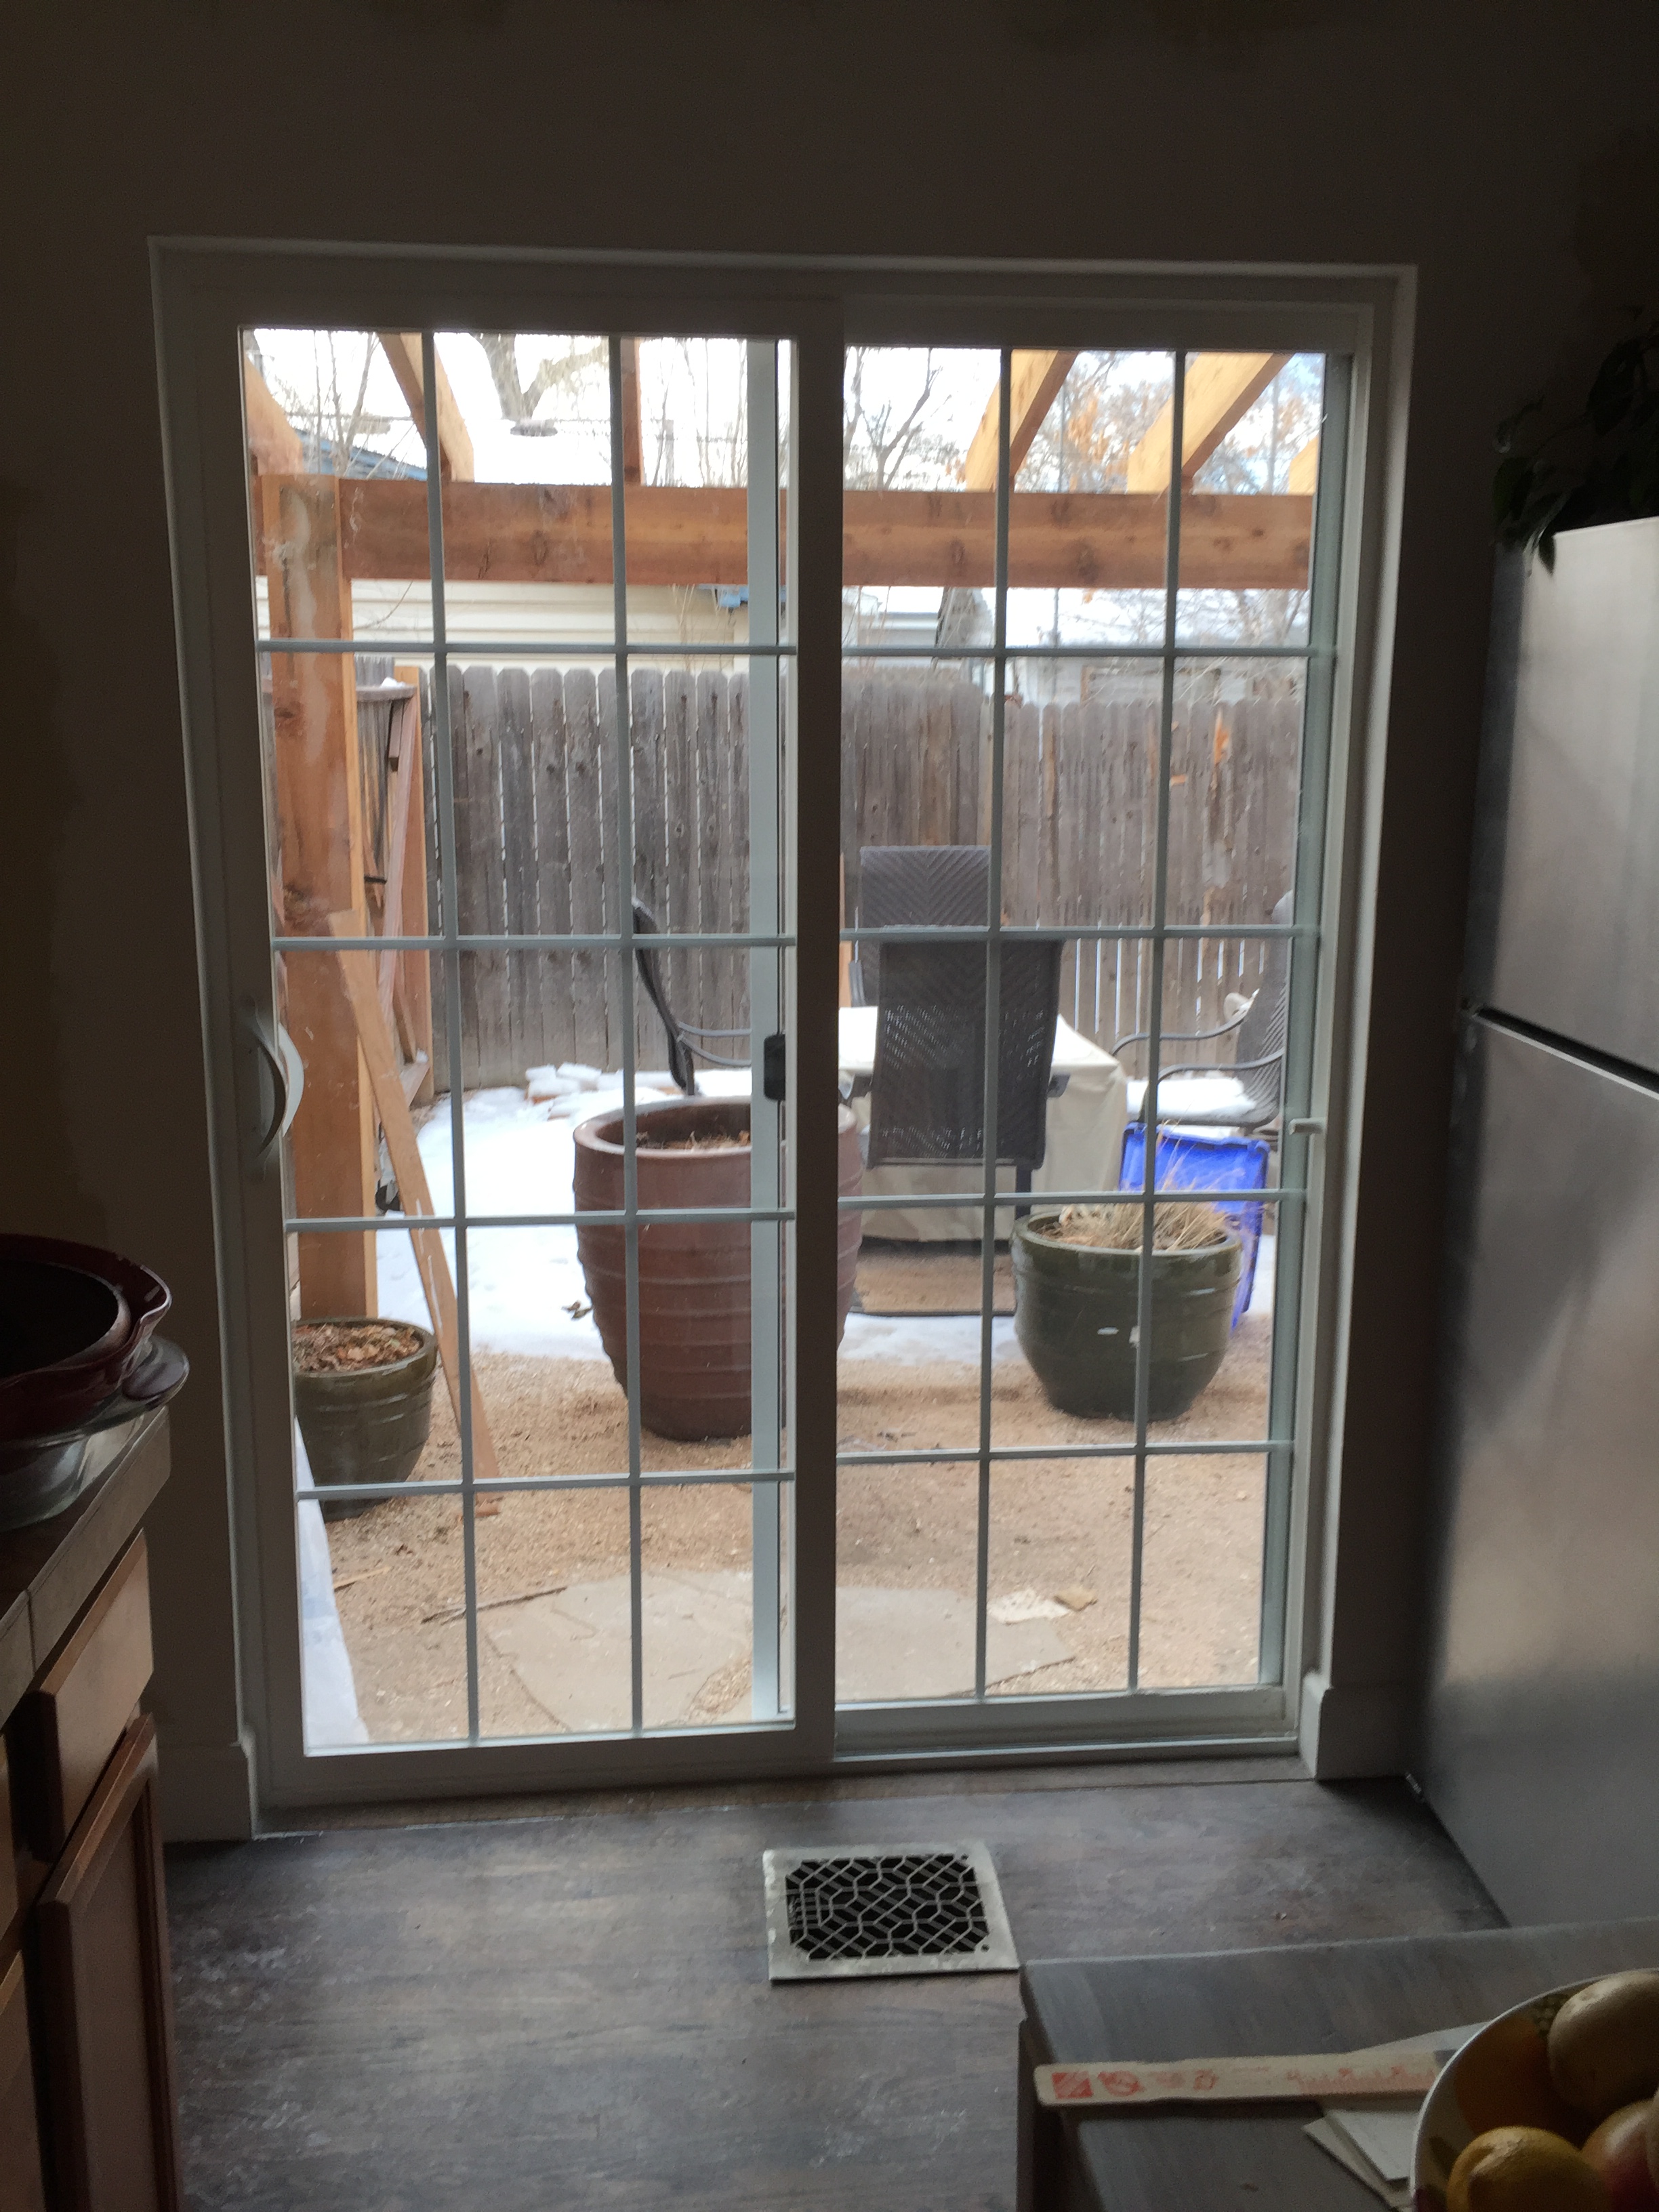
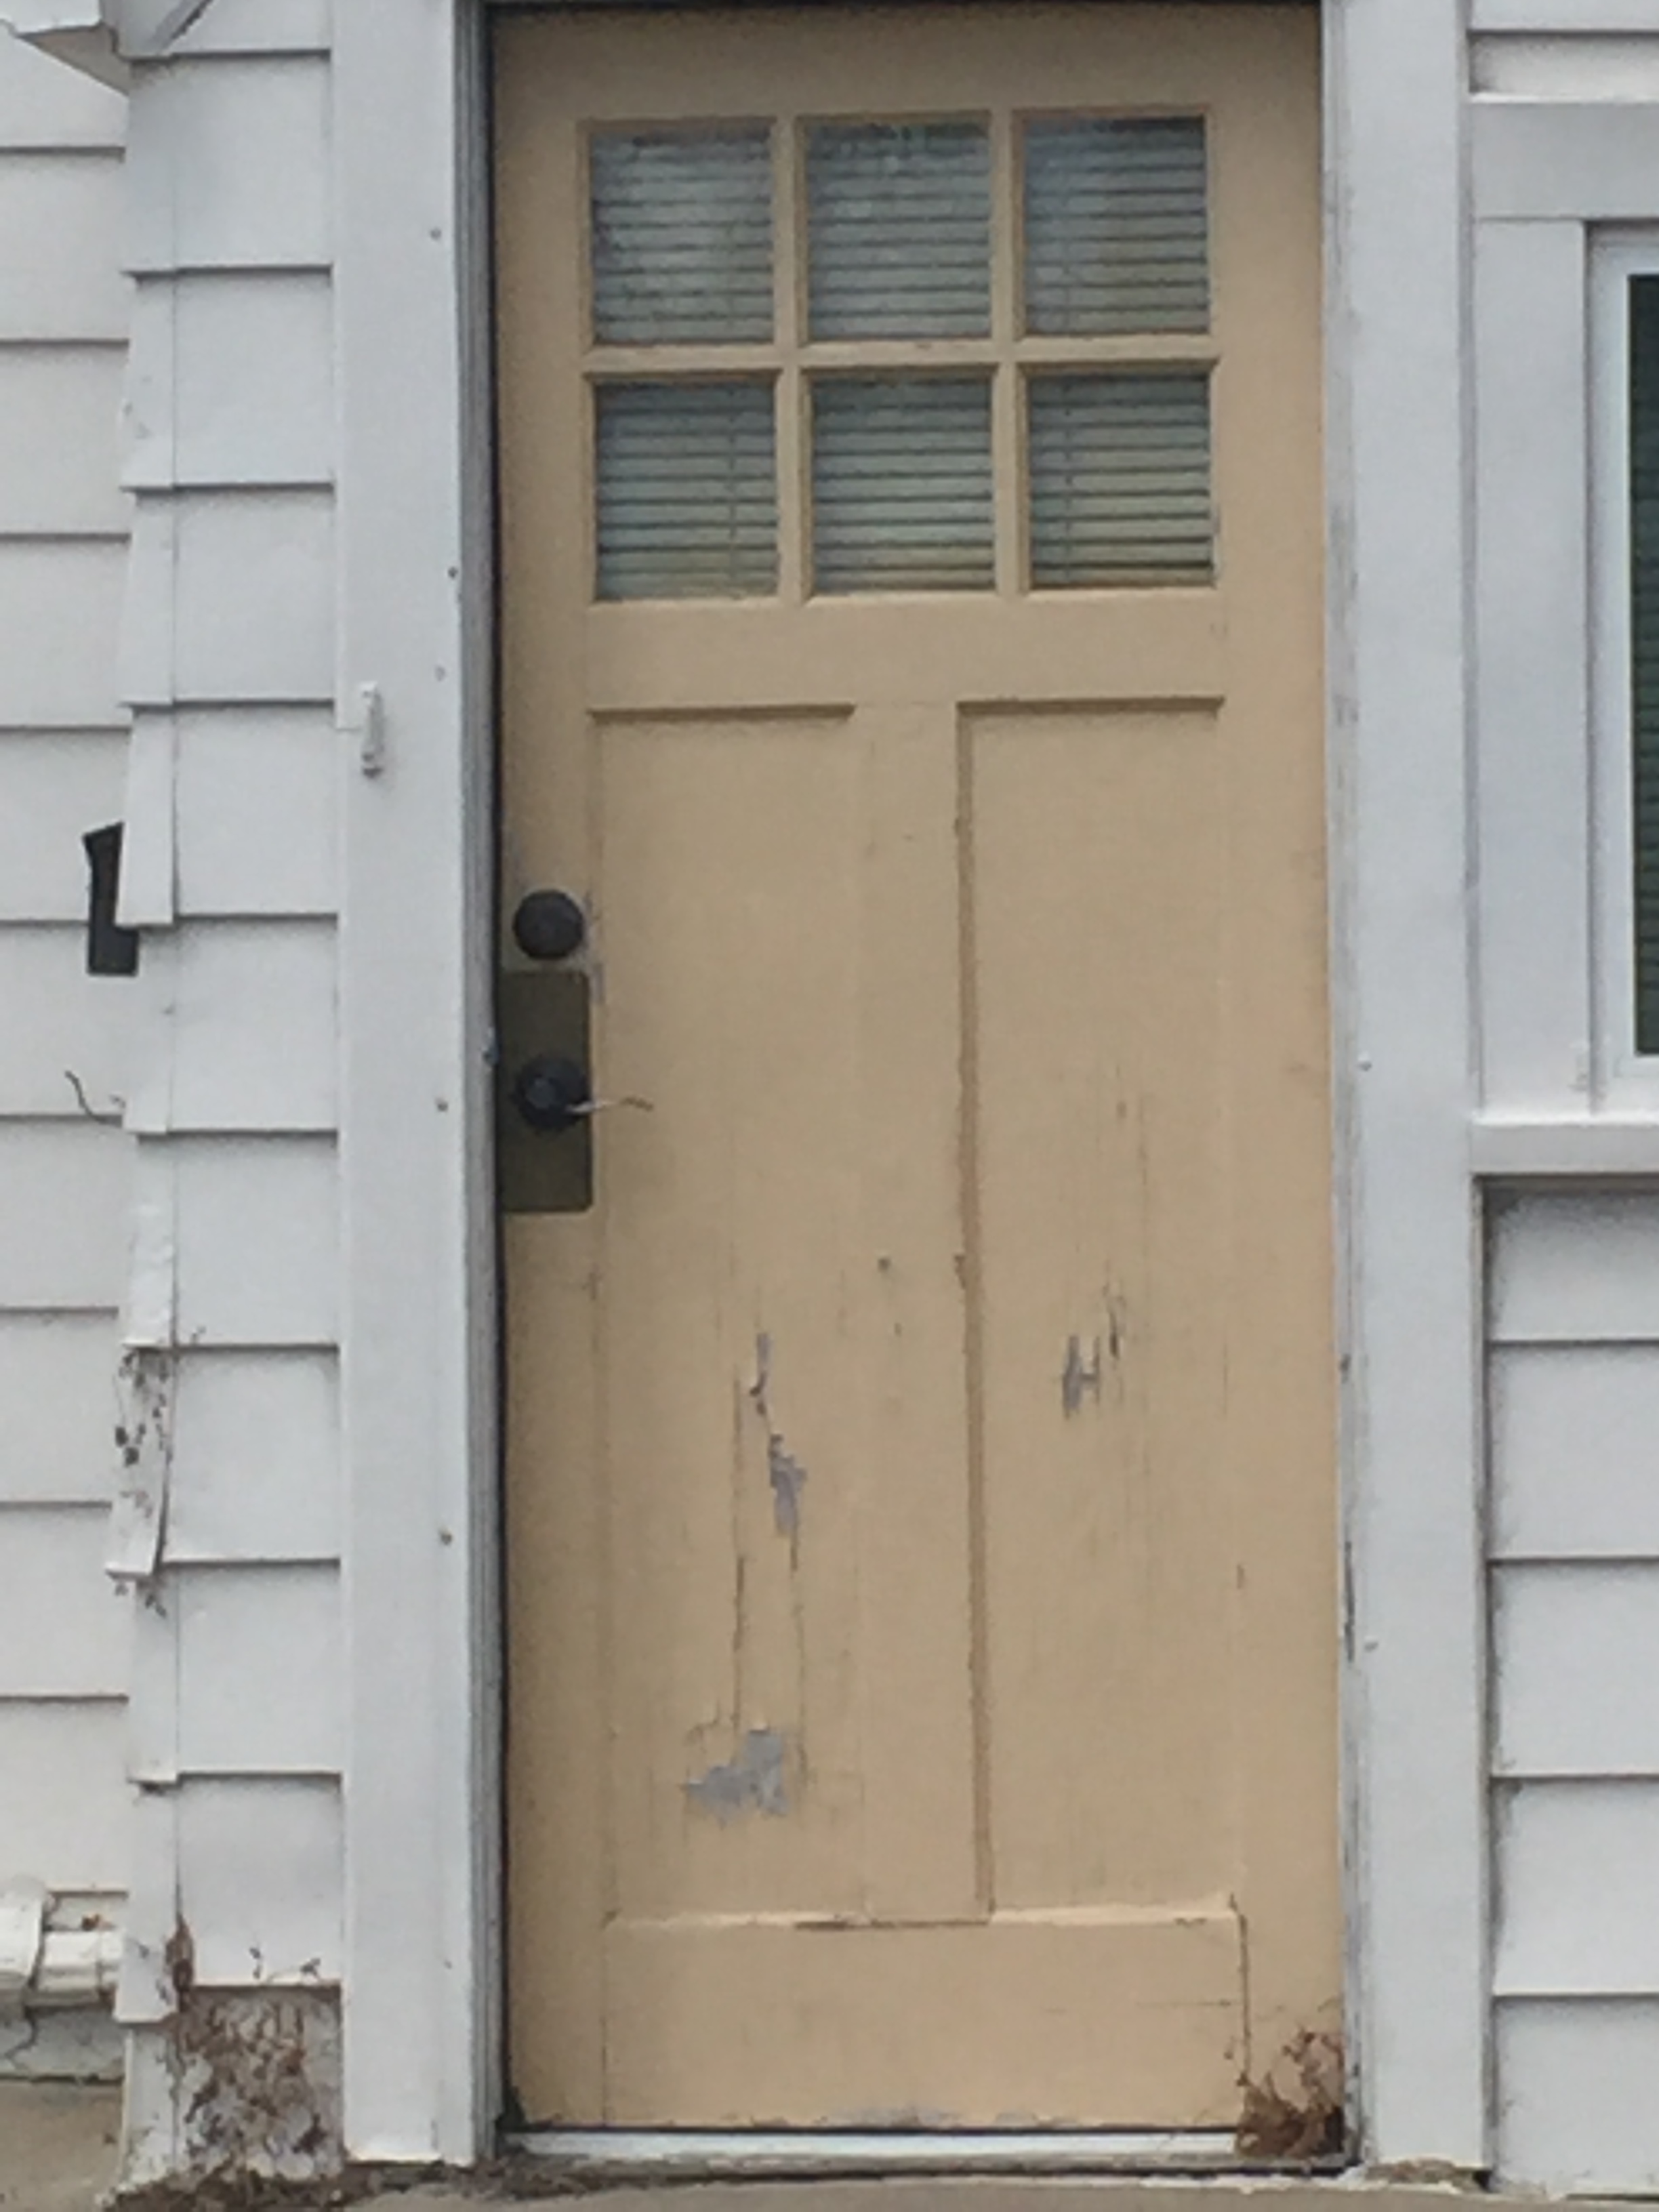
The refrigerator temporarily in the middle of the kitchen. This was expected to take 1 day to complete, but it took 3 days in reality. The door was installed in 1 day, but the plaster, sanding and details took longer. Luckily, this house has a loop layout. I can walk through the bedrooms to get to the kitchen from the living room while this door goes in. I feel like I’m camping, sort of.

The mud needs to dry overnight before sanding, so we left the taped plastic up.
We had good weather while they worked on the door. Better for the guys and better for me while the wall is opened up!
It took most of the day, but I can see how open and bright this door will make my kitchen.
The new door creates so much more light. You see it right as you walk in the front door!
Wow, I love this new slider door! It’s much brighter and makes my small kitchen feel bigger.
This is now a view. I want to clean it up and make it nice to look at.
The back porch is looking so much better too! No utilities on the back wall and all the battens are now up. I’m getting used to the Green primer on the exterior walls, but the actual color will be off White, once painted.

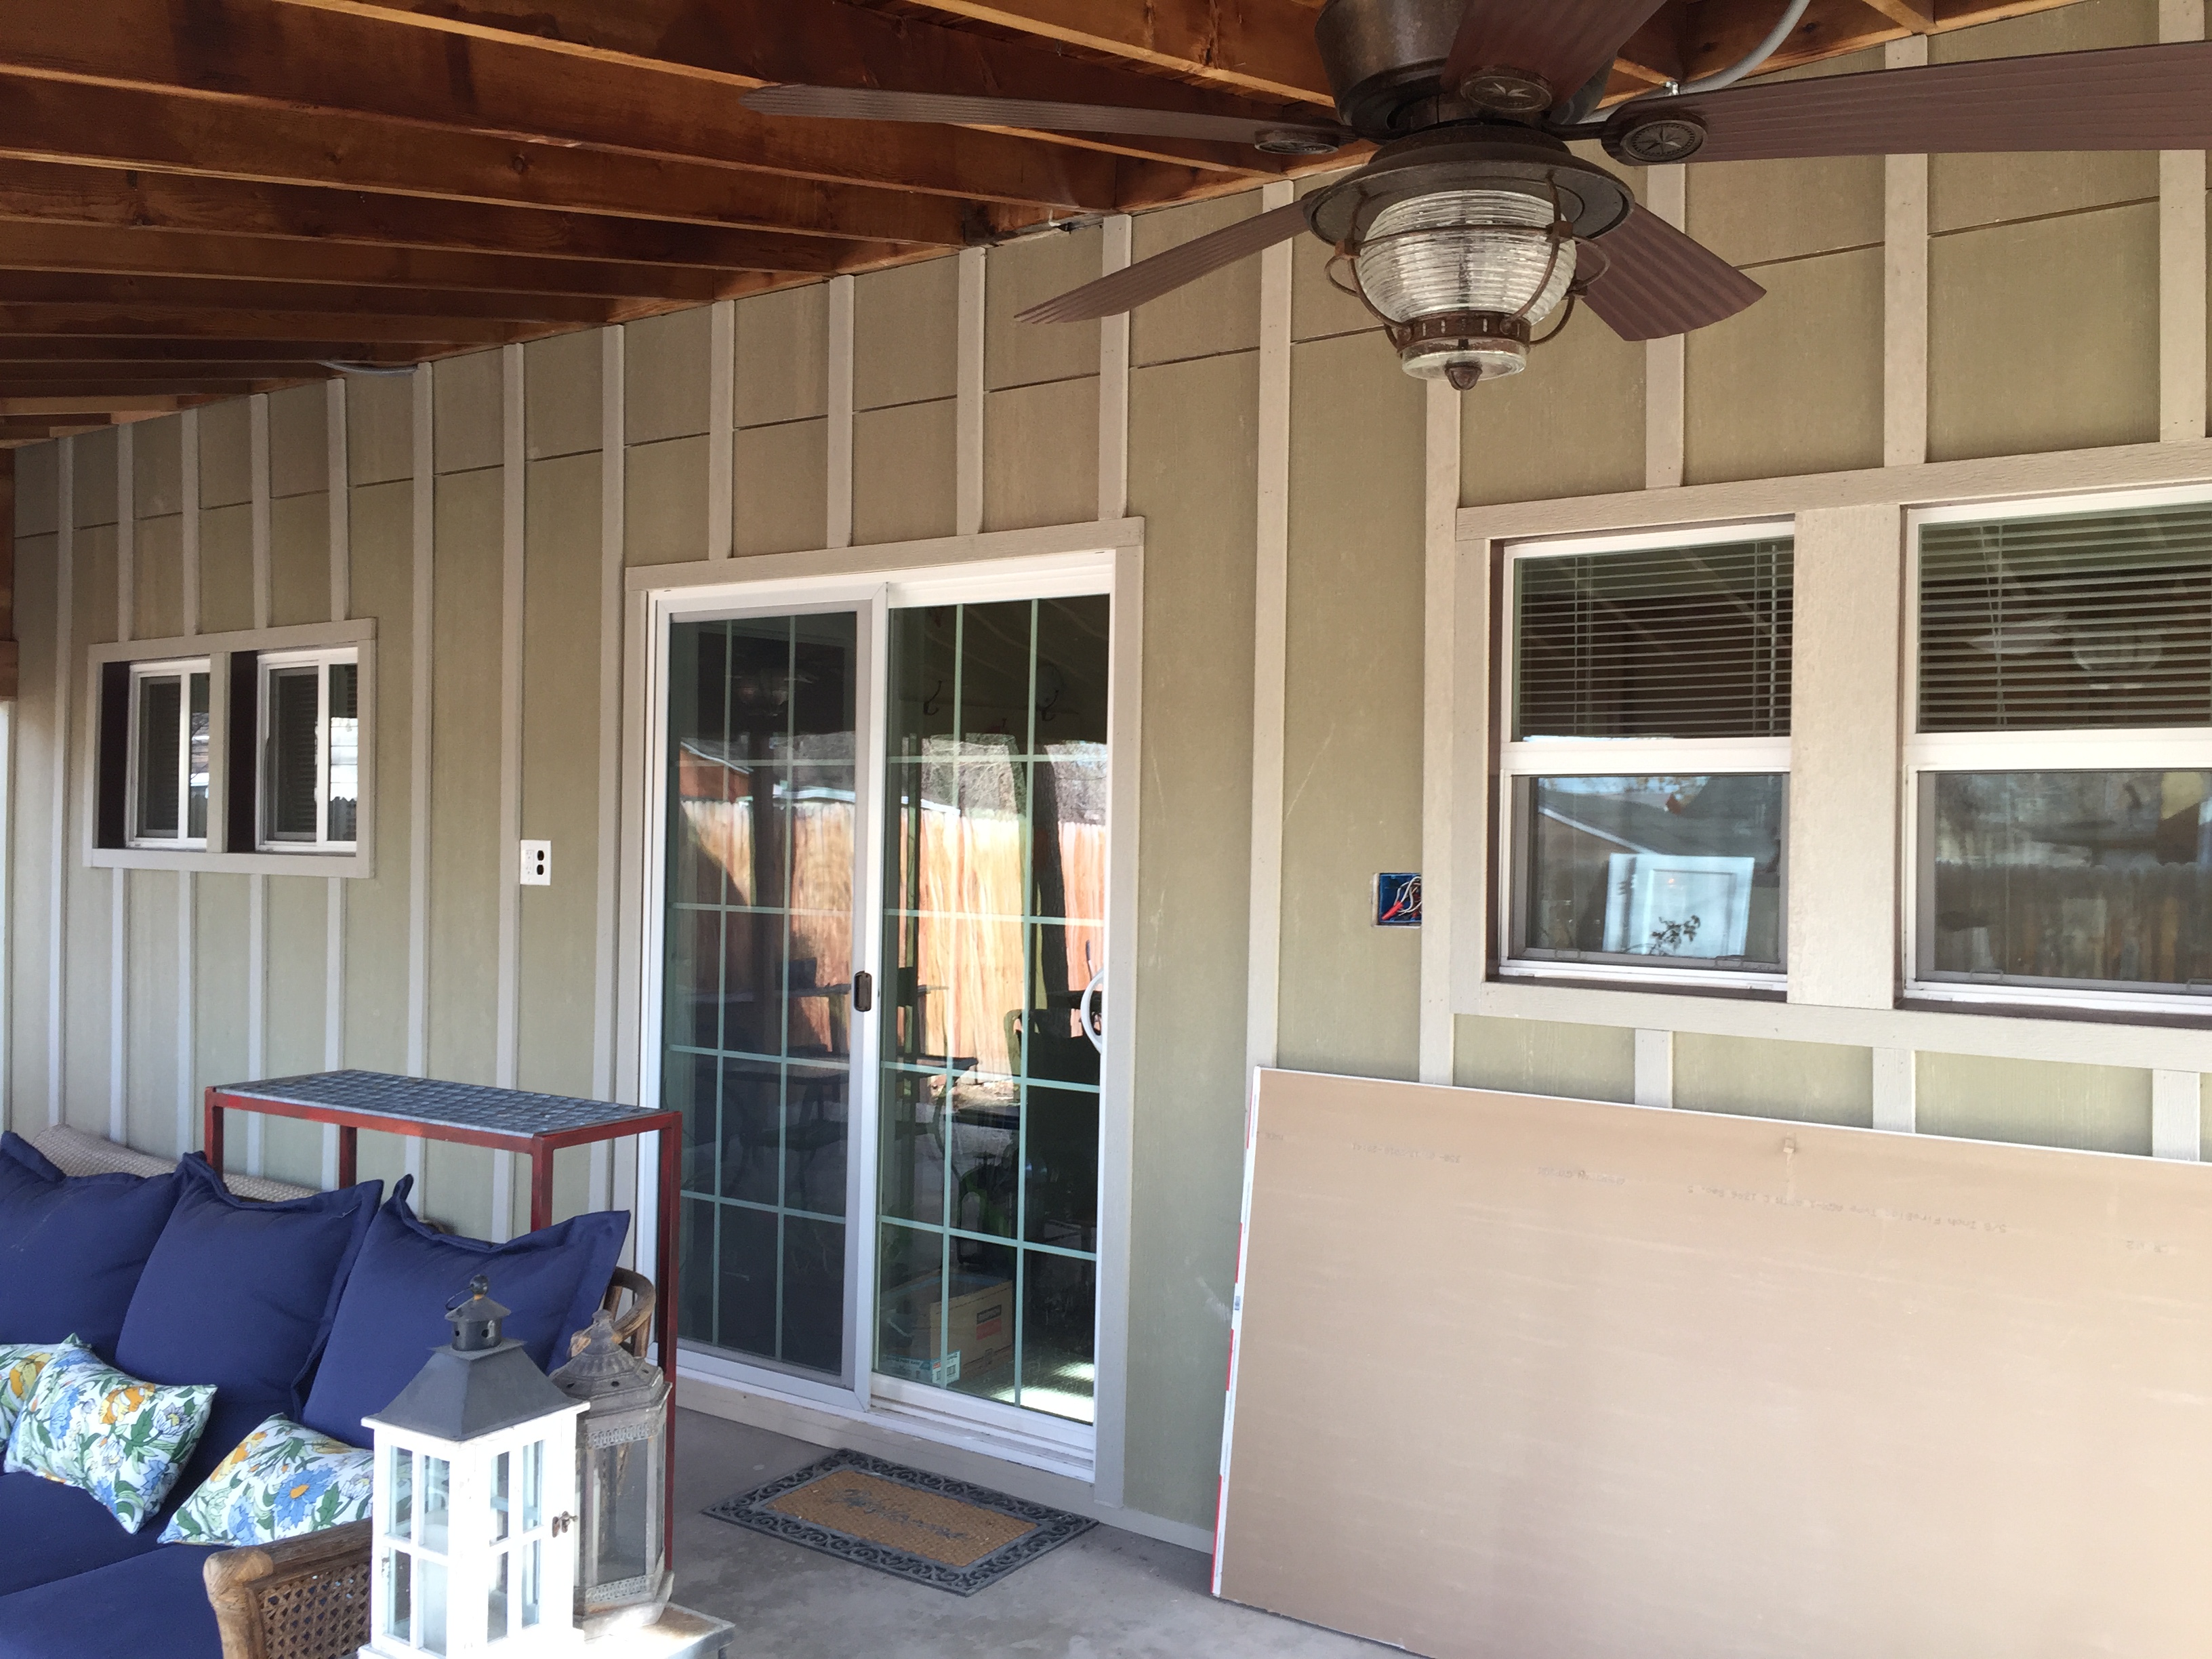
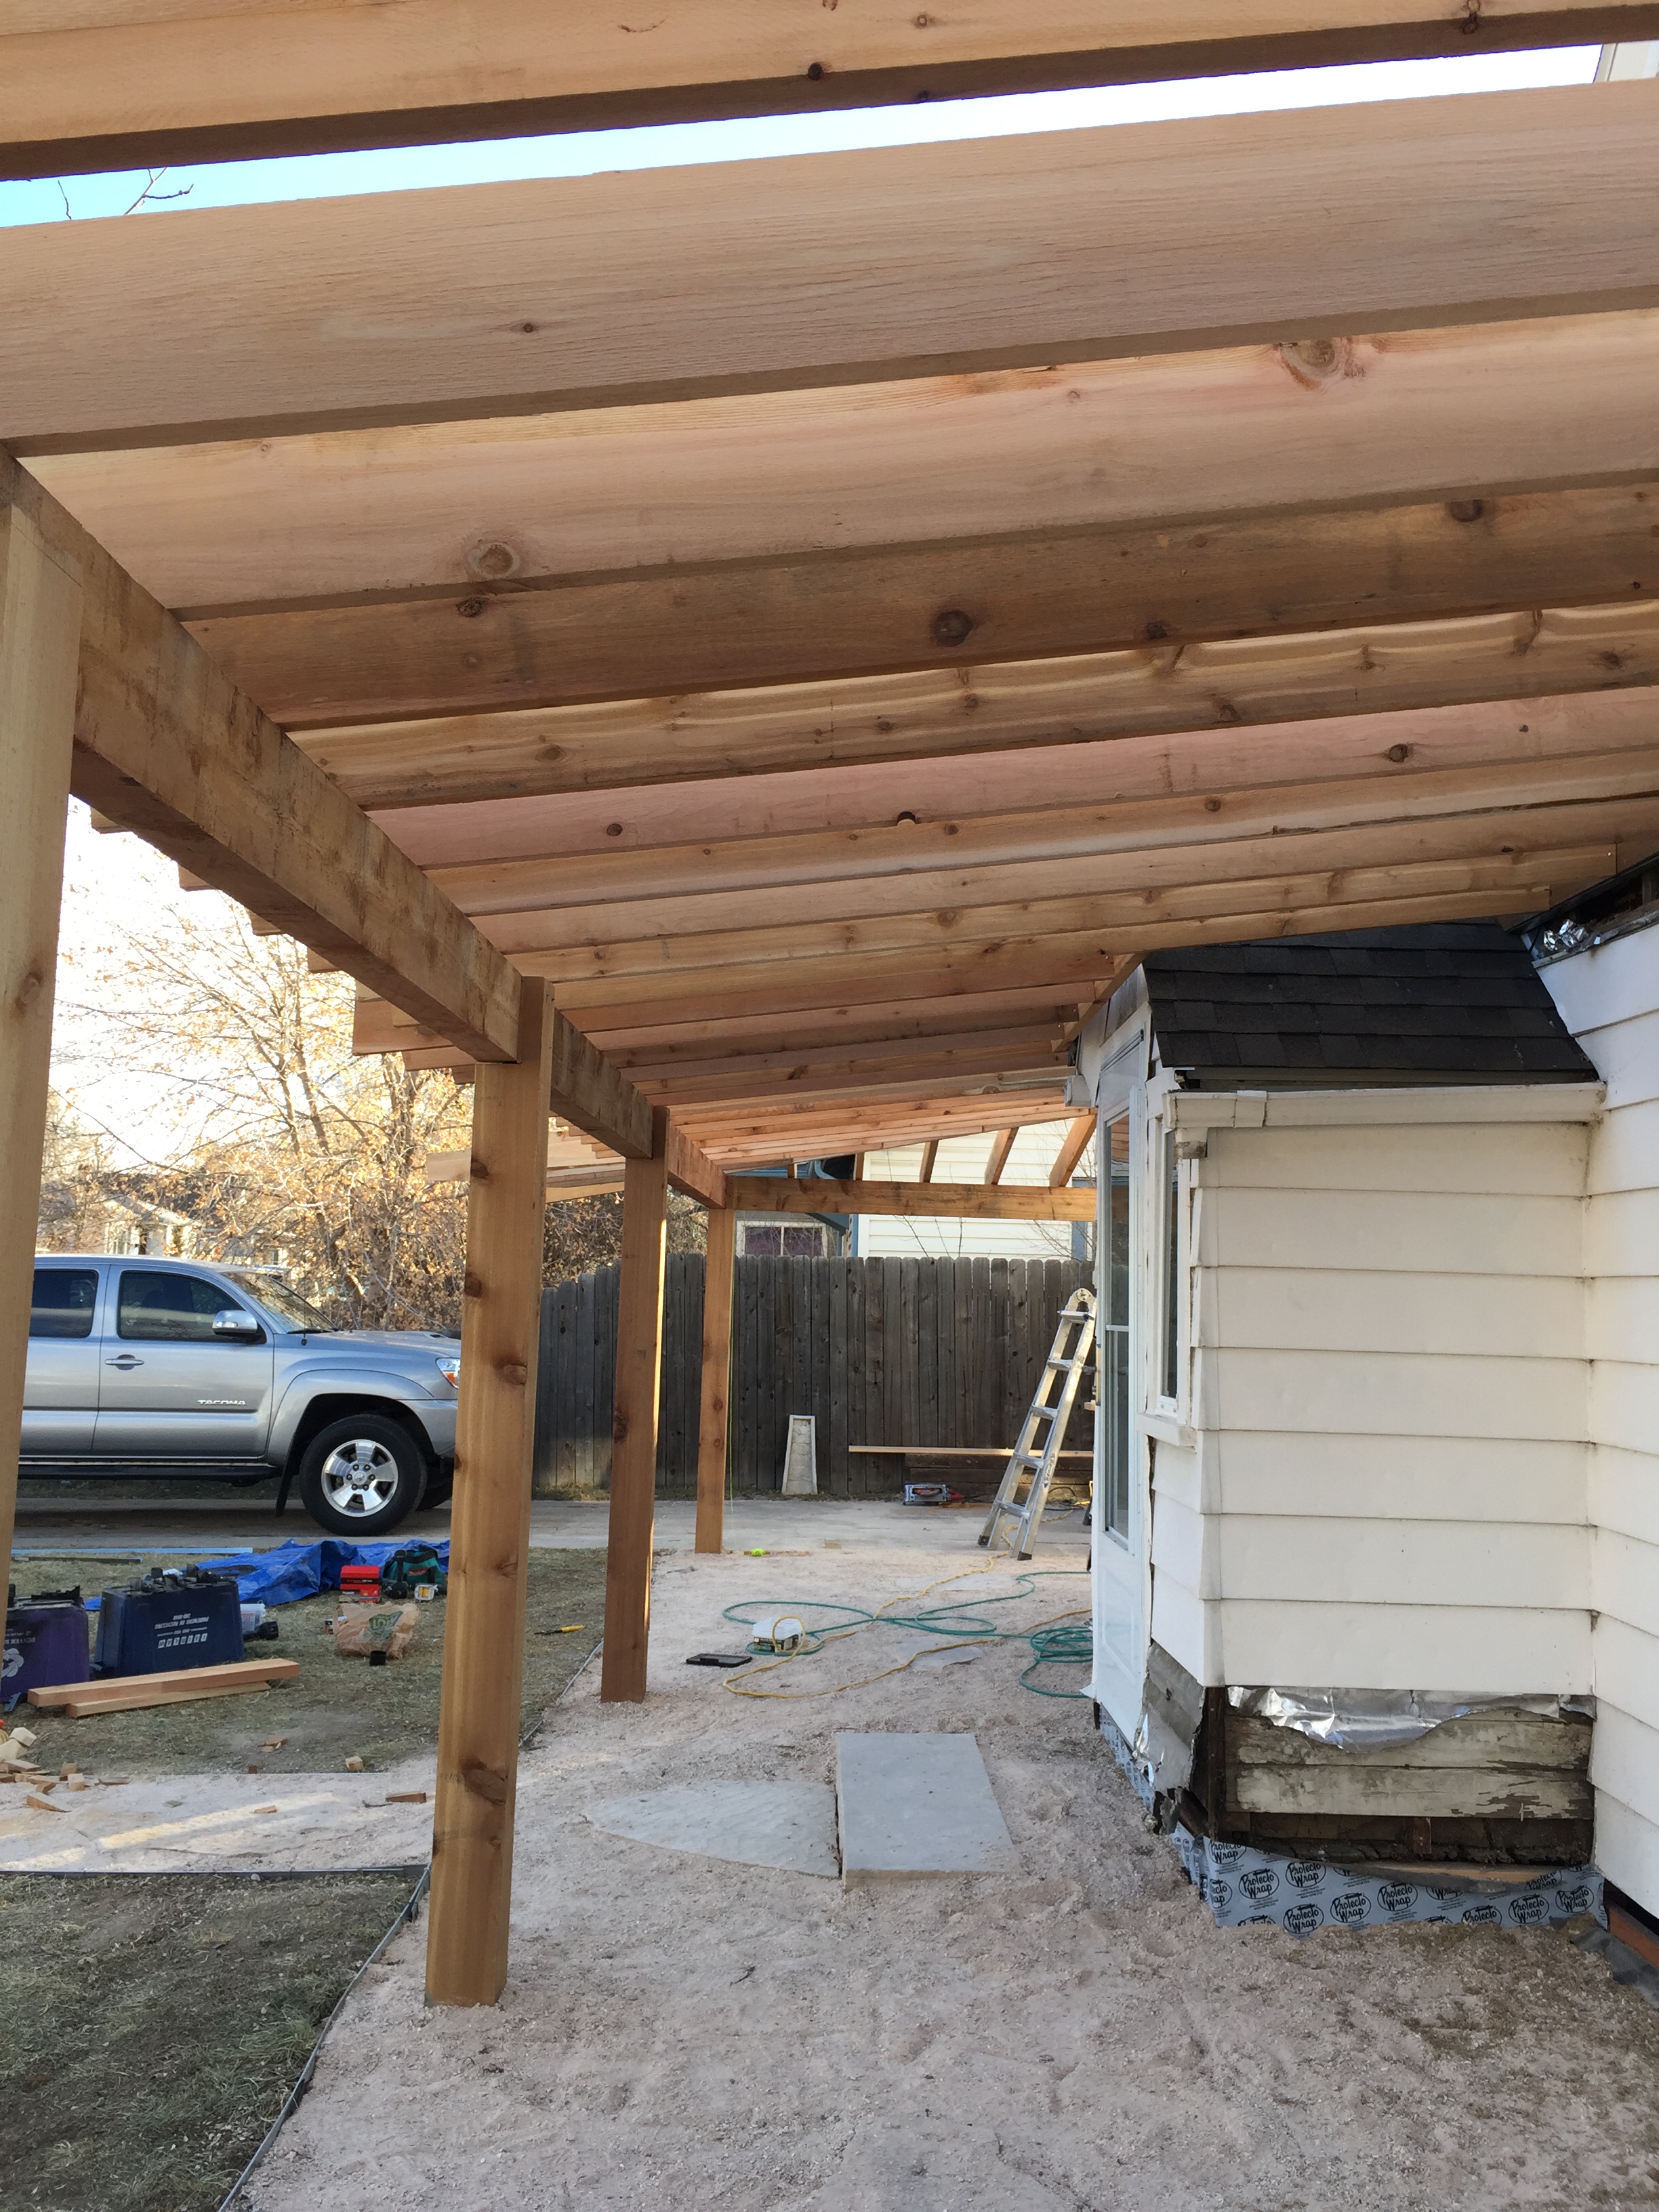
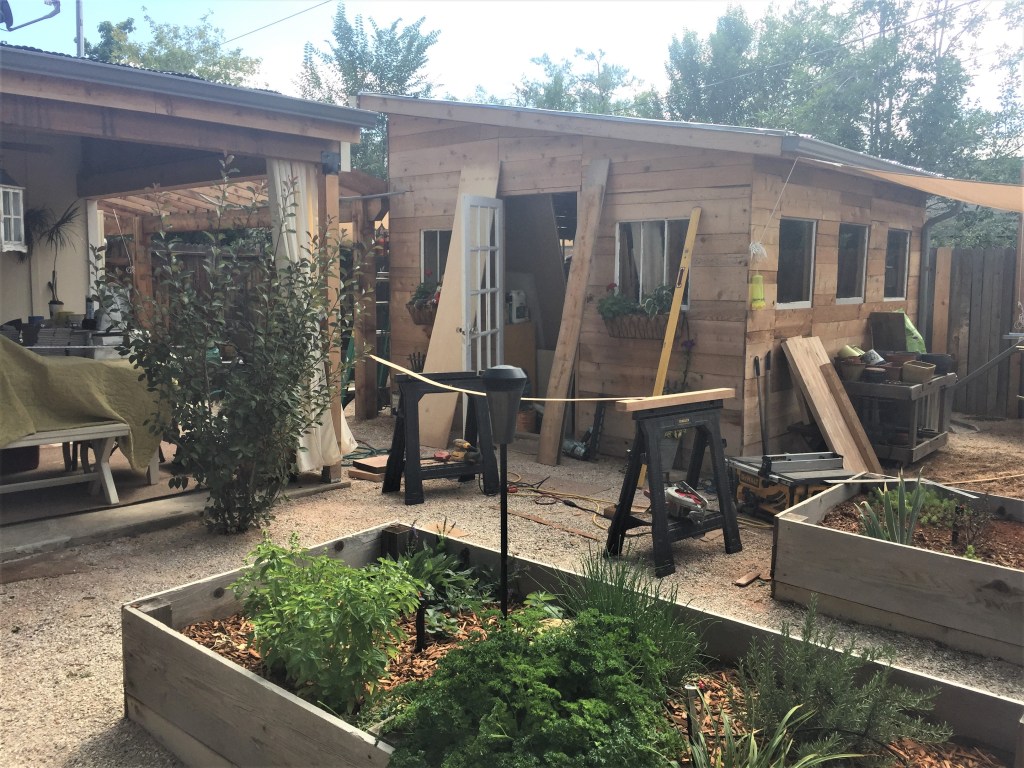
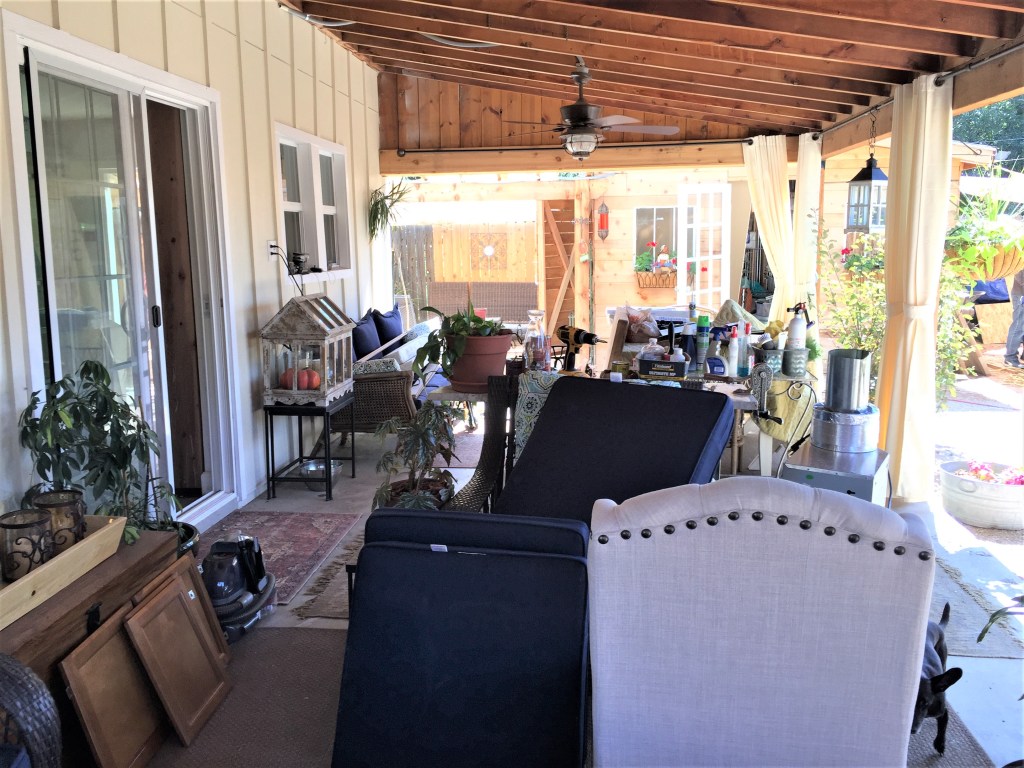
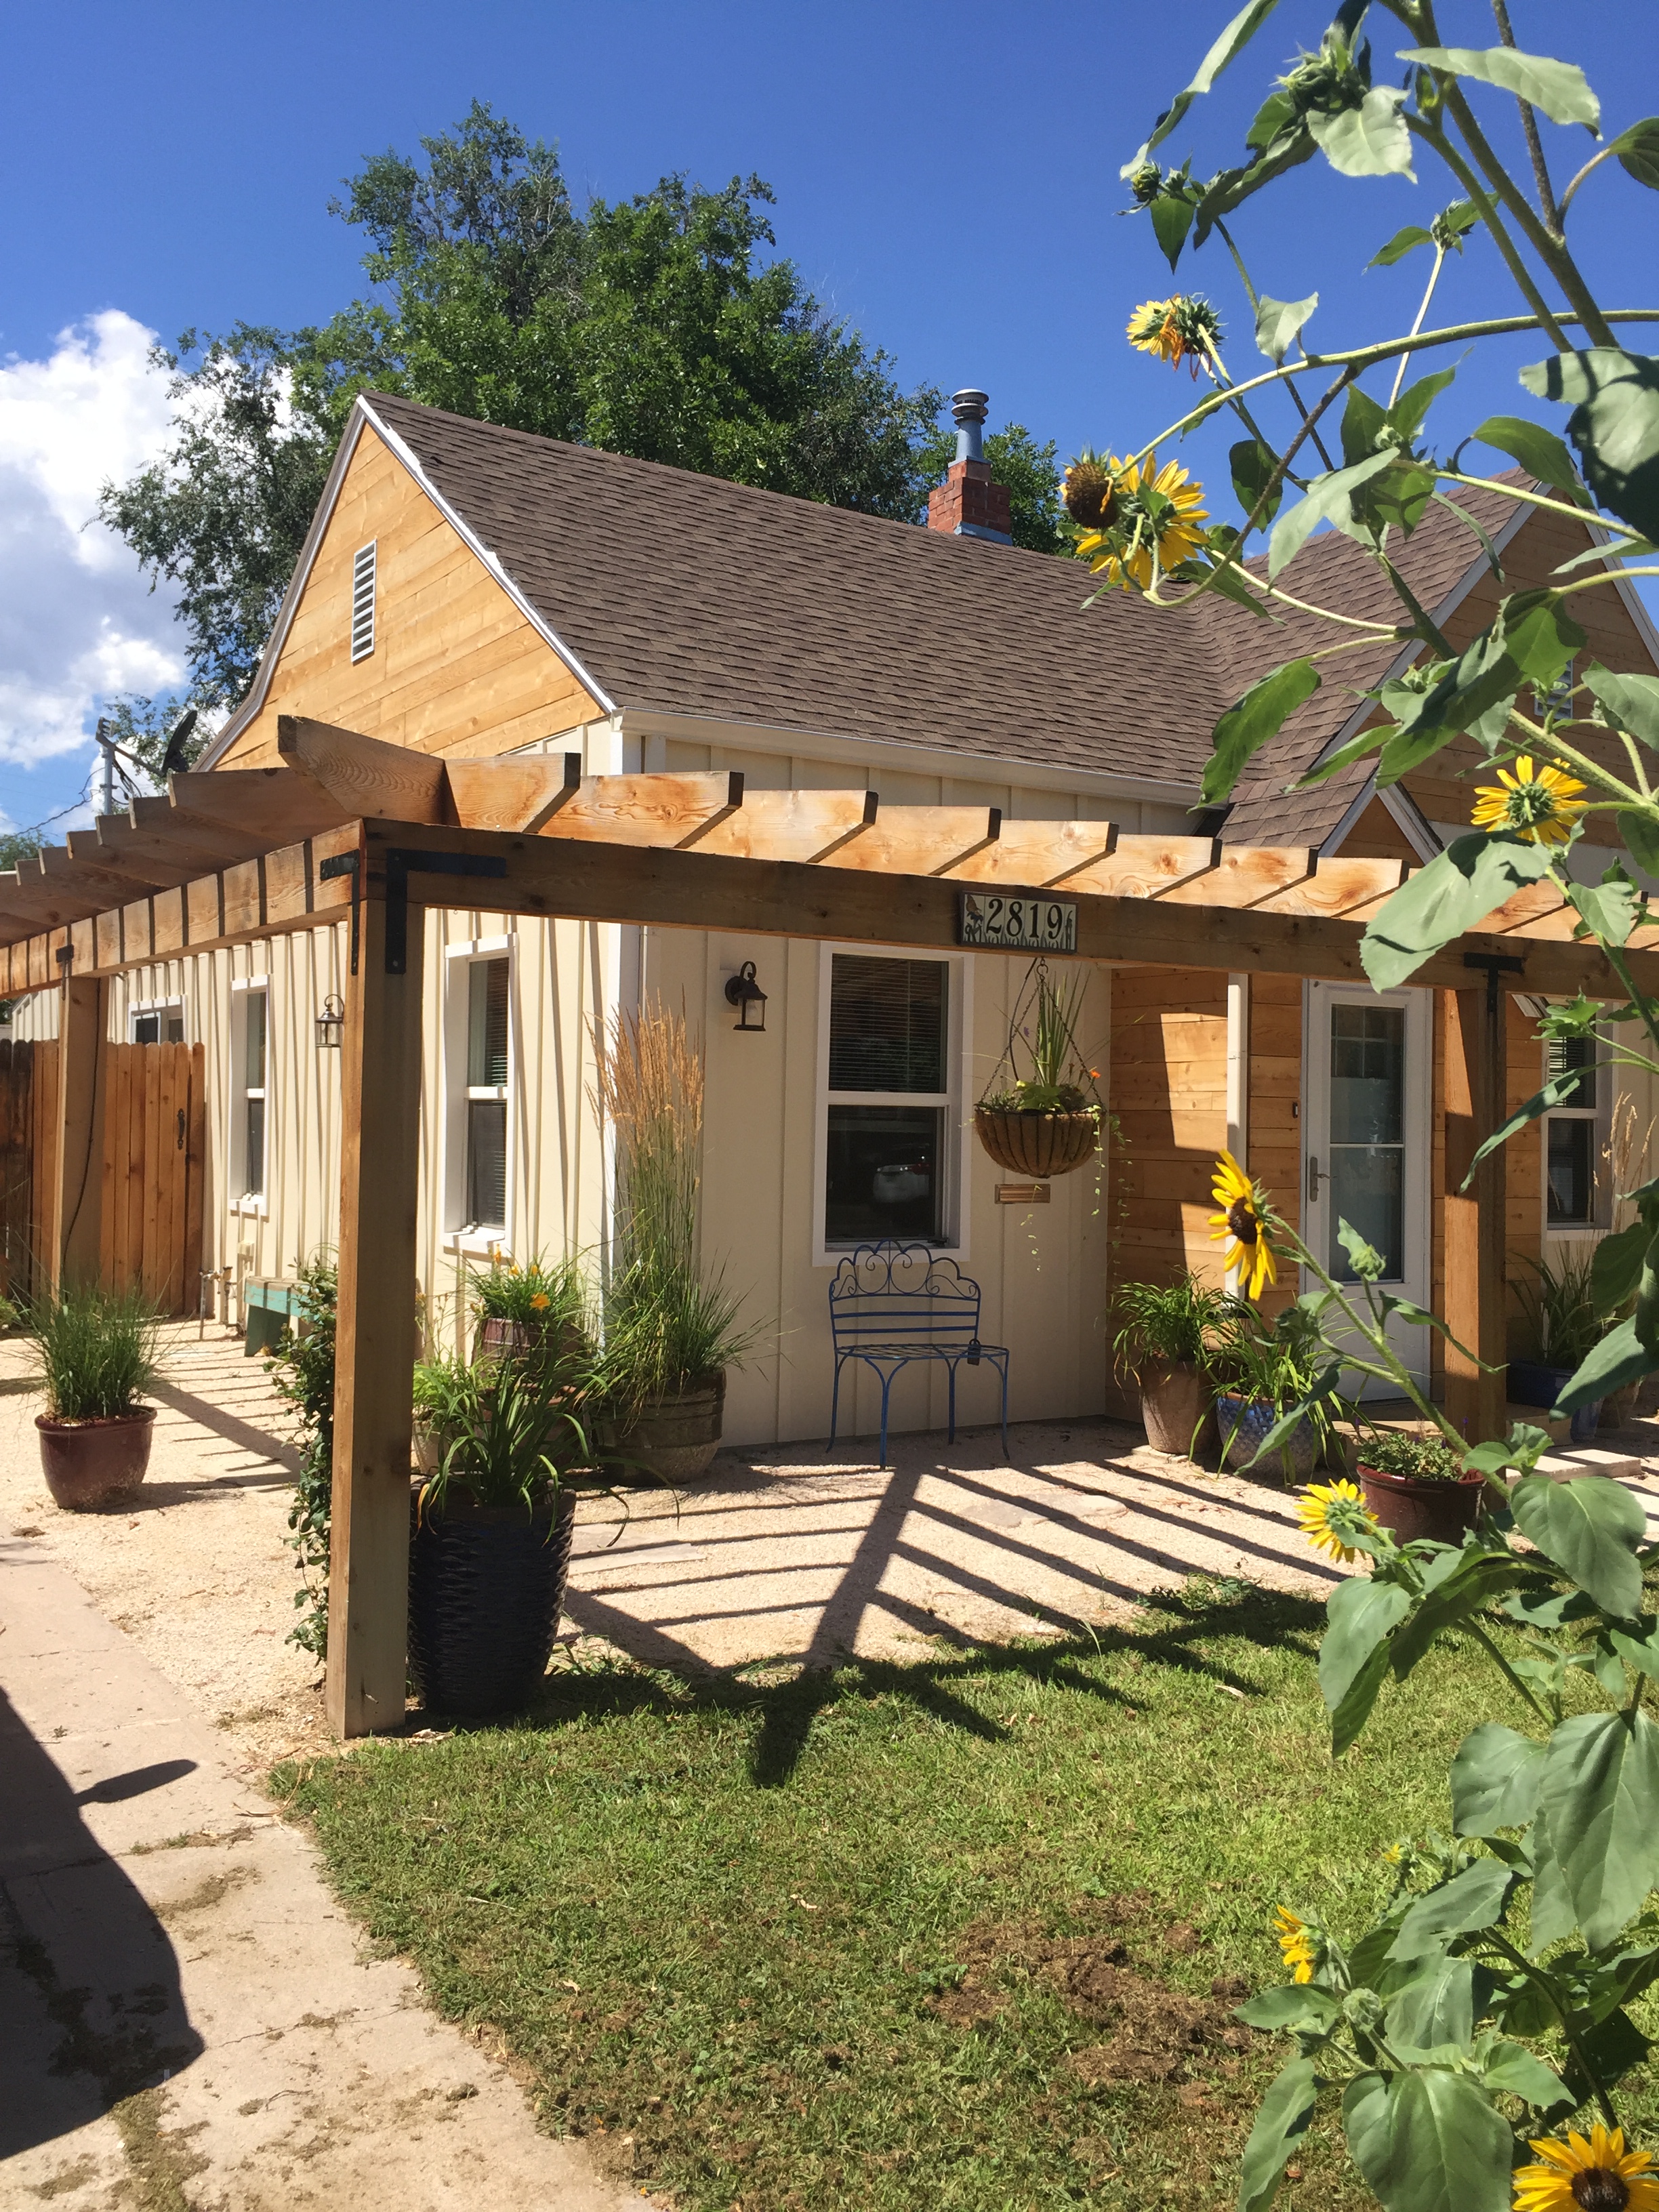
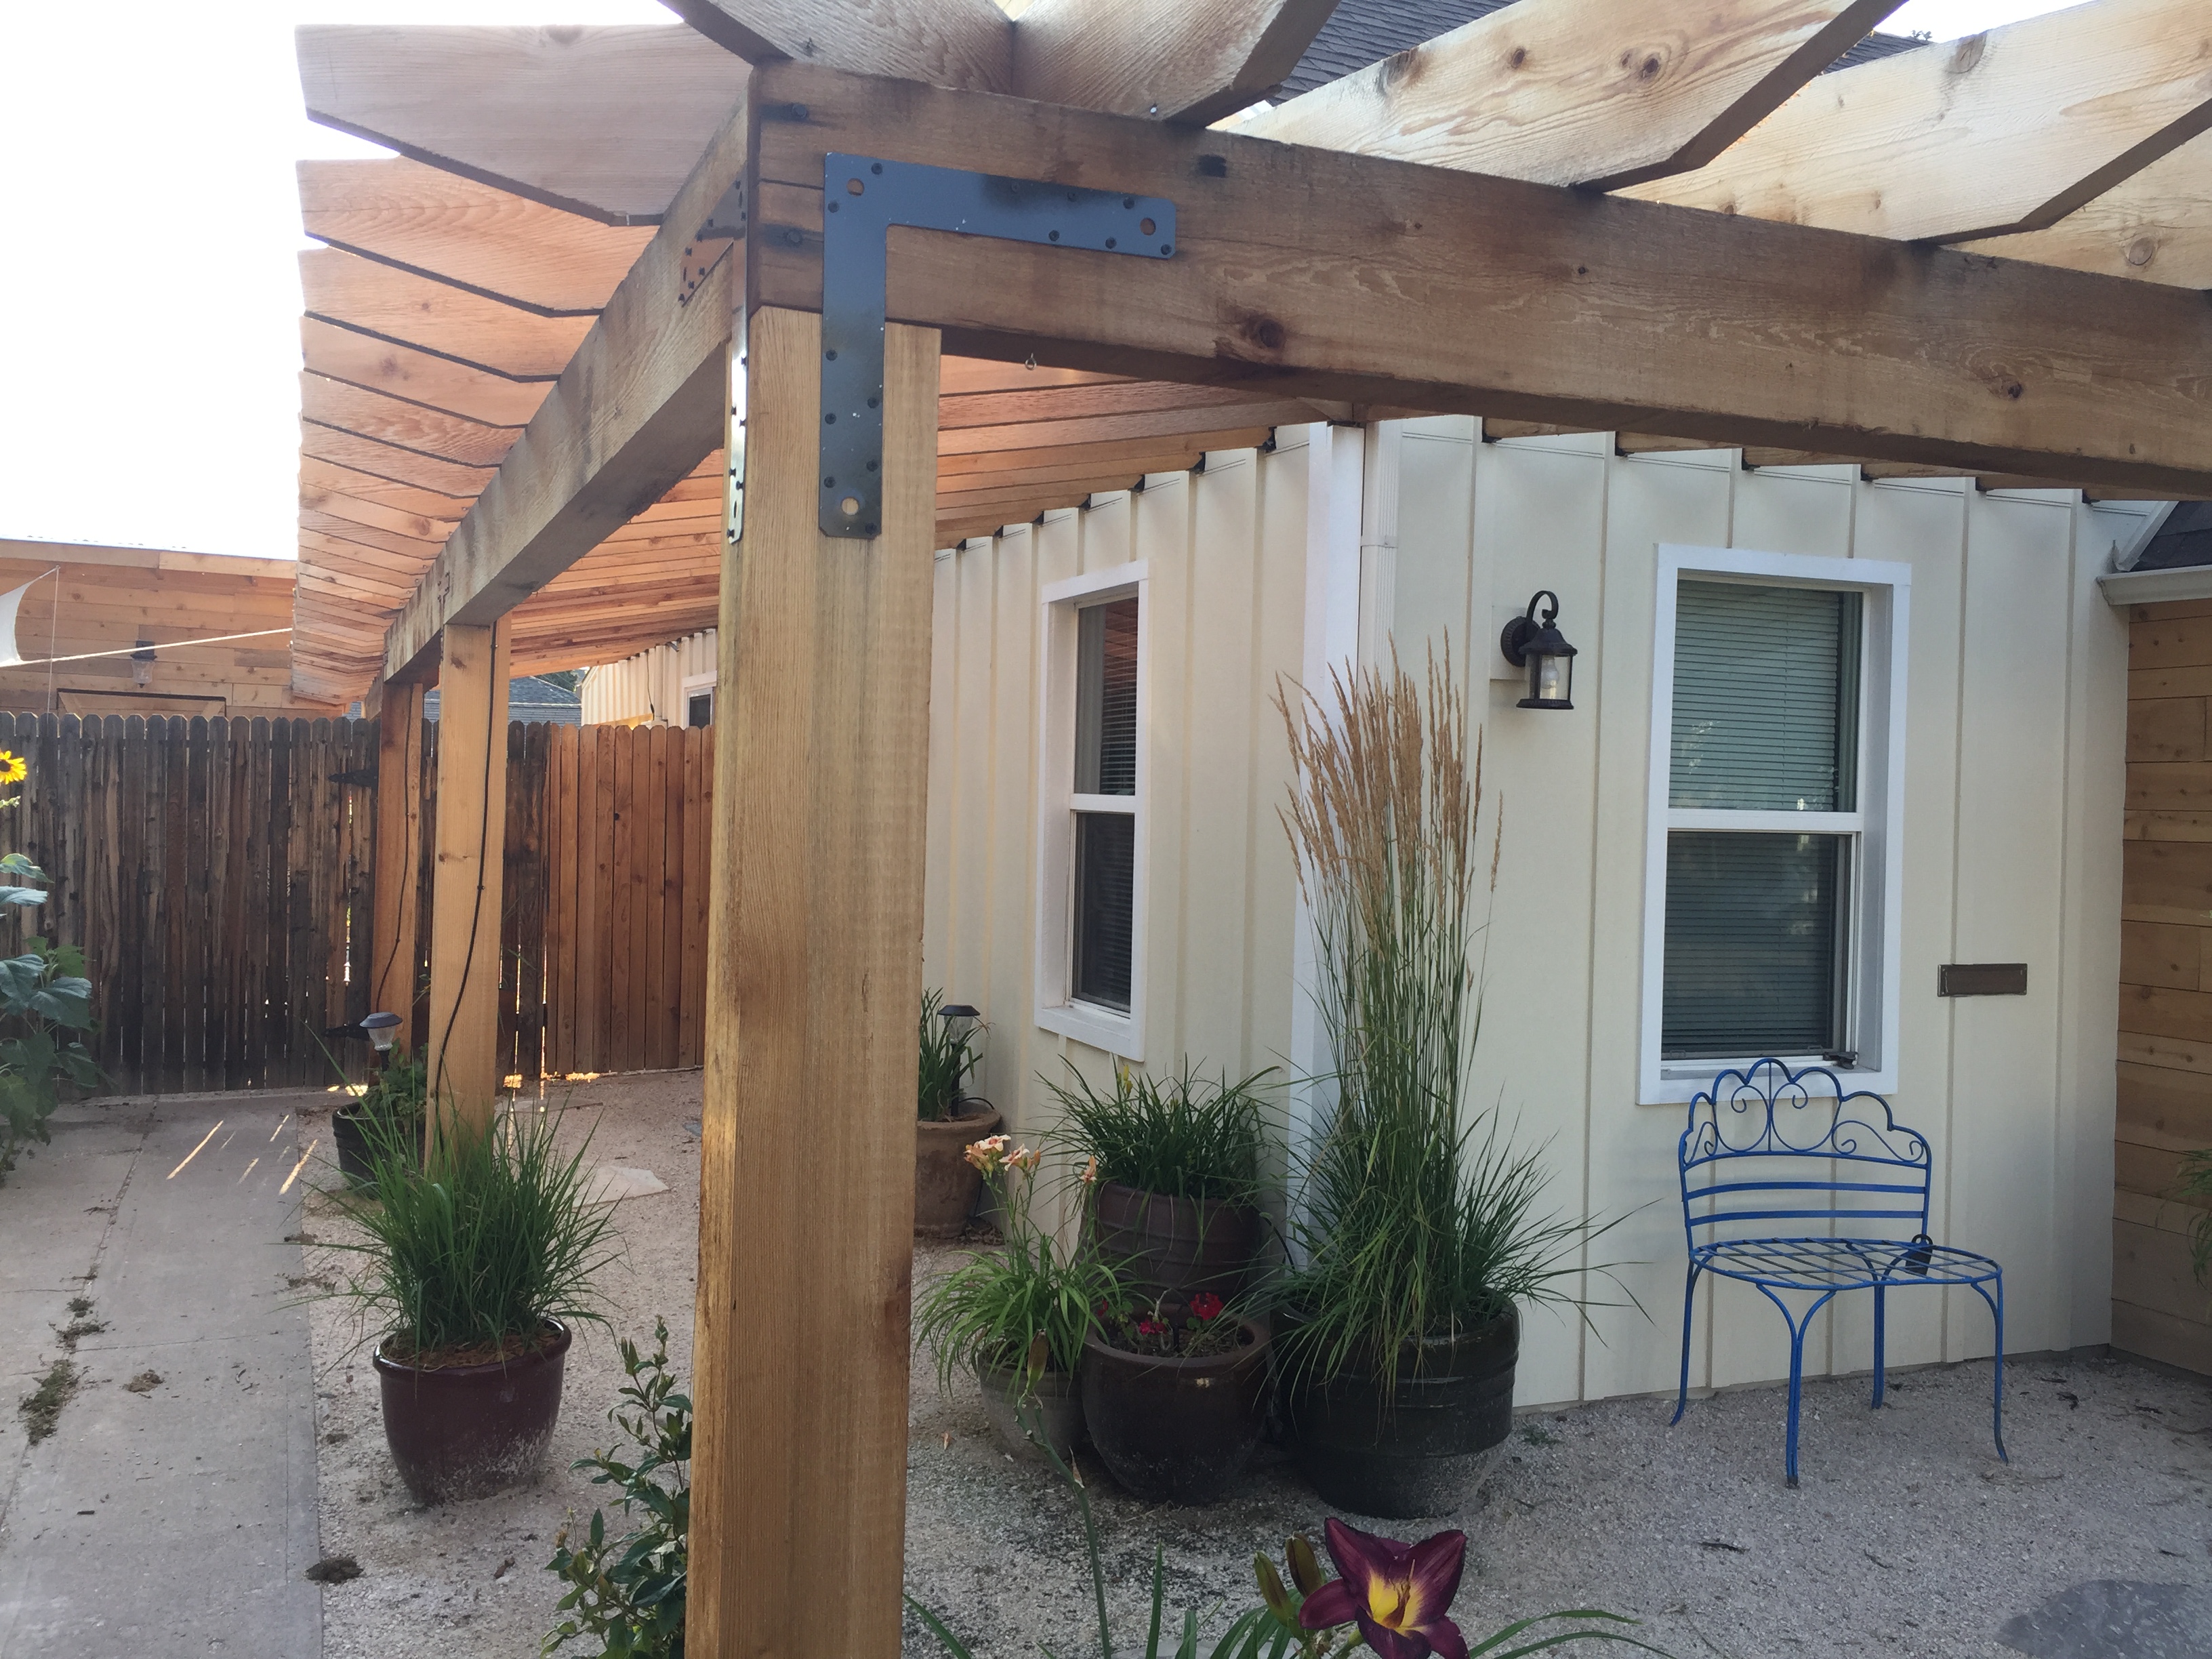
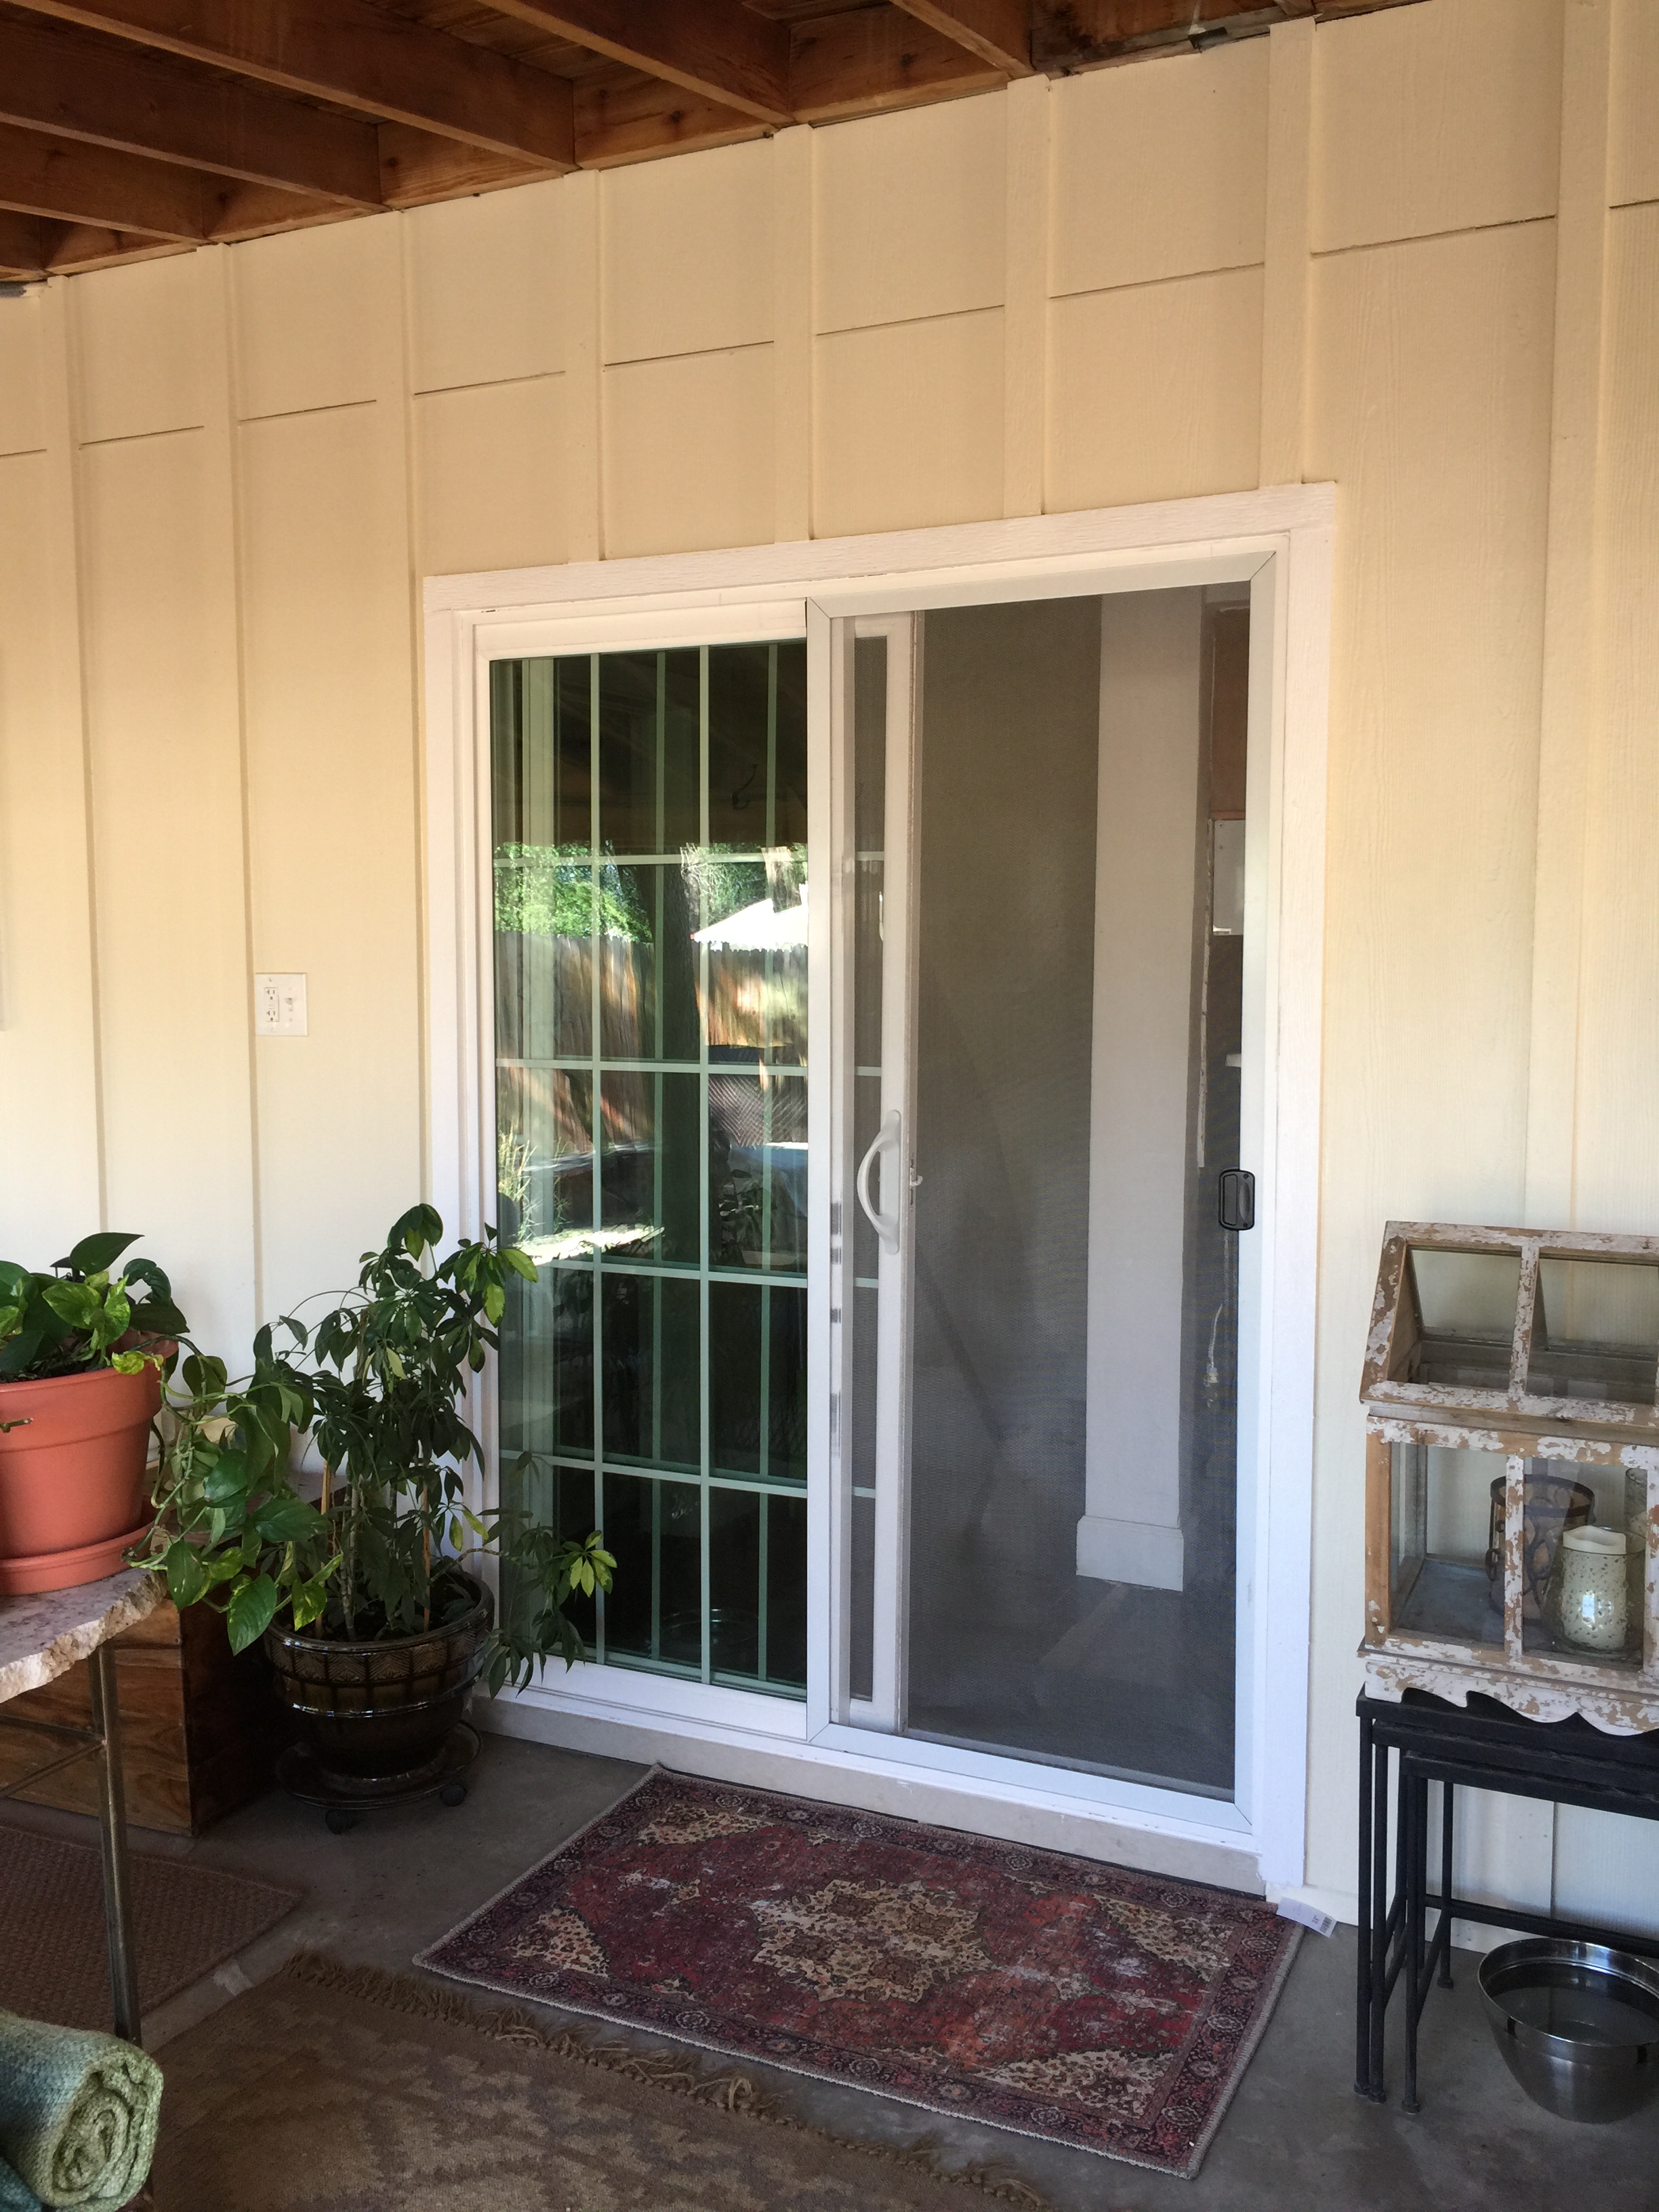
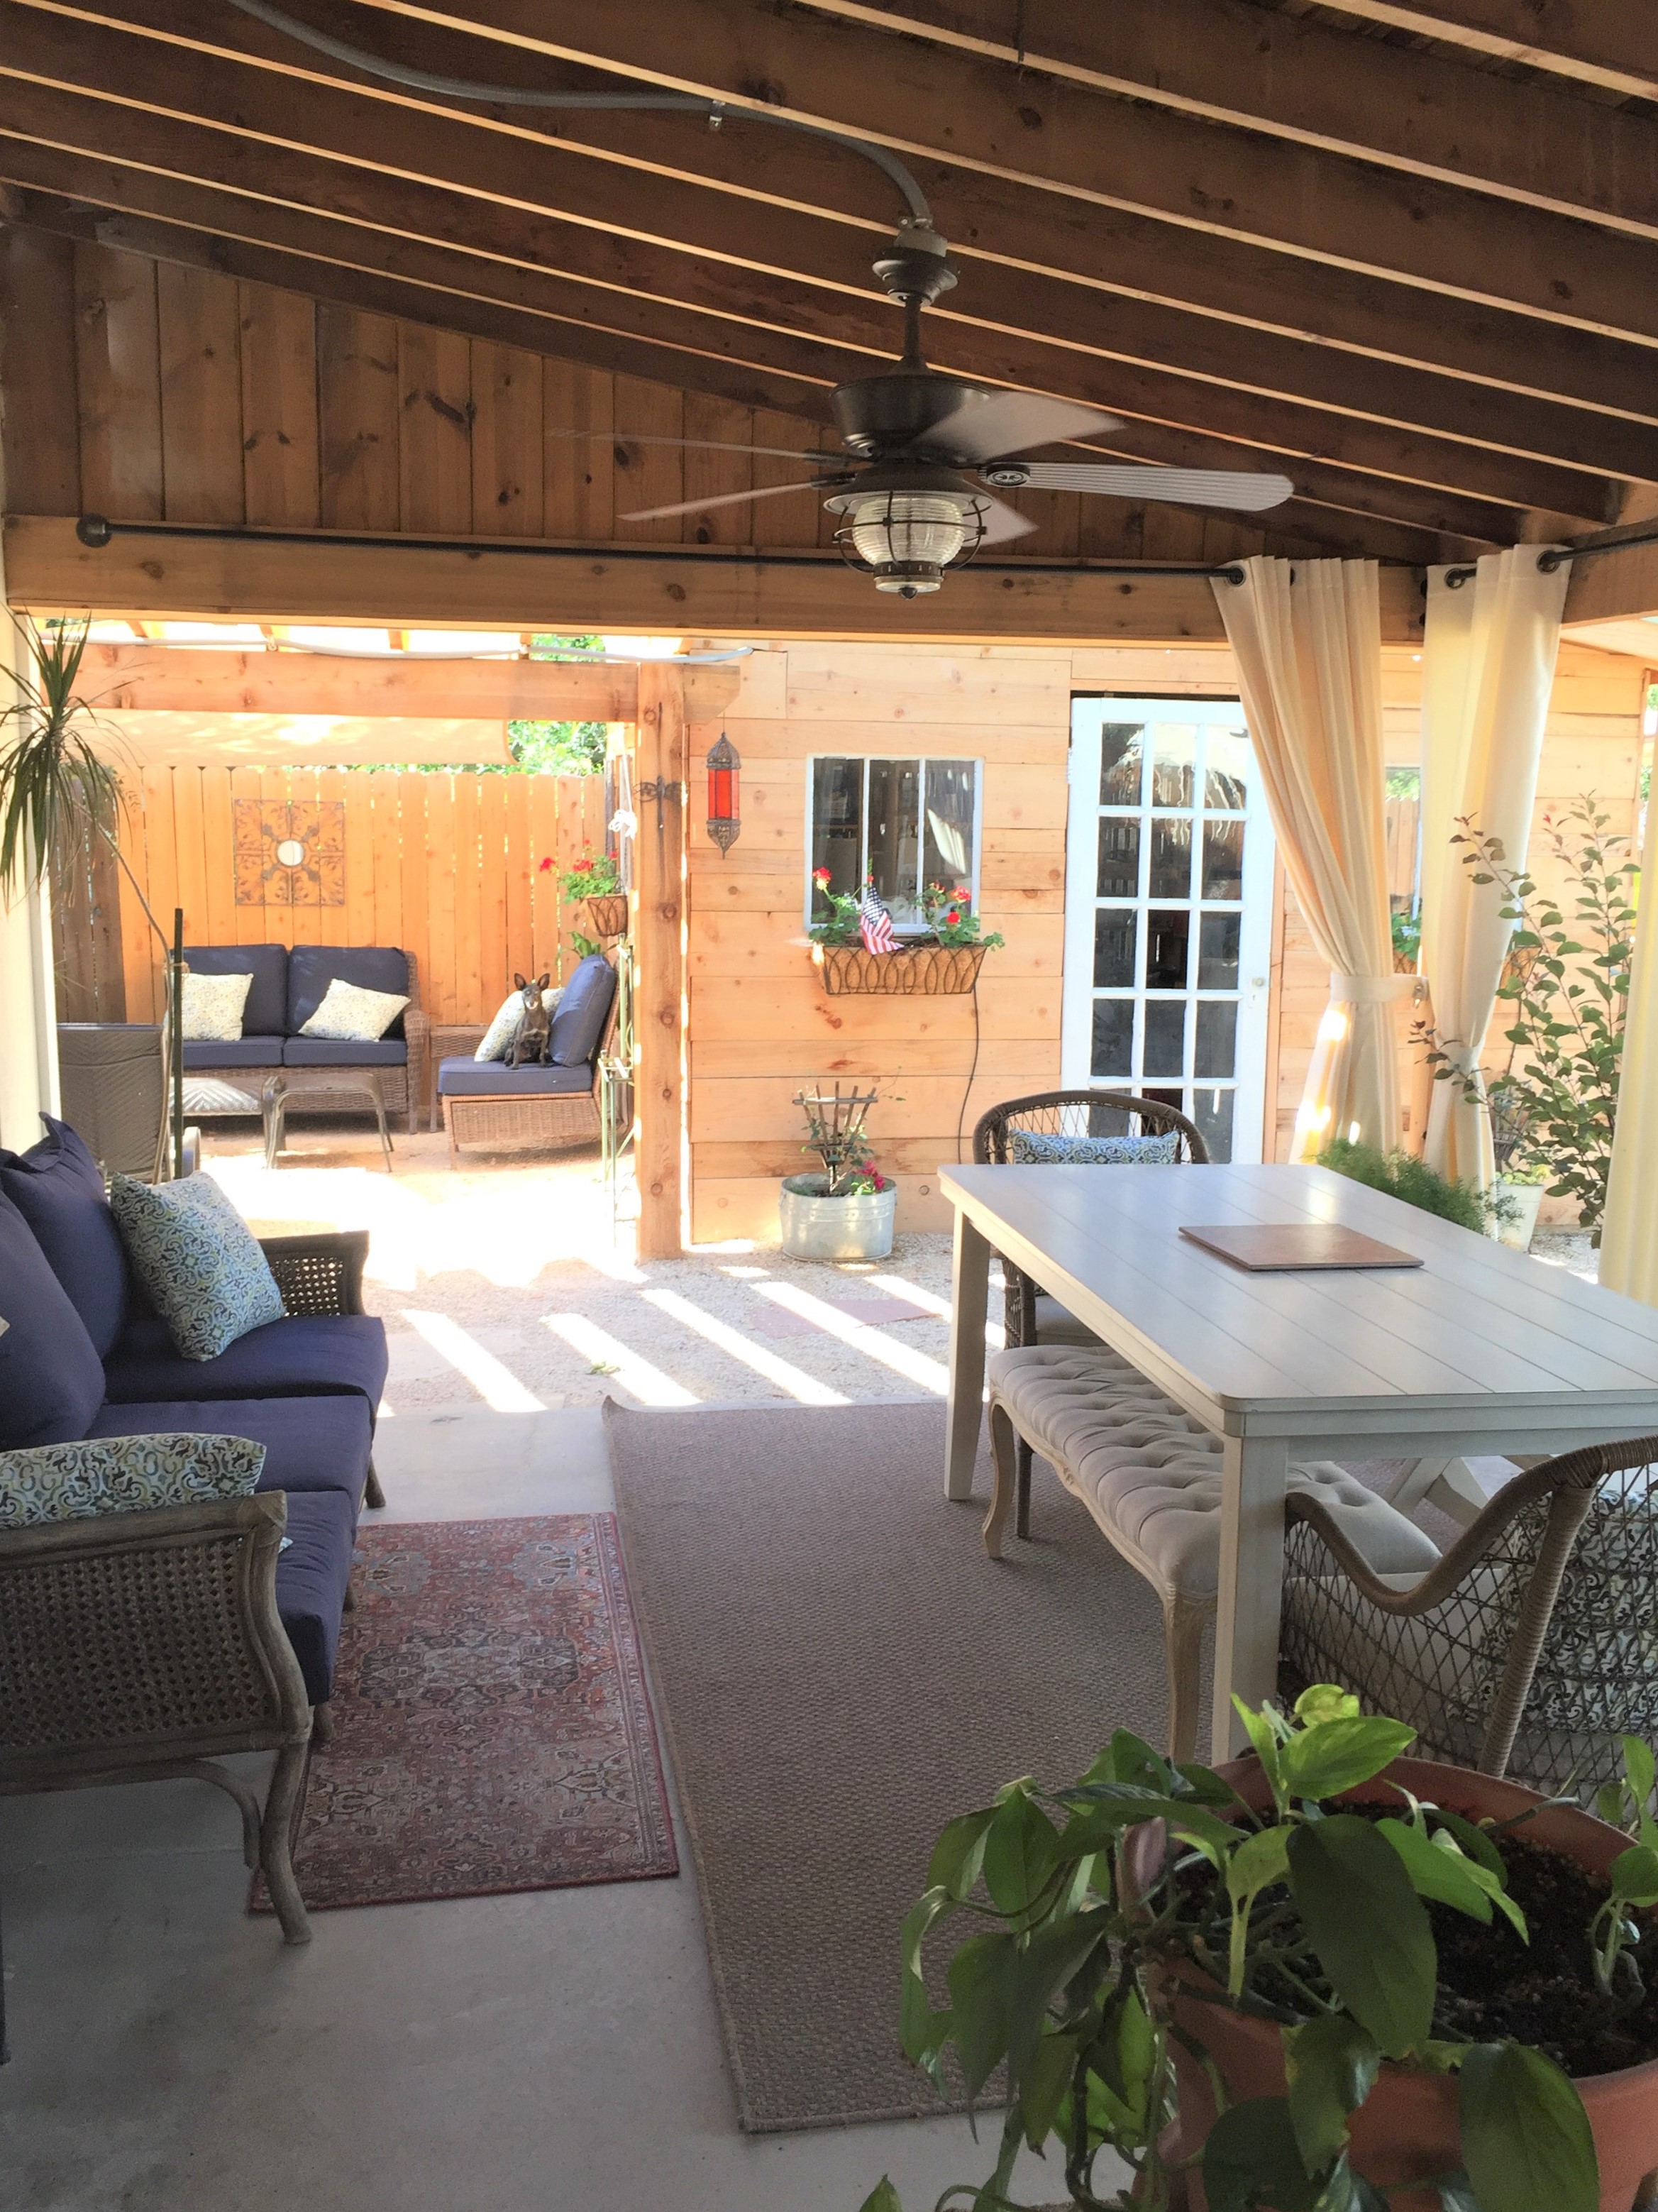
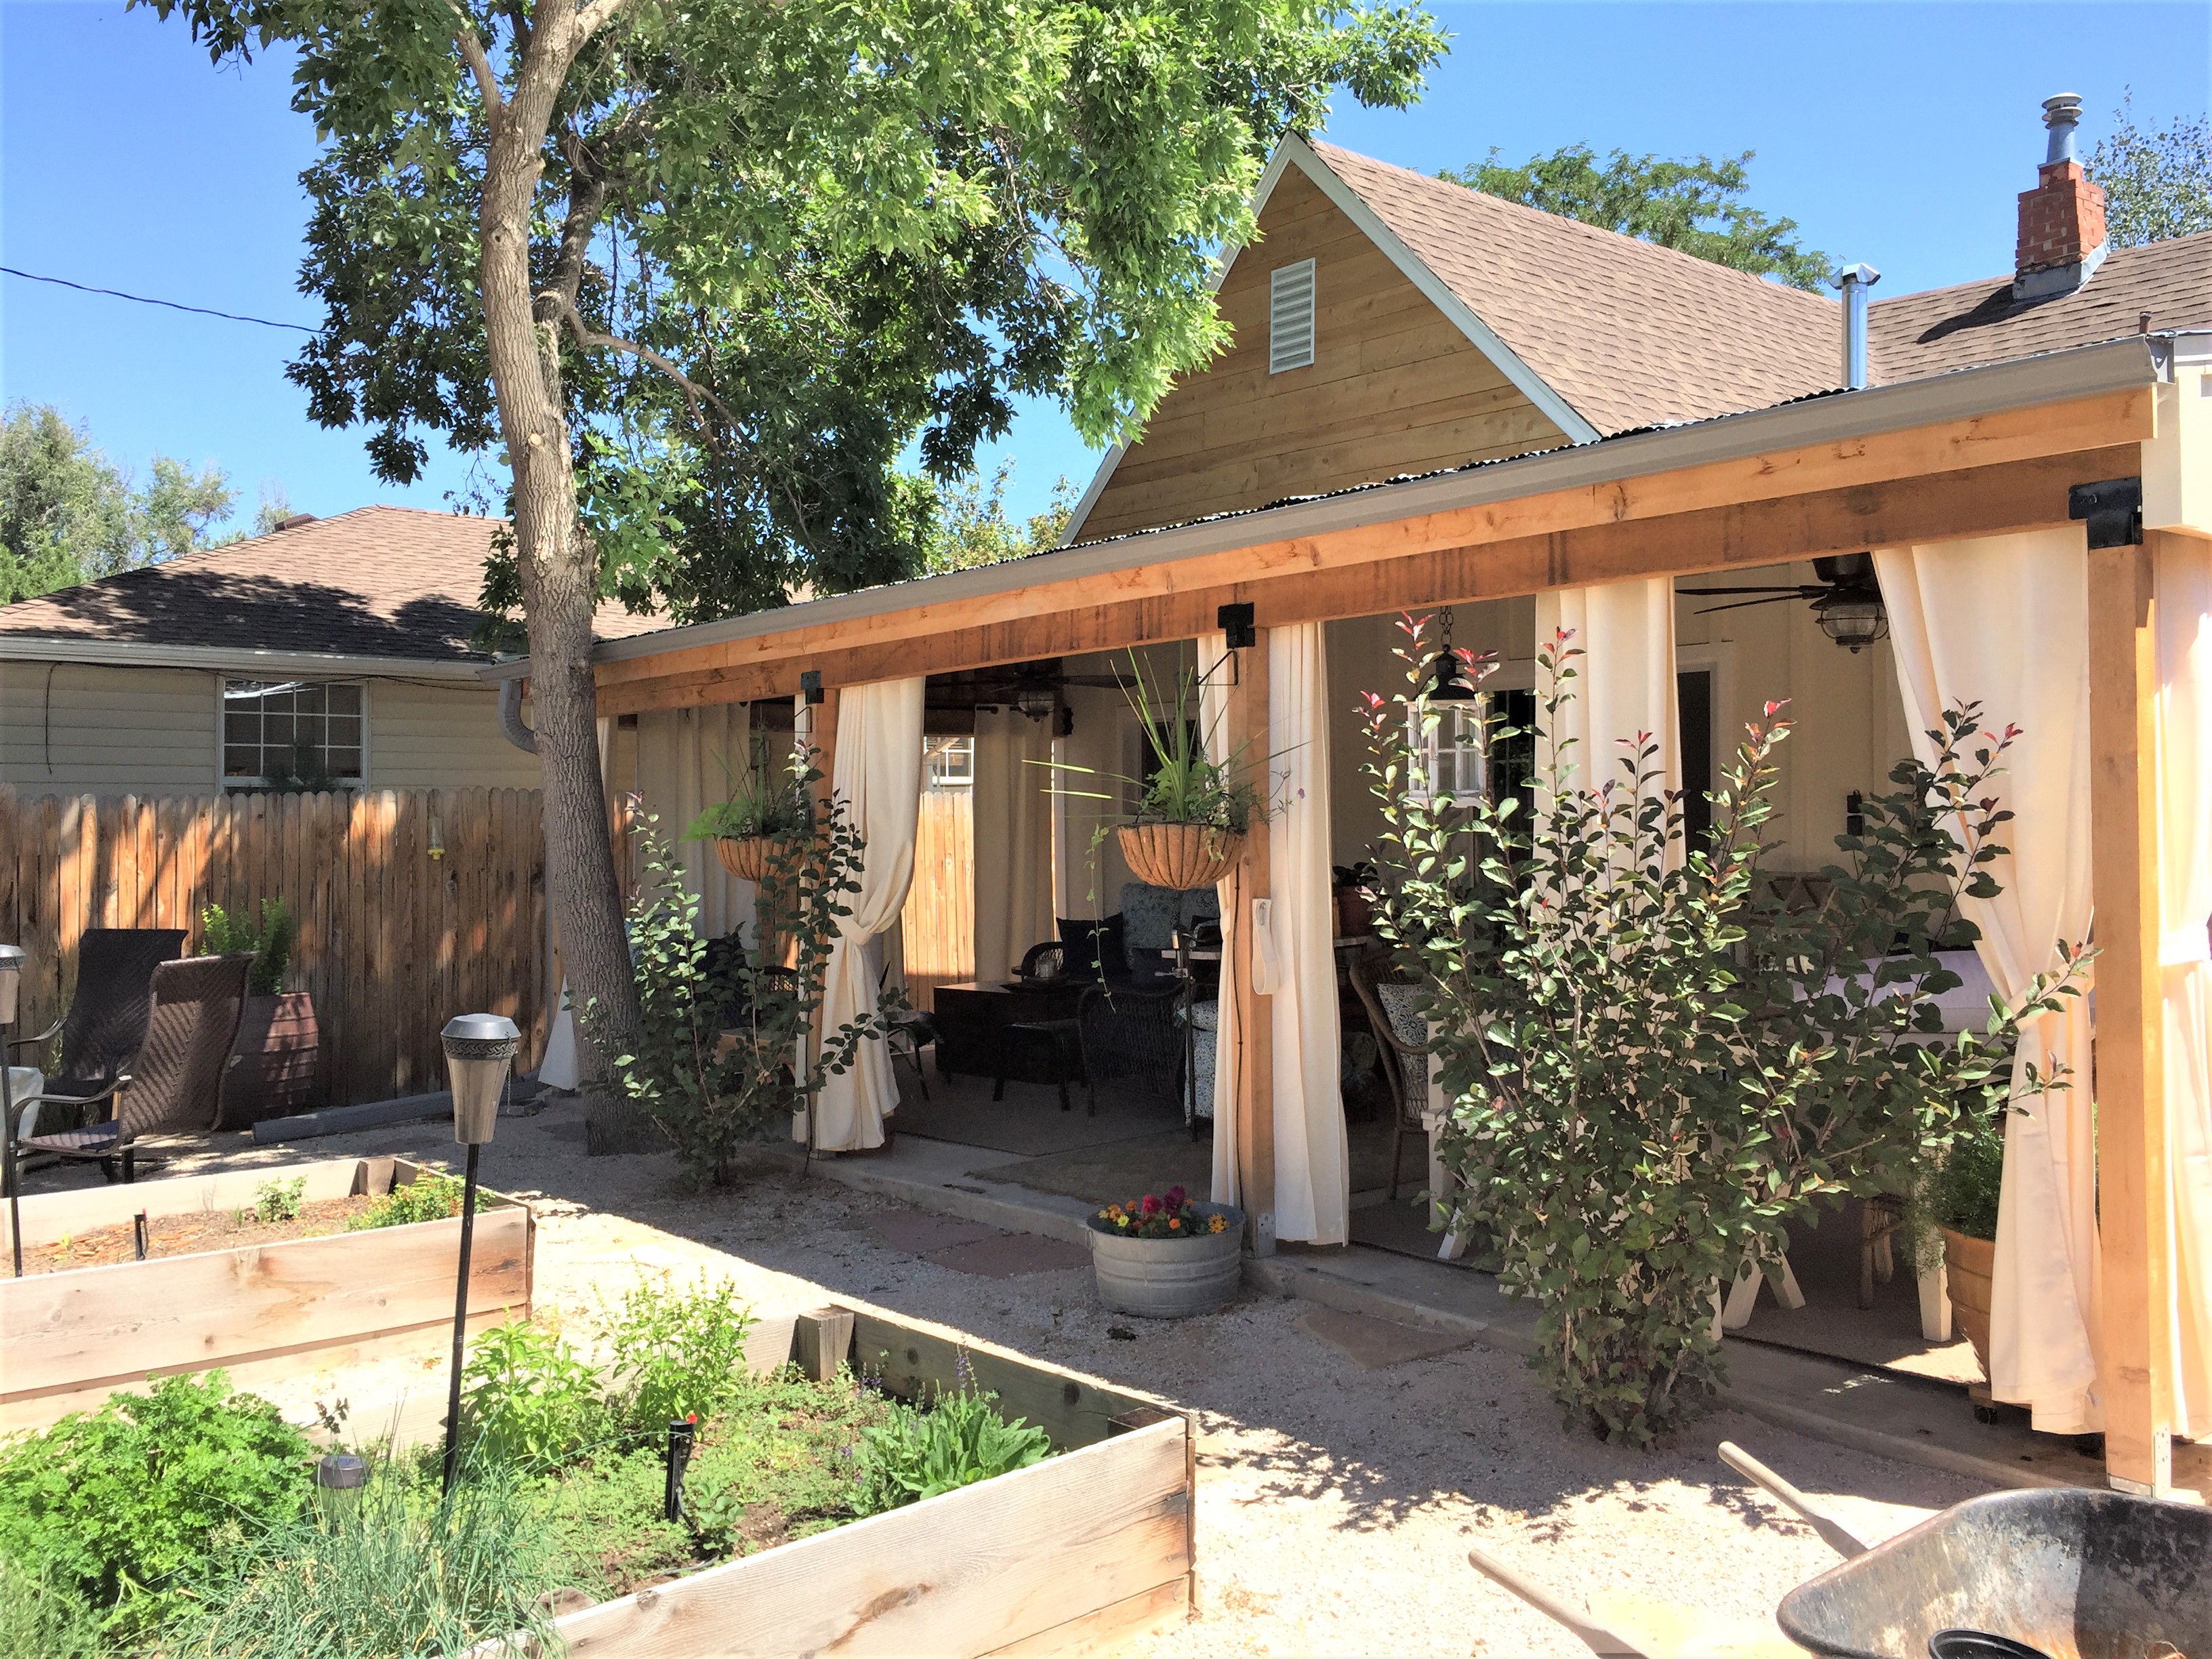
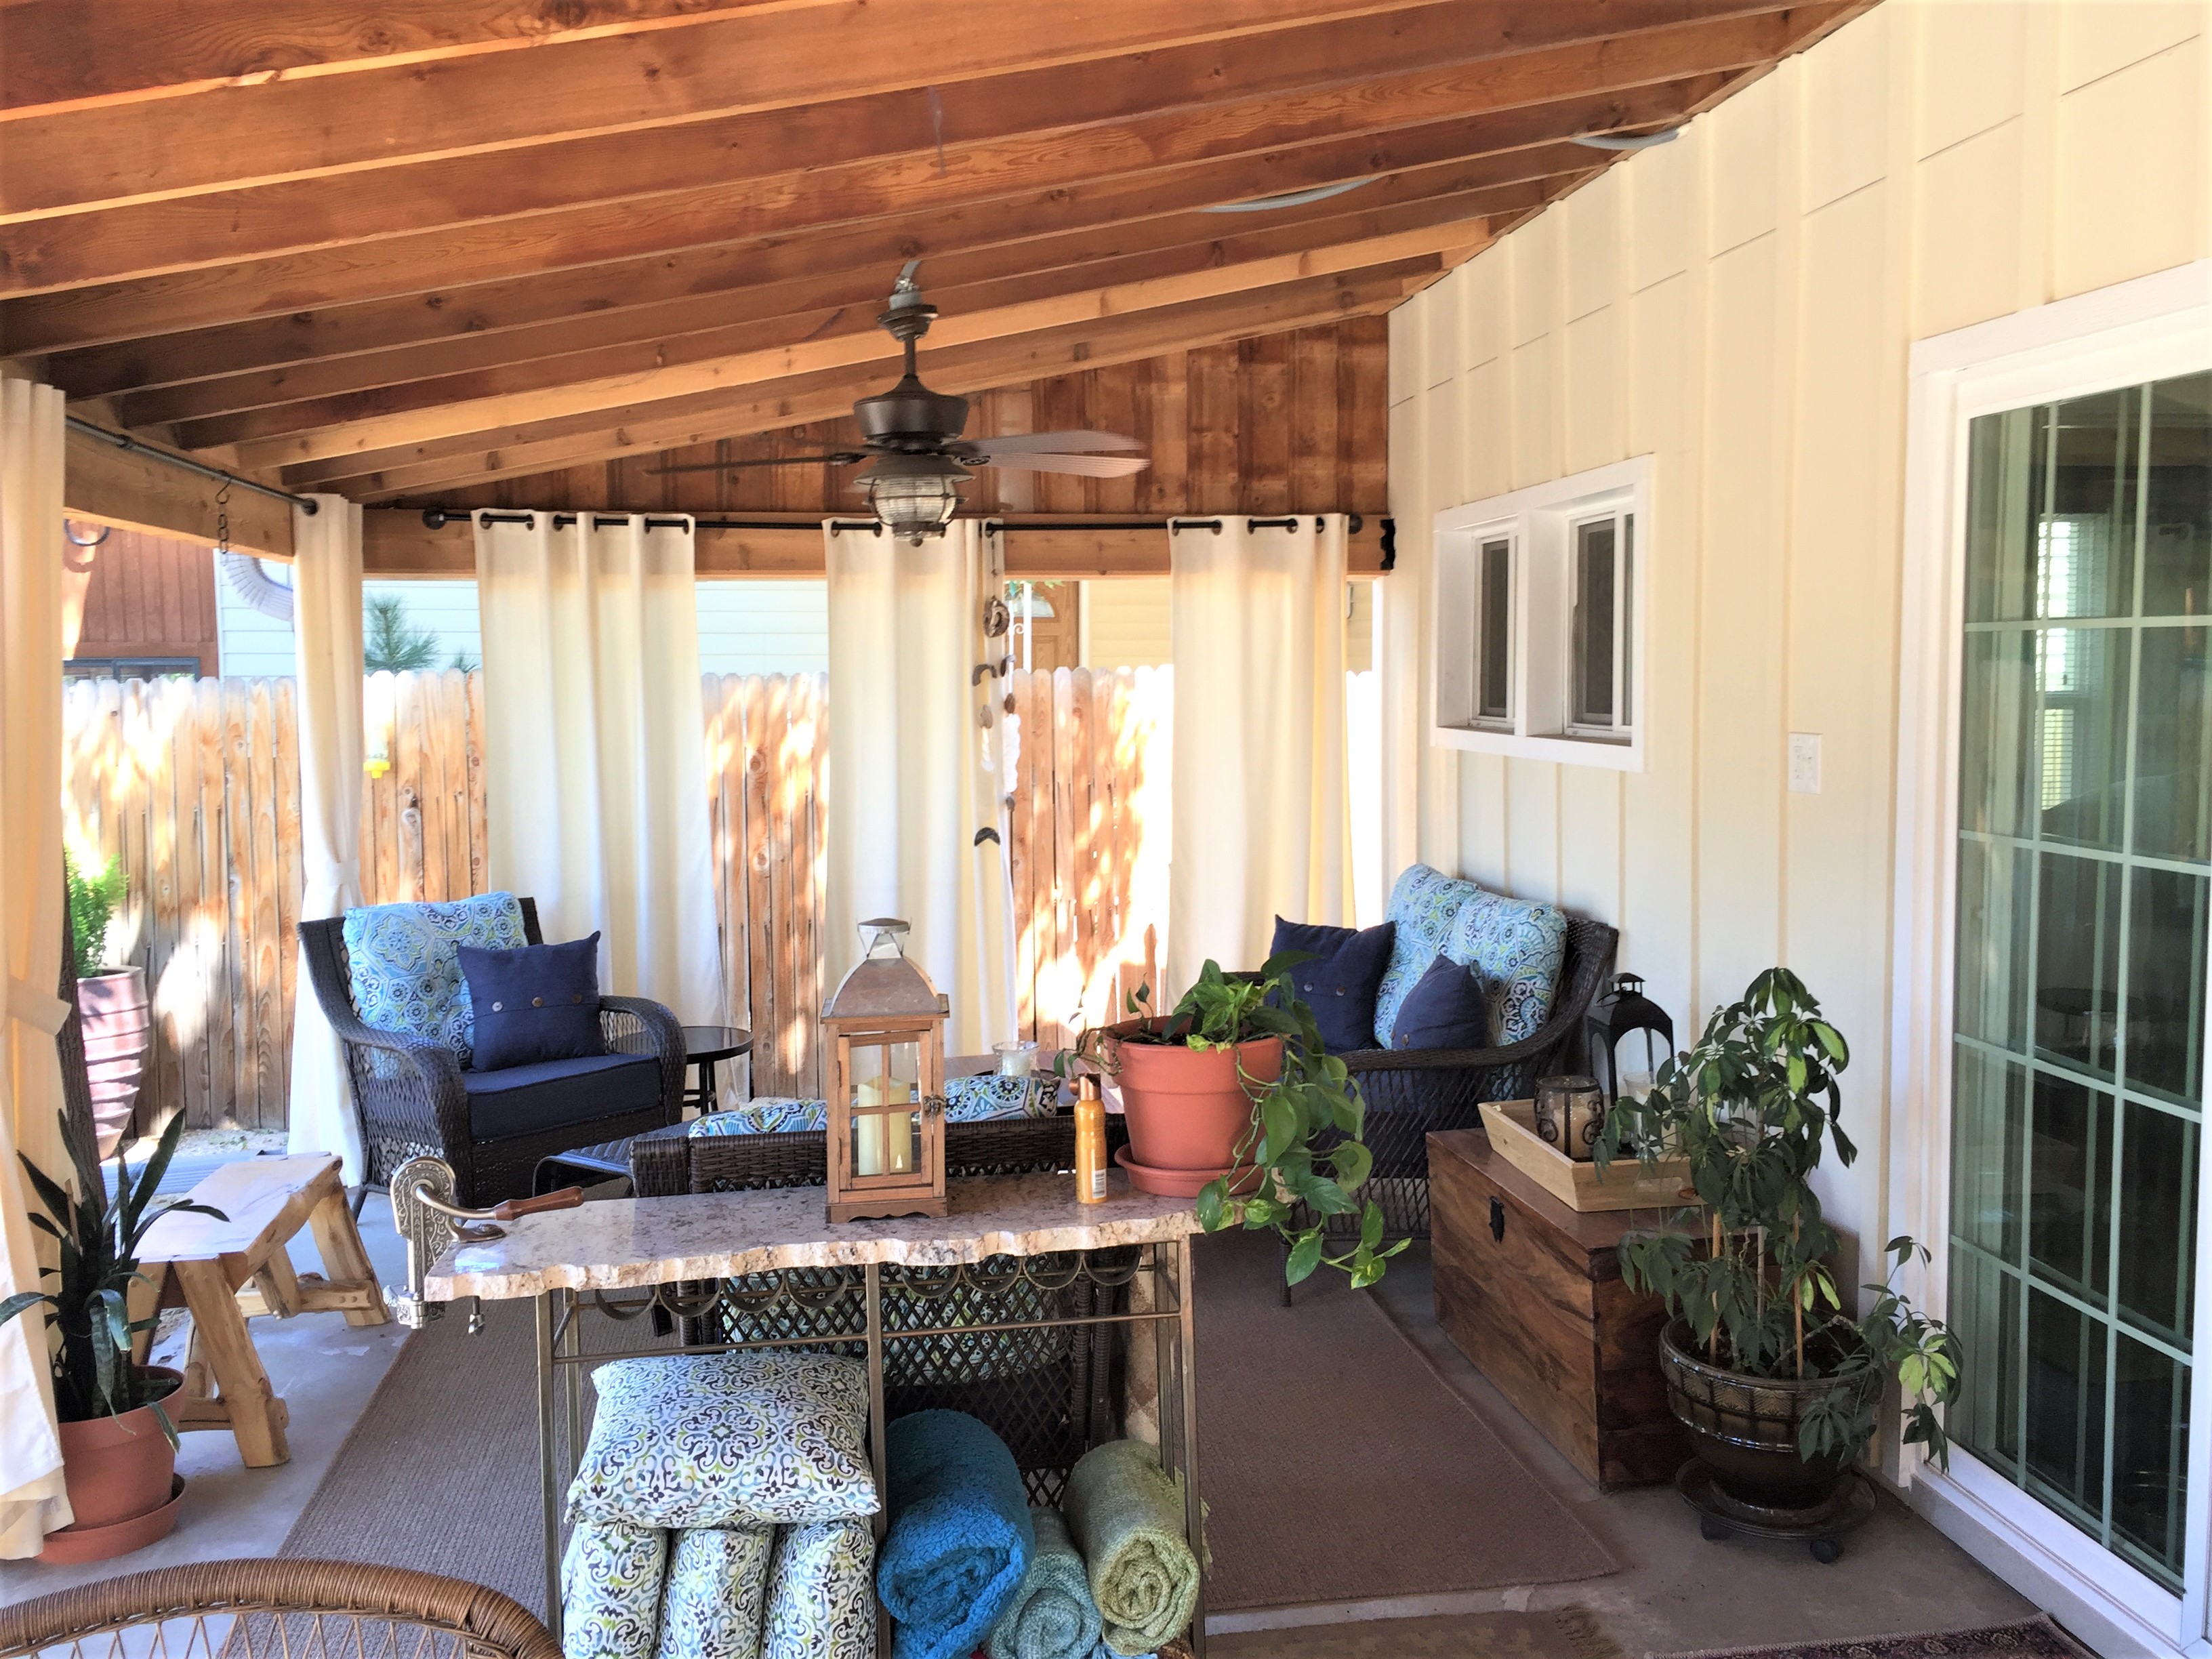
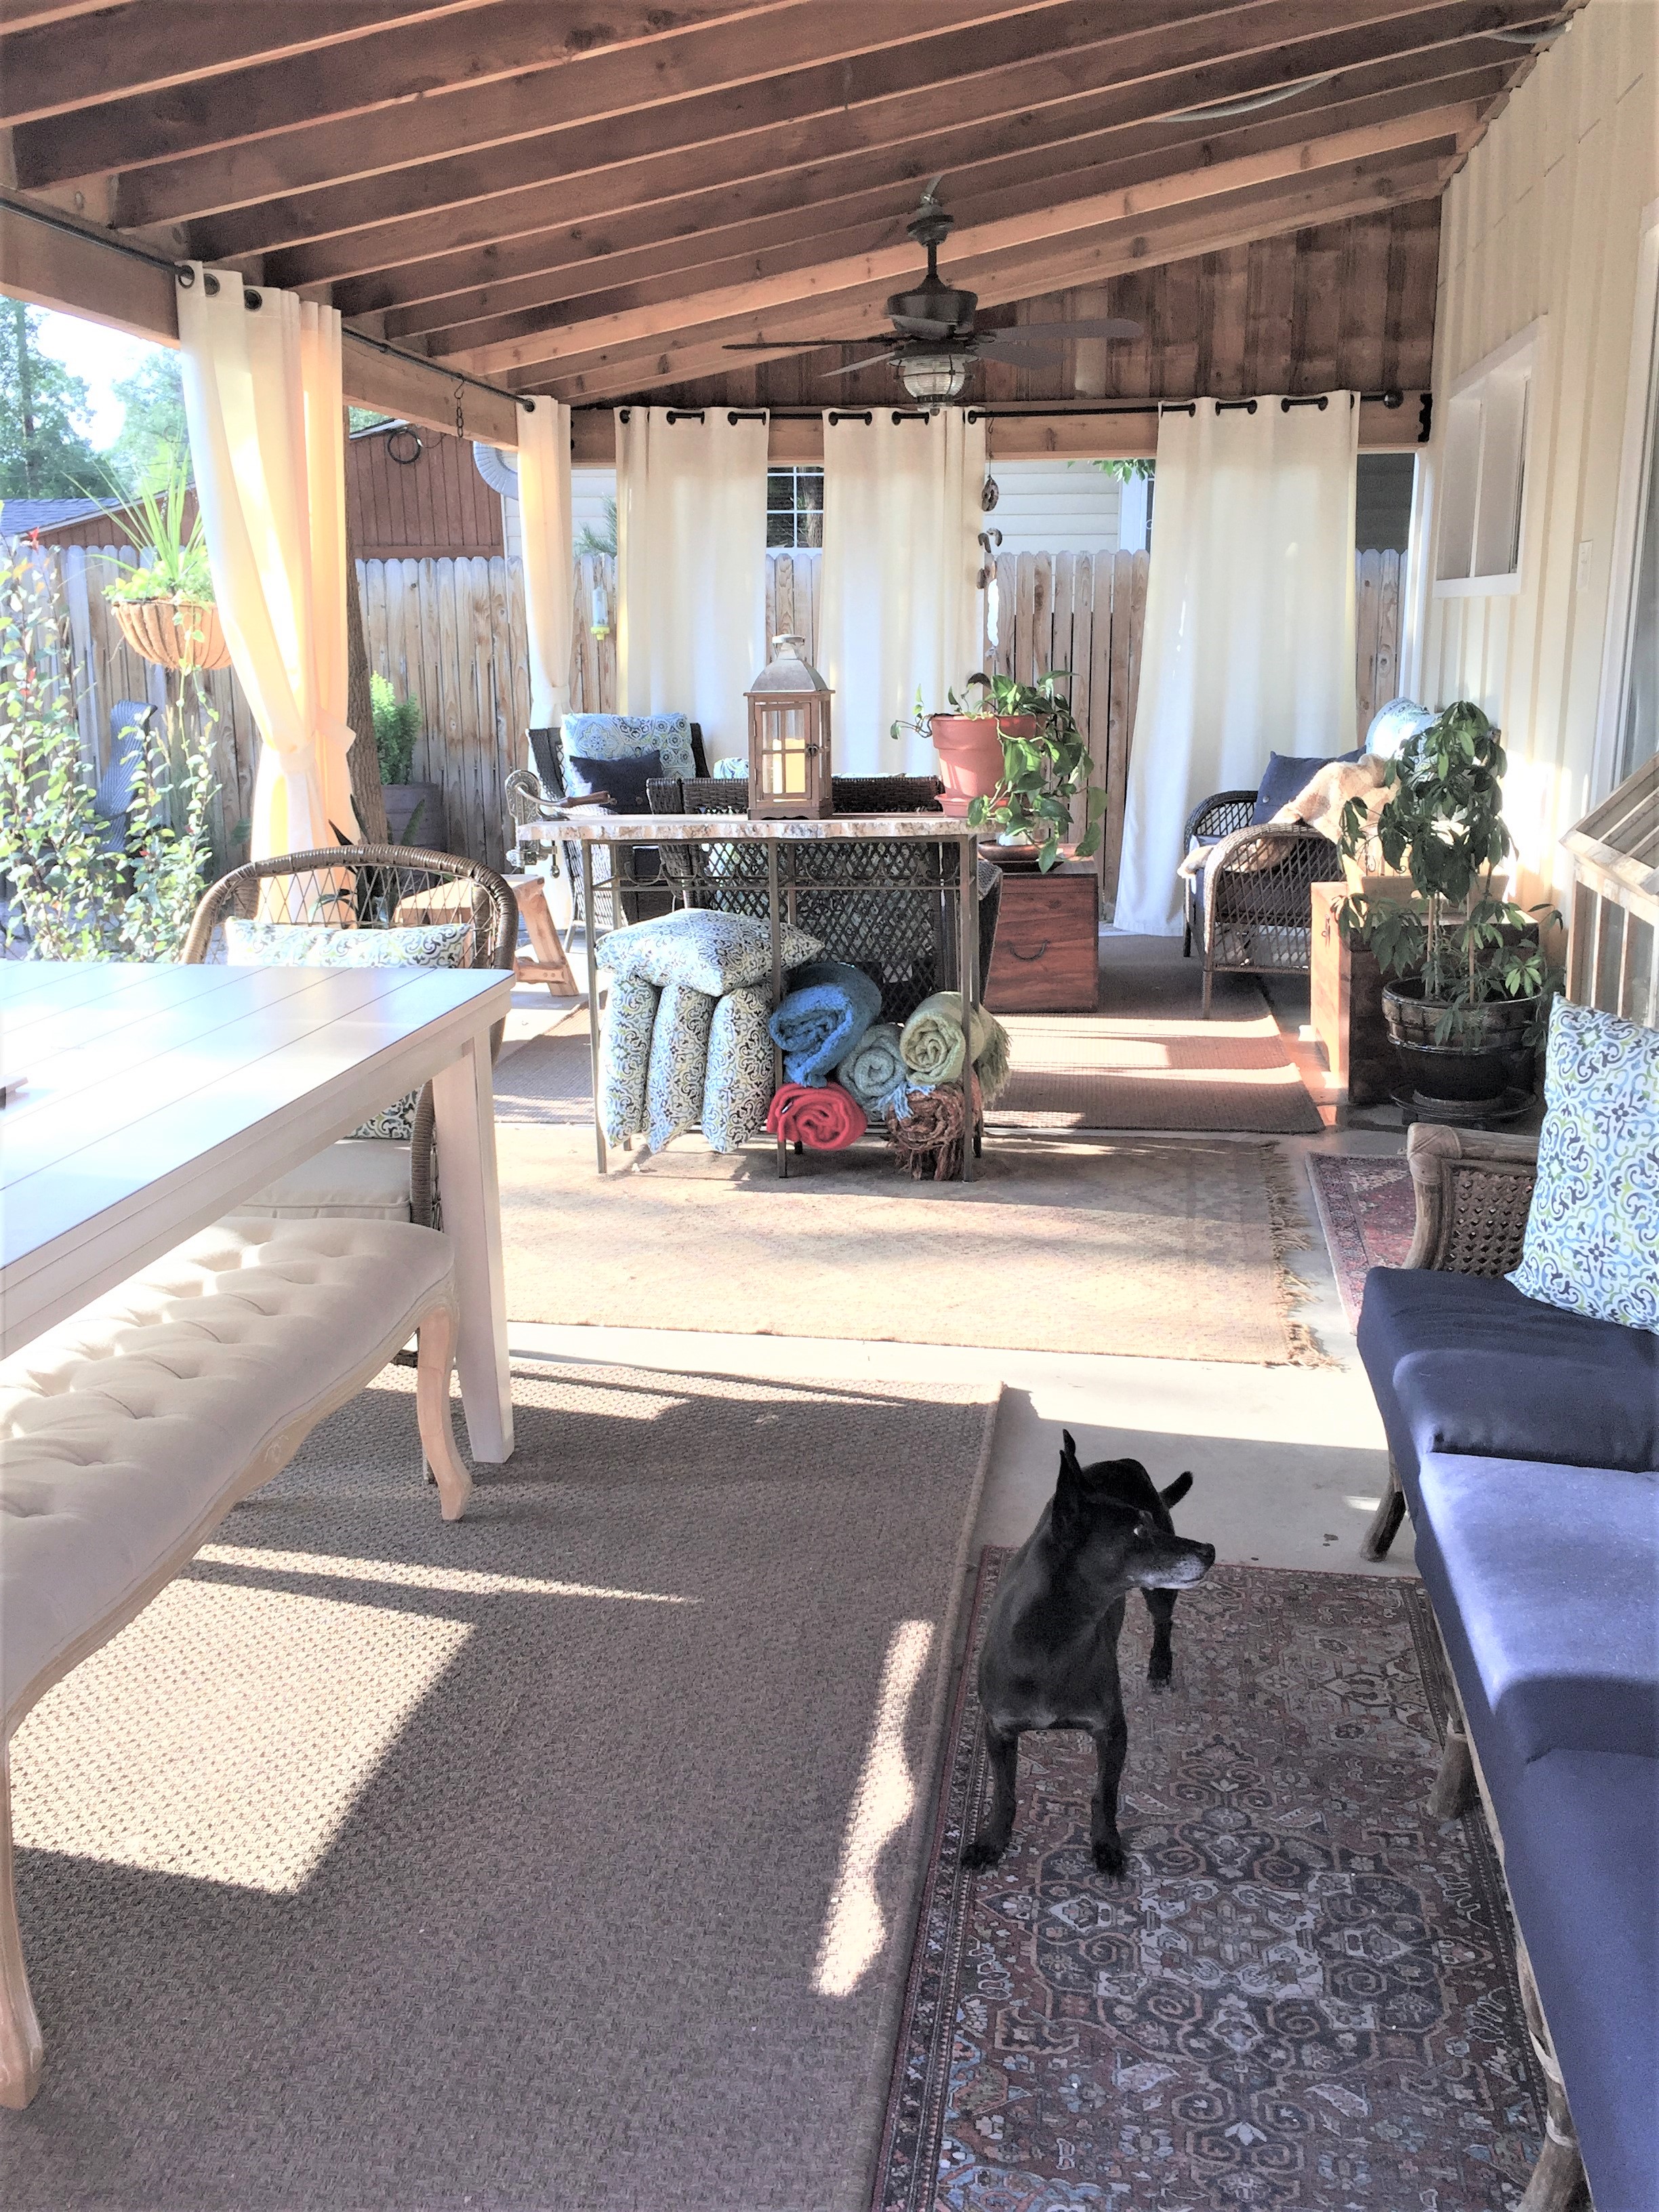
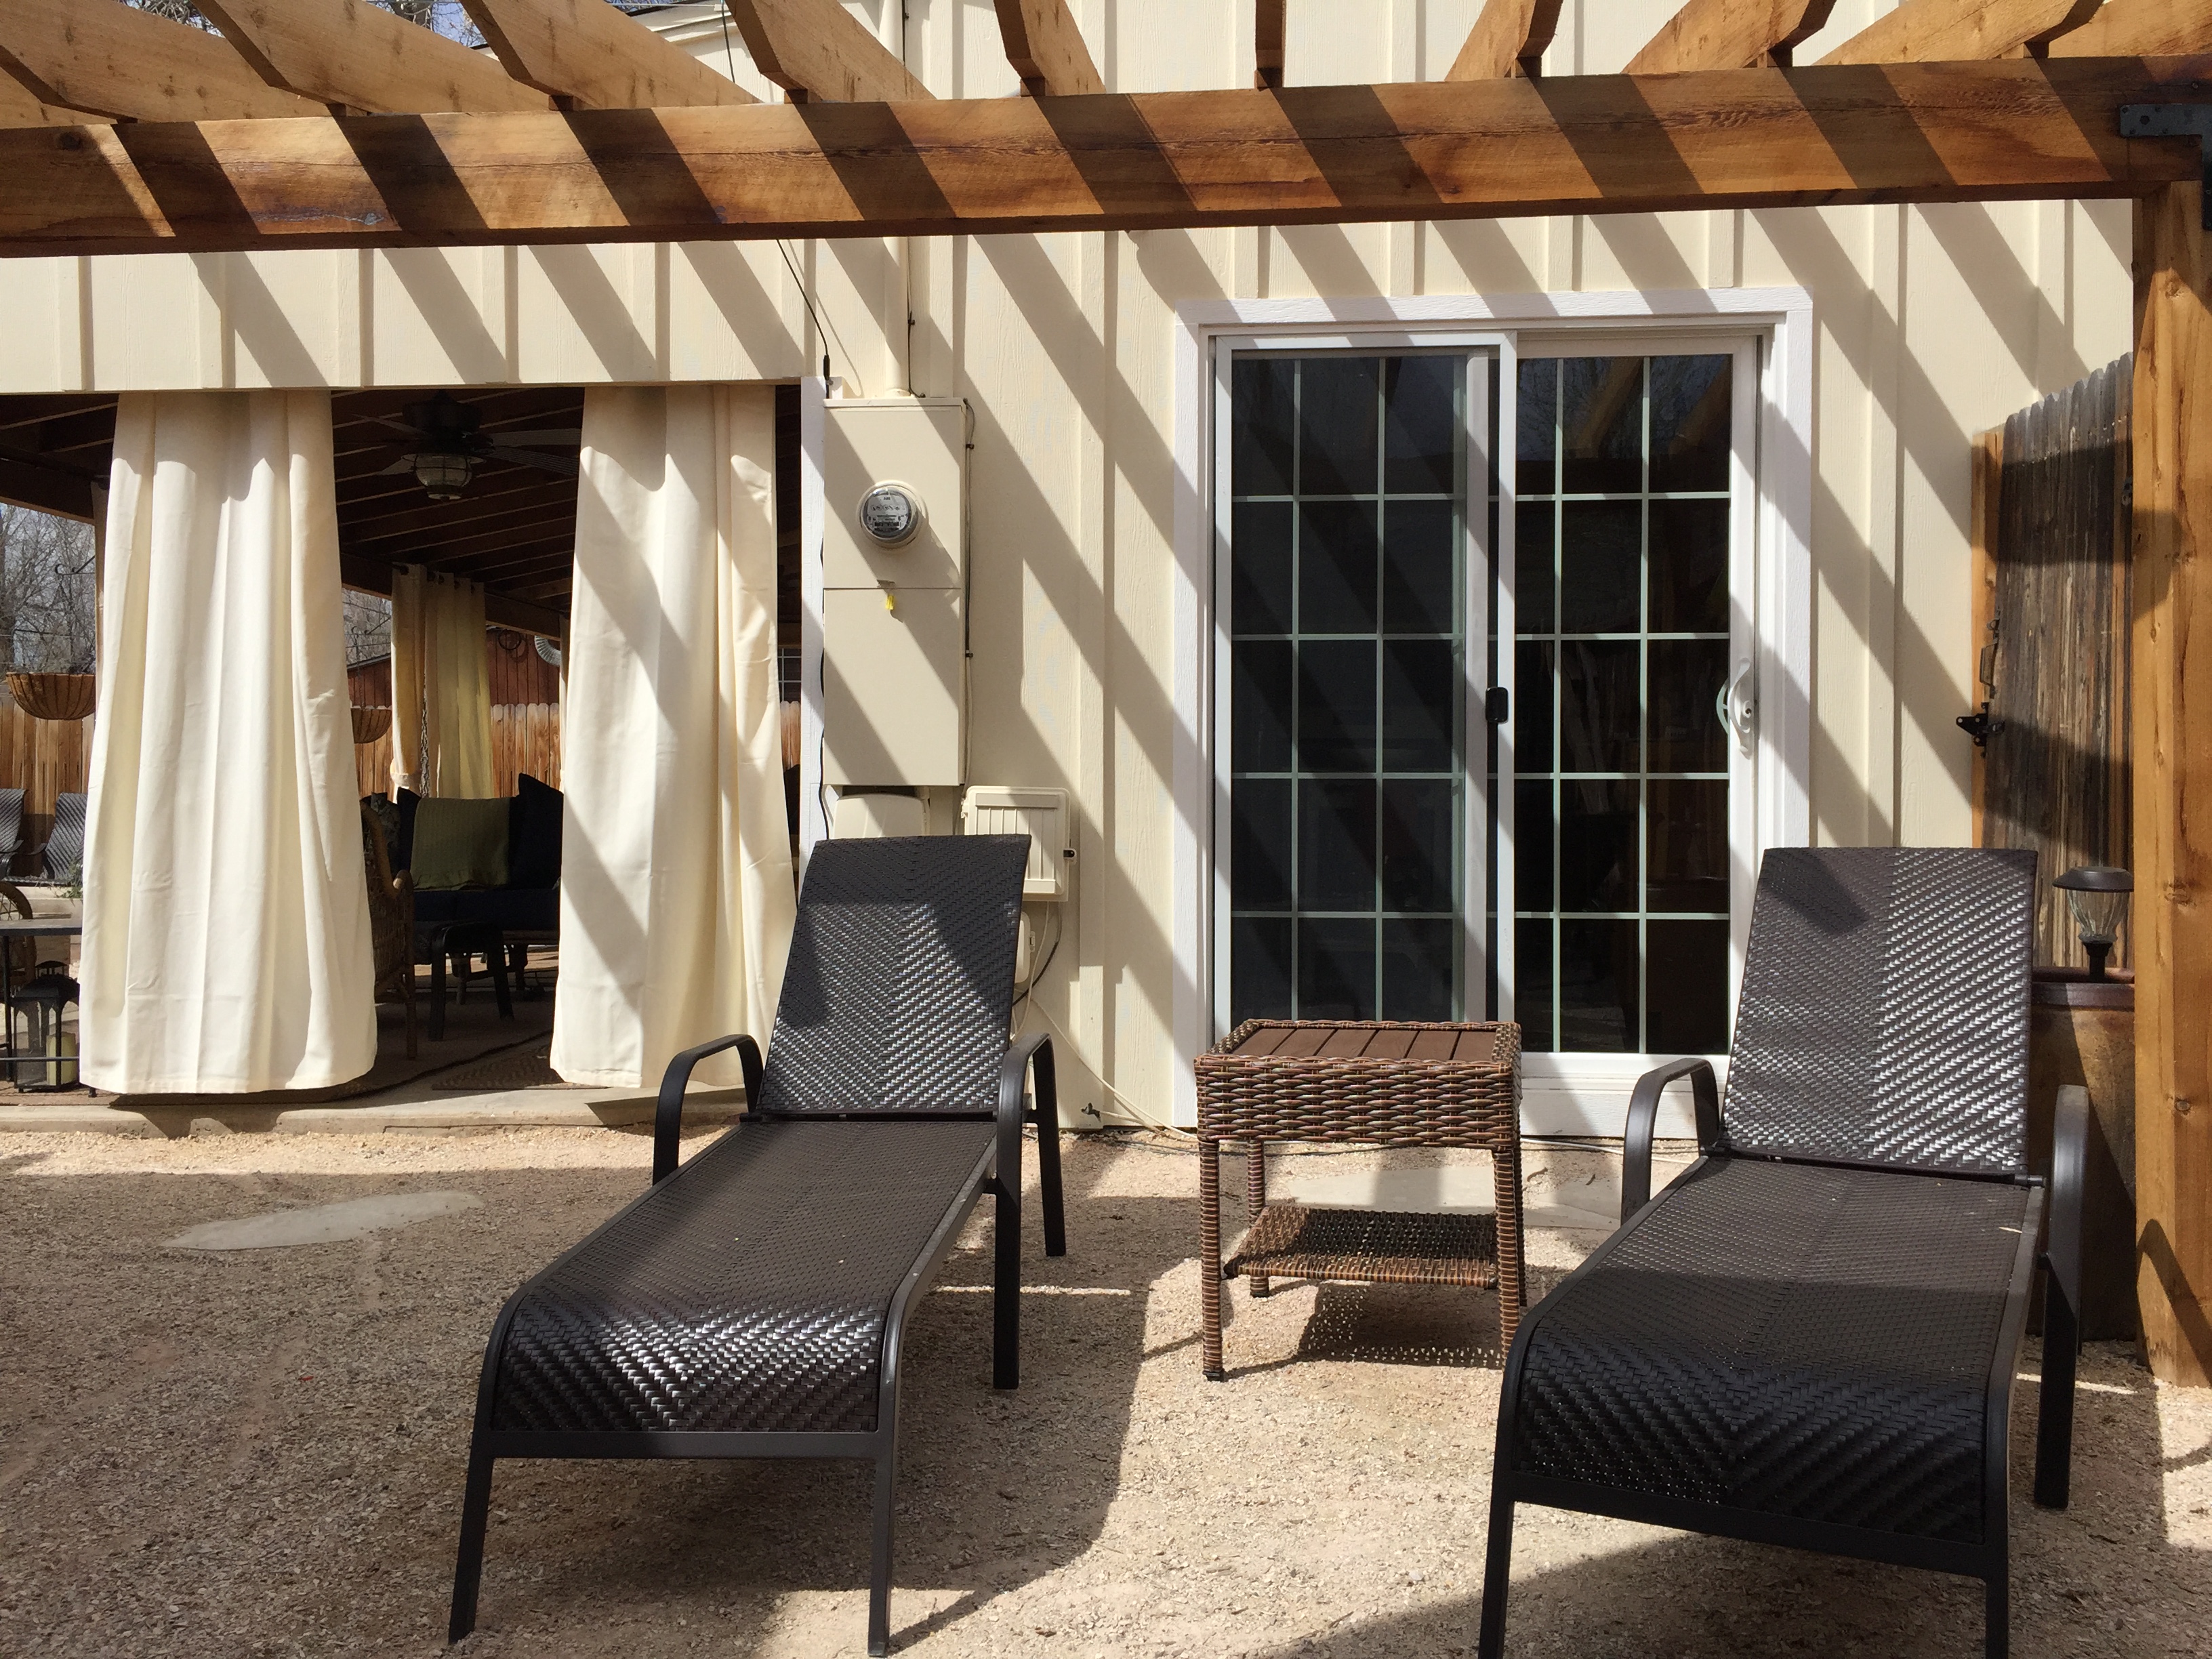
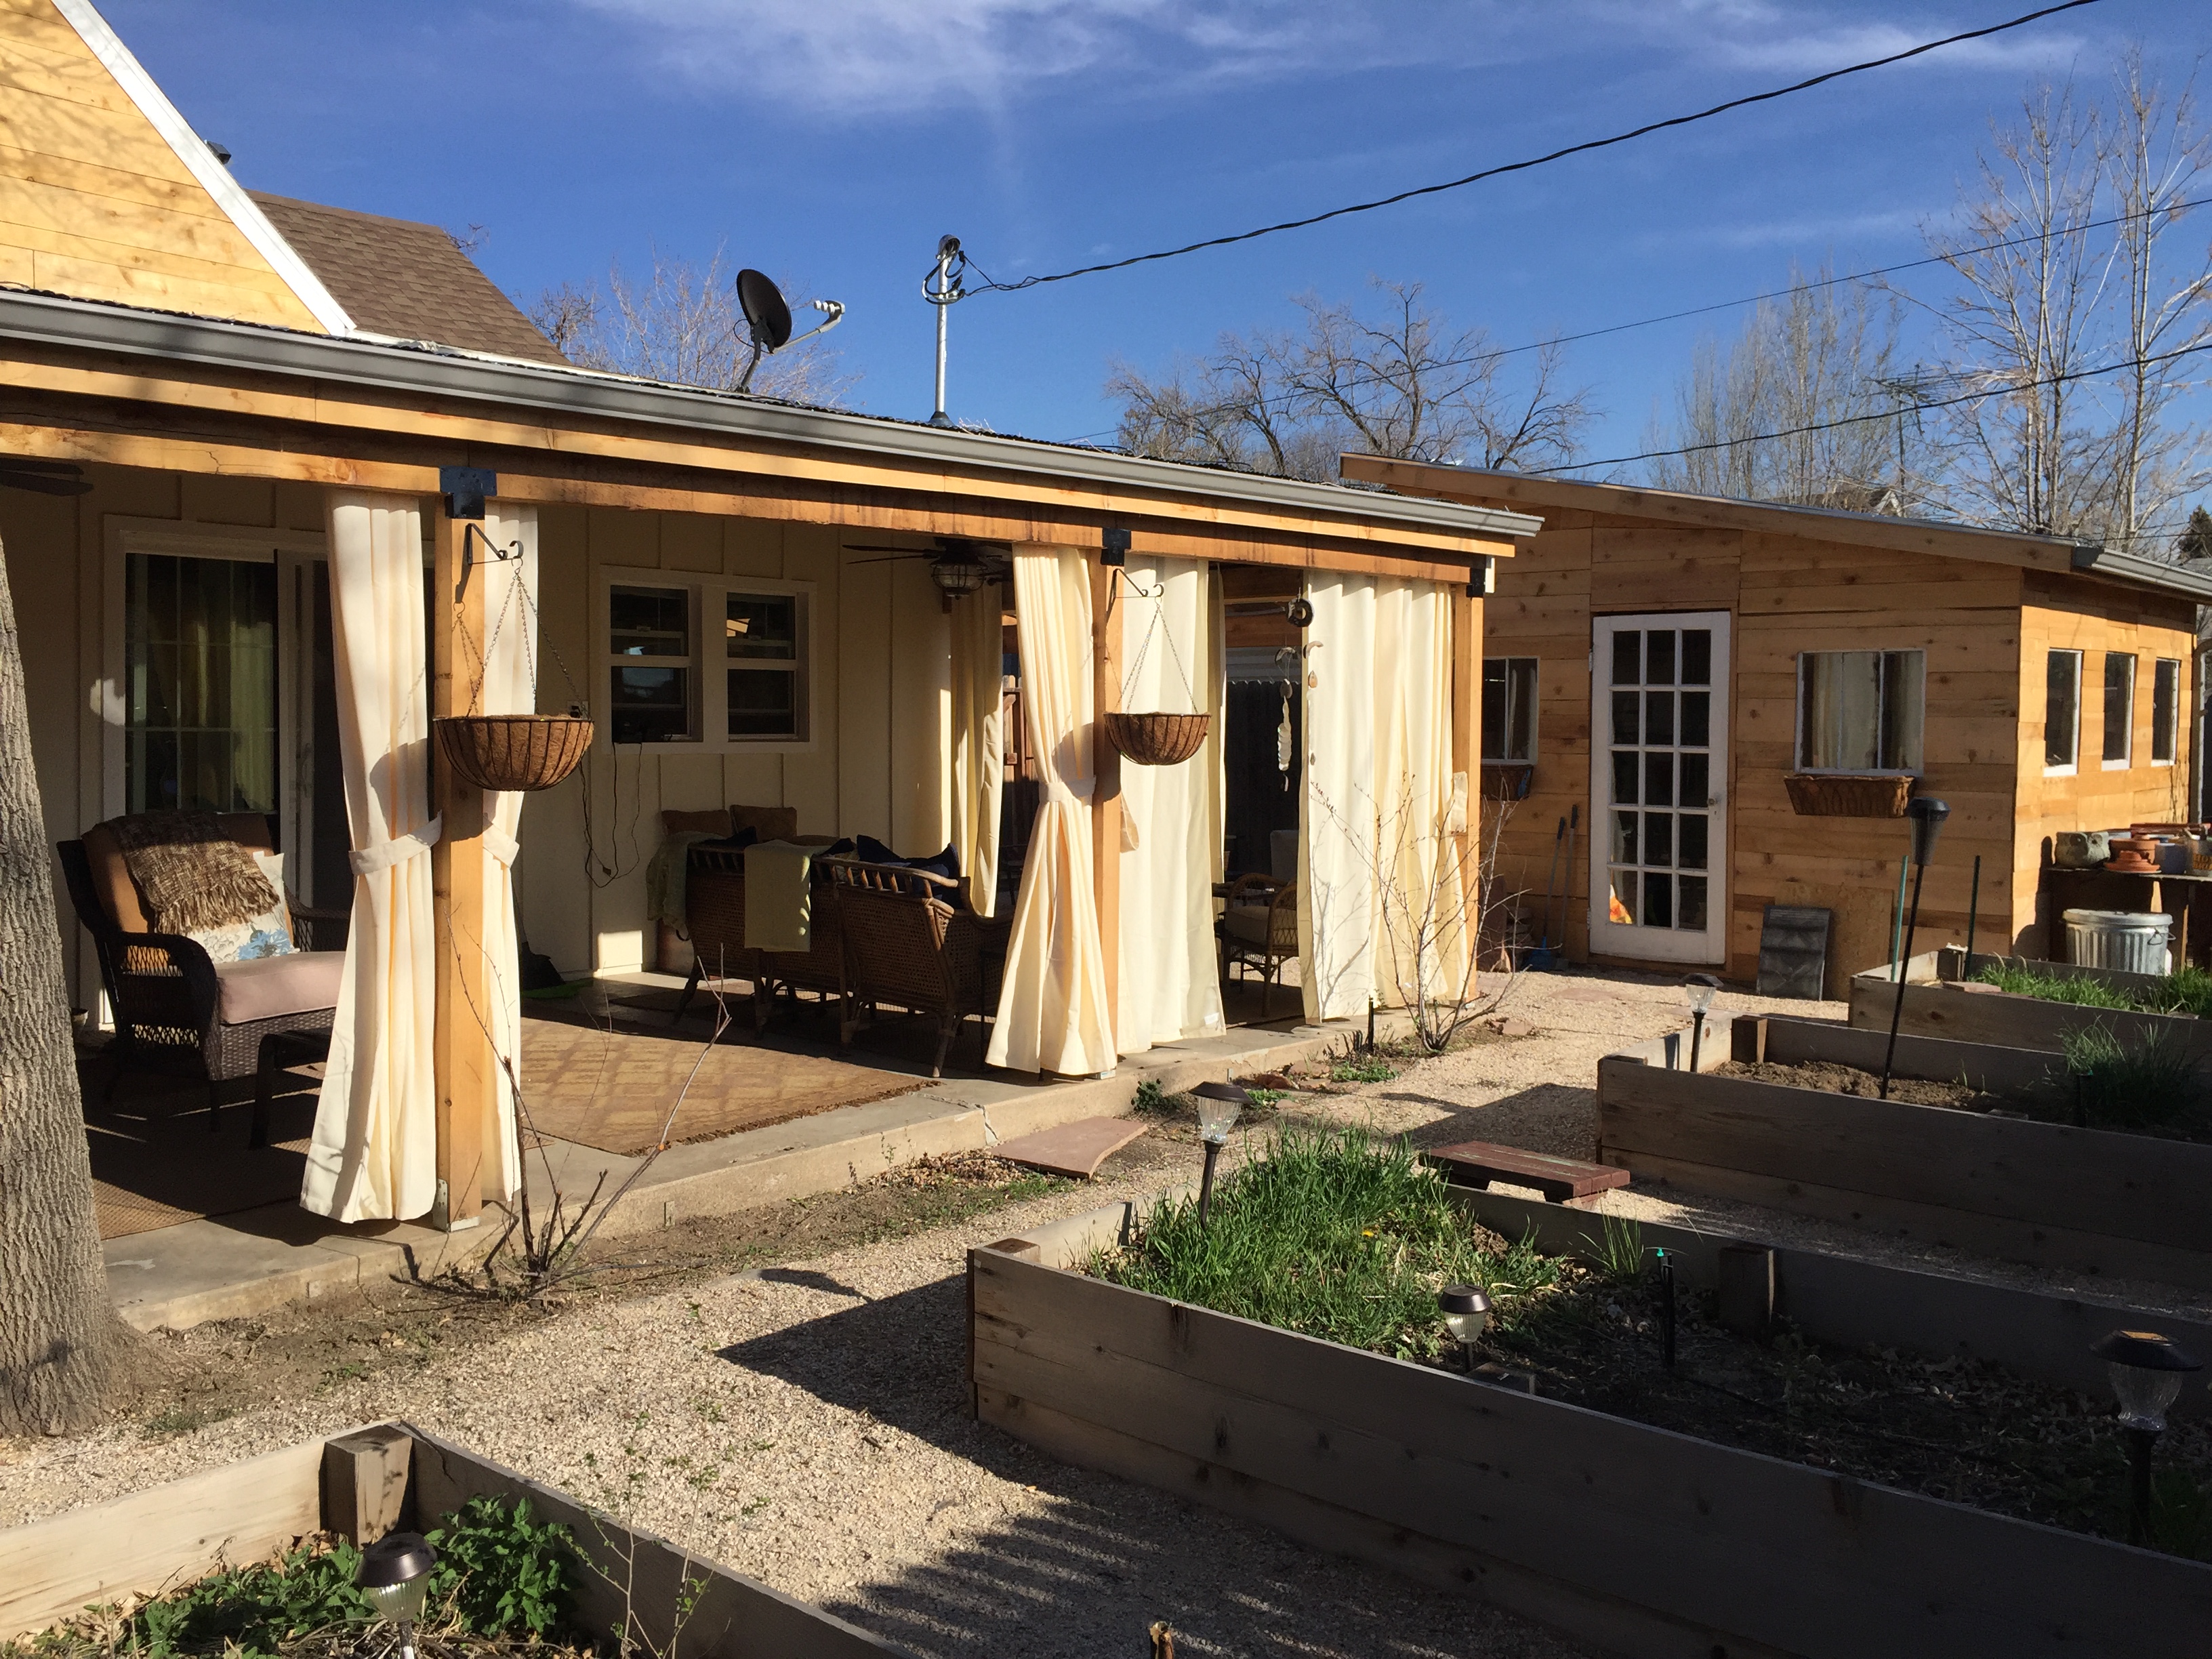
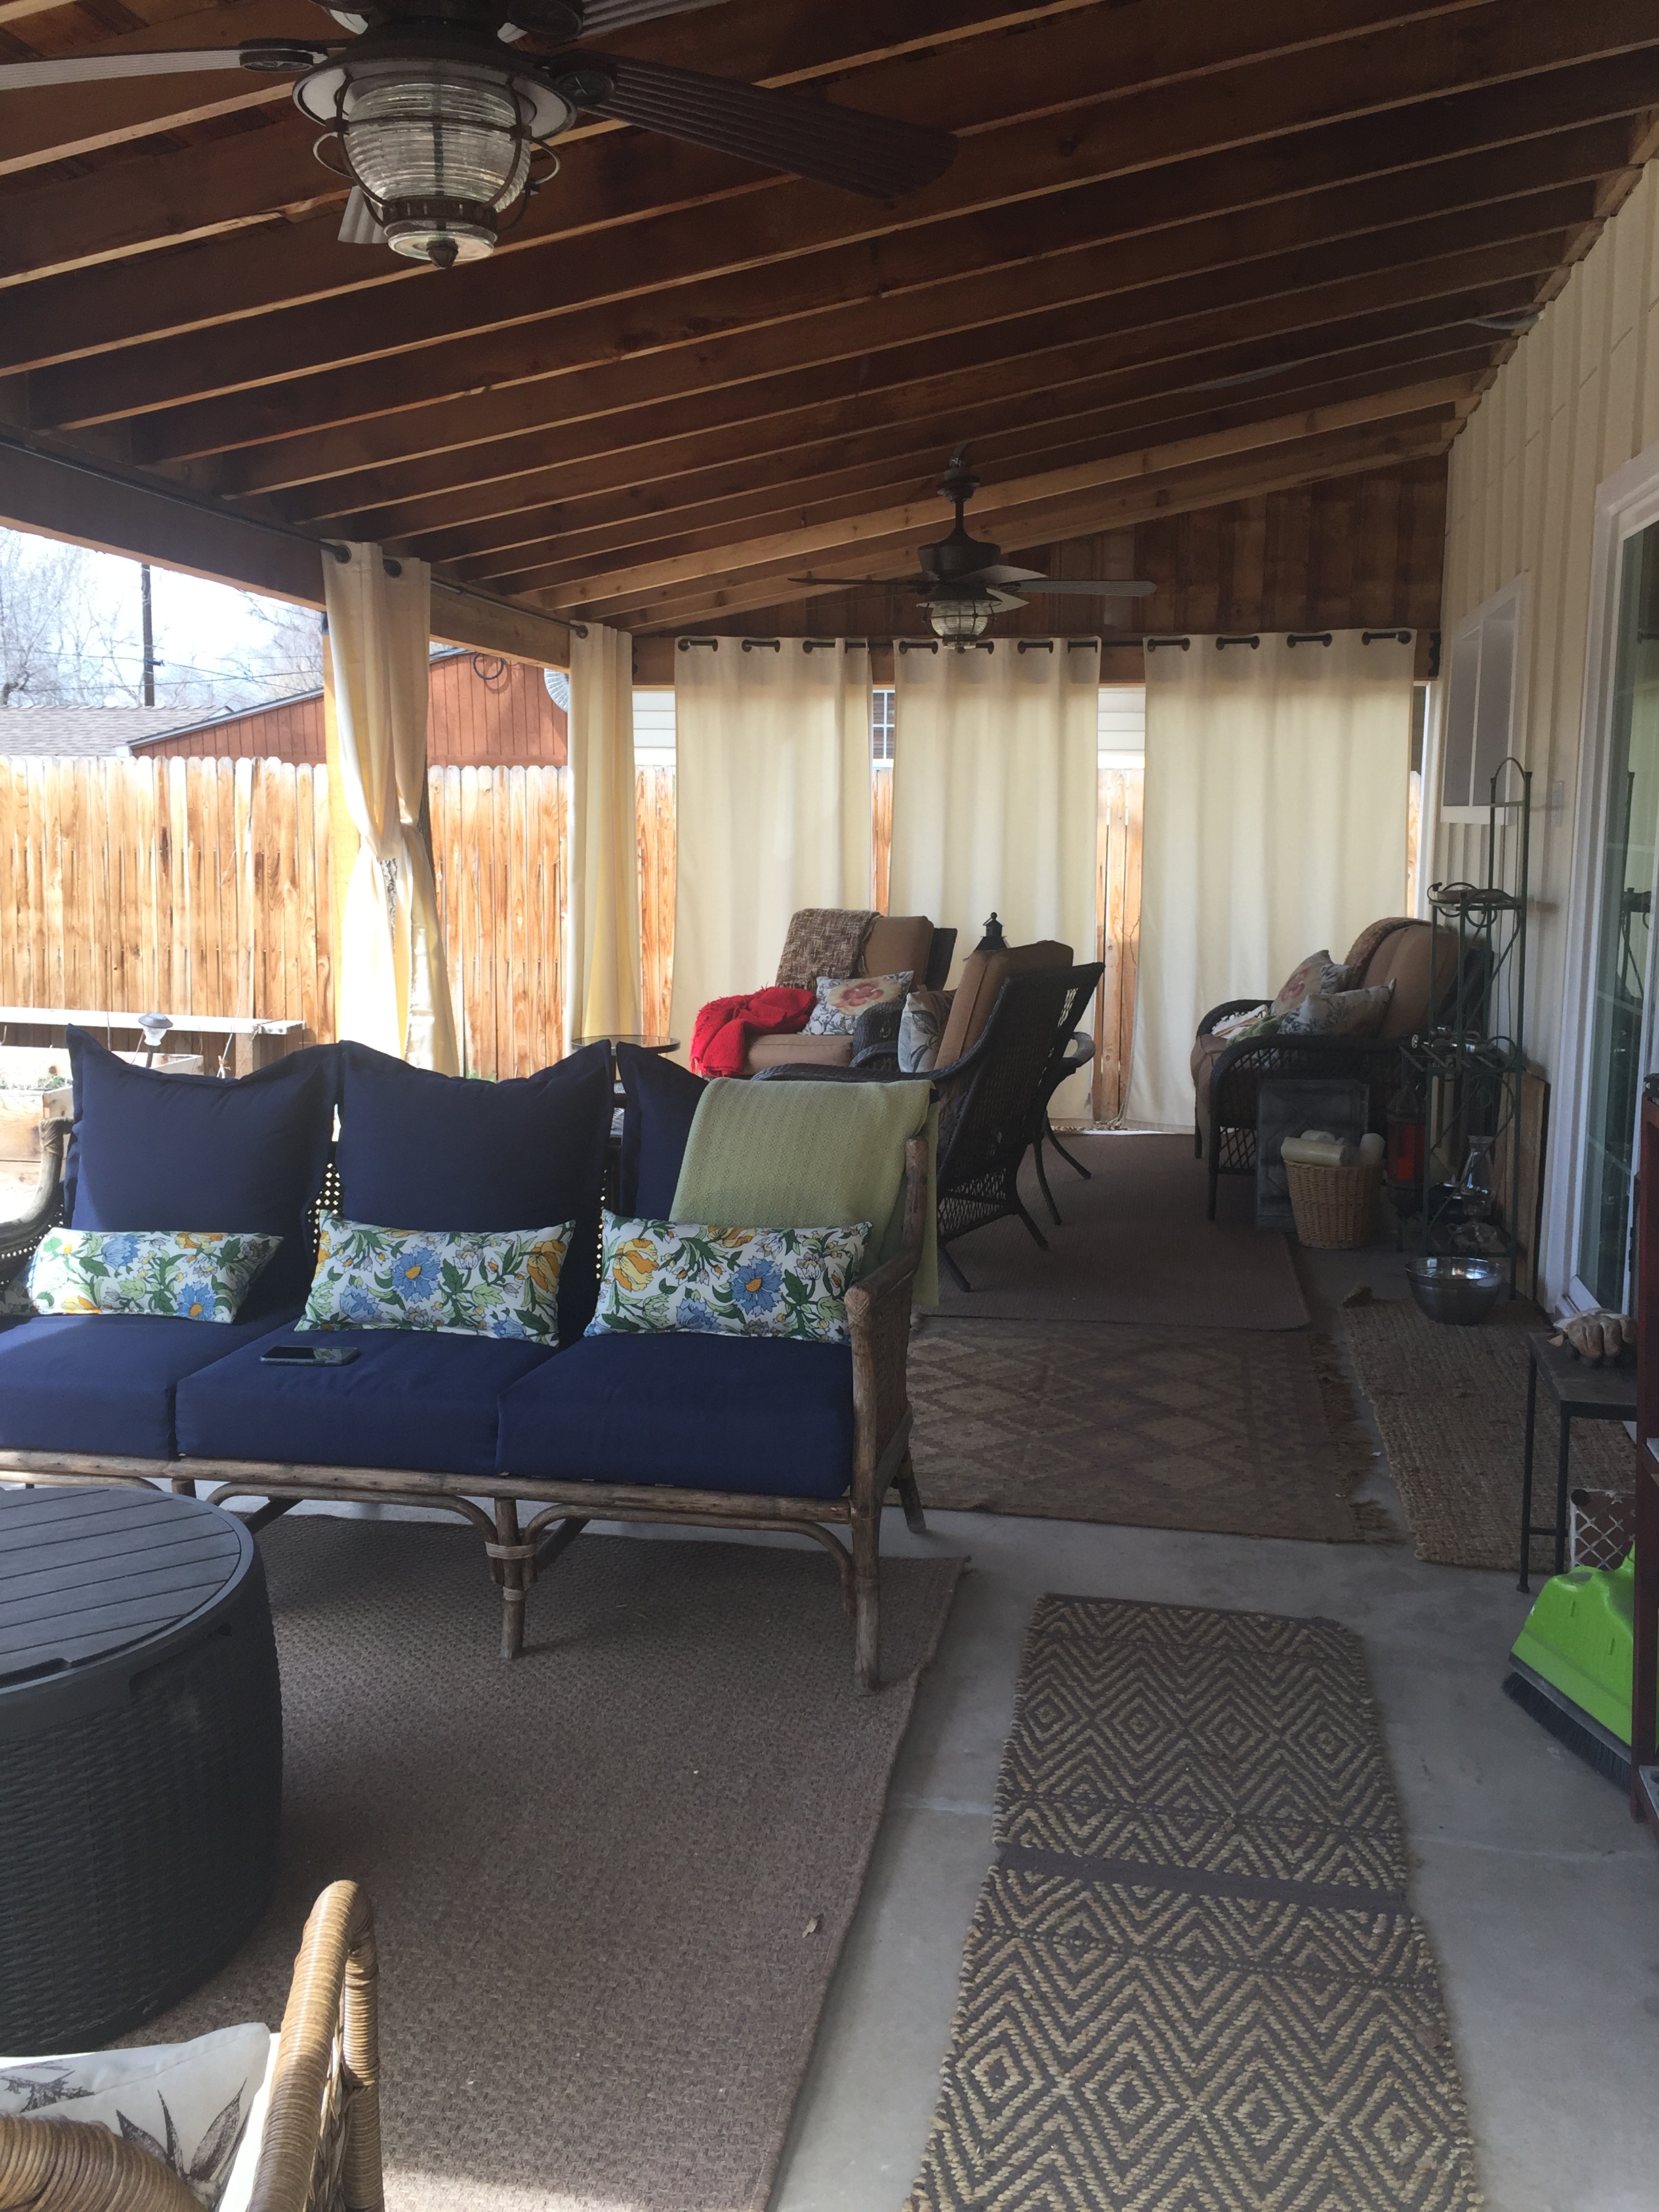
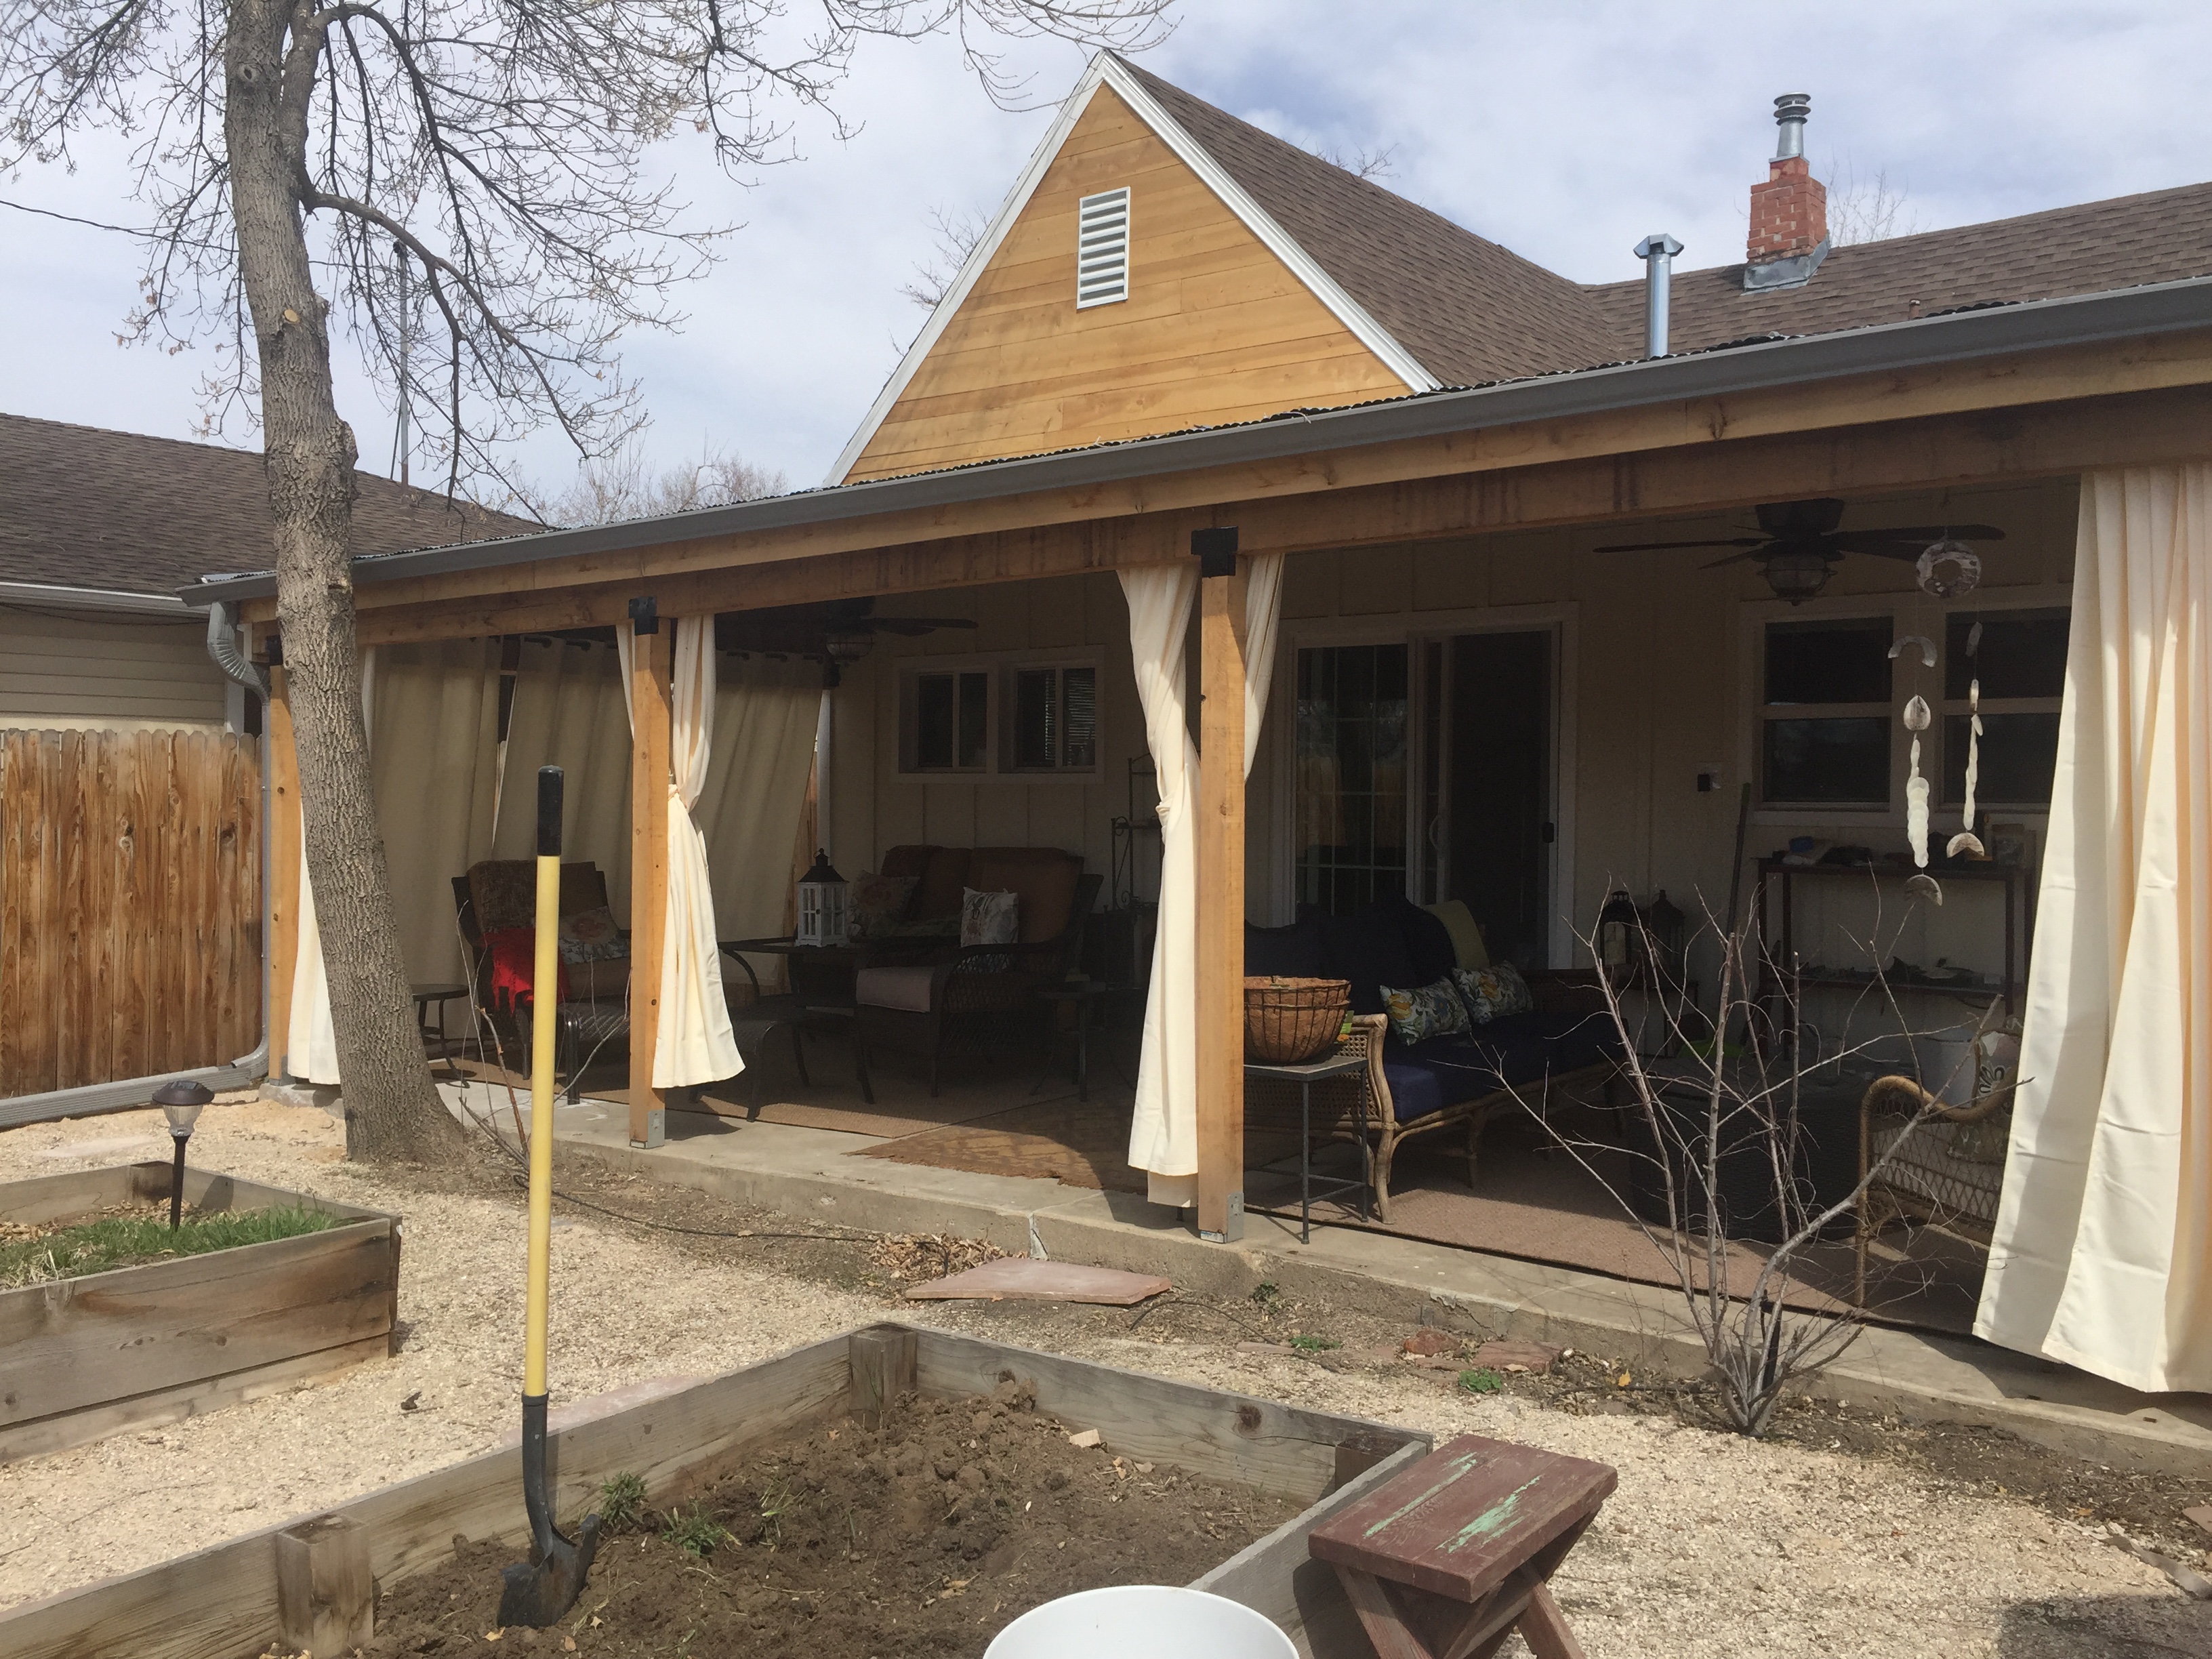
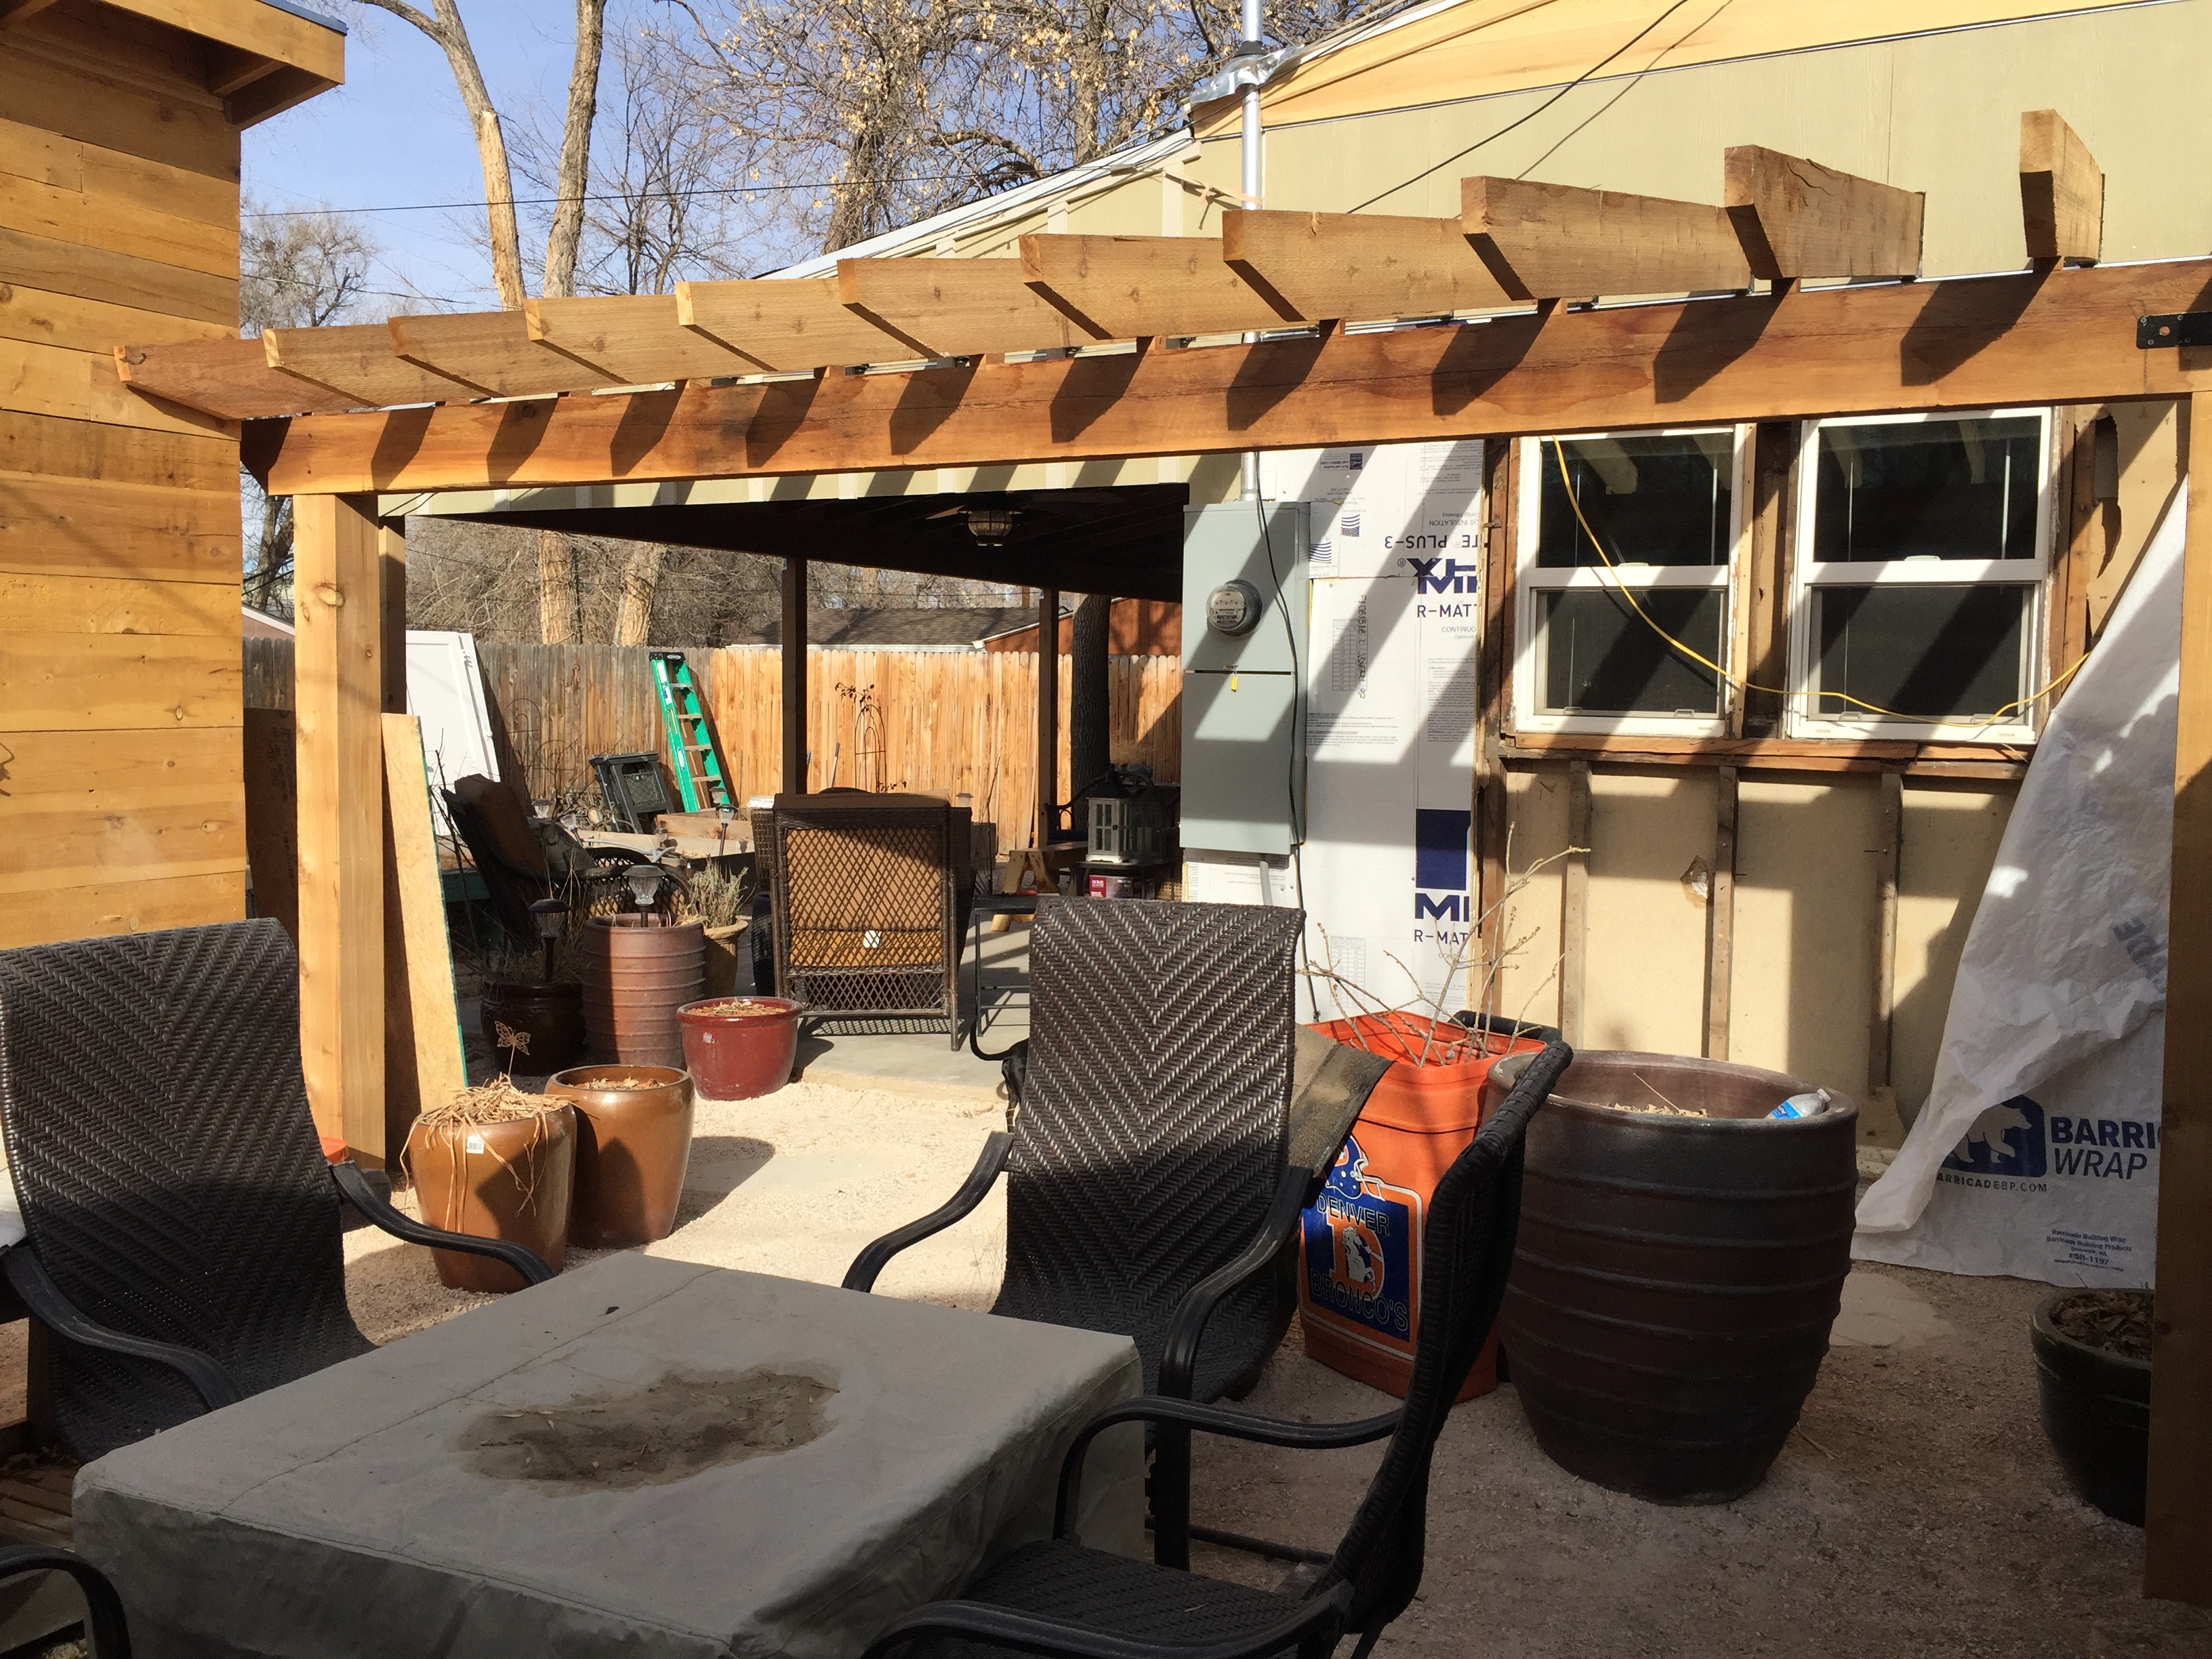
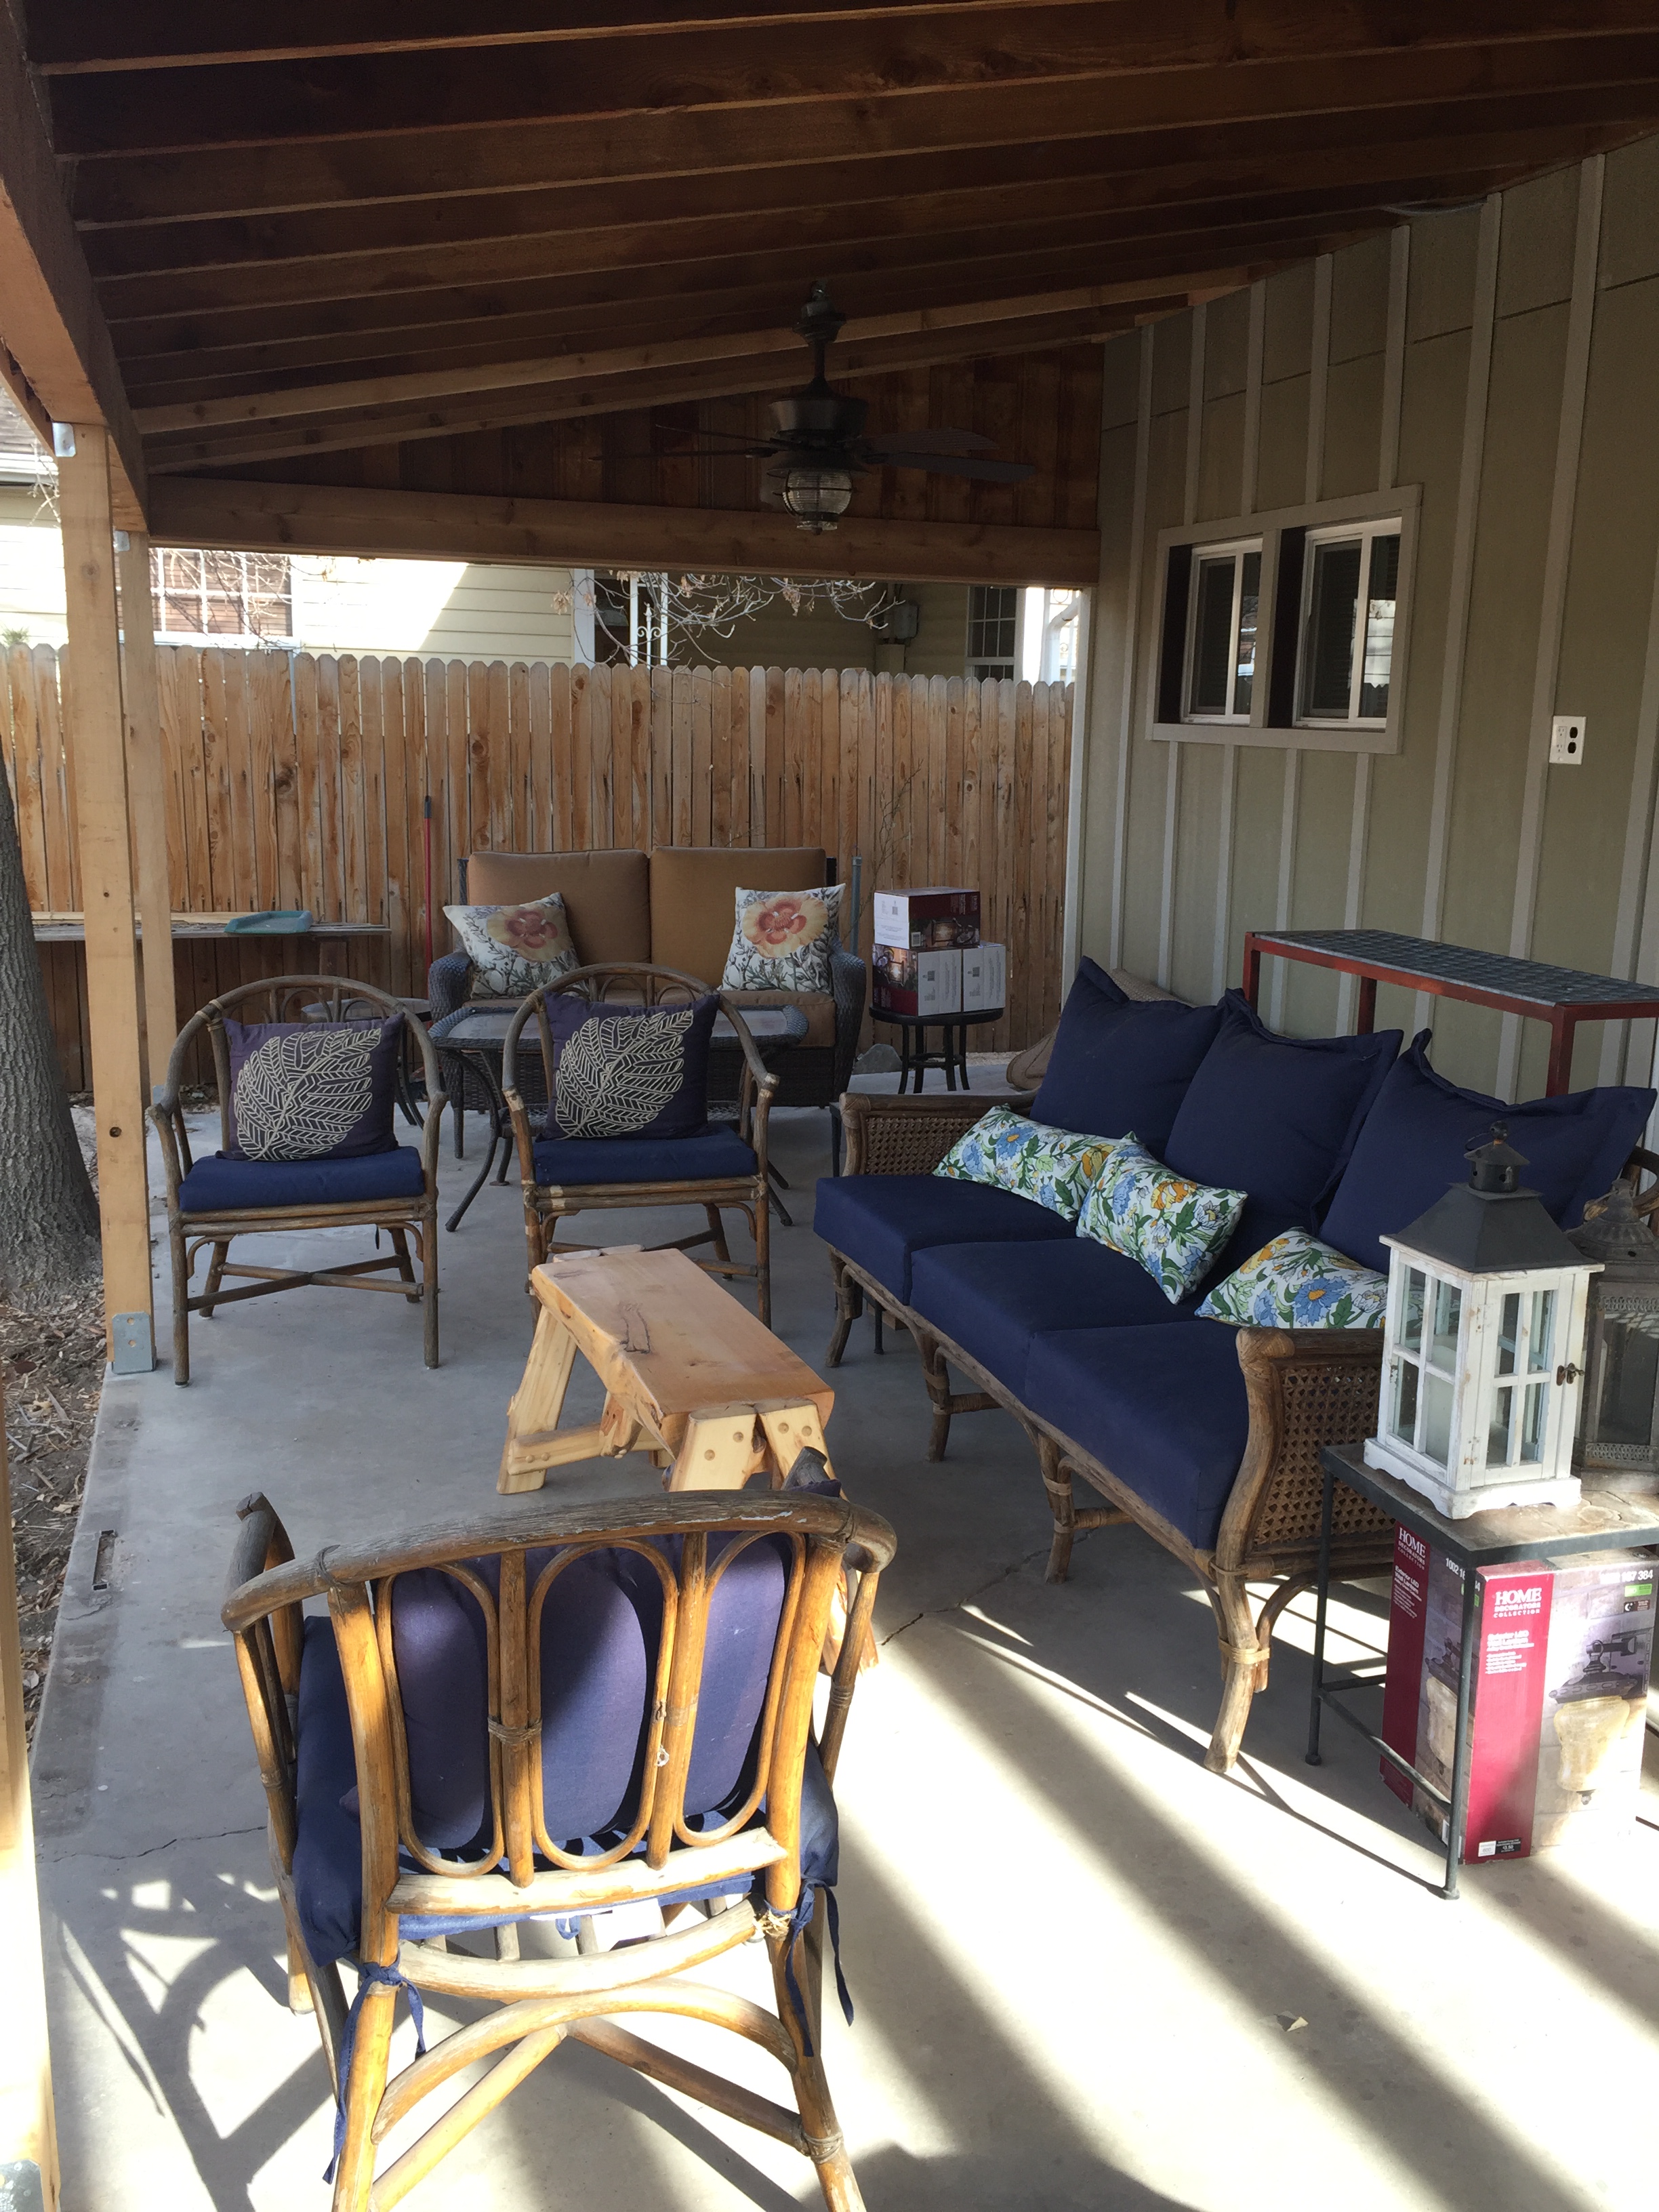
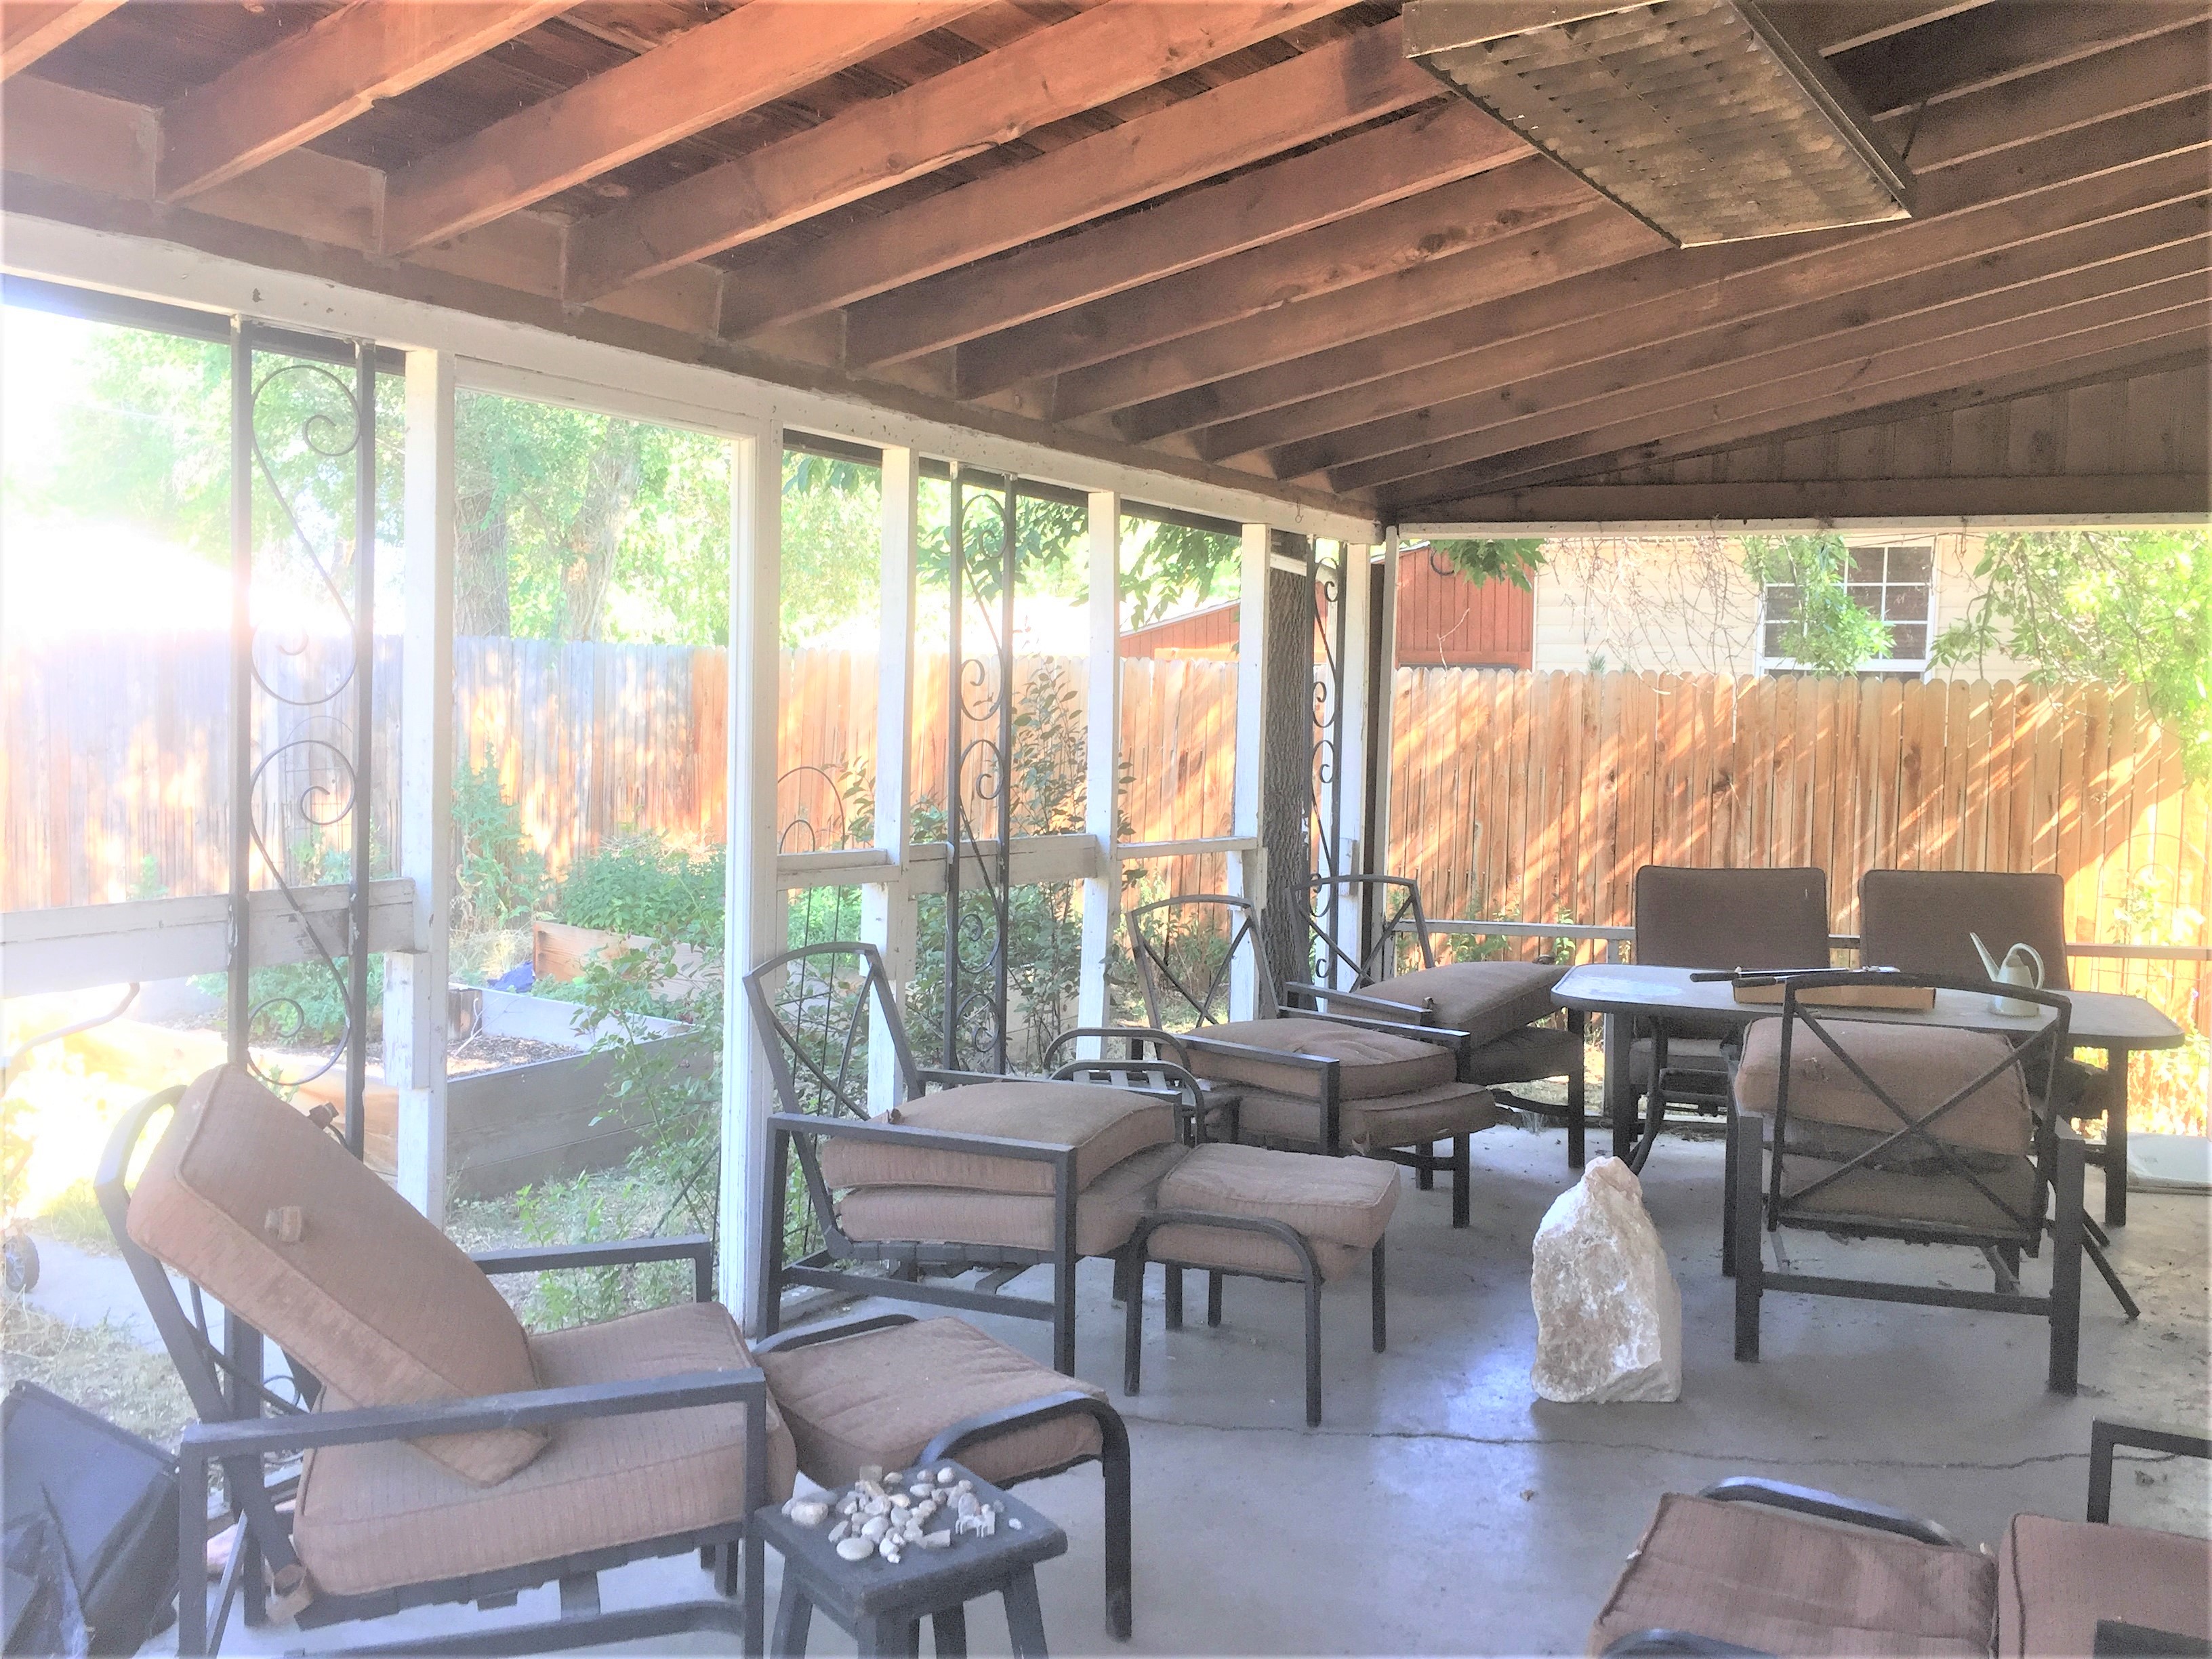
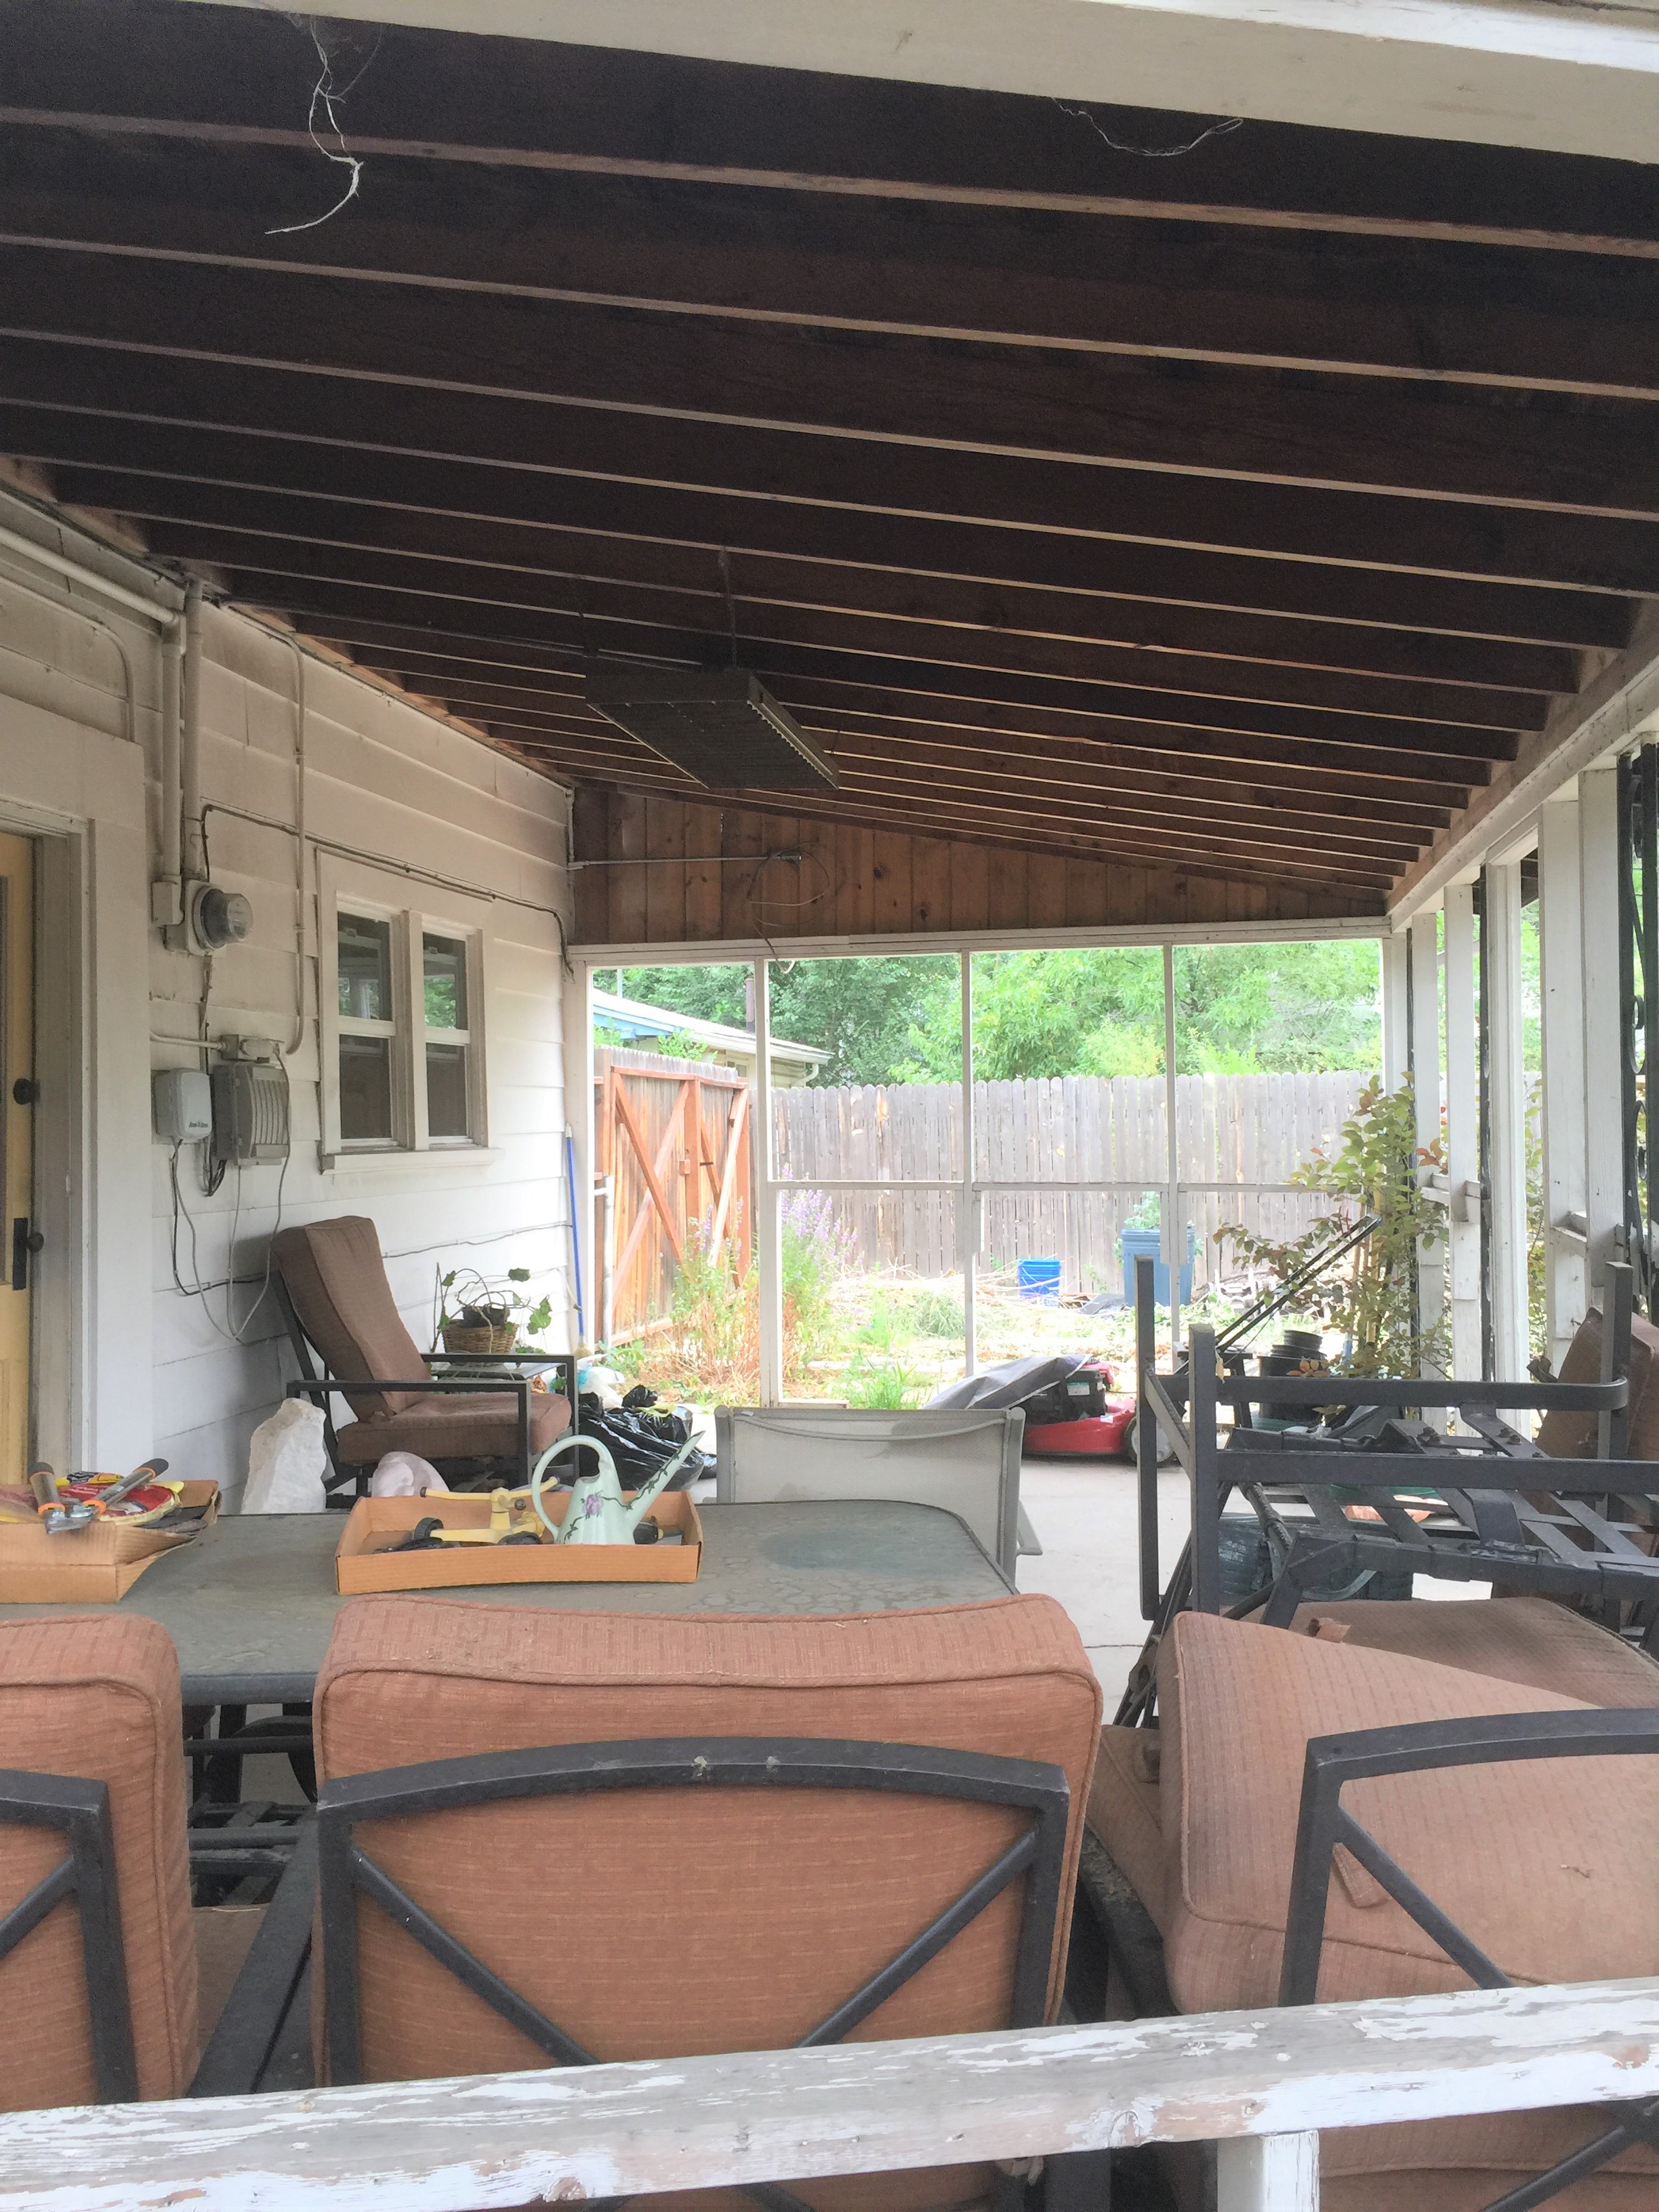
The concrete pad expansion is done, tongue and groove panels are installed on the underside of the roof and the patio is now full size. I ‘m considering a fresh layer of concrete poured over the whole pad to cover any nicks or flaws in the concrete. But right now, I’m trying to finish the big stuff.

Although the exterior paint isn’t done, I’m anxious to get my patio organized so I can use it!
The patio roof has been prepped for the metal roofing, which has been ordered. However, we got snow and the roof leaked onto the patio below.
Right outside my back door. What a mess!
Ricky, my electrician is installing the exterior lights.
New exterior lights.
I found these tiled house numbers locally, but I think I need something more modern. I ordered a different one online and think it’ll be better.
The lights at night. I’ll change the bulbs to dimmer bulbs so I can adjust the amount of light they put out.

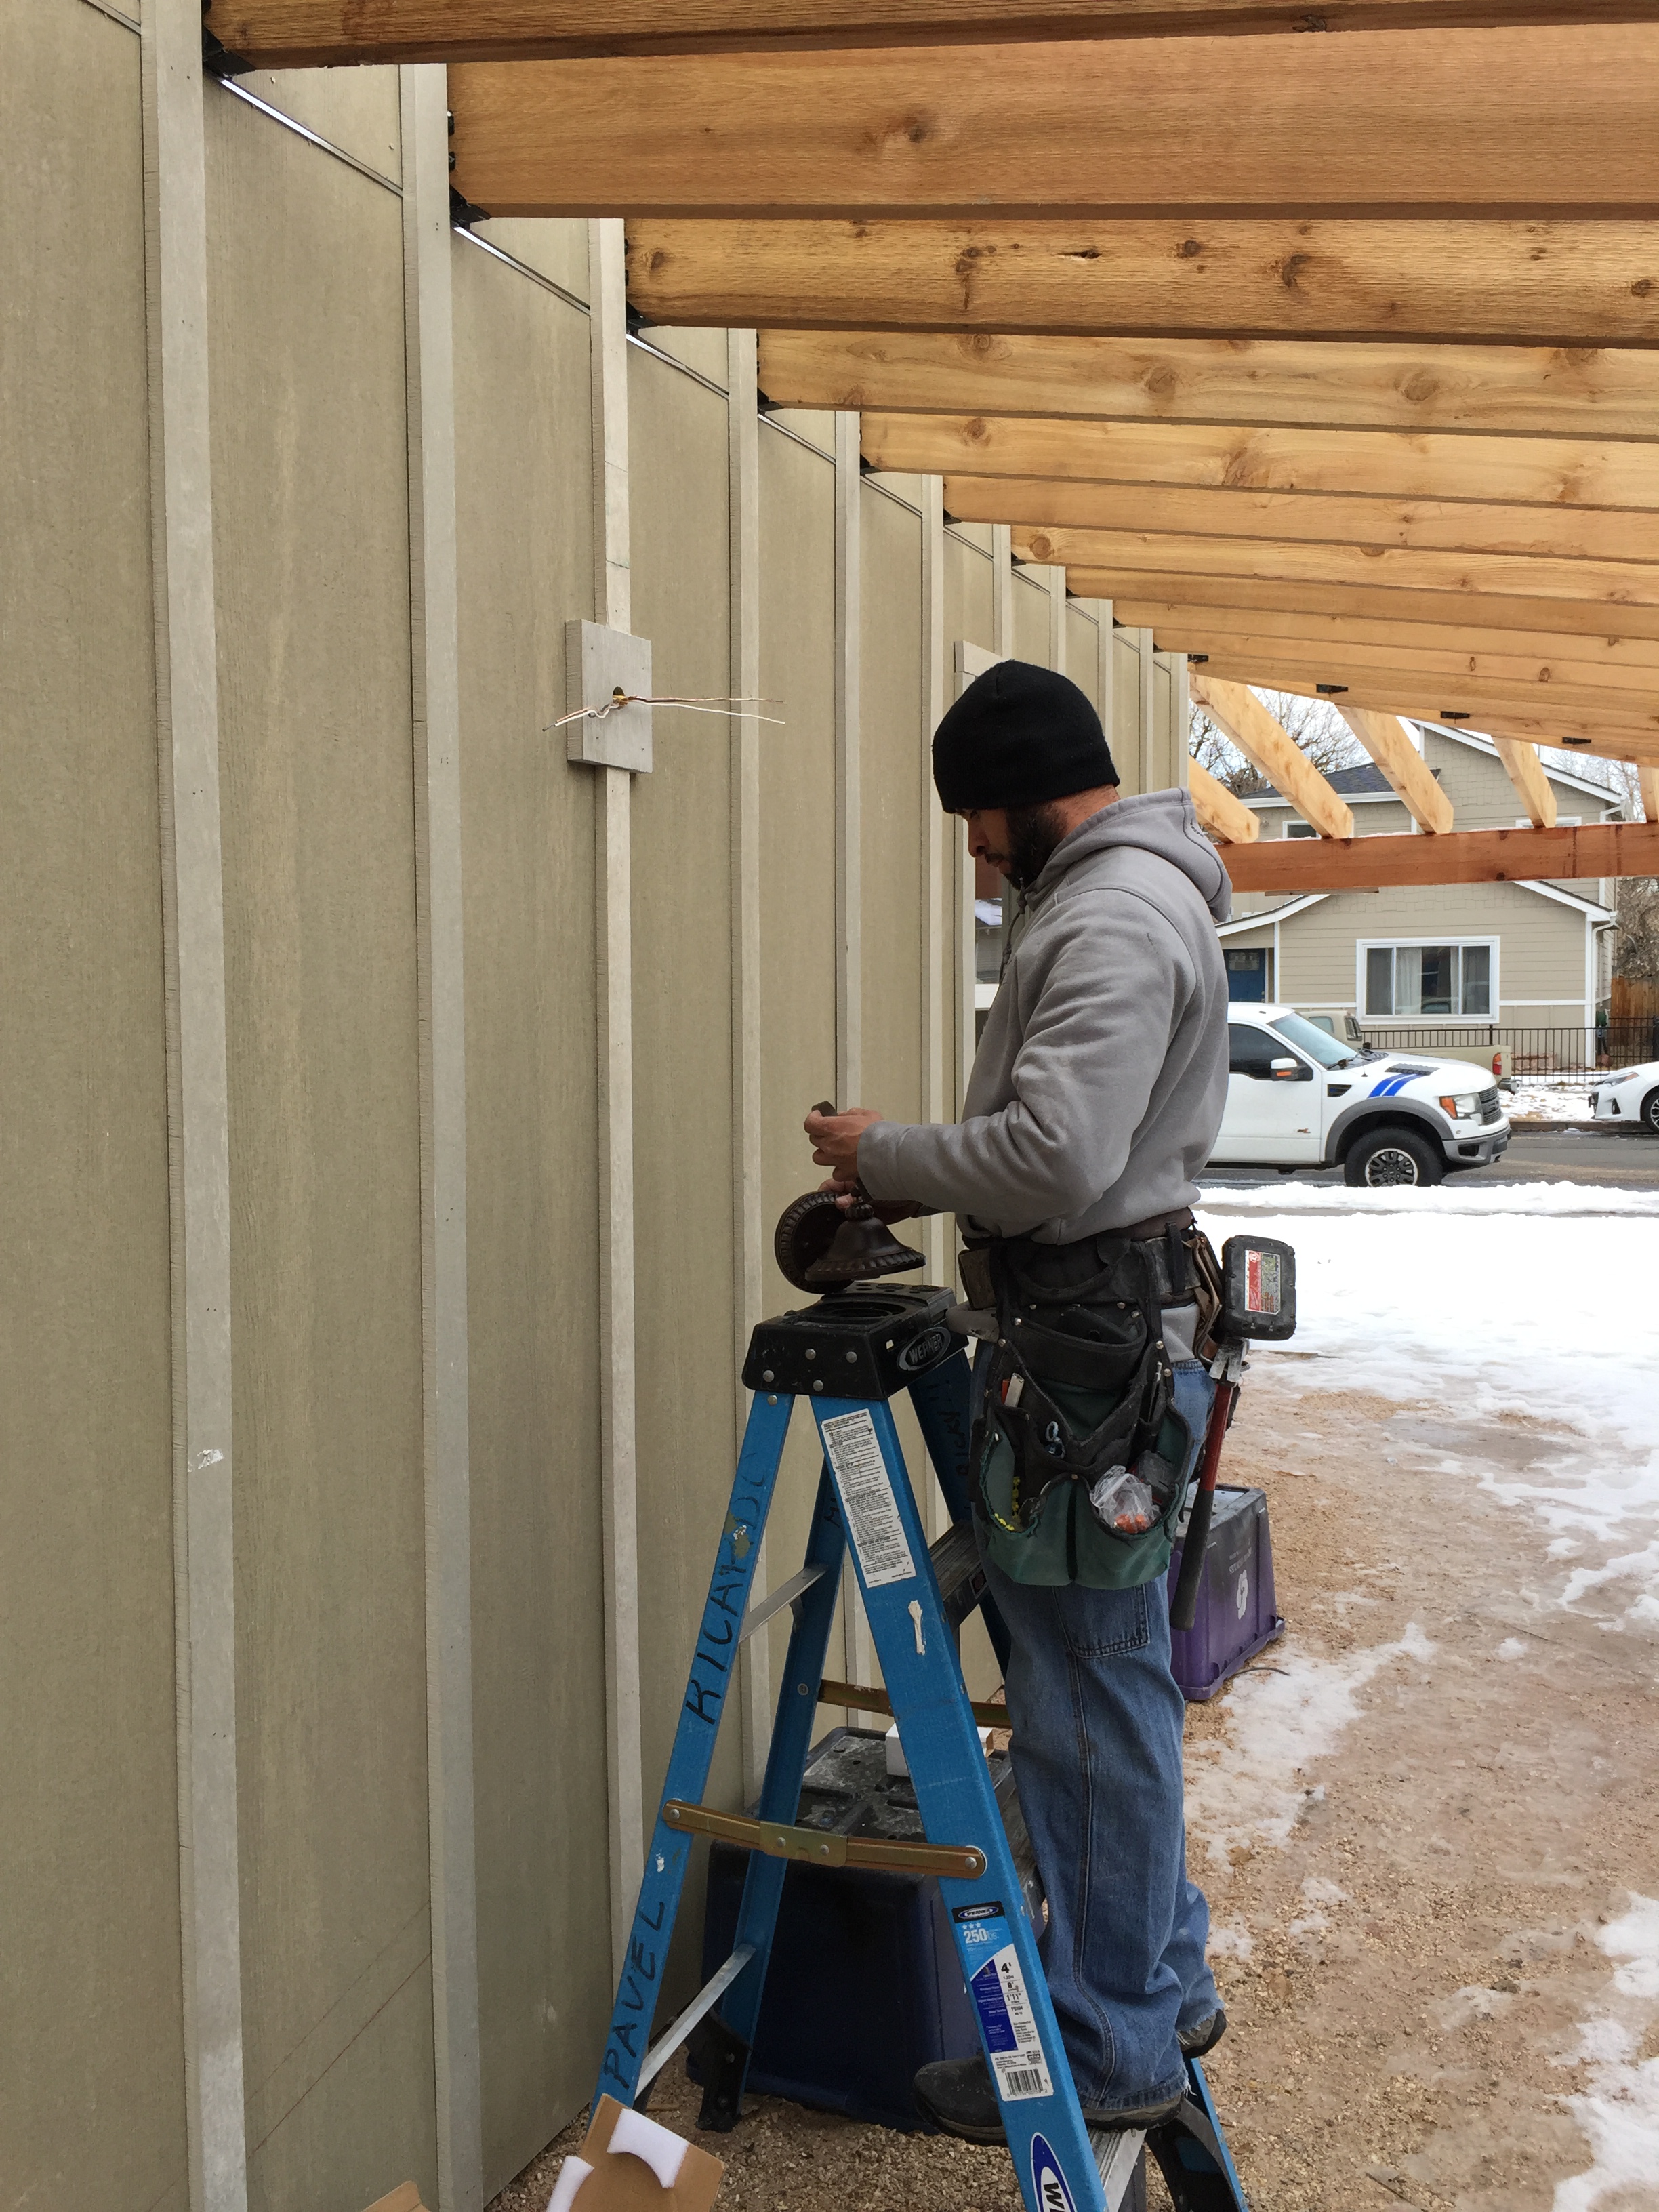
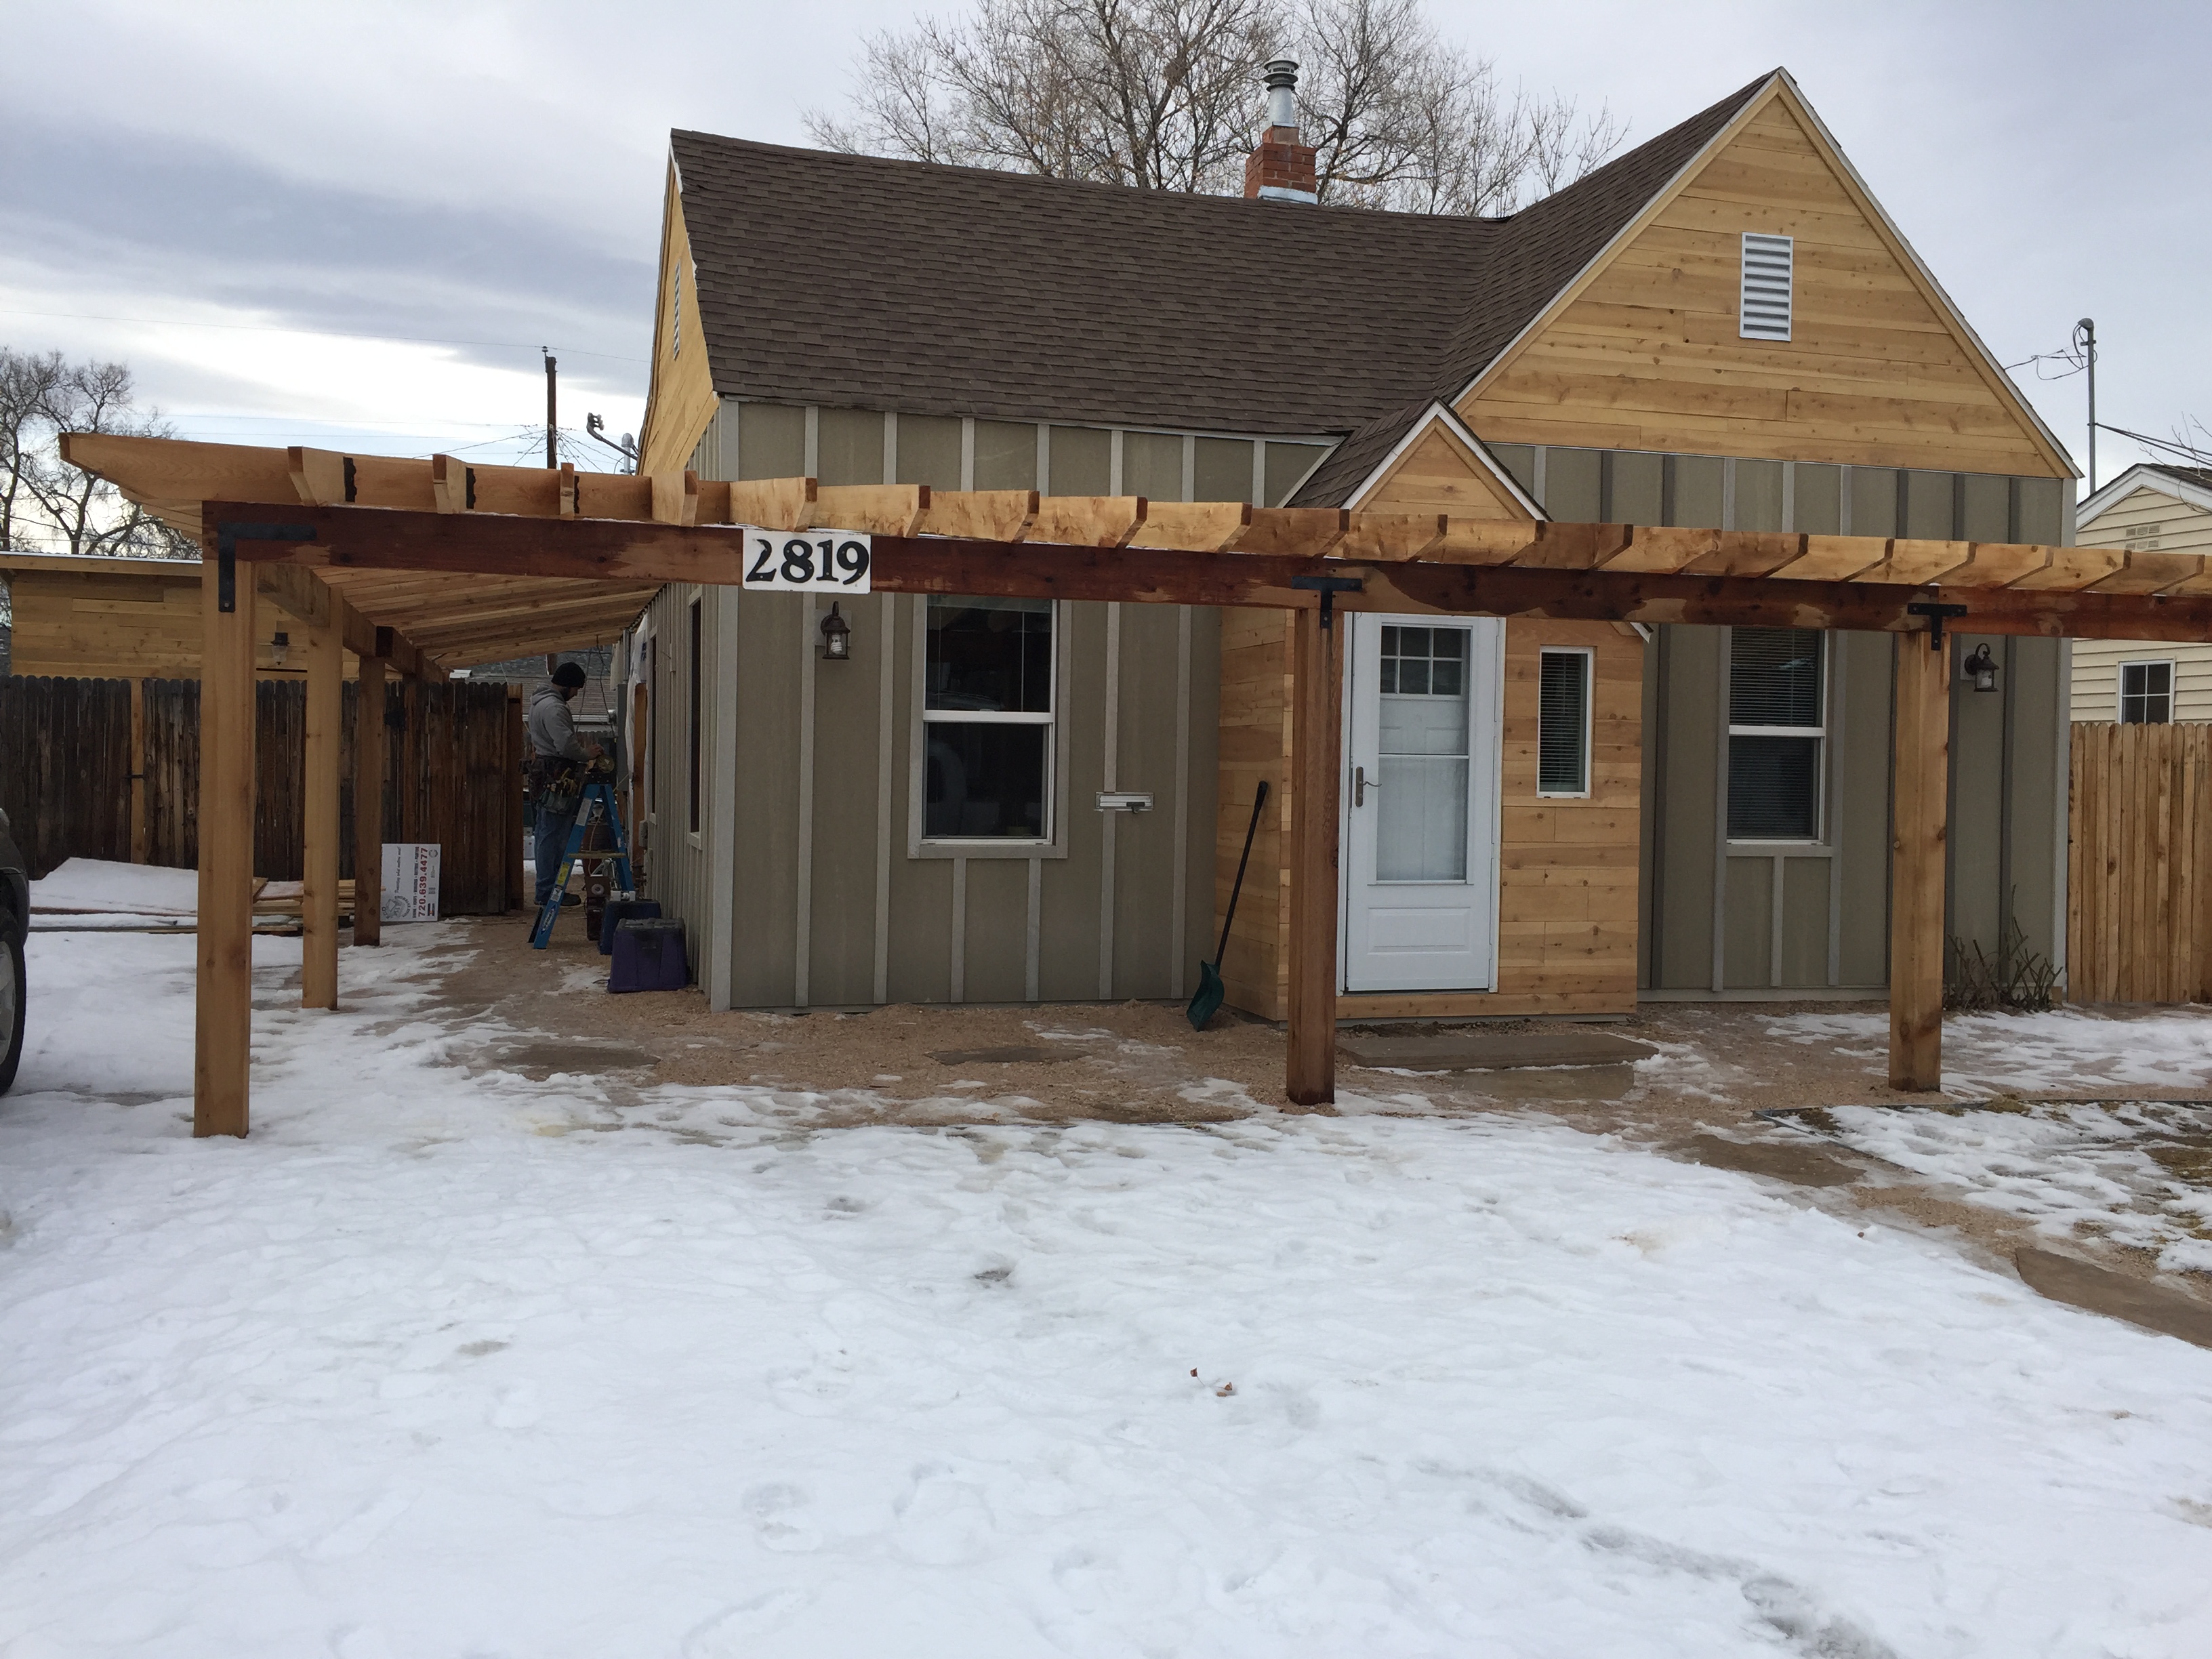
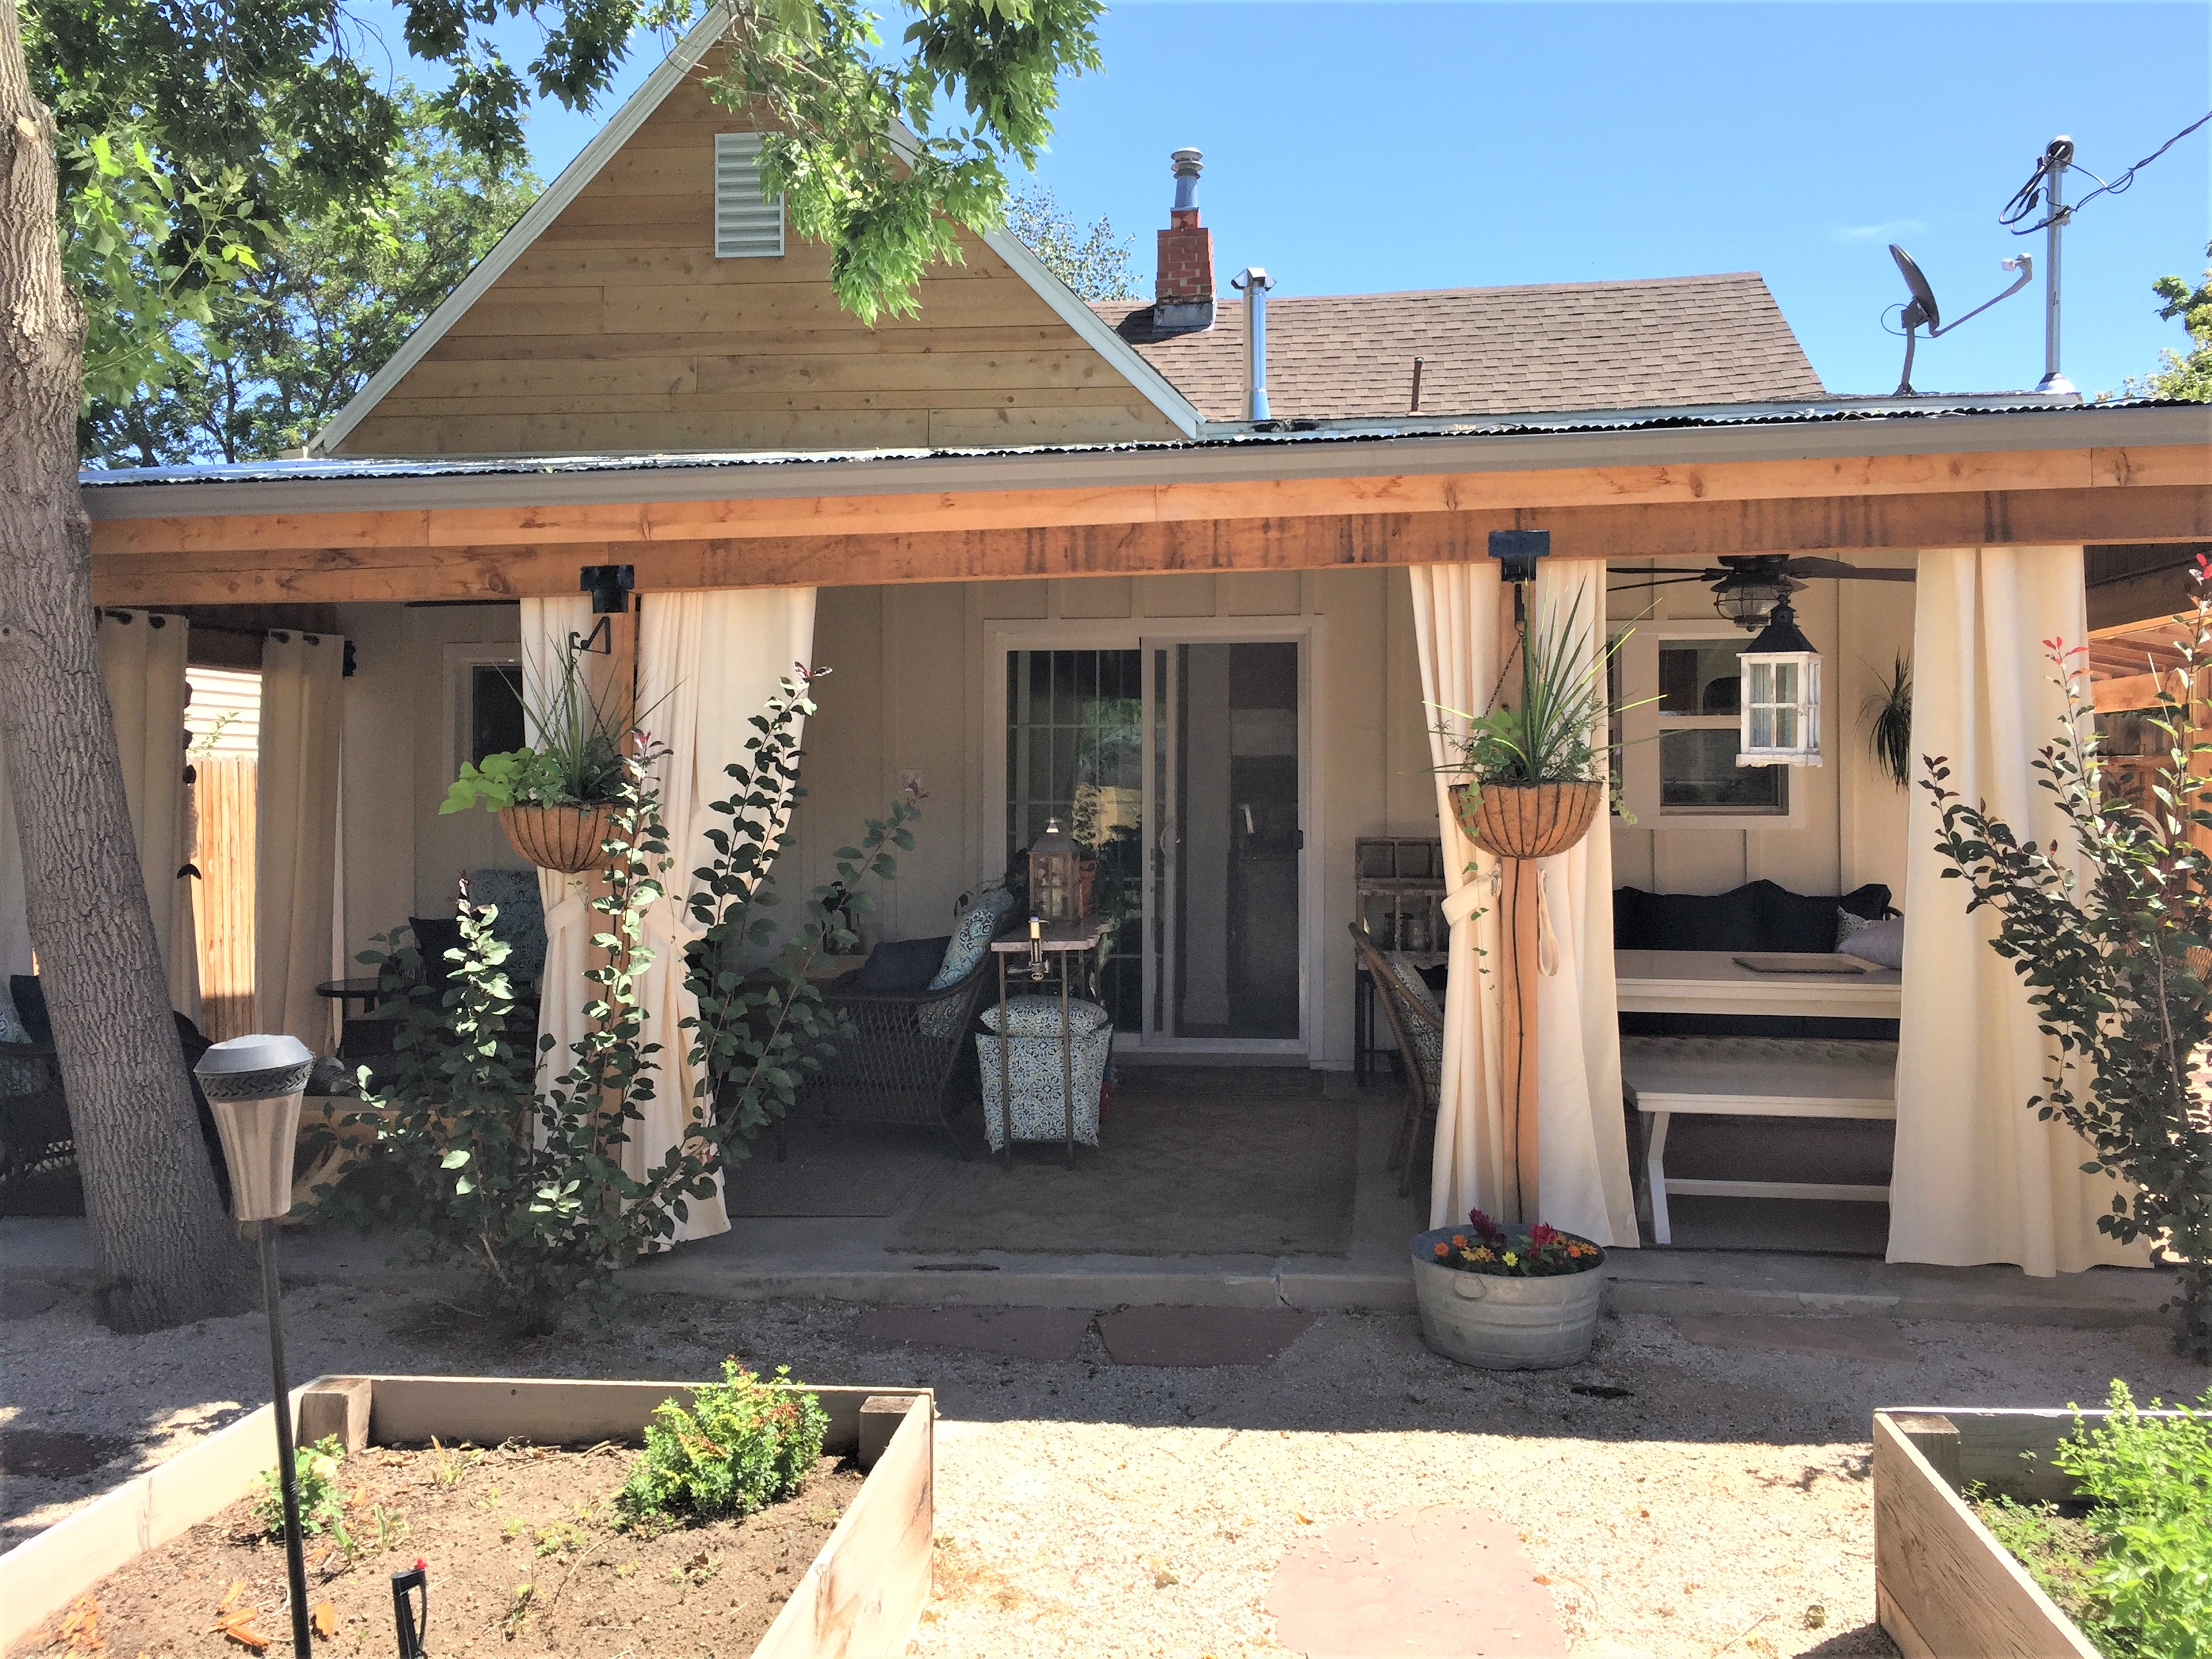
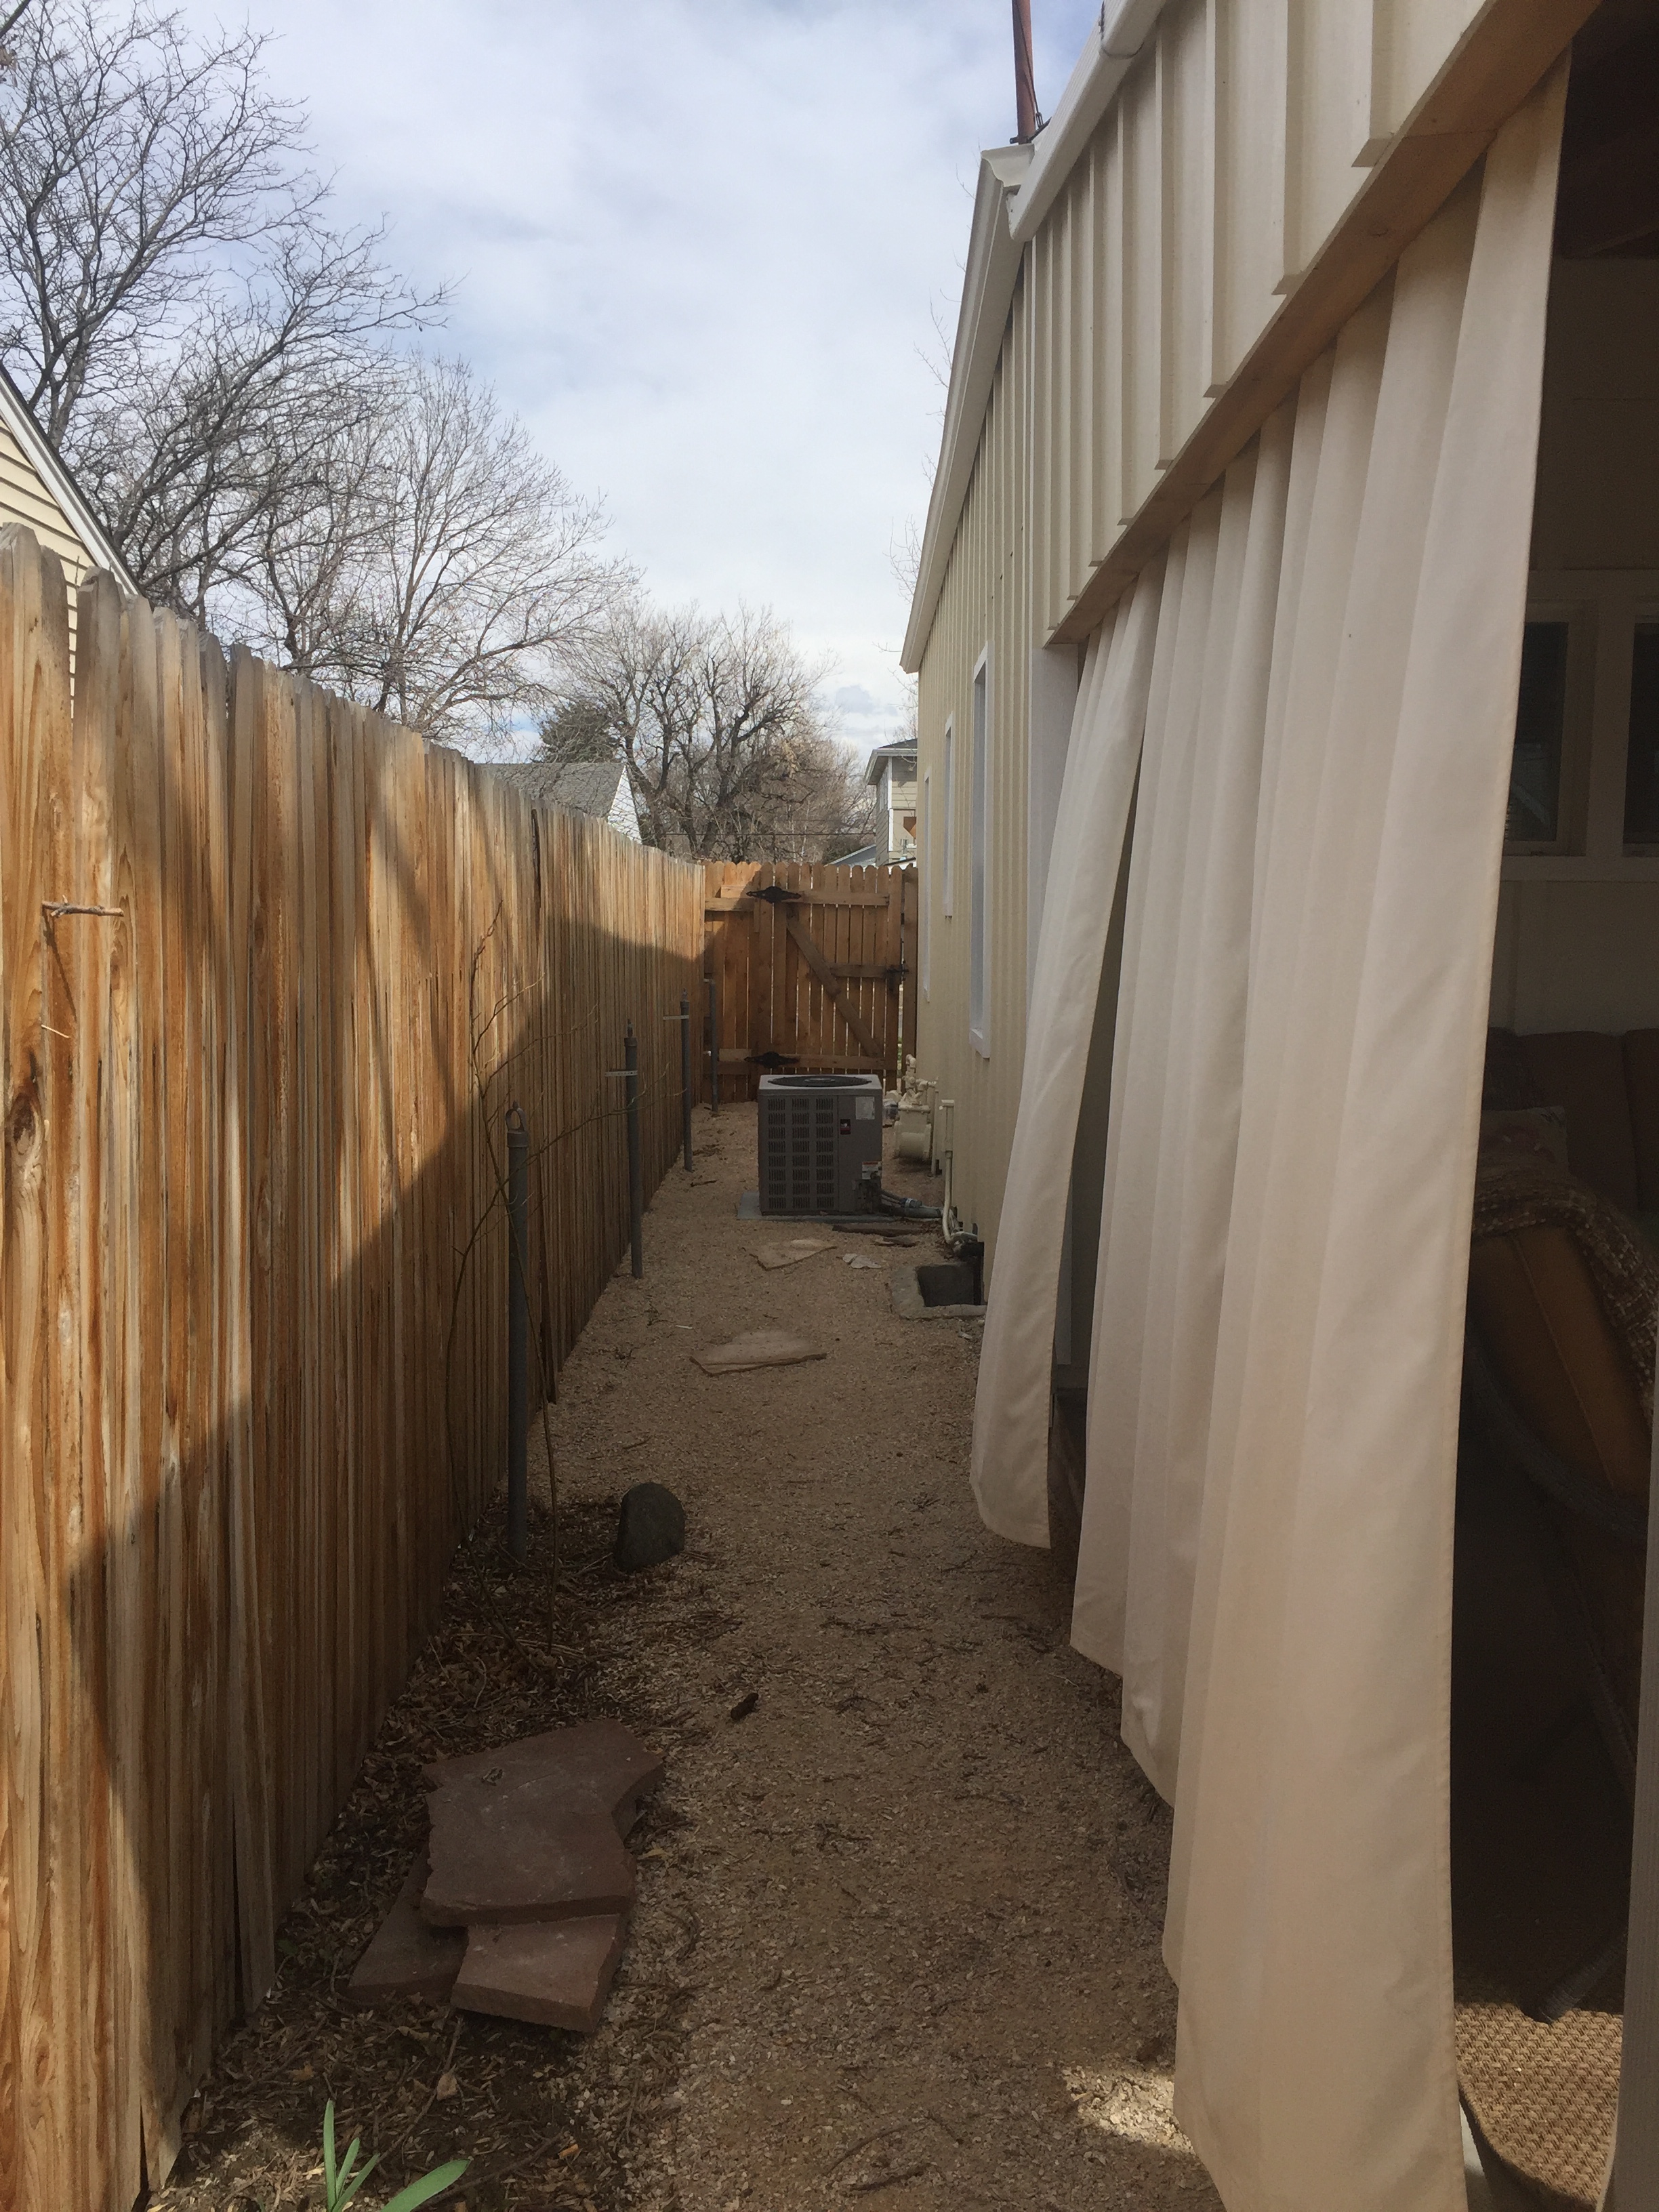
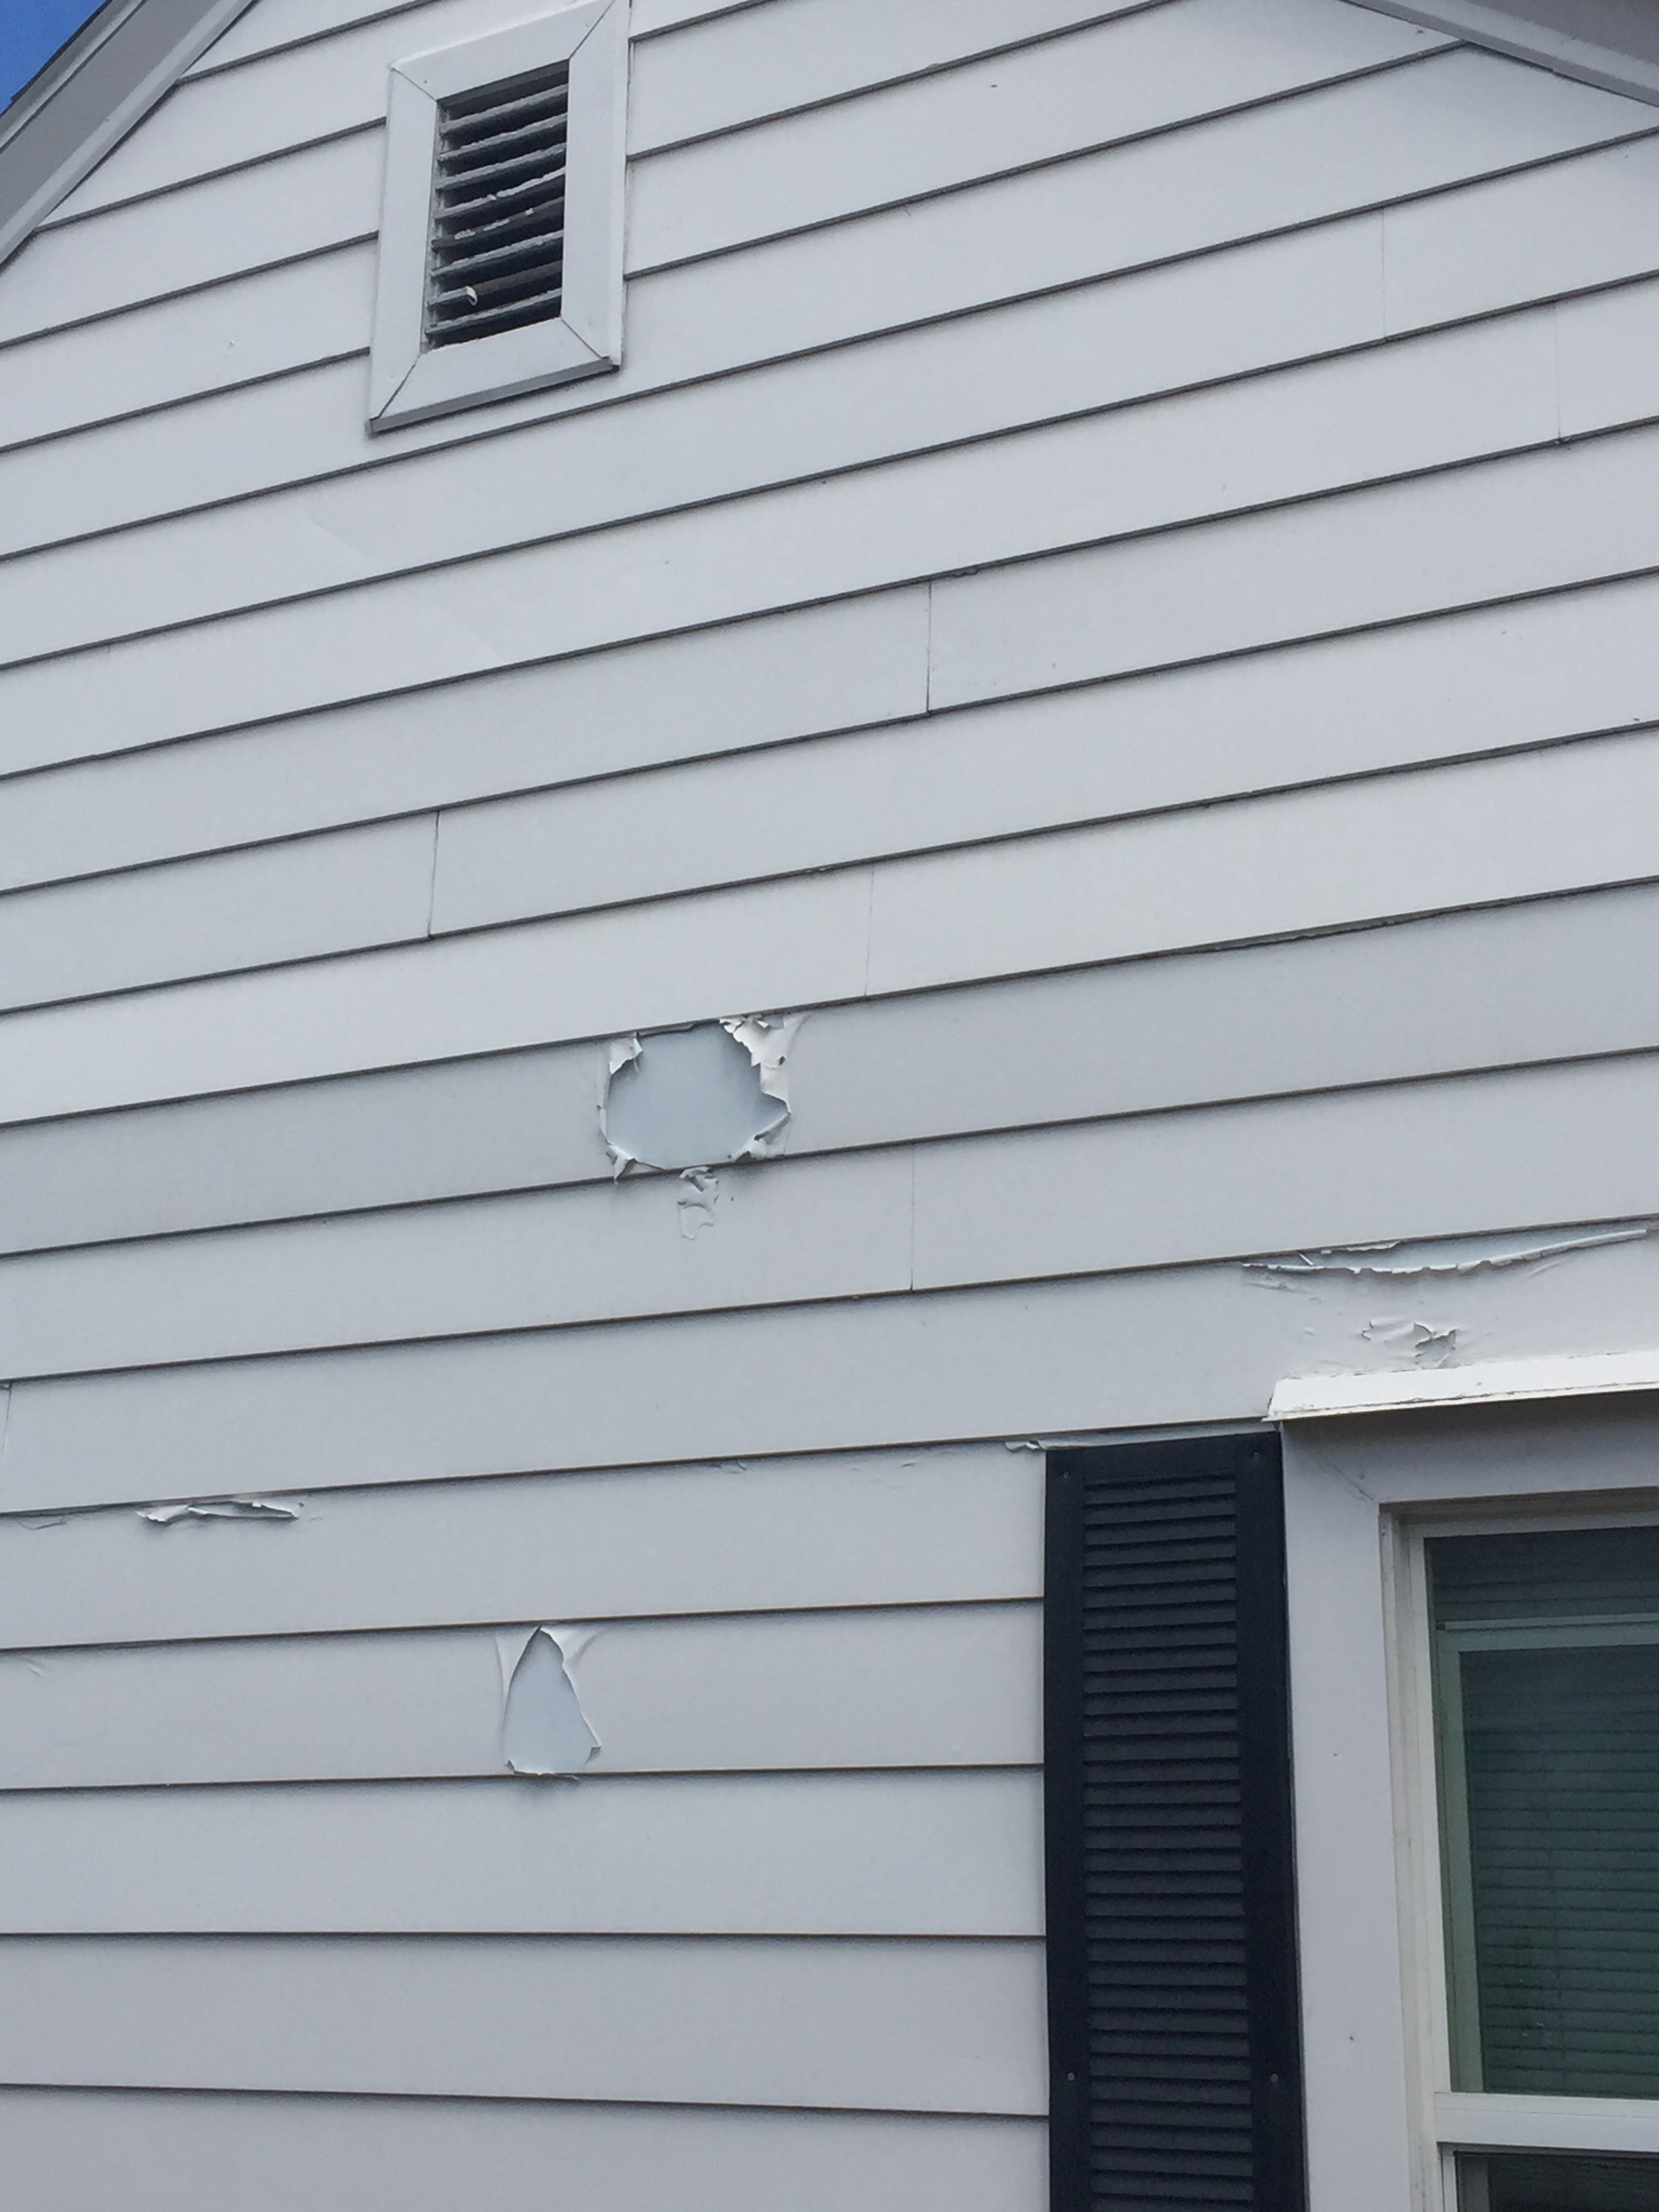
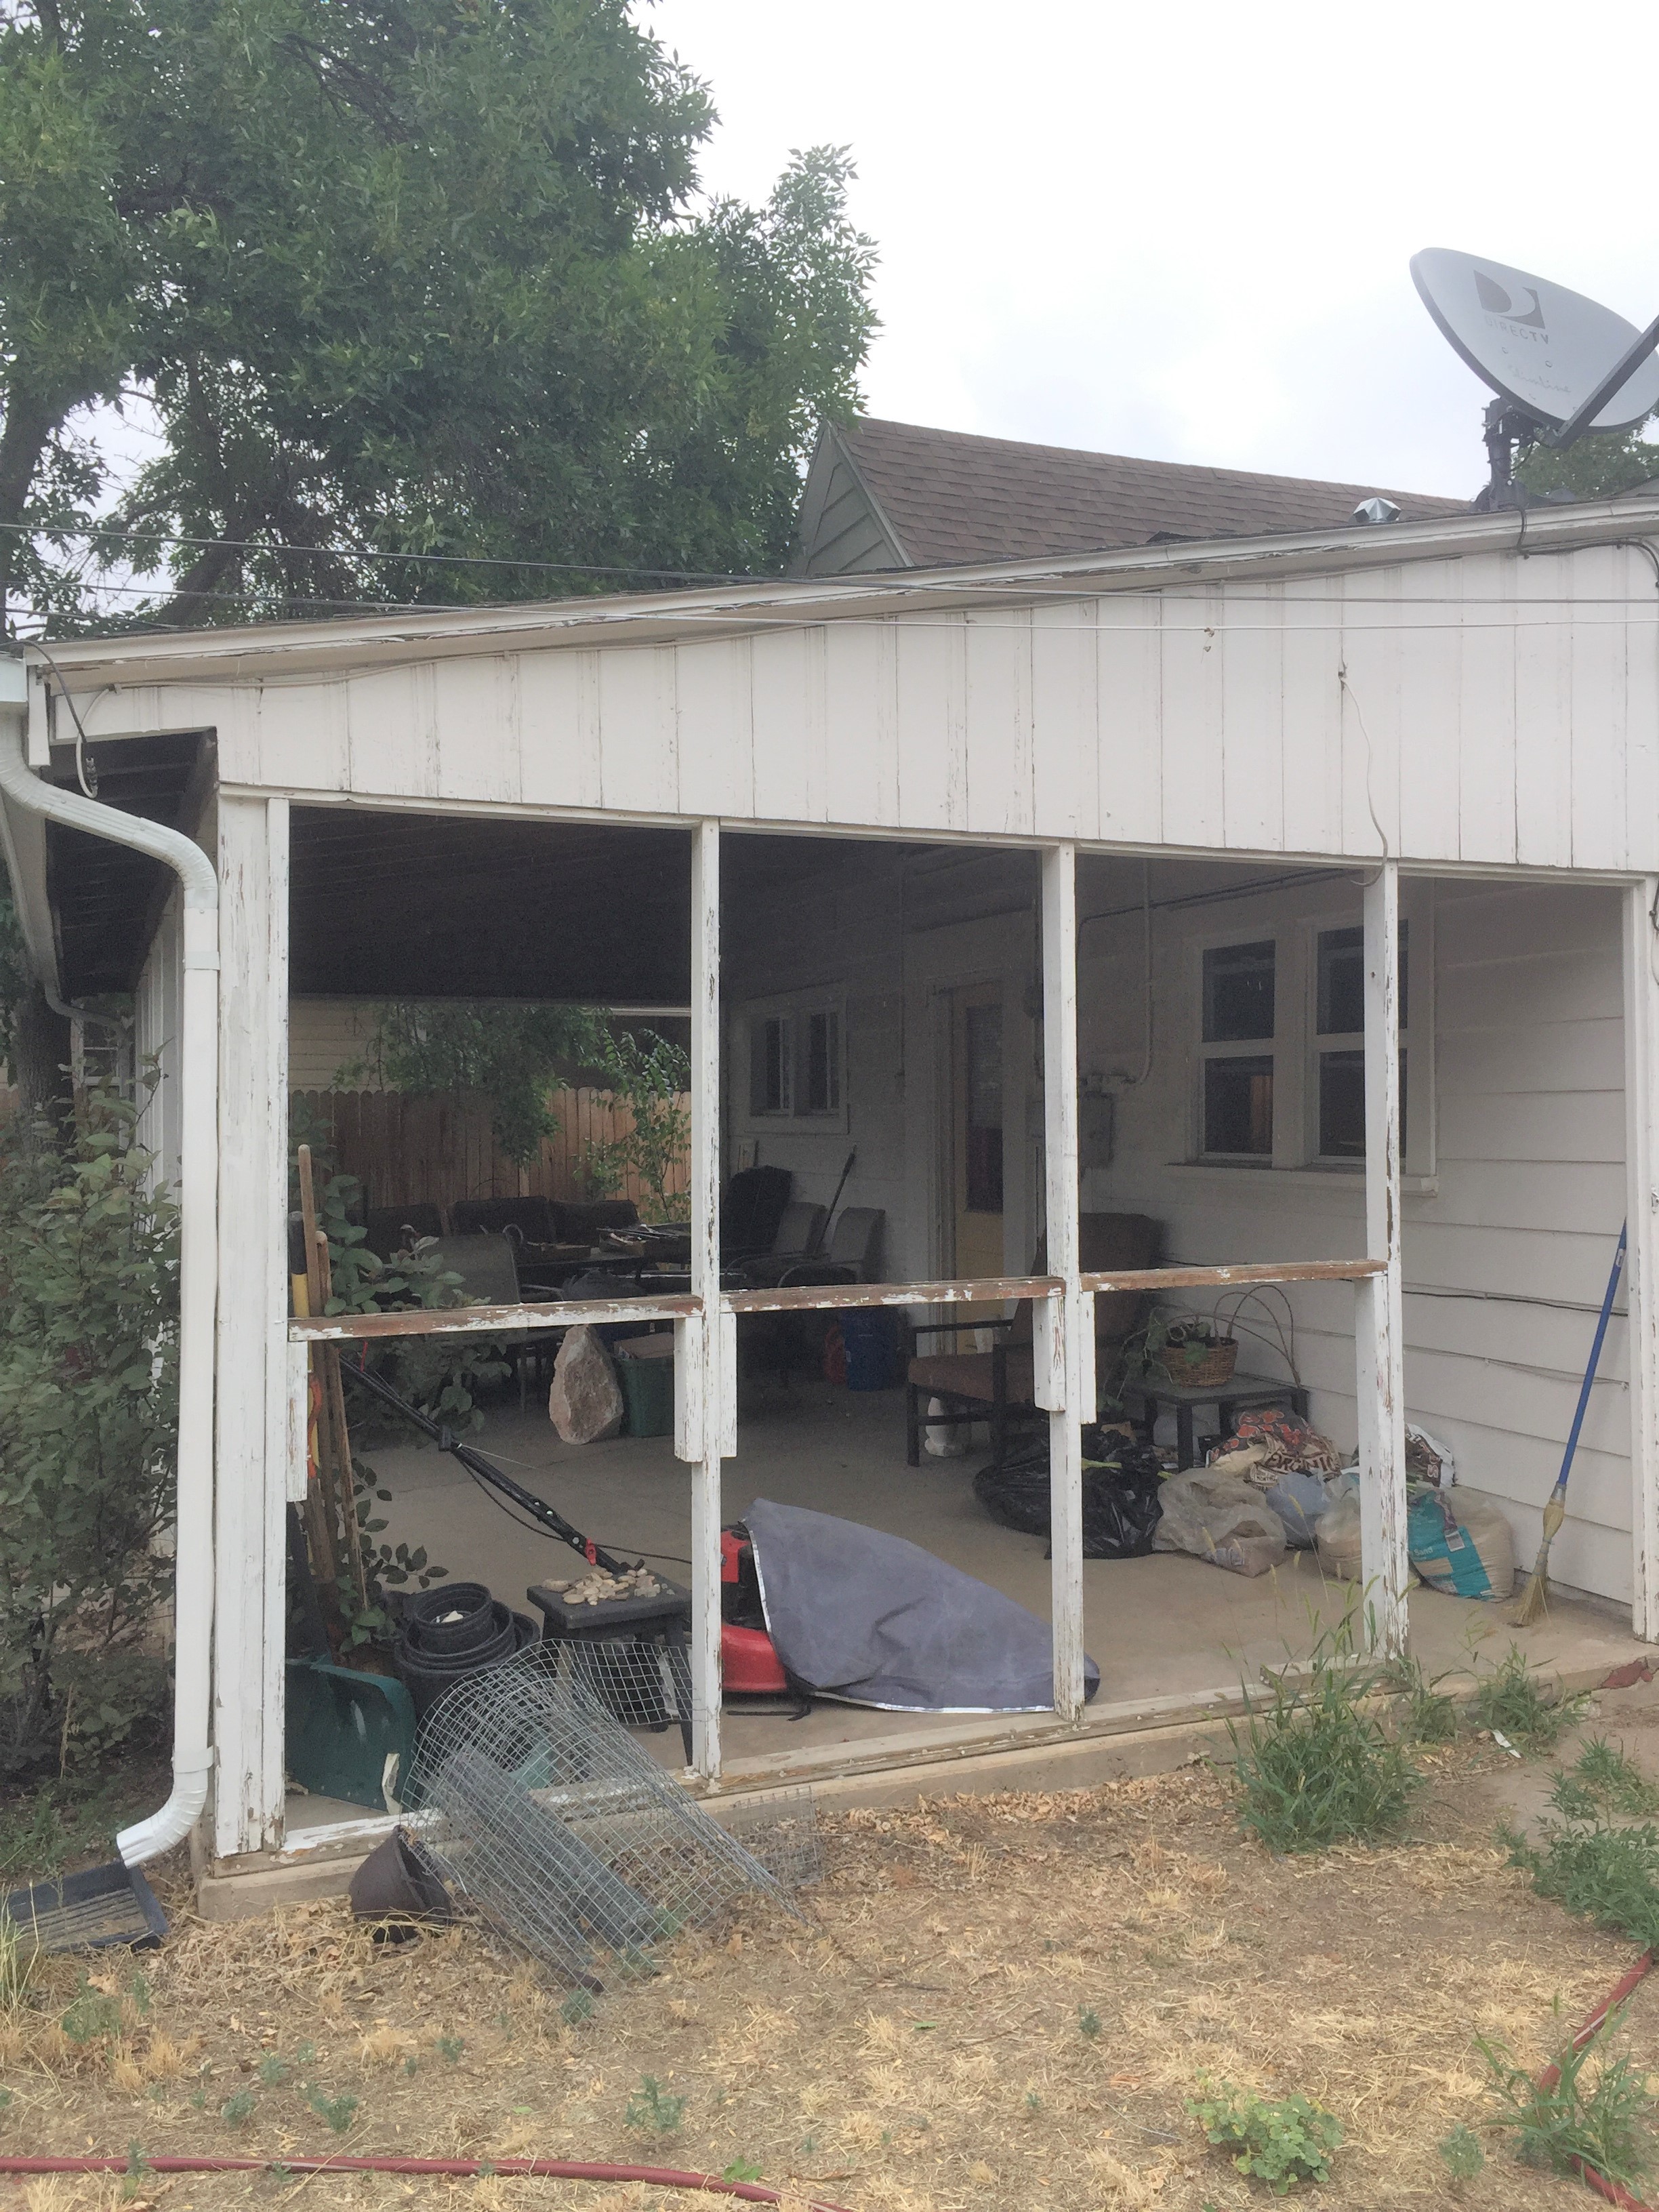
I expect the siding crew to be back next week to finish the siding around the new patio slider. I already have a painter lined up to paint the siding, and my gutter guy will be here to attach the gutters next. The last big thing is the metal roof on the back patio. Hopefully in 2 weeks this part of the project will be done.

Starting is actually scary and wonderfully intimidating…

I’ve done 20+ remodels and each time I get excited and nervous as I plan and schedule. What is my goal? What style do I want? How much money can I spend?… the list of considerations is long!

Built in 1934, 2 bedroom, 1 bath, 893 finished square feet upstairs, 310 unfinished square feet basement.  There is an original carriage house on the back part of the lot.

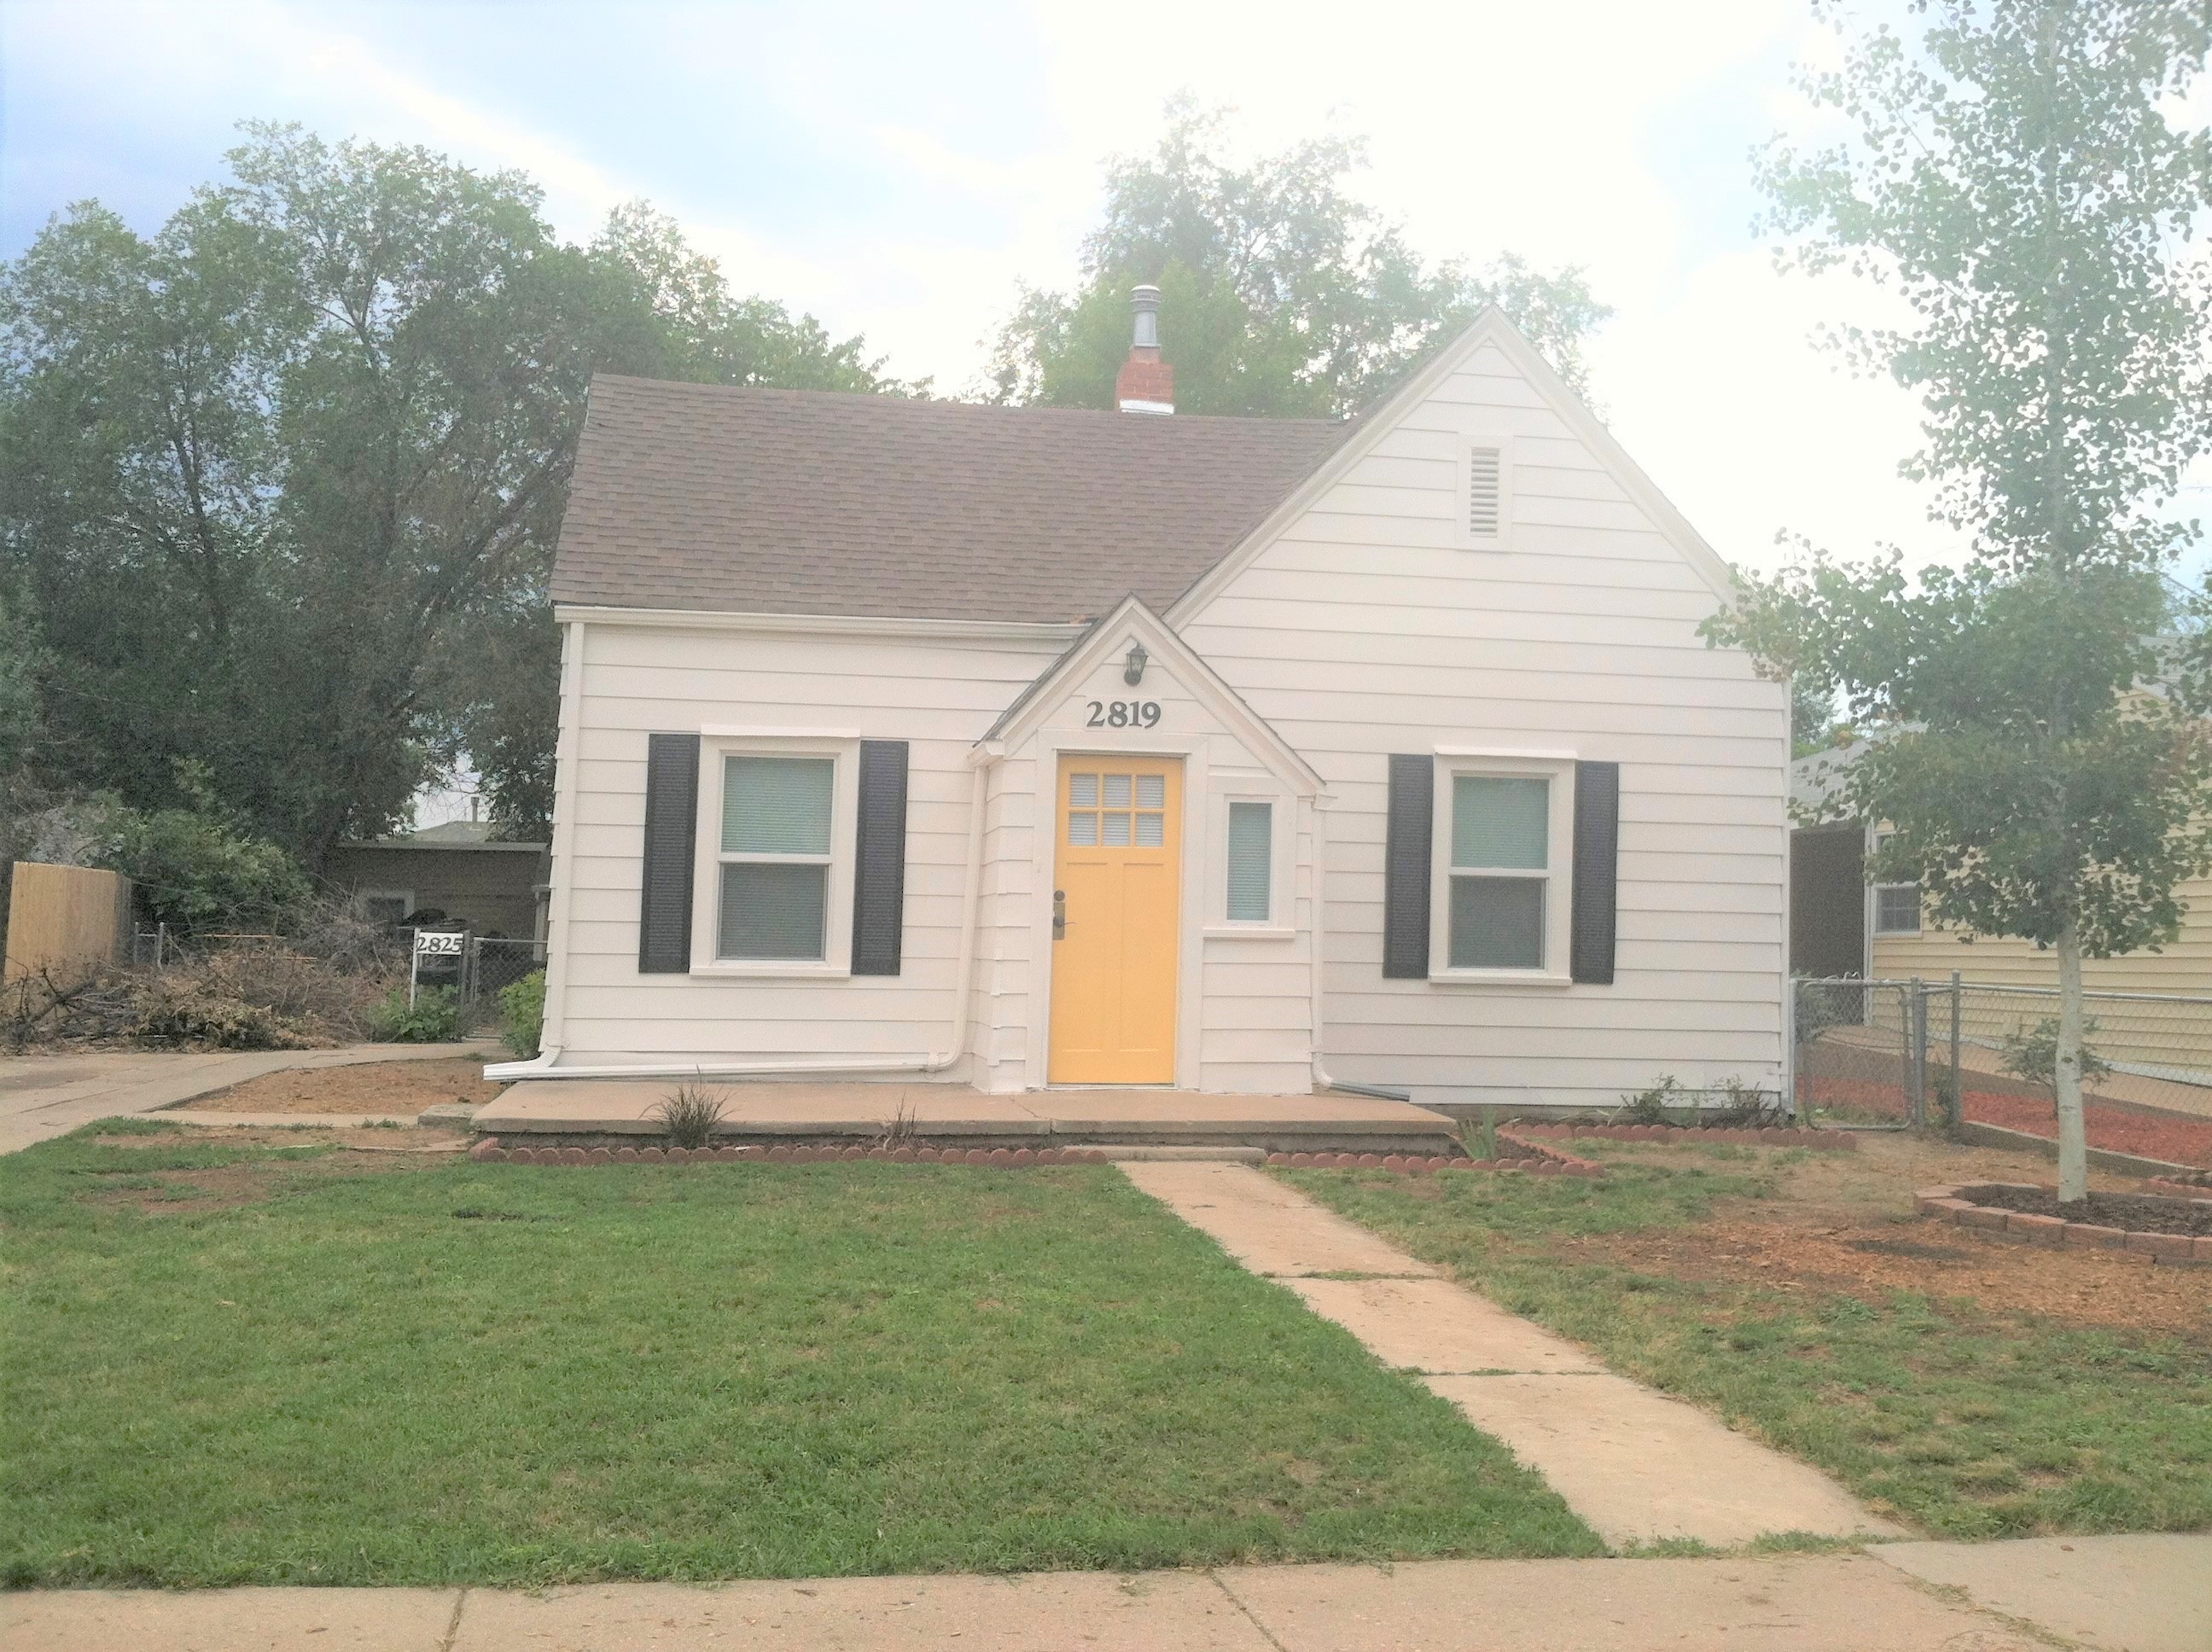
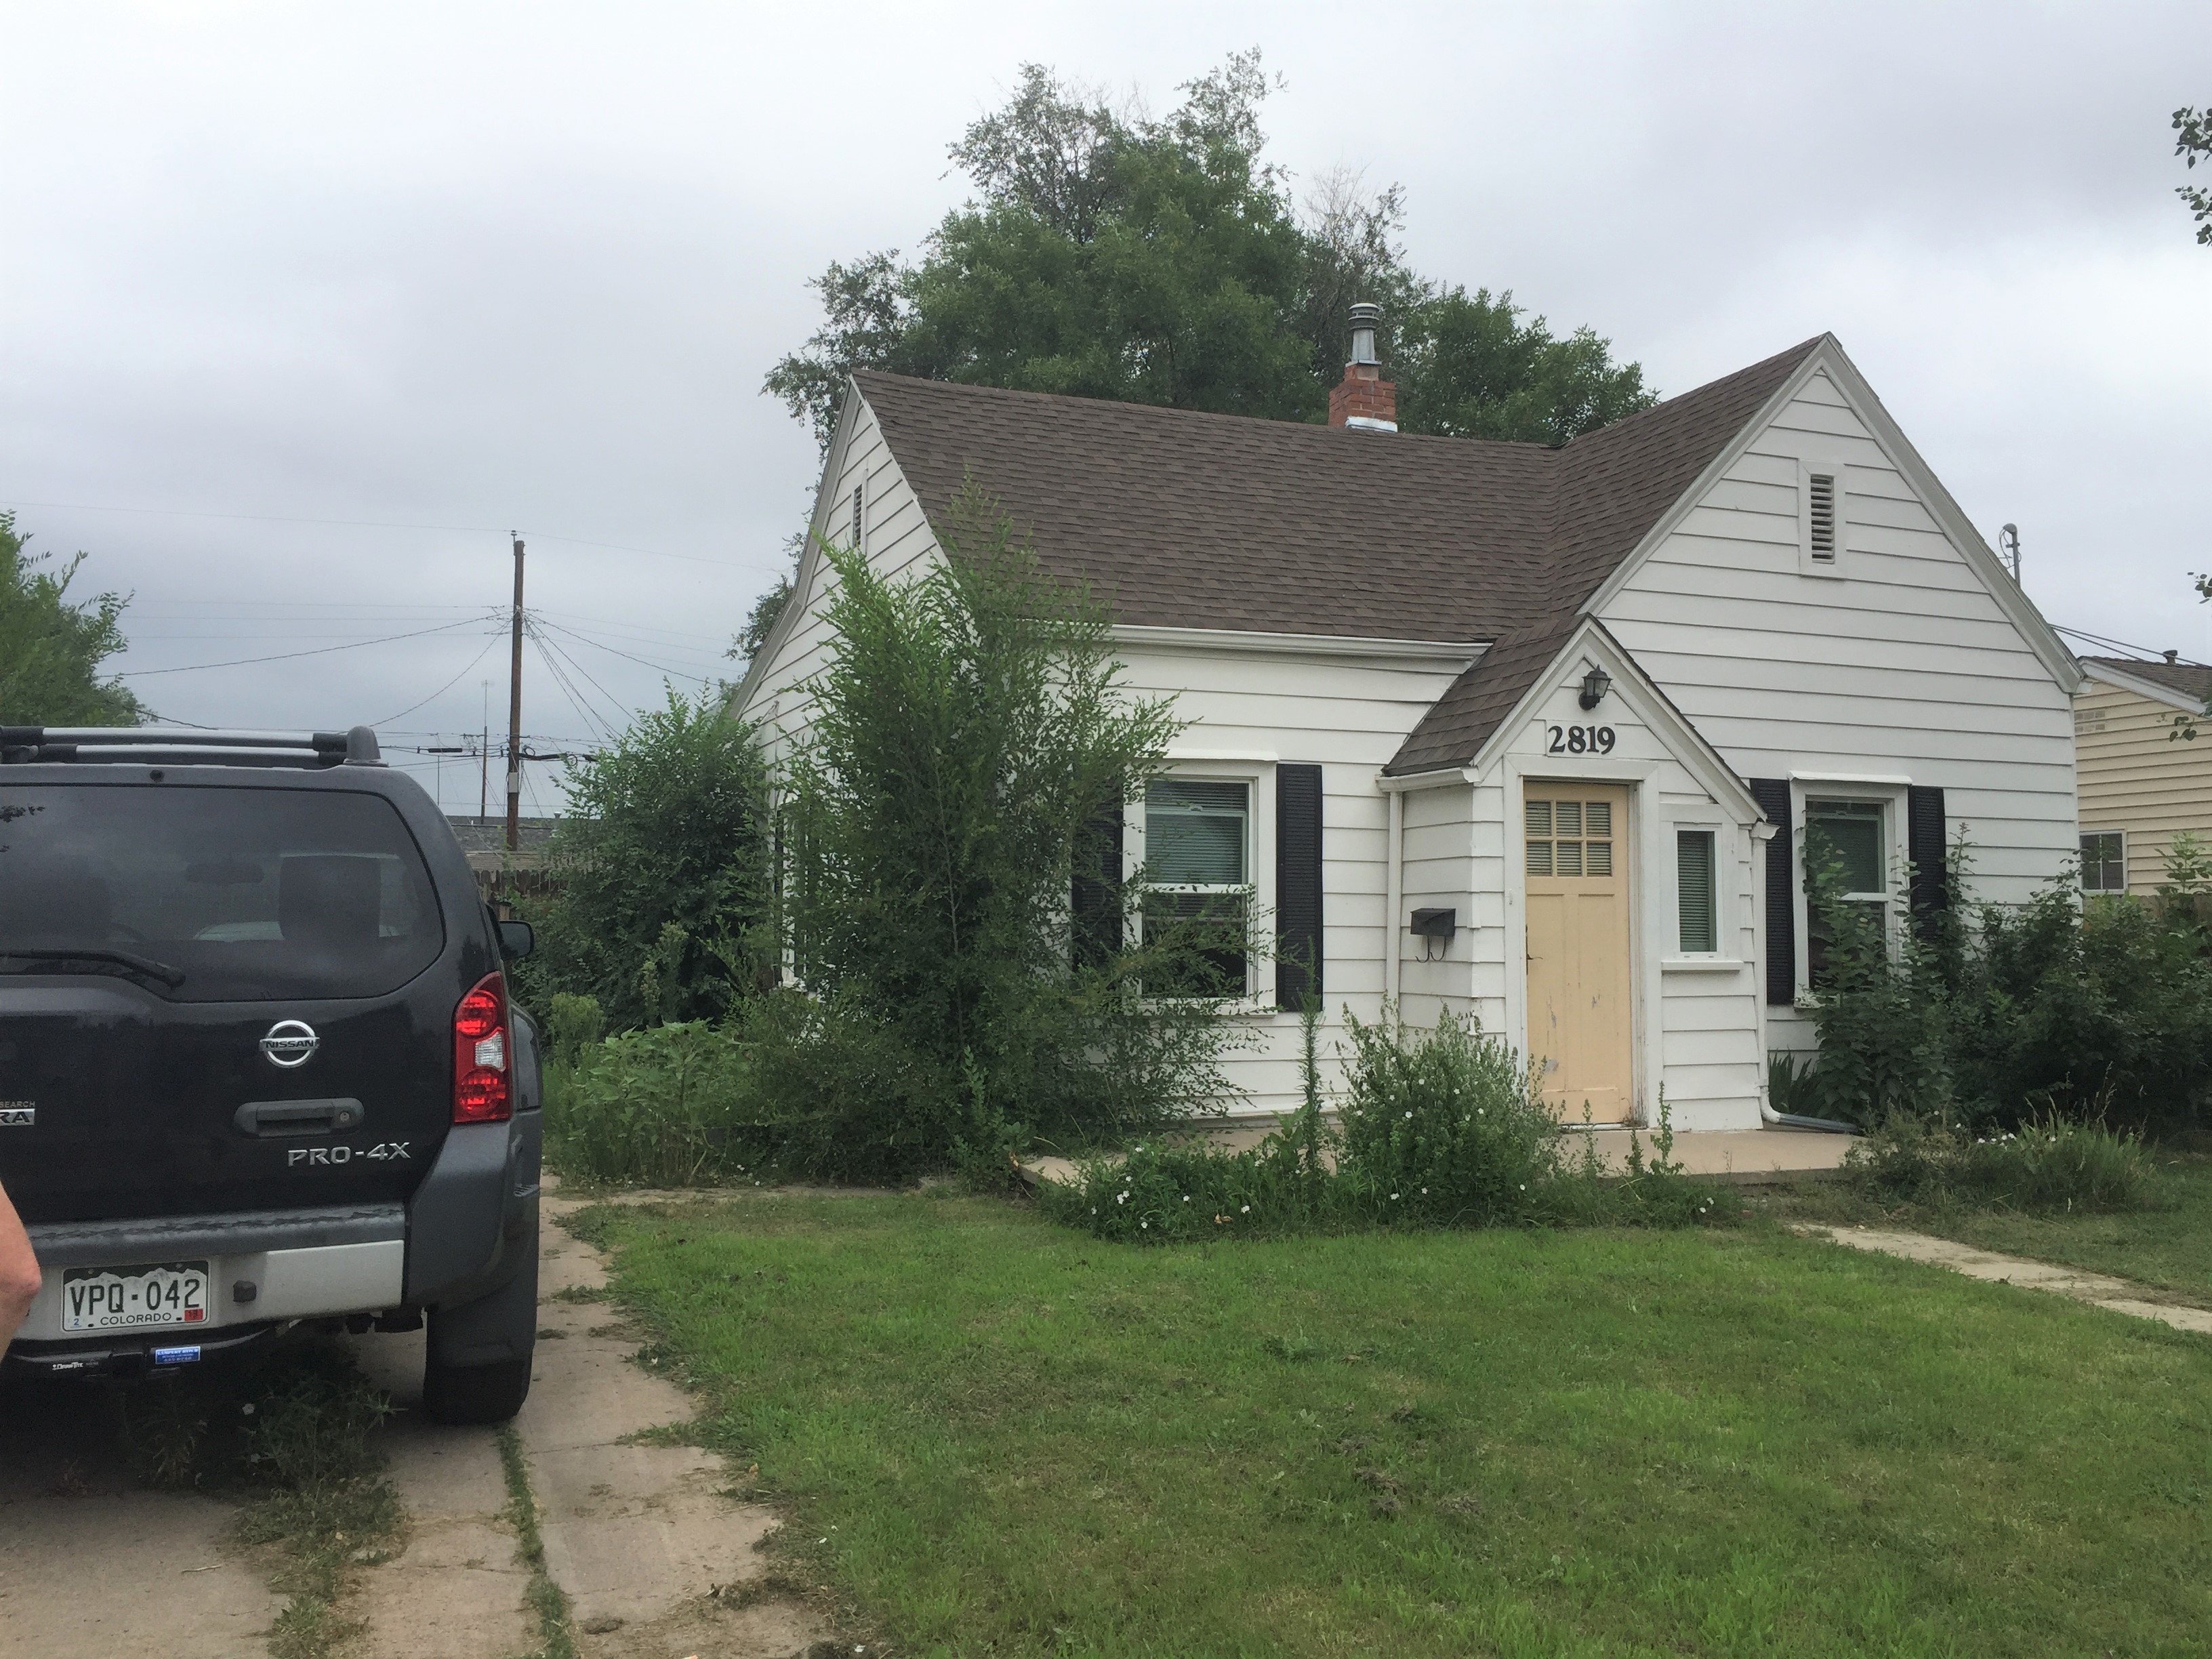
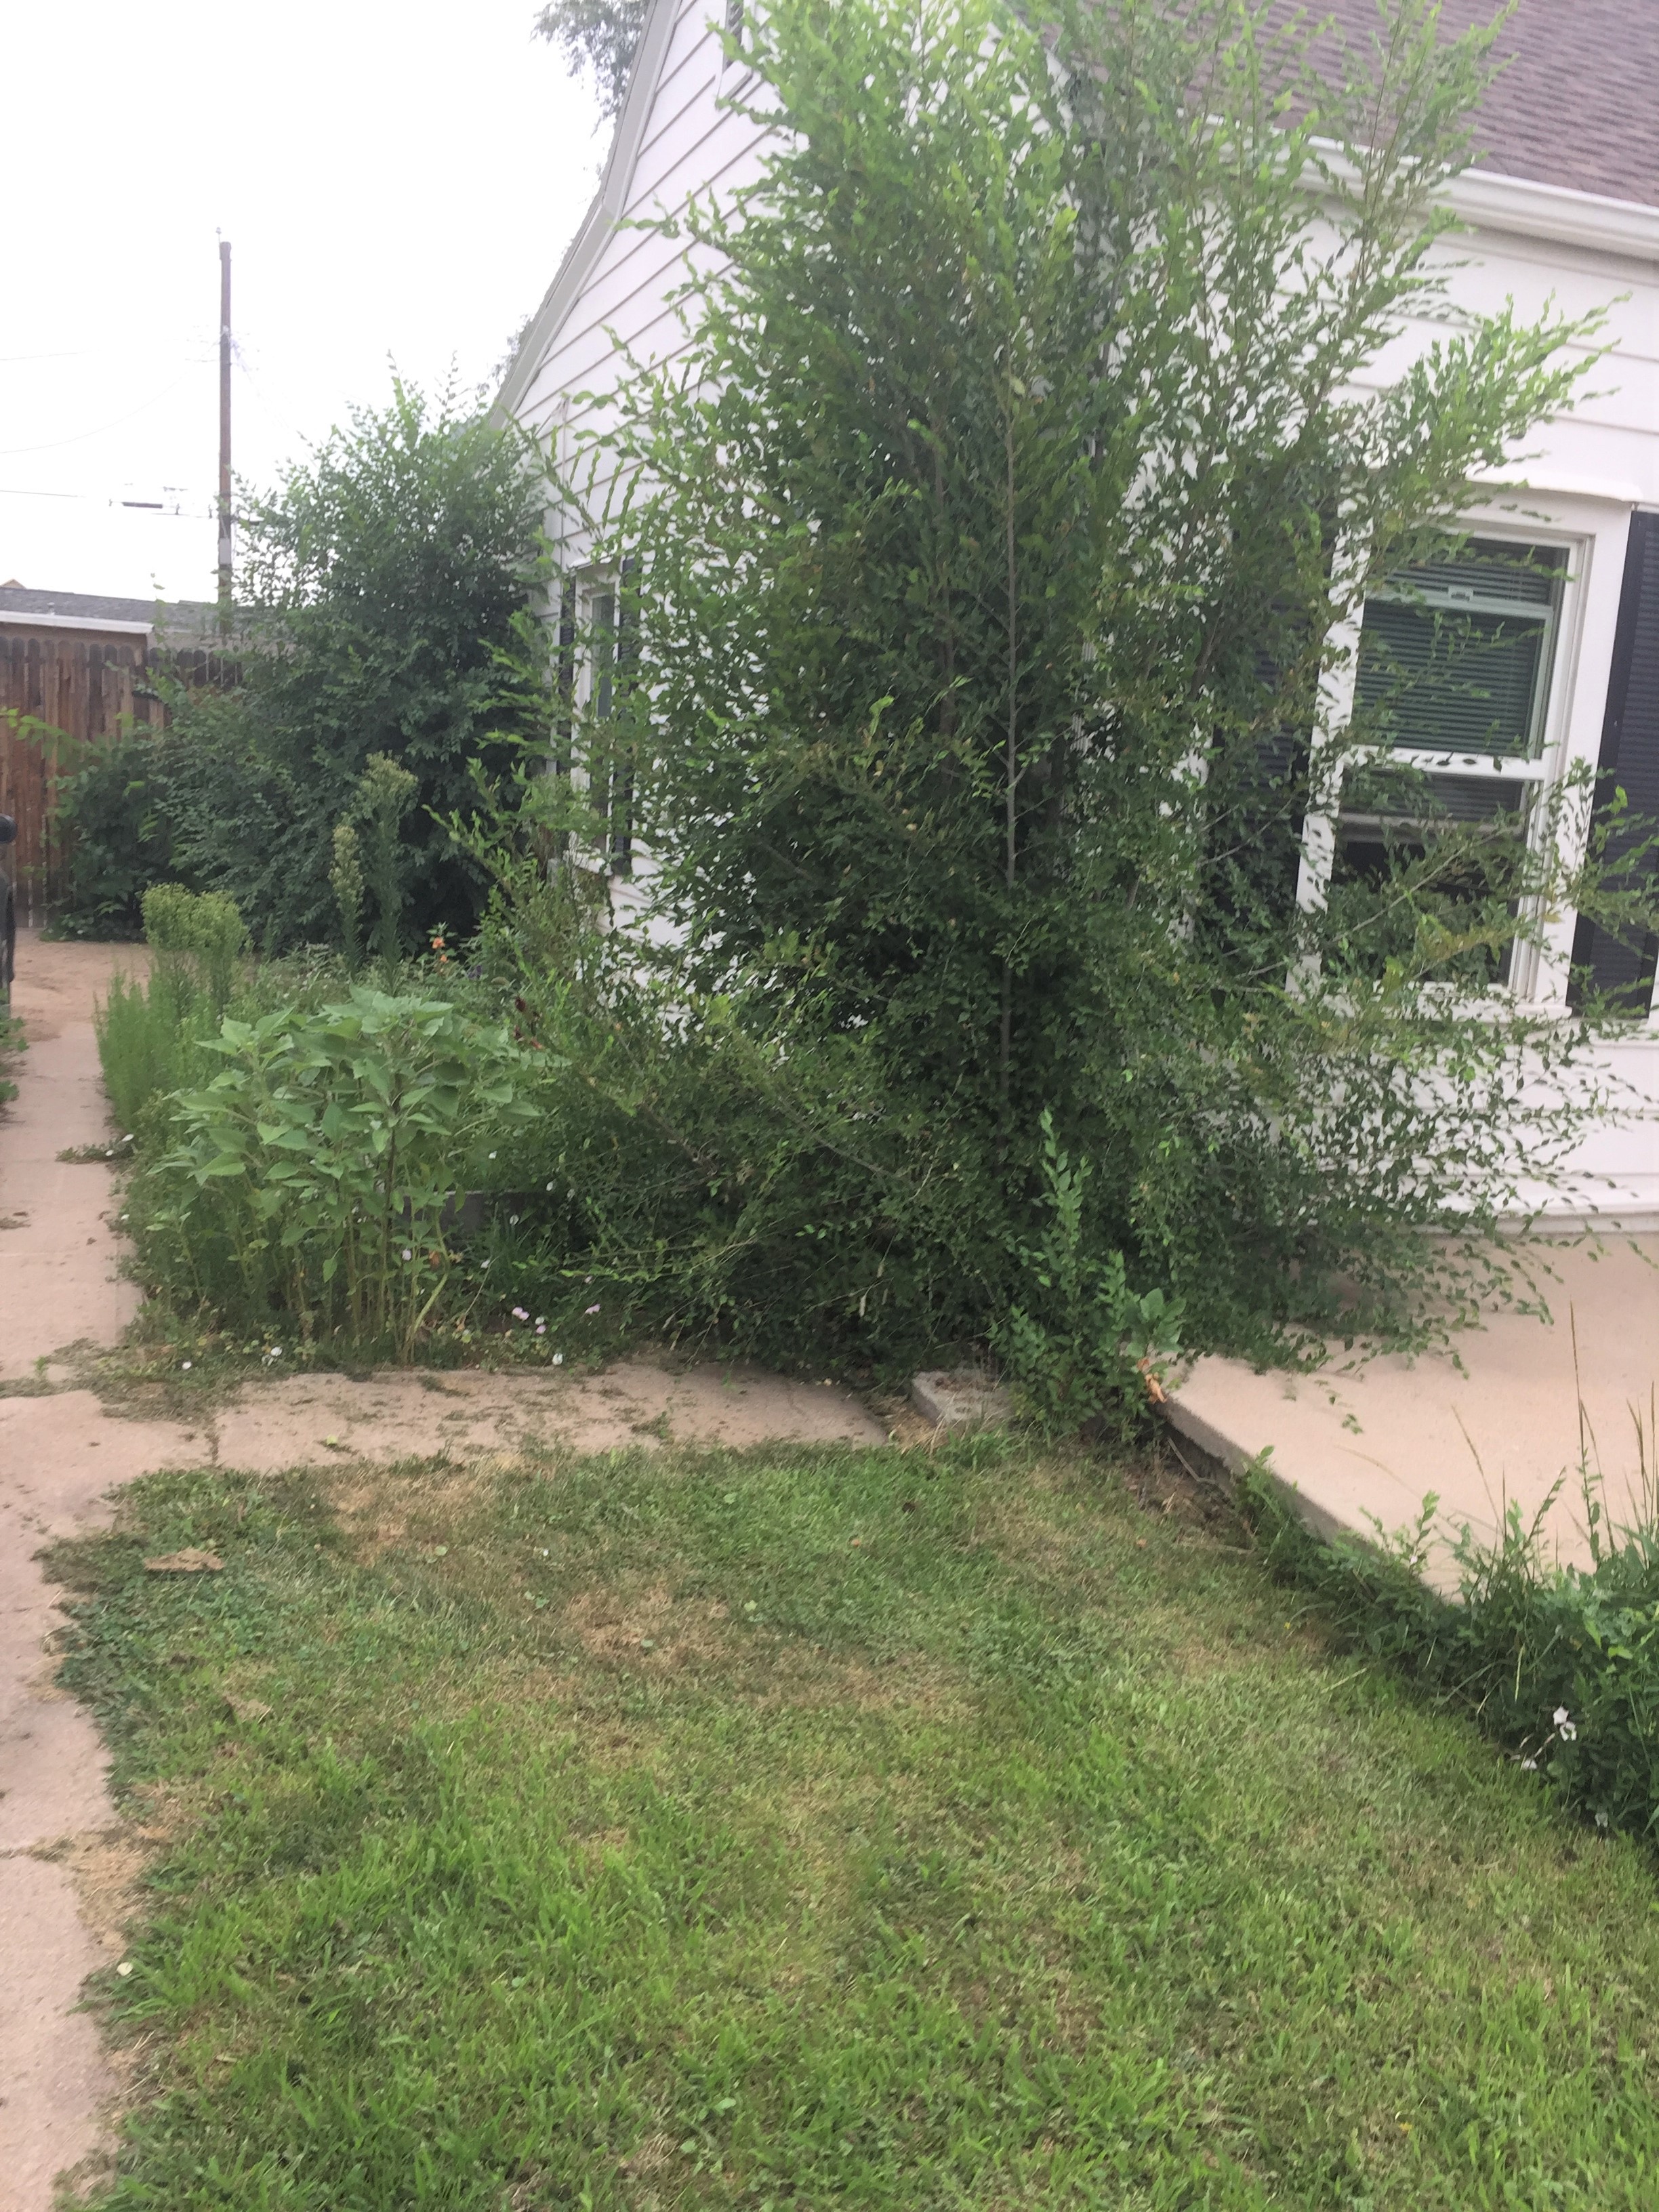
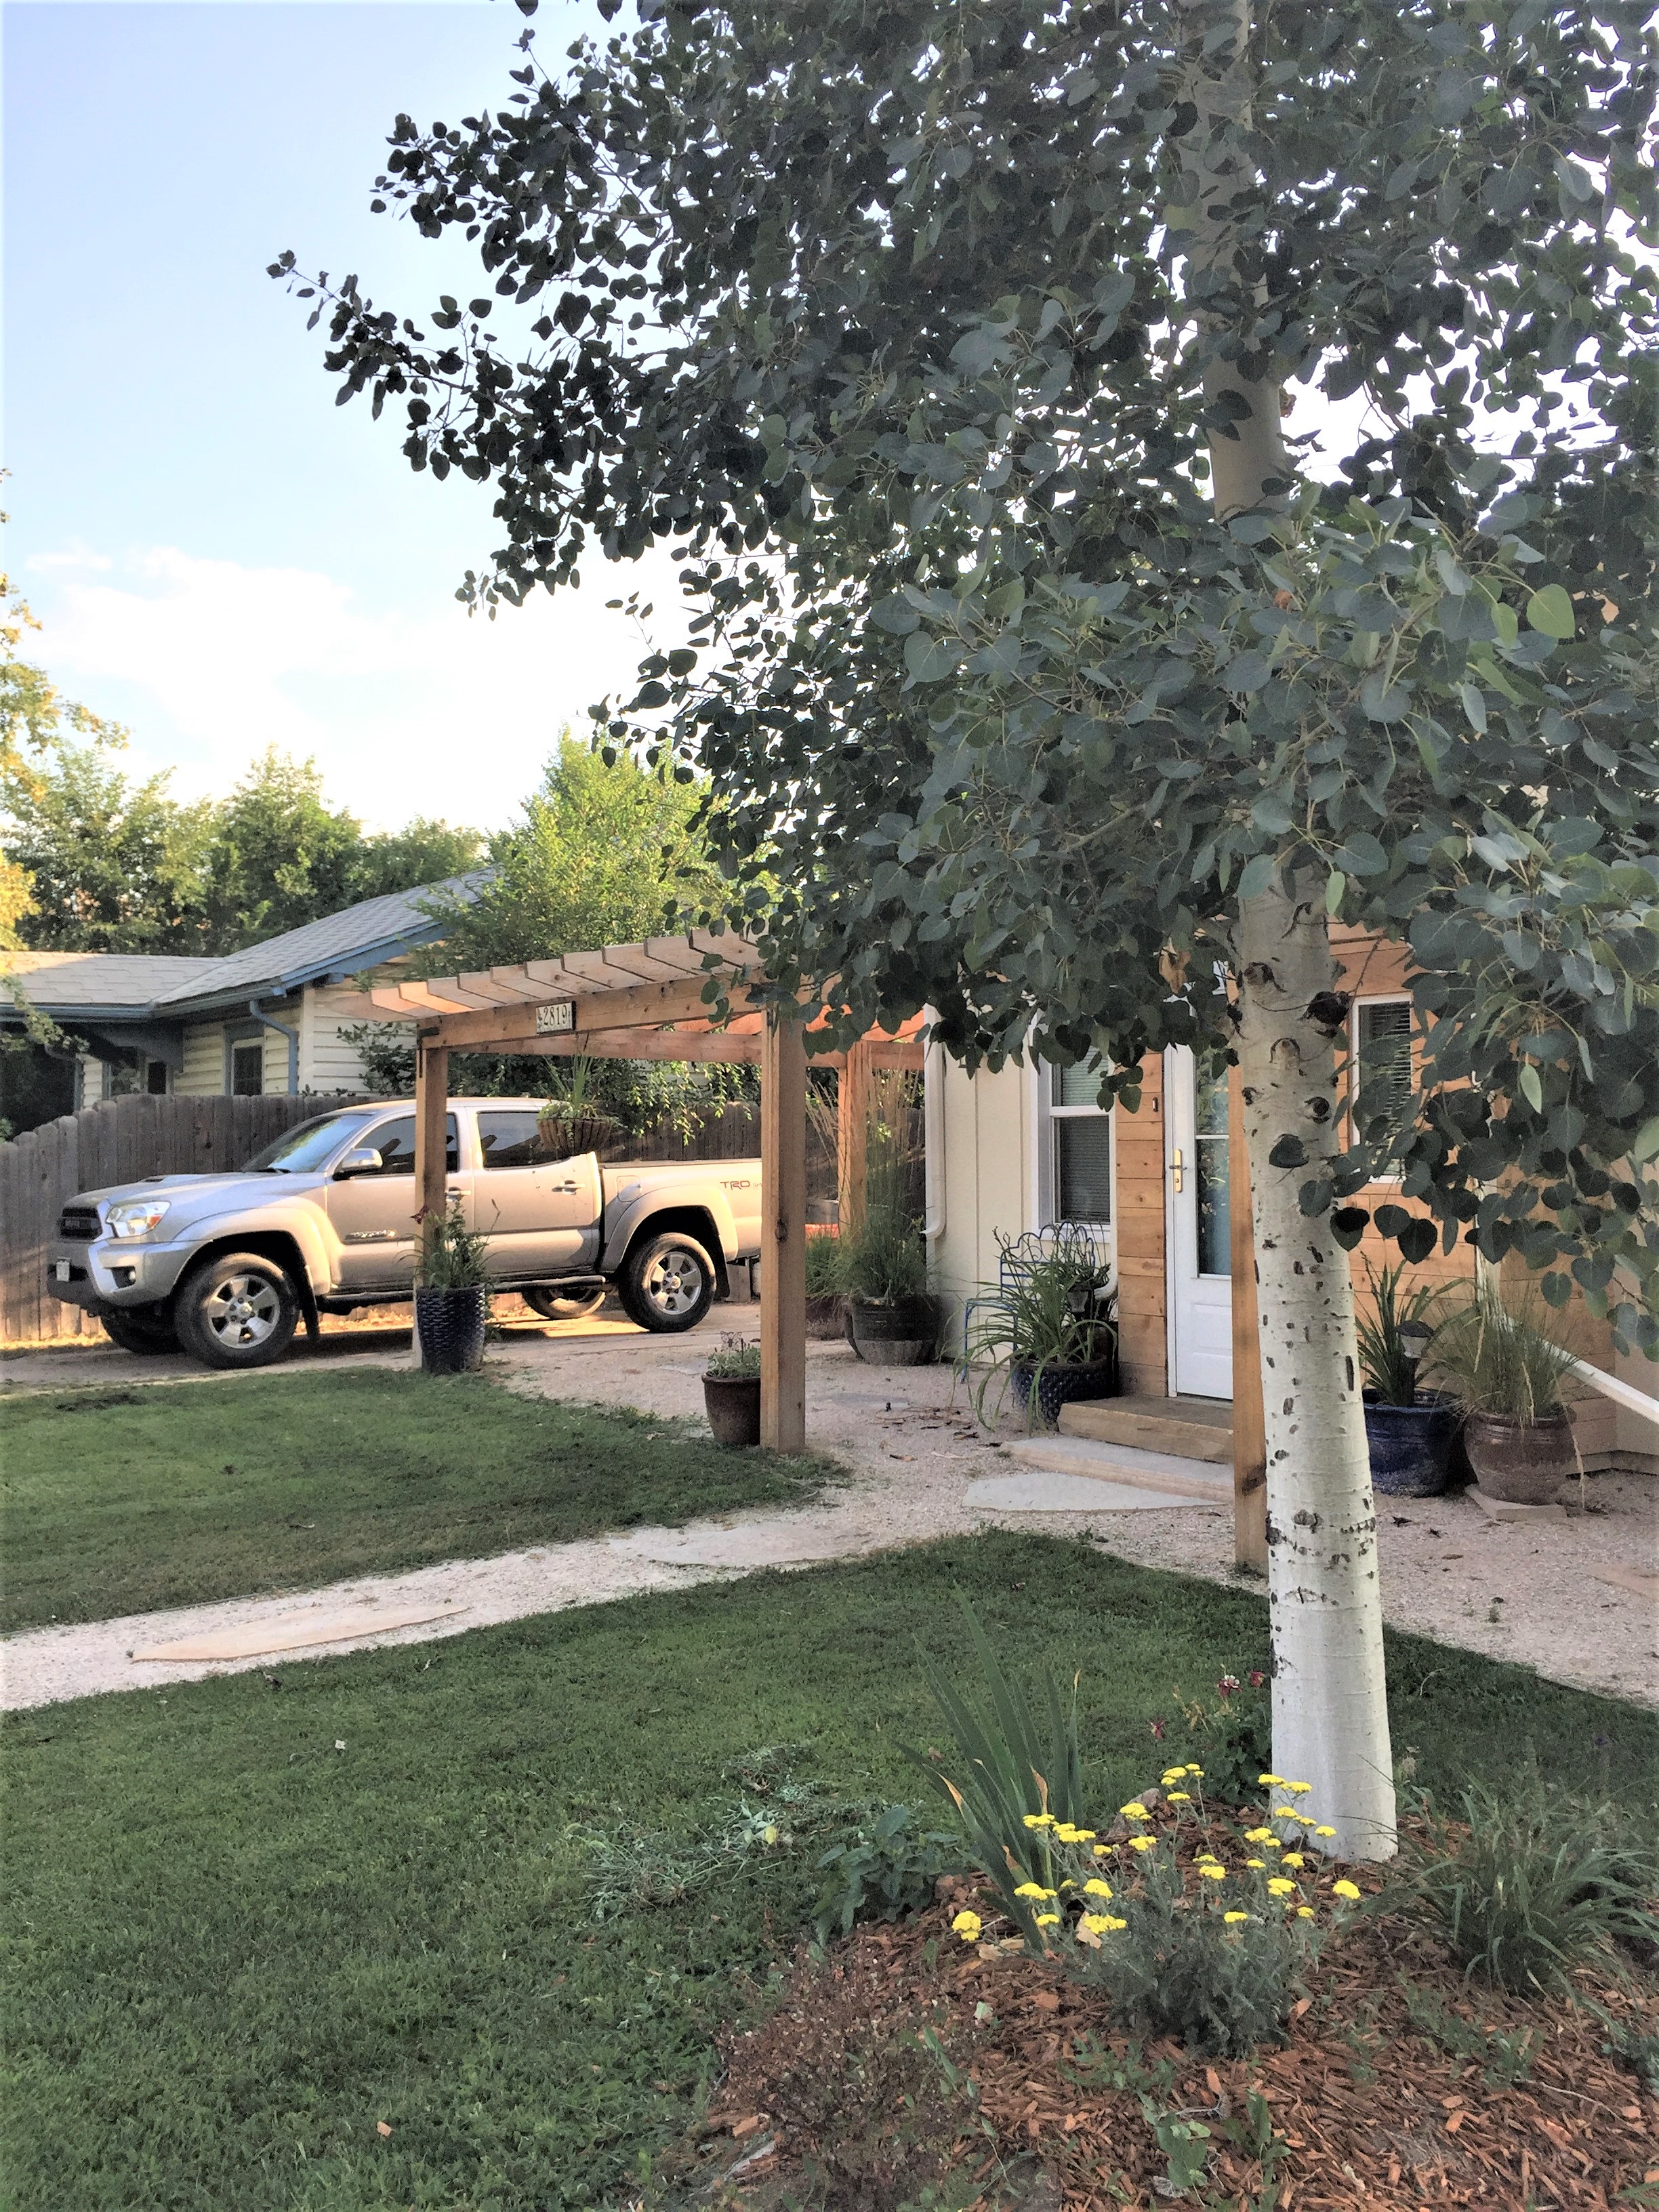
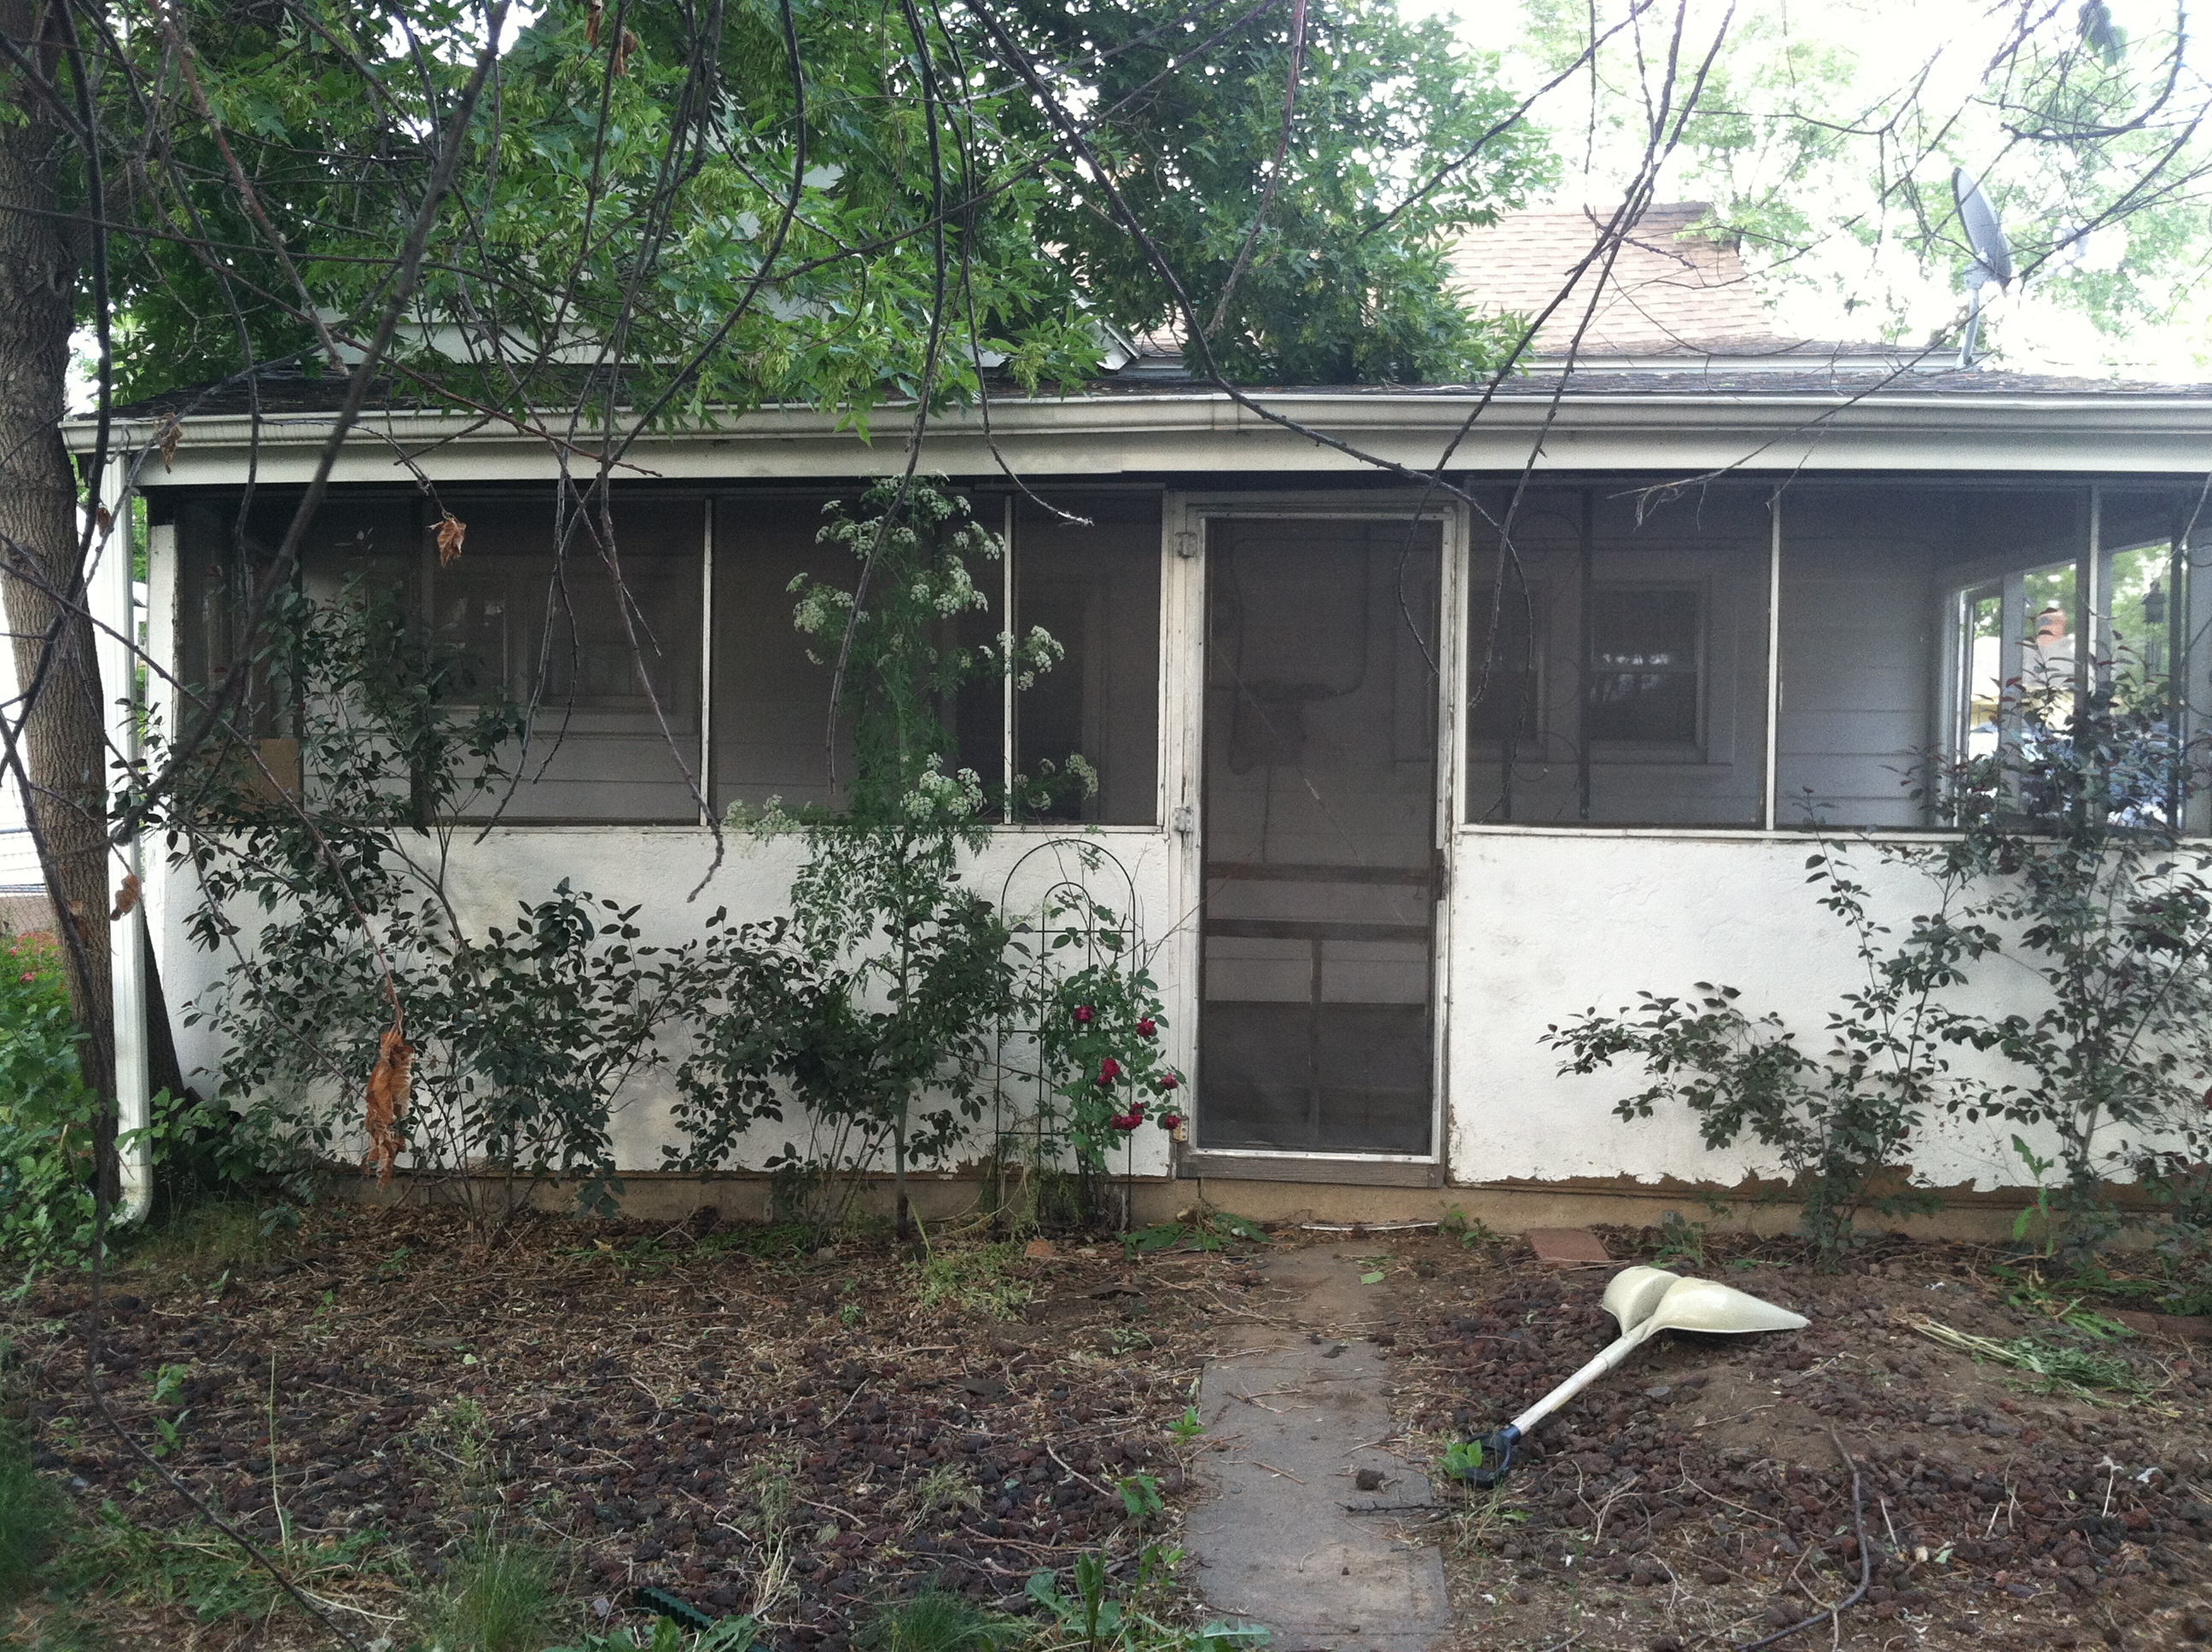
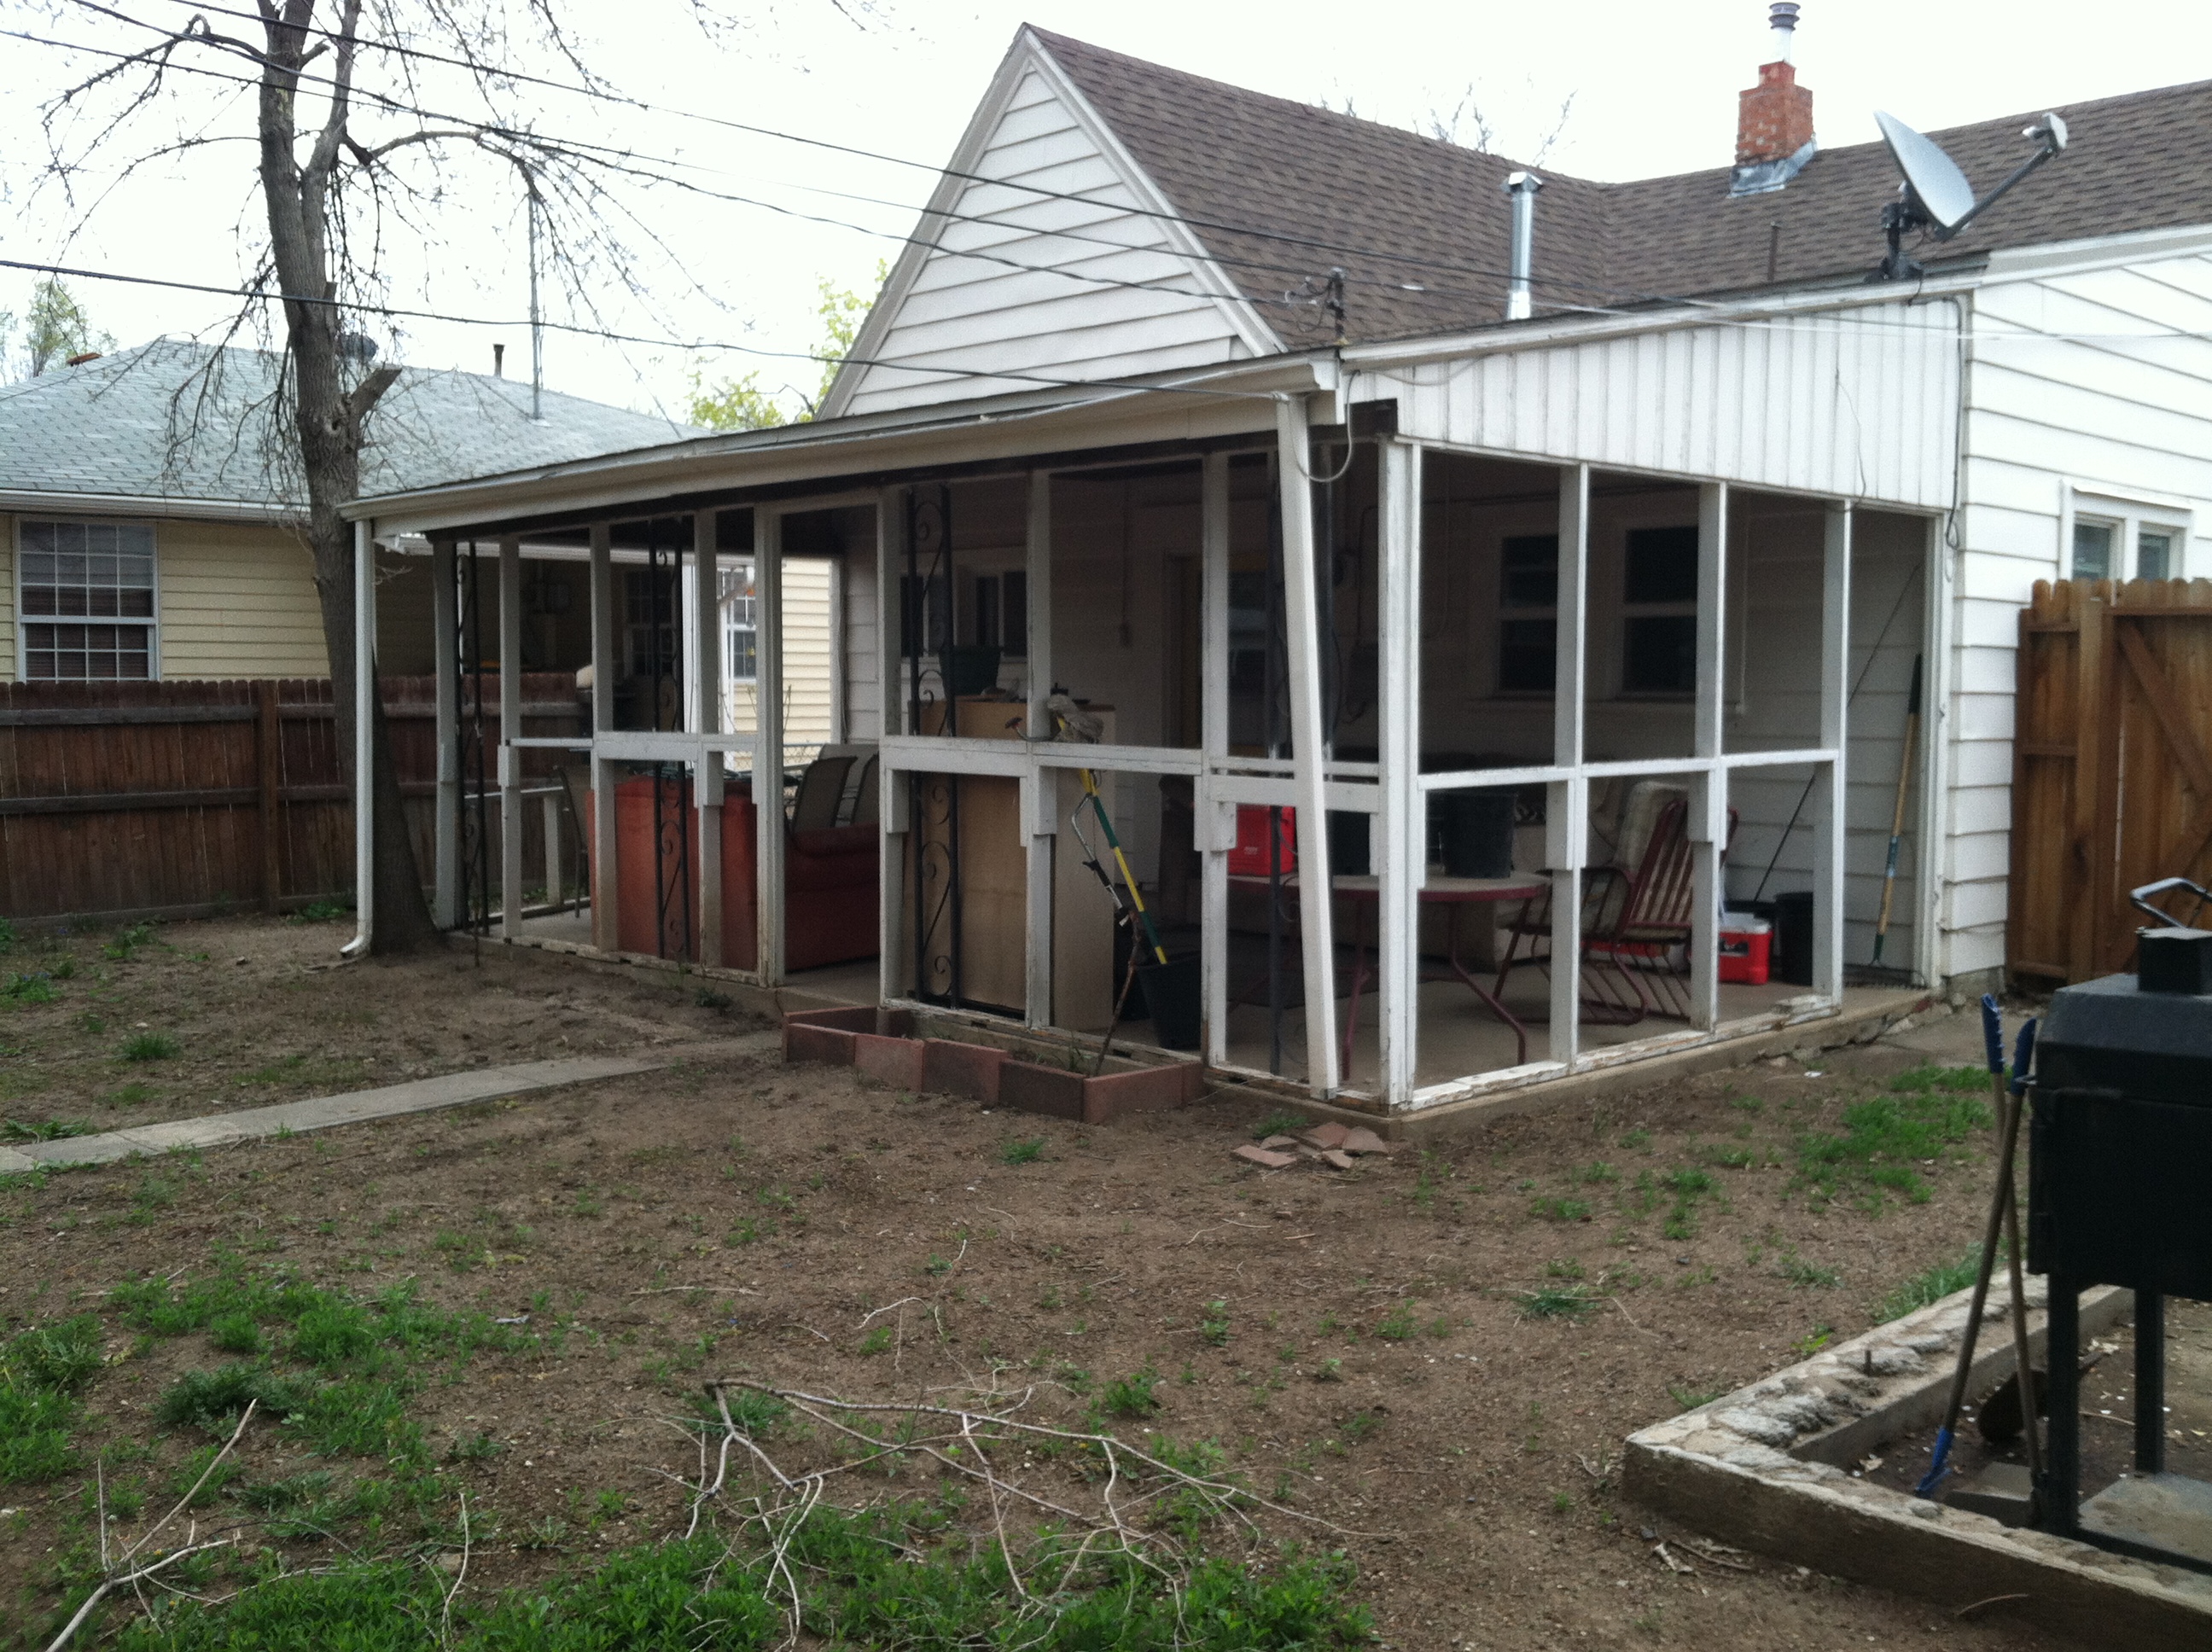
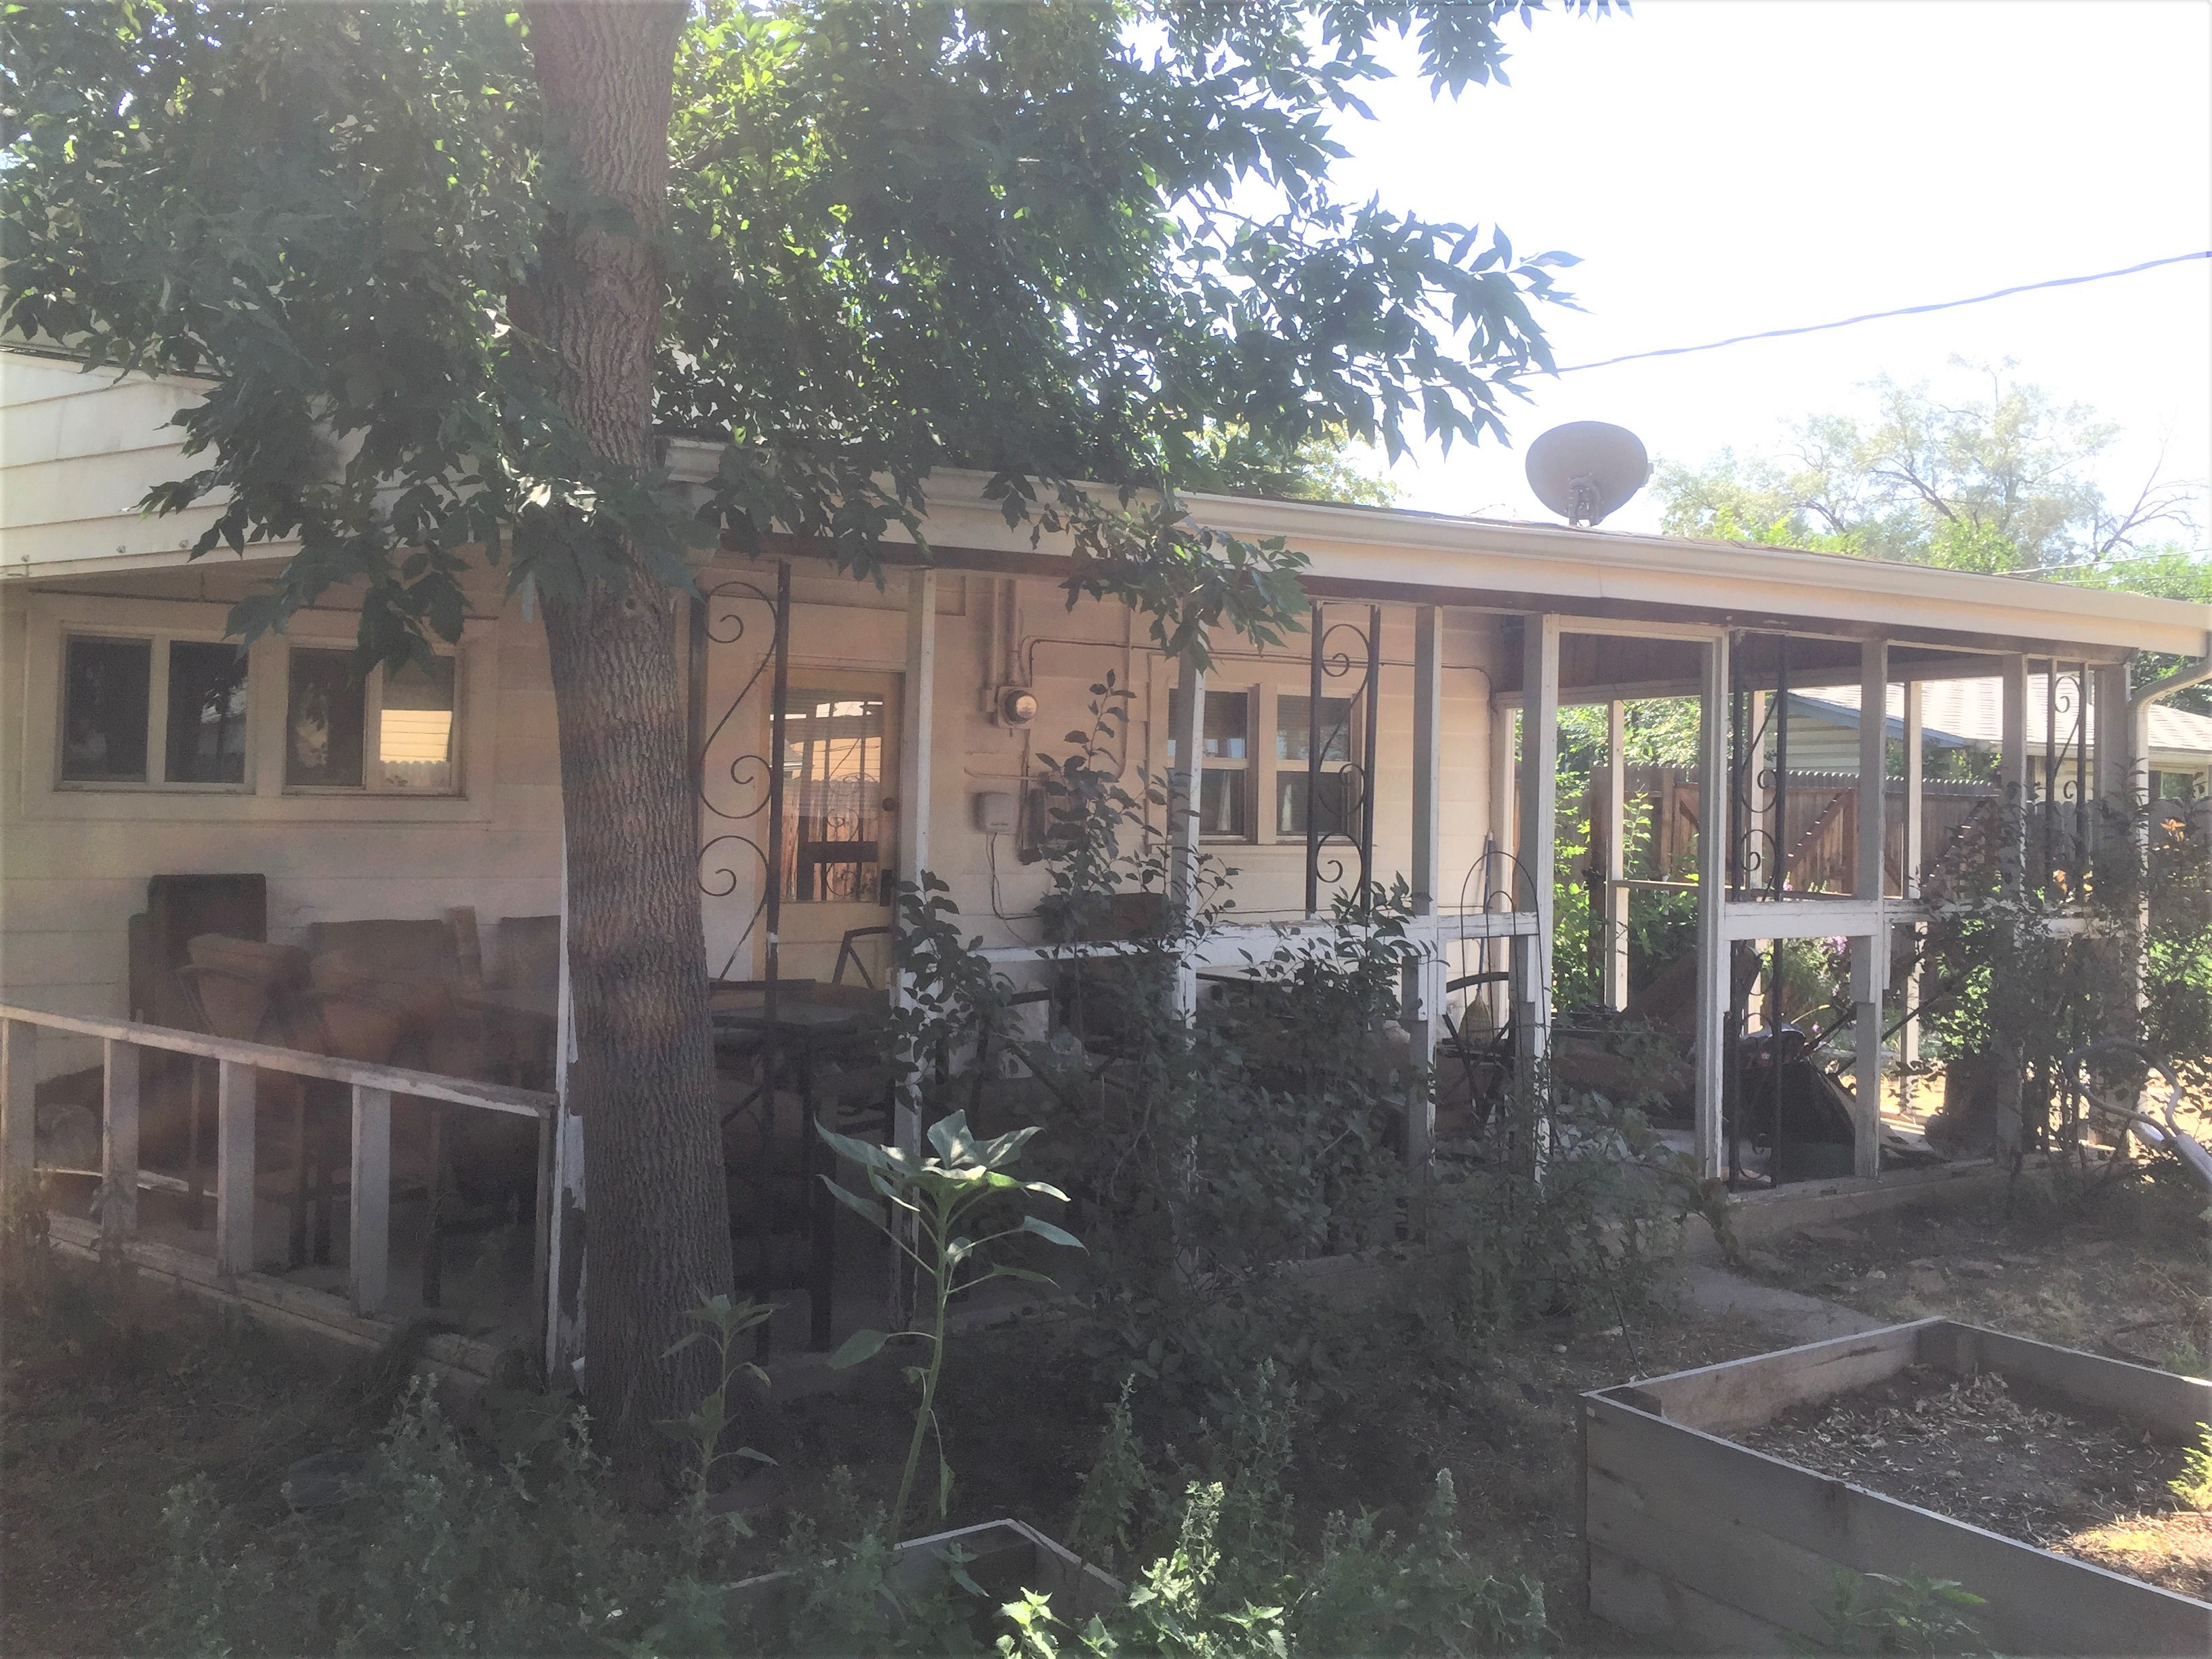
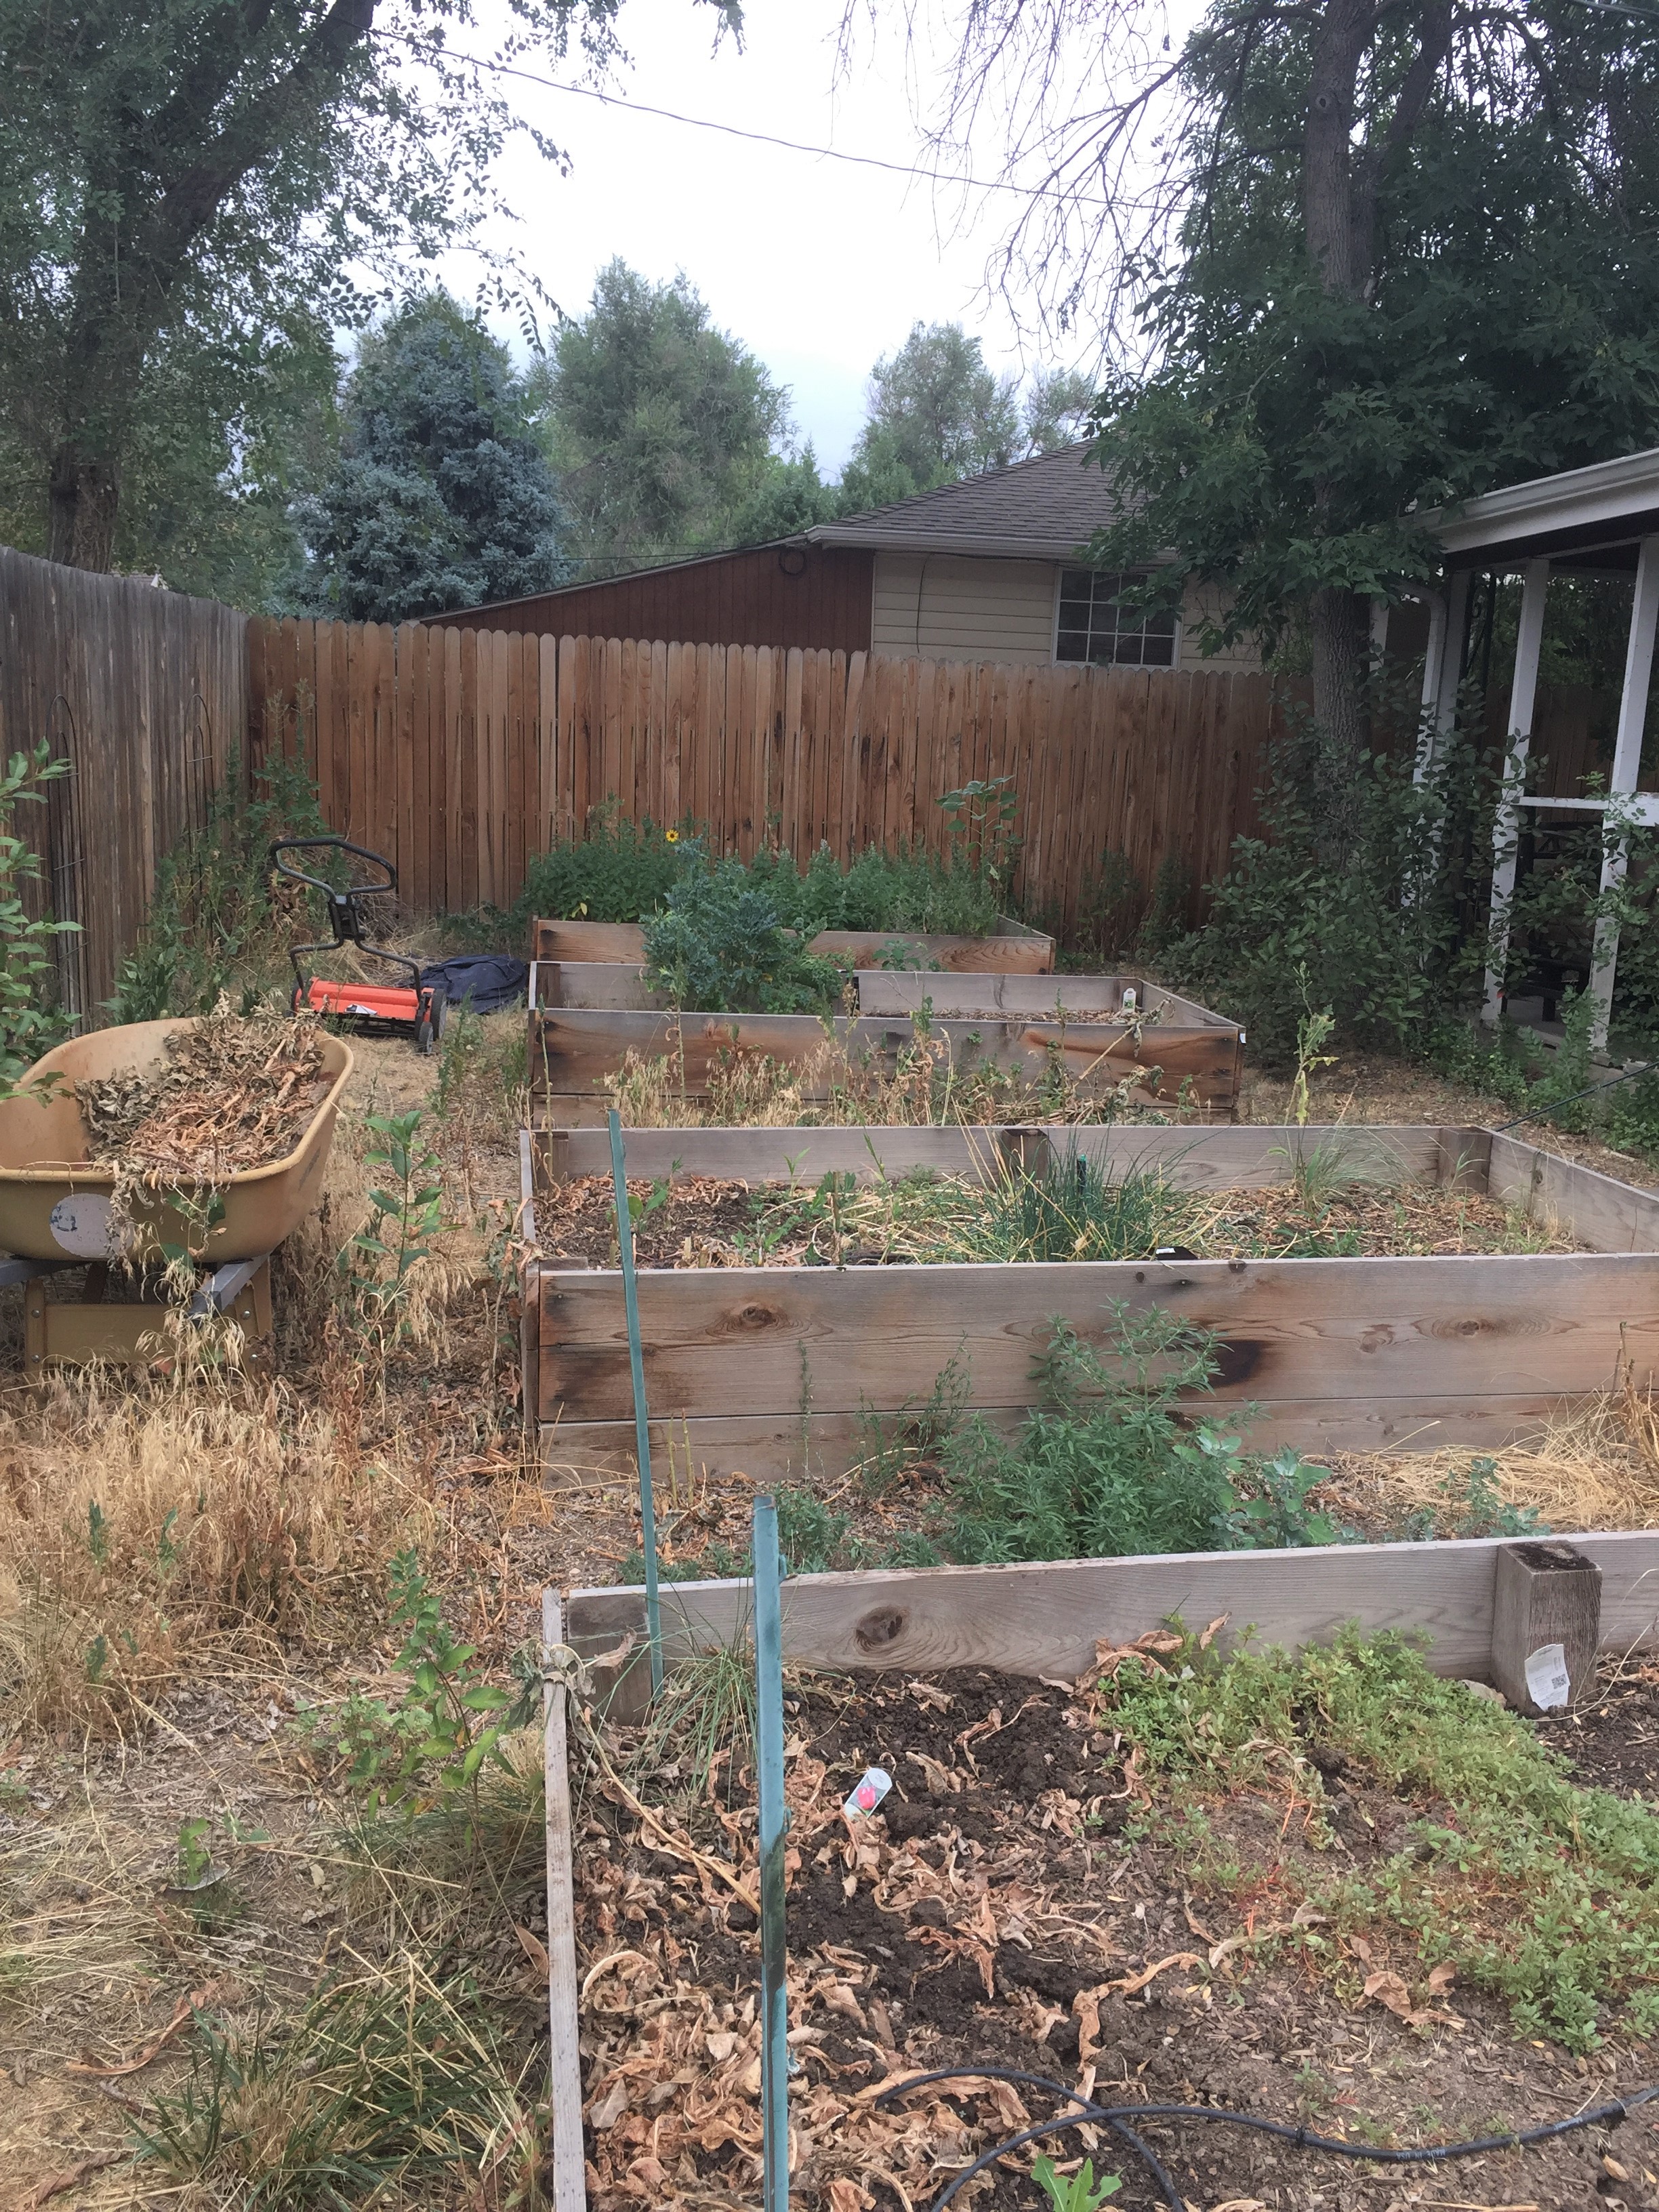
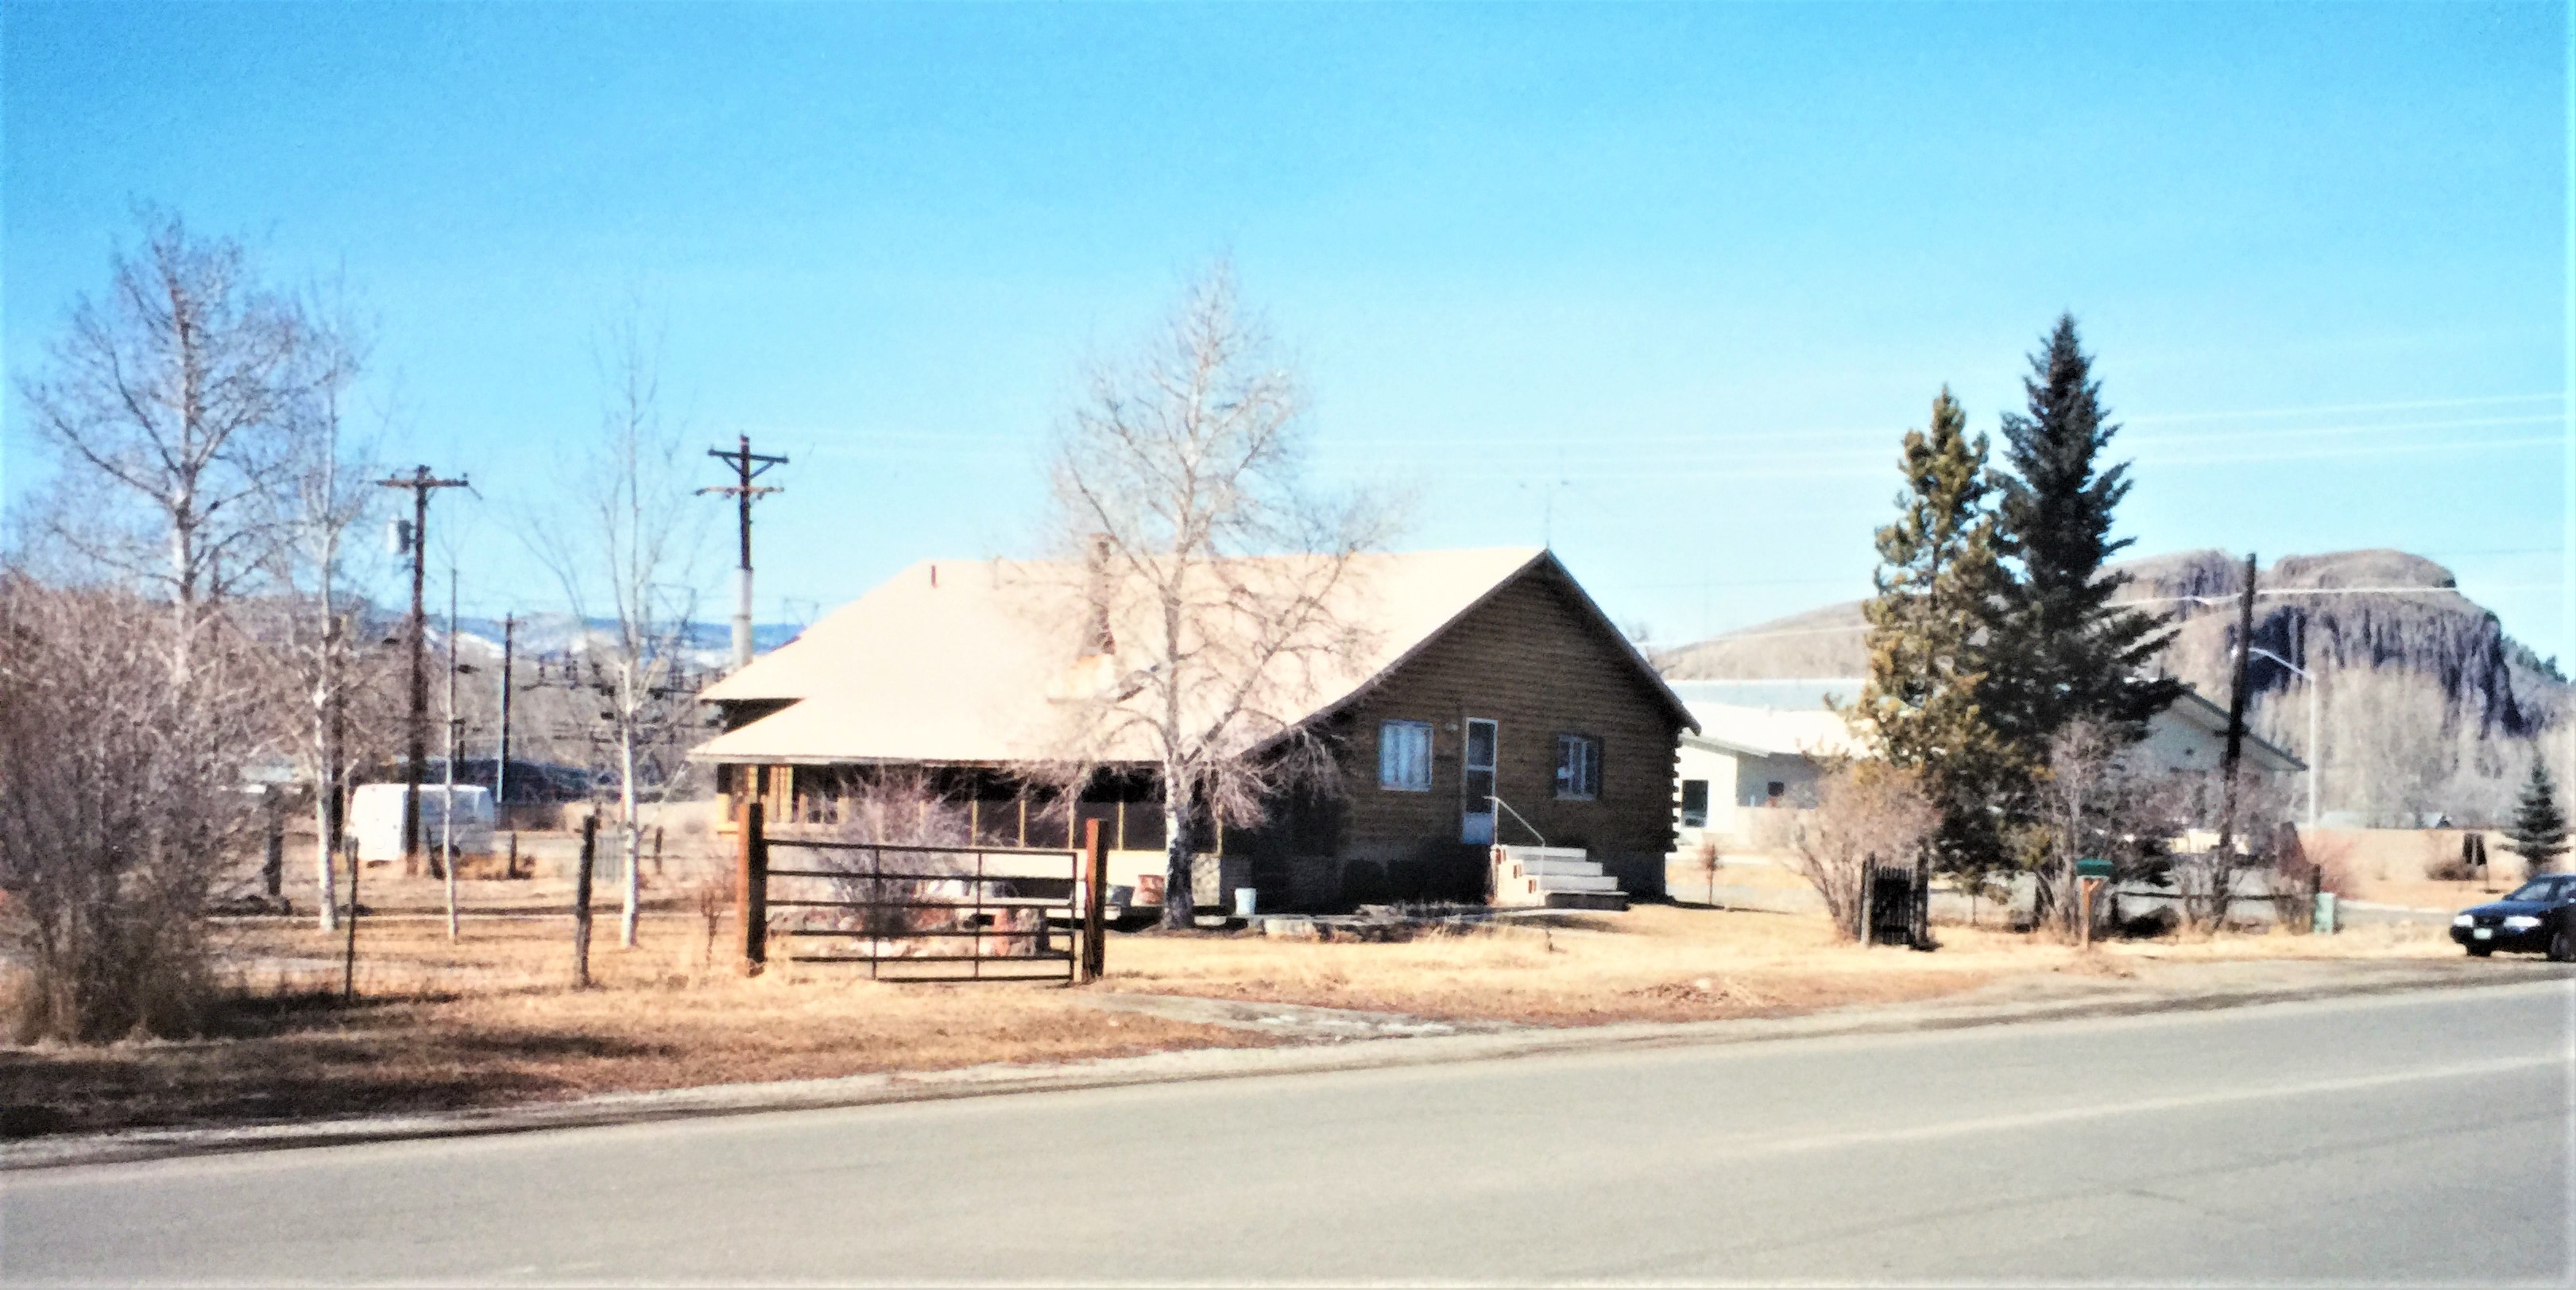
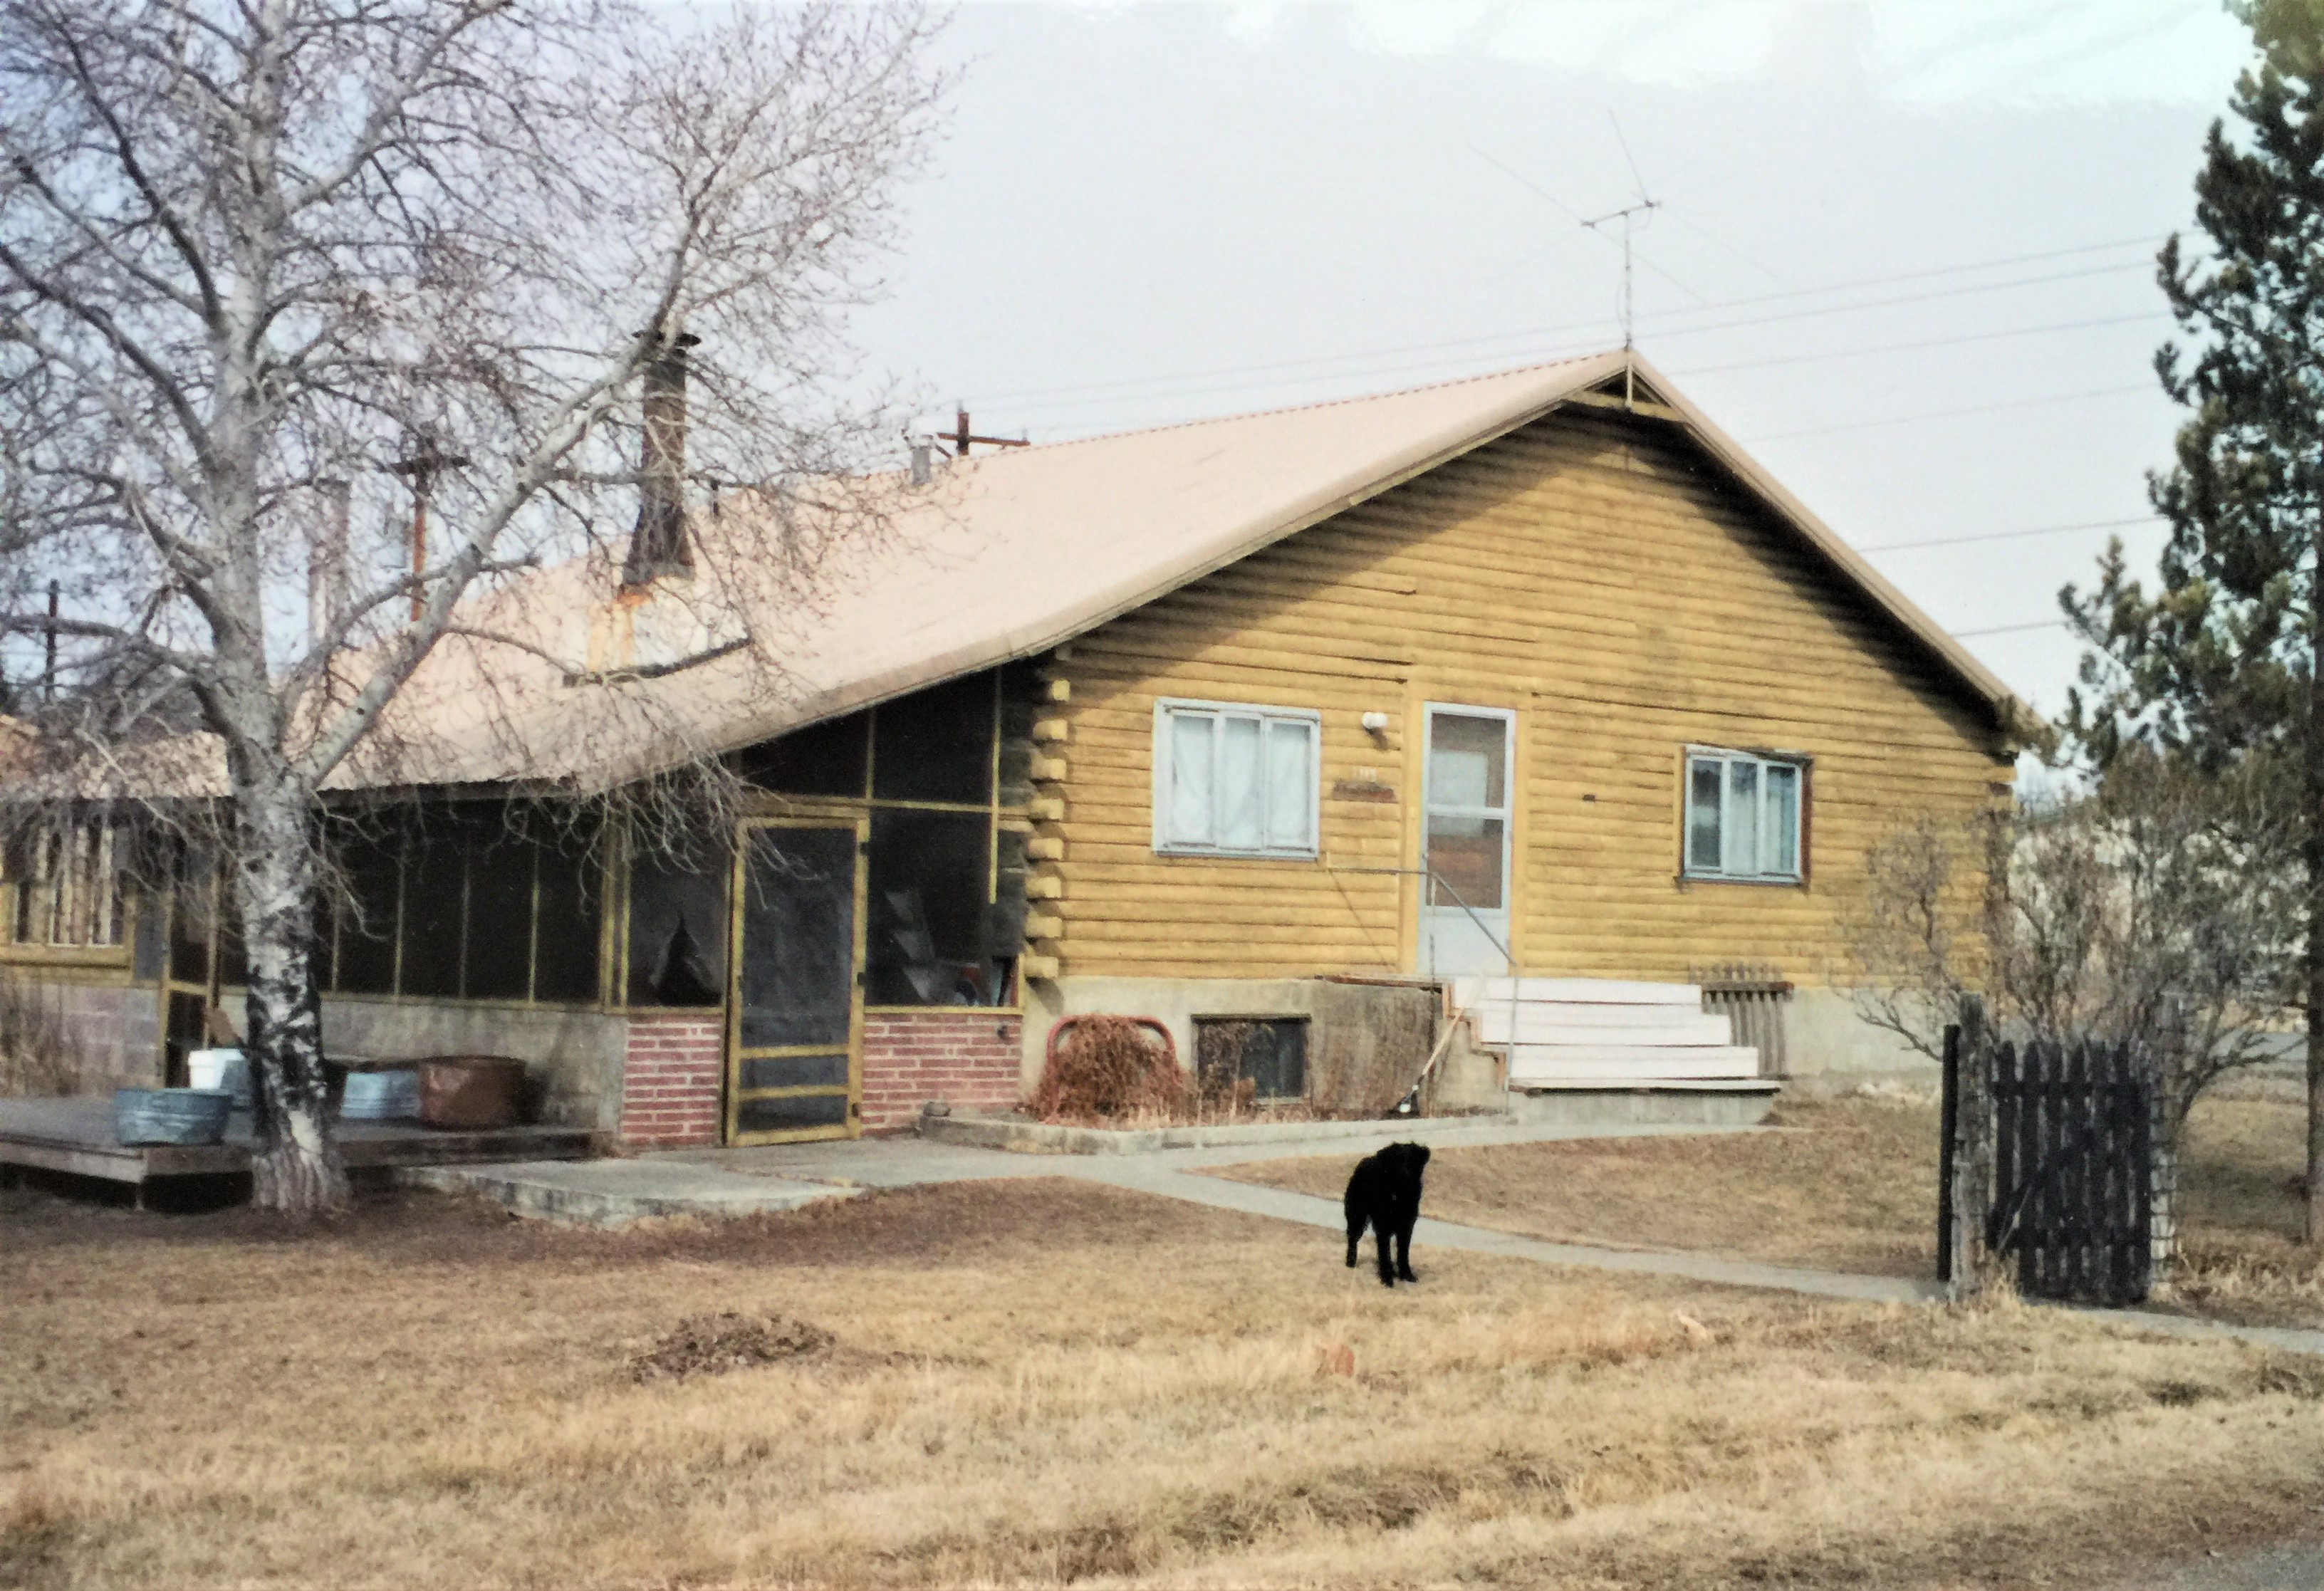
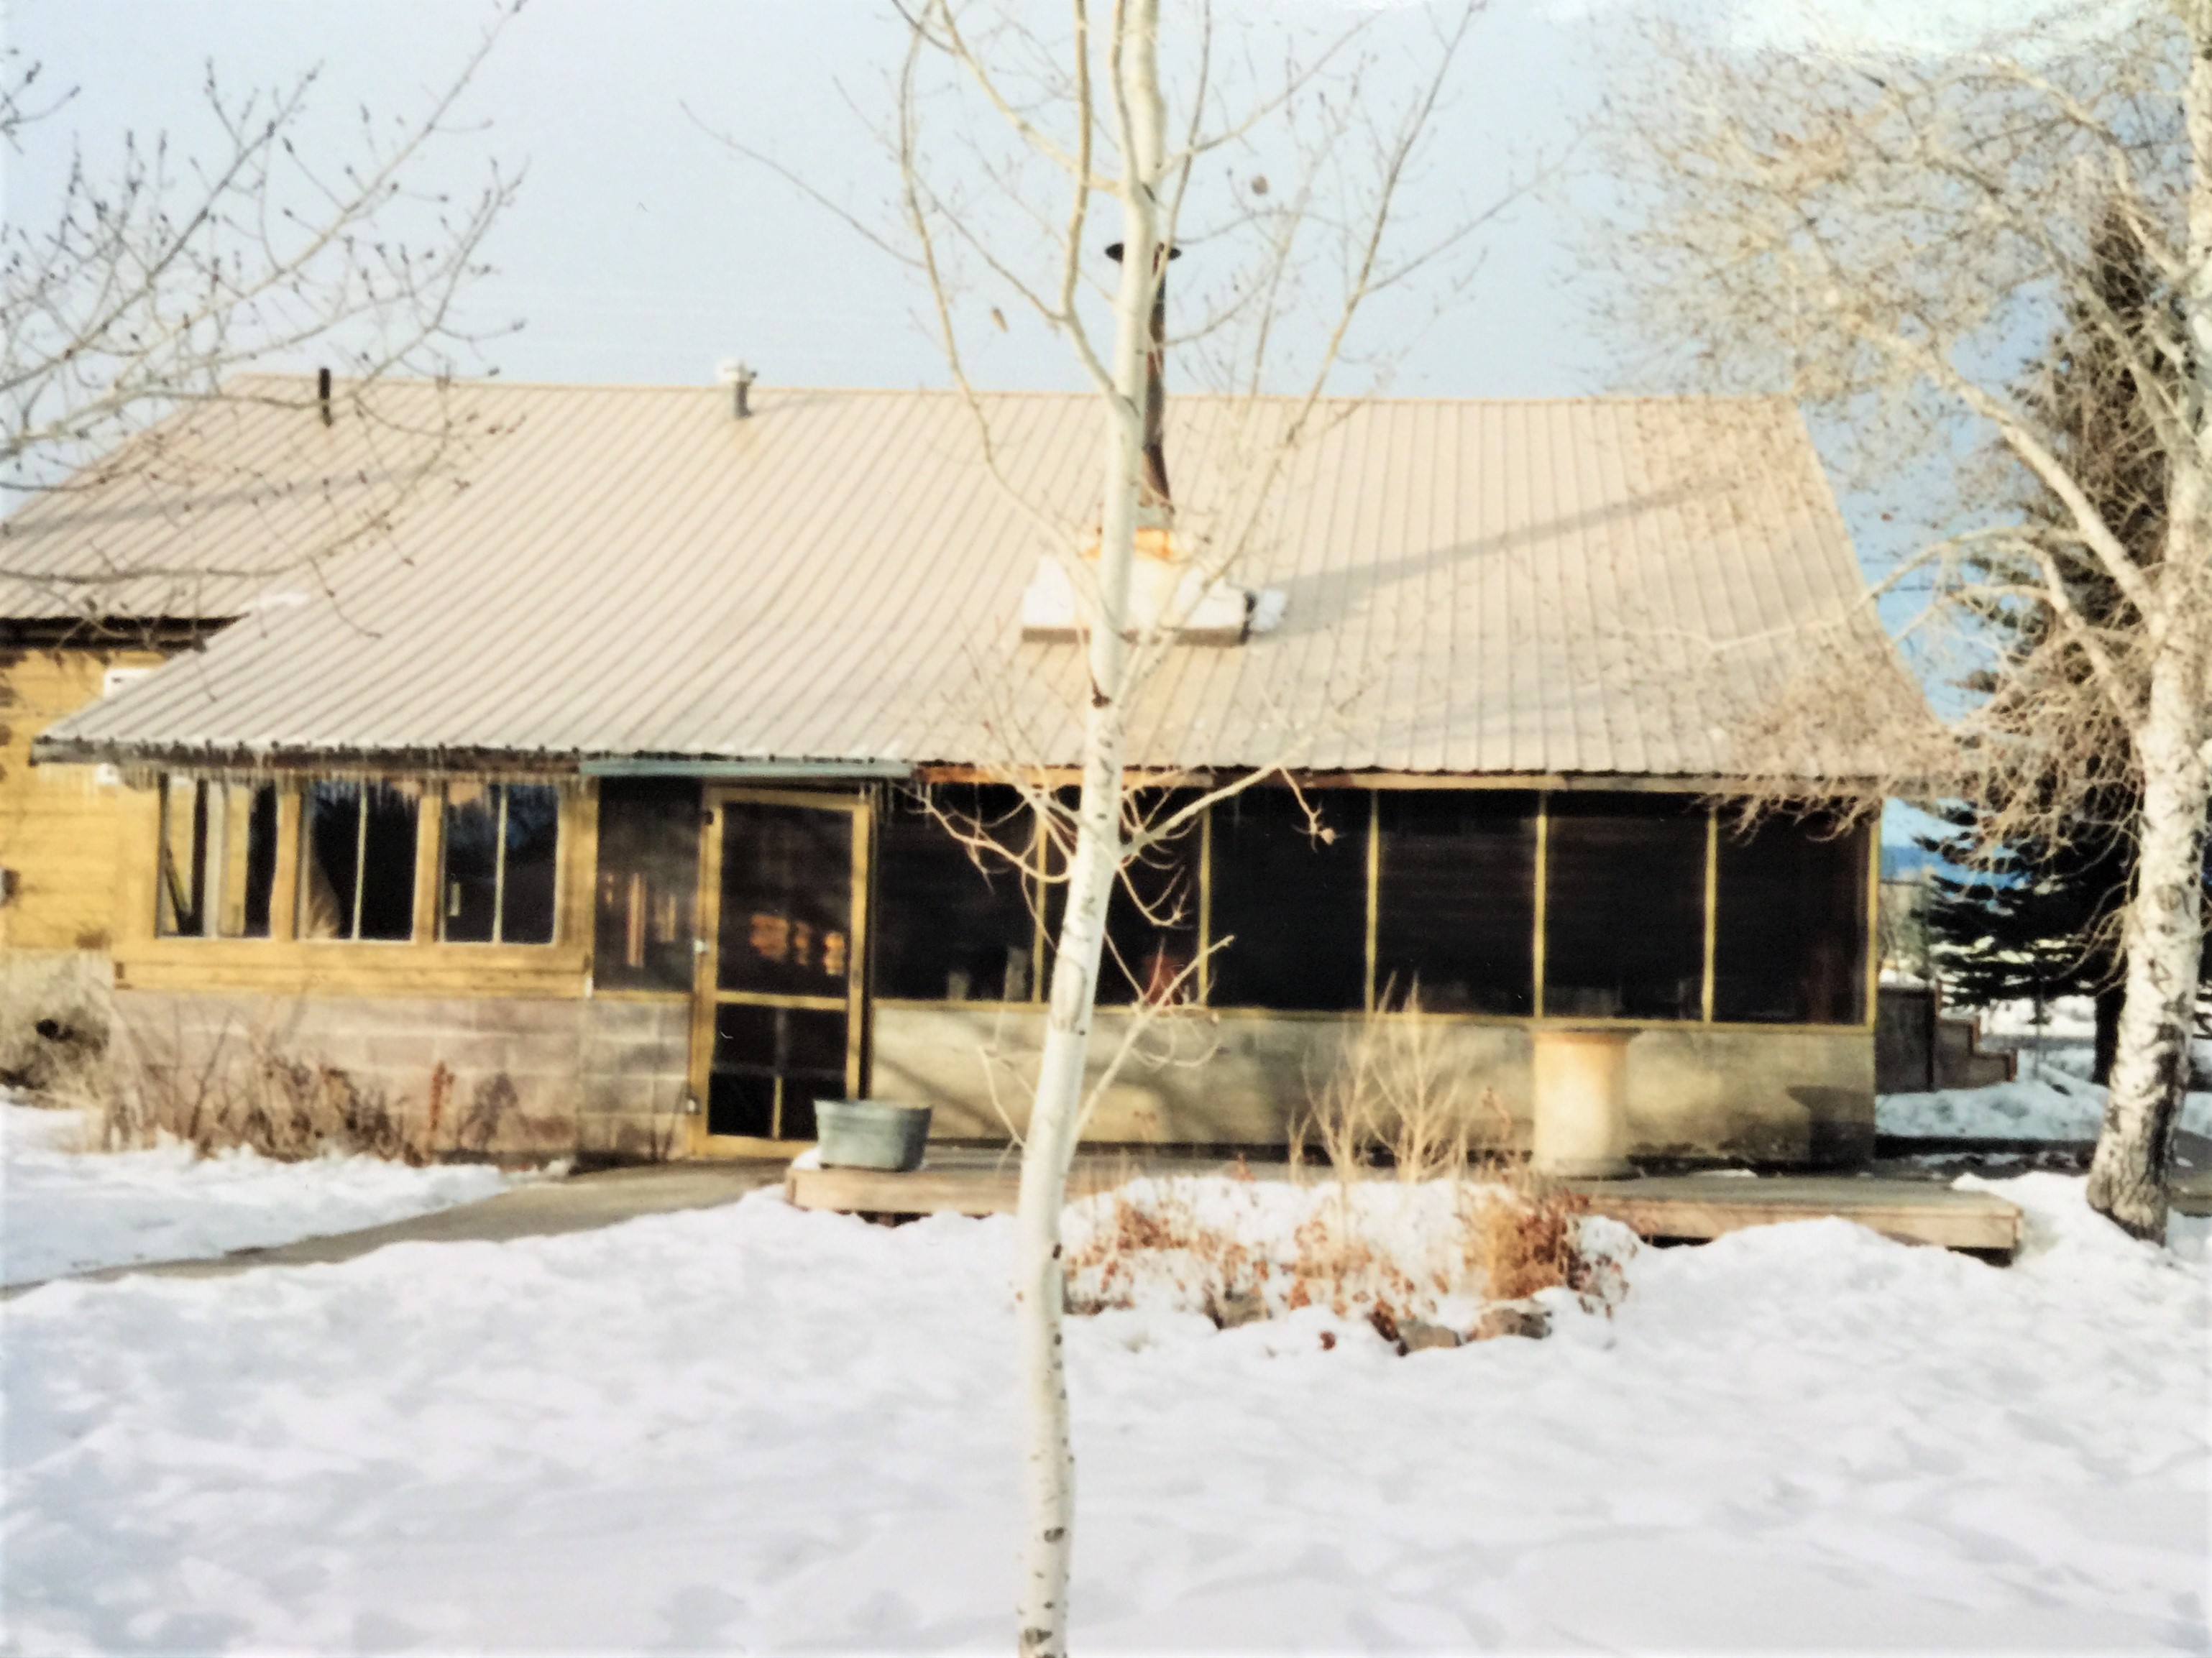
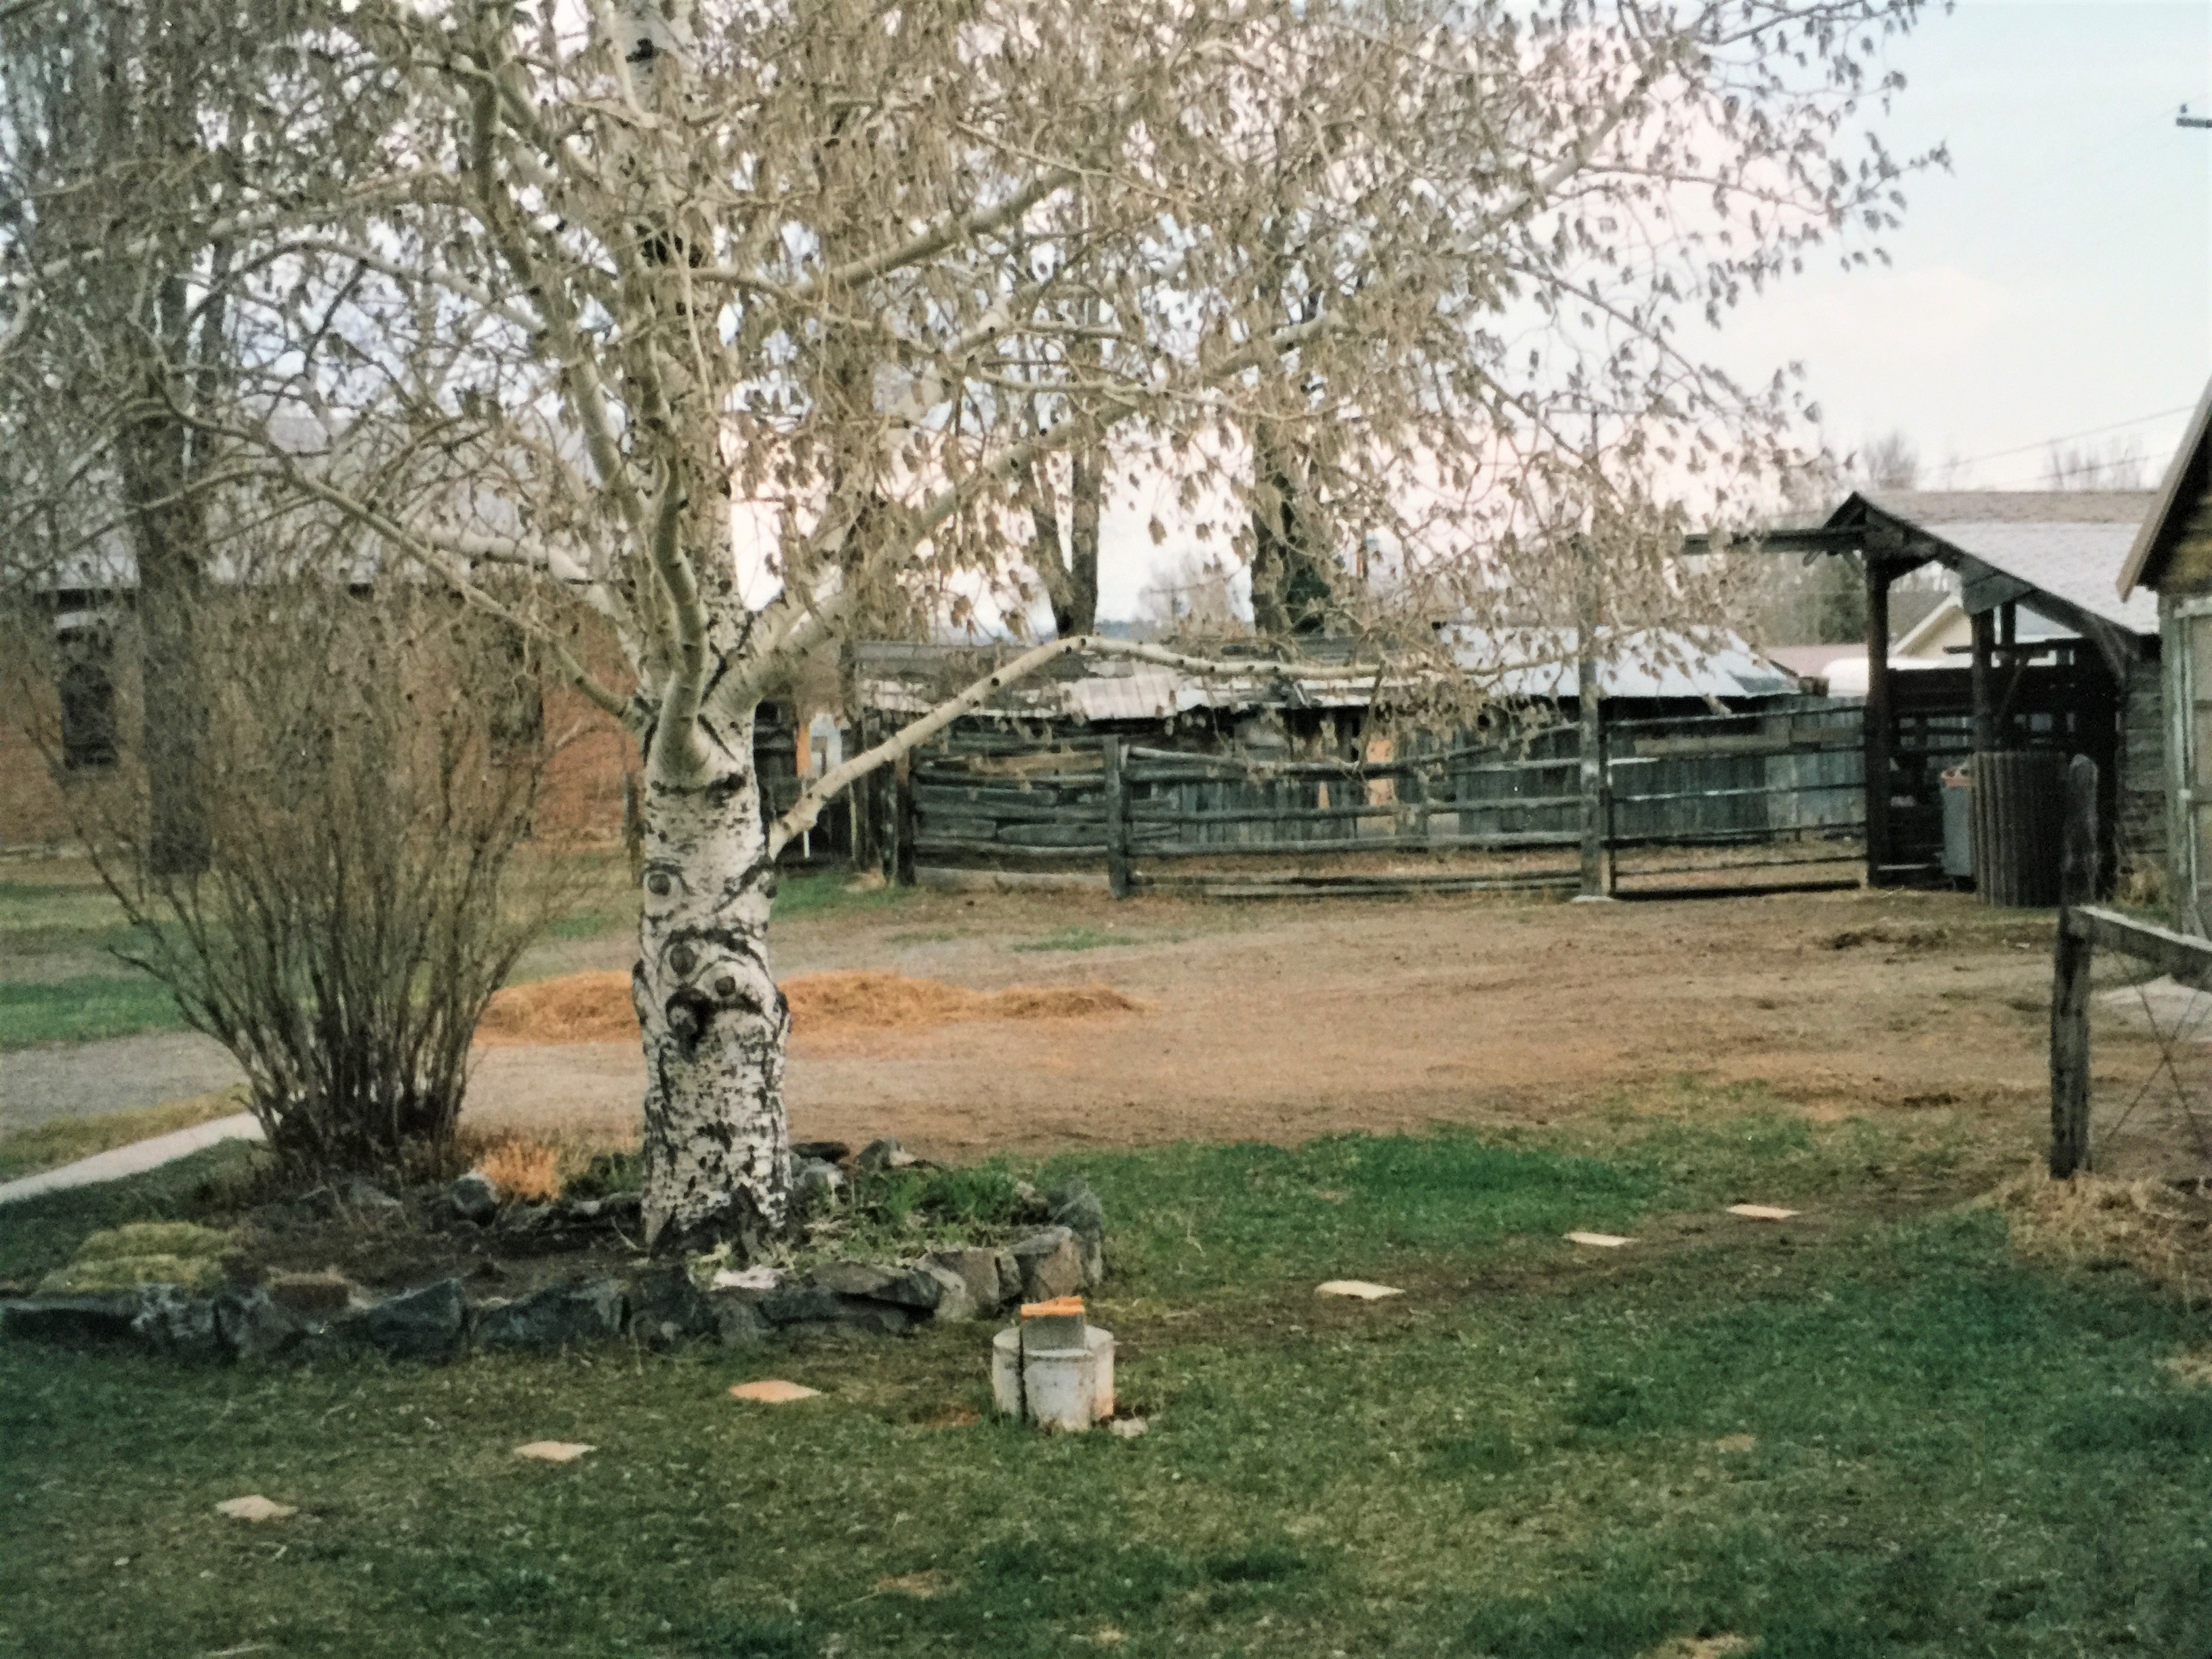
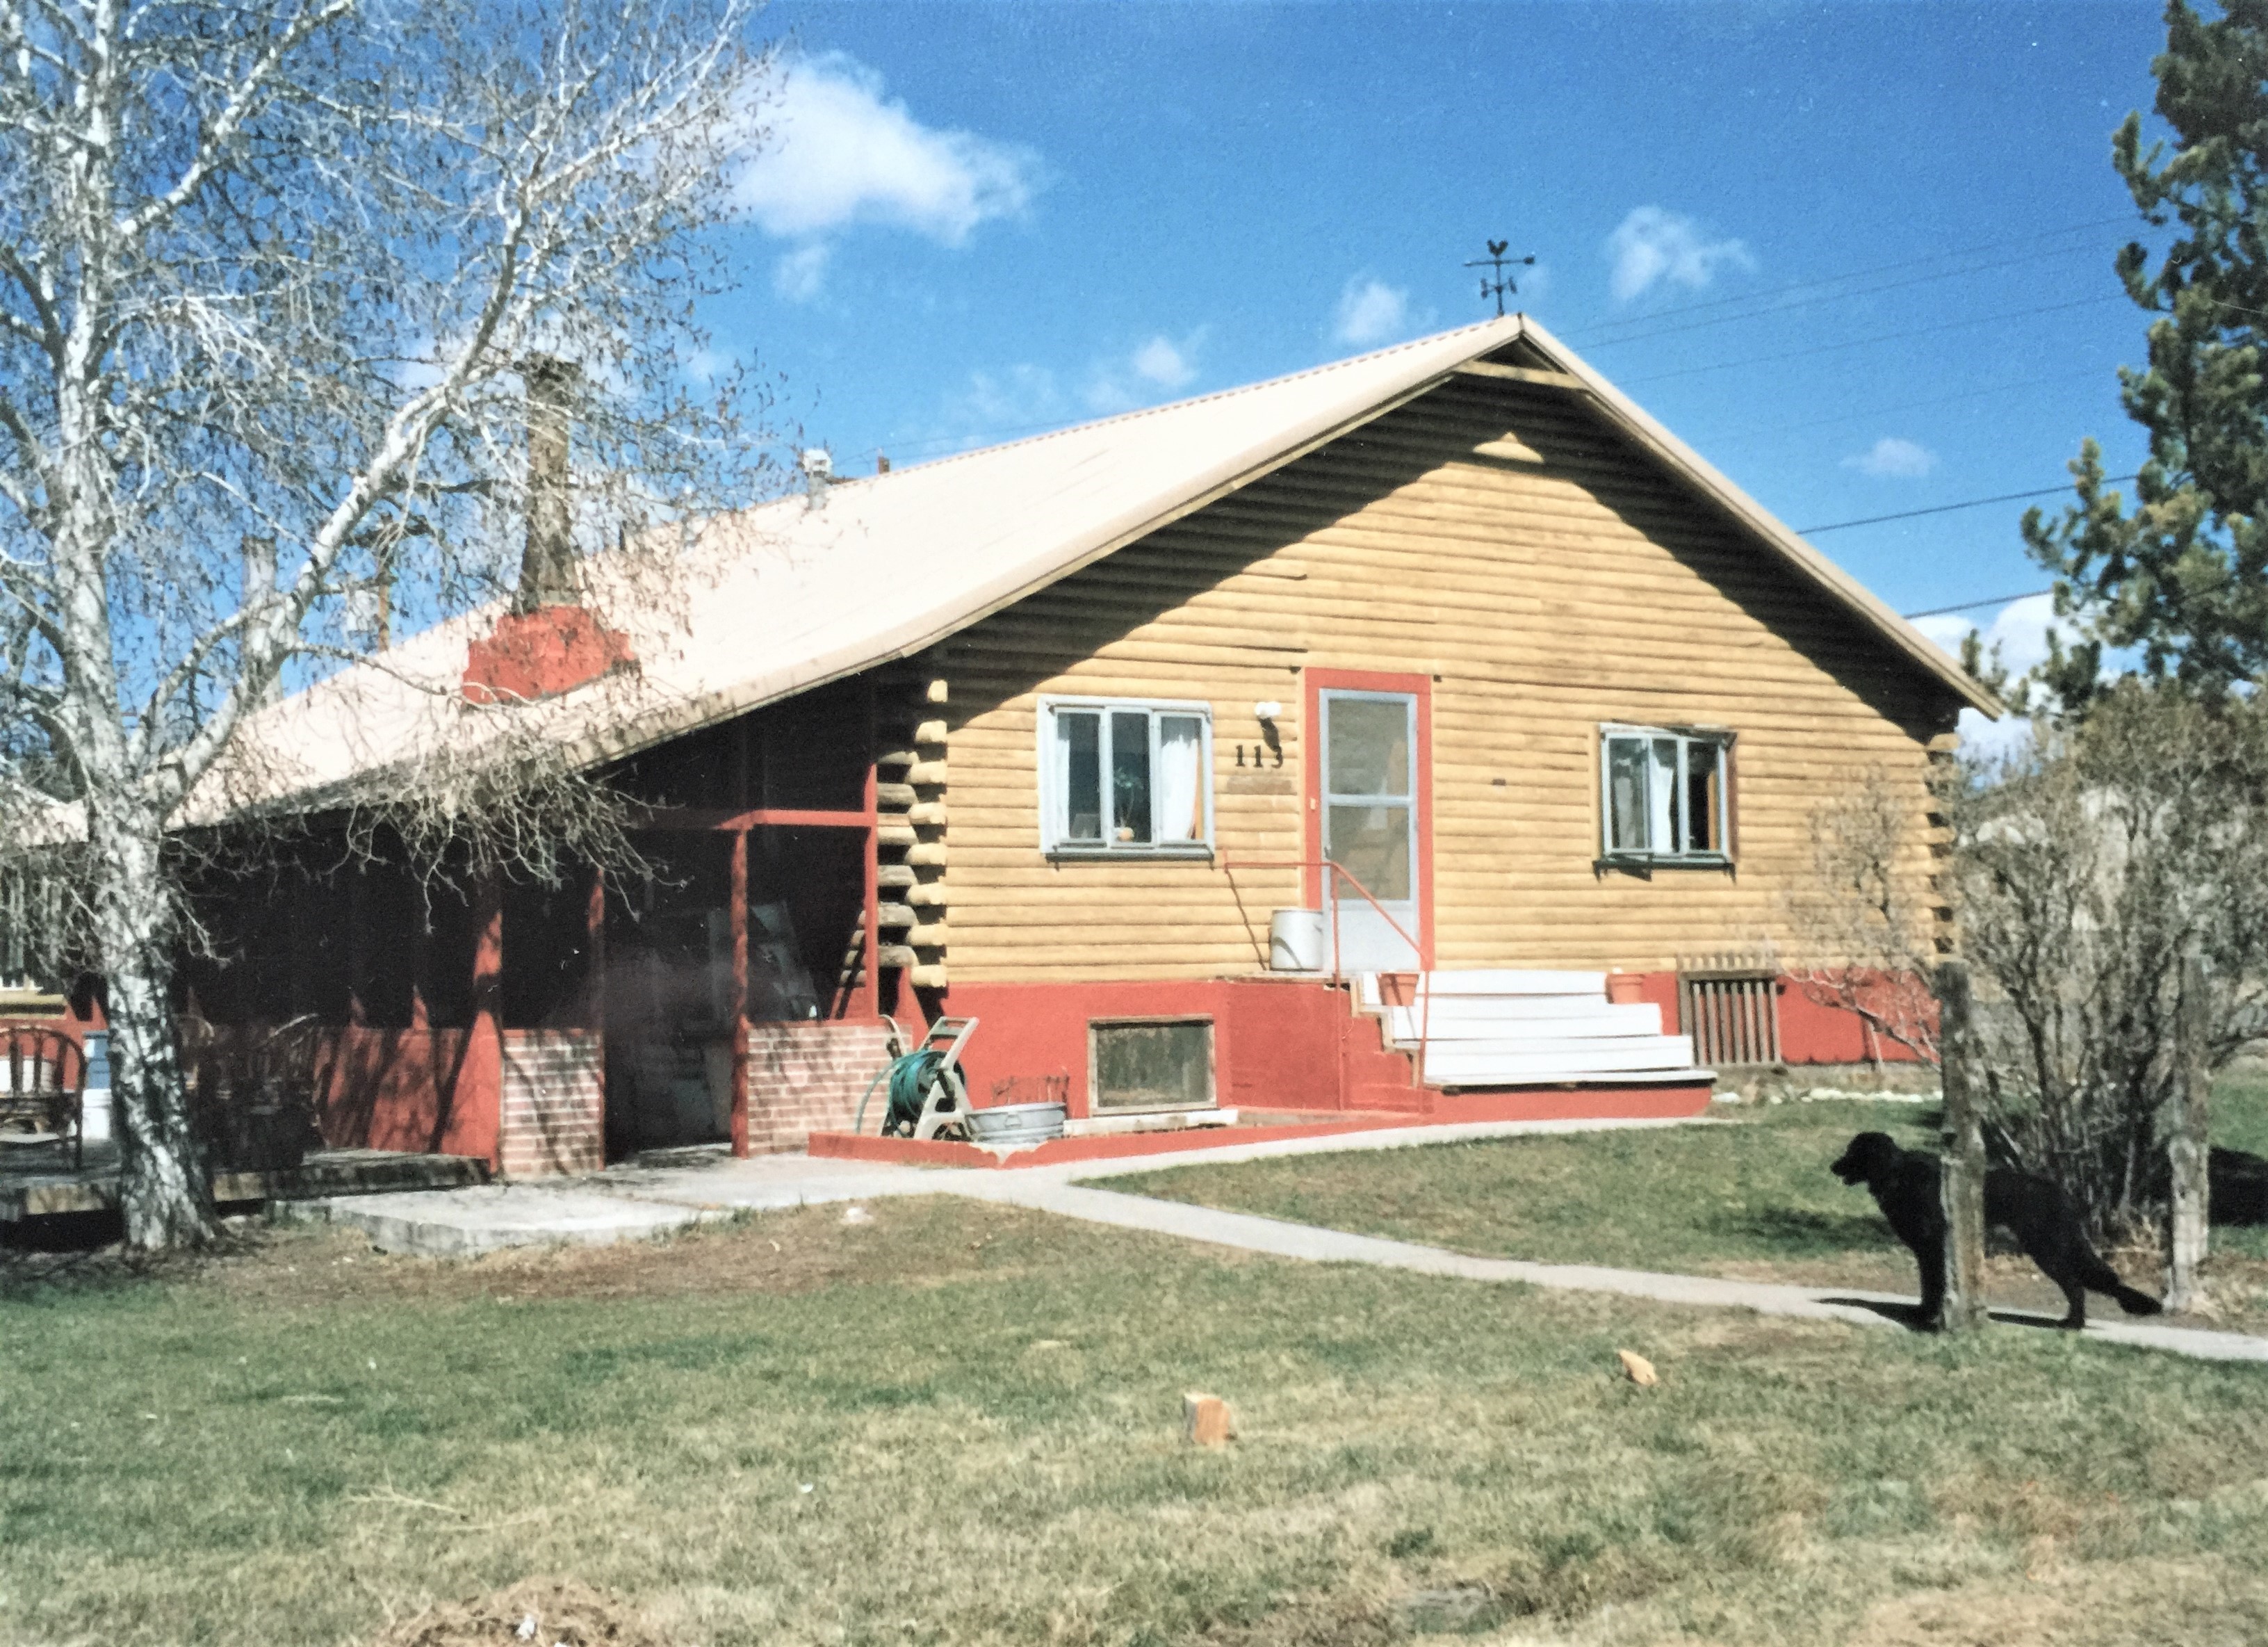
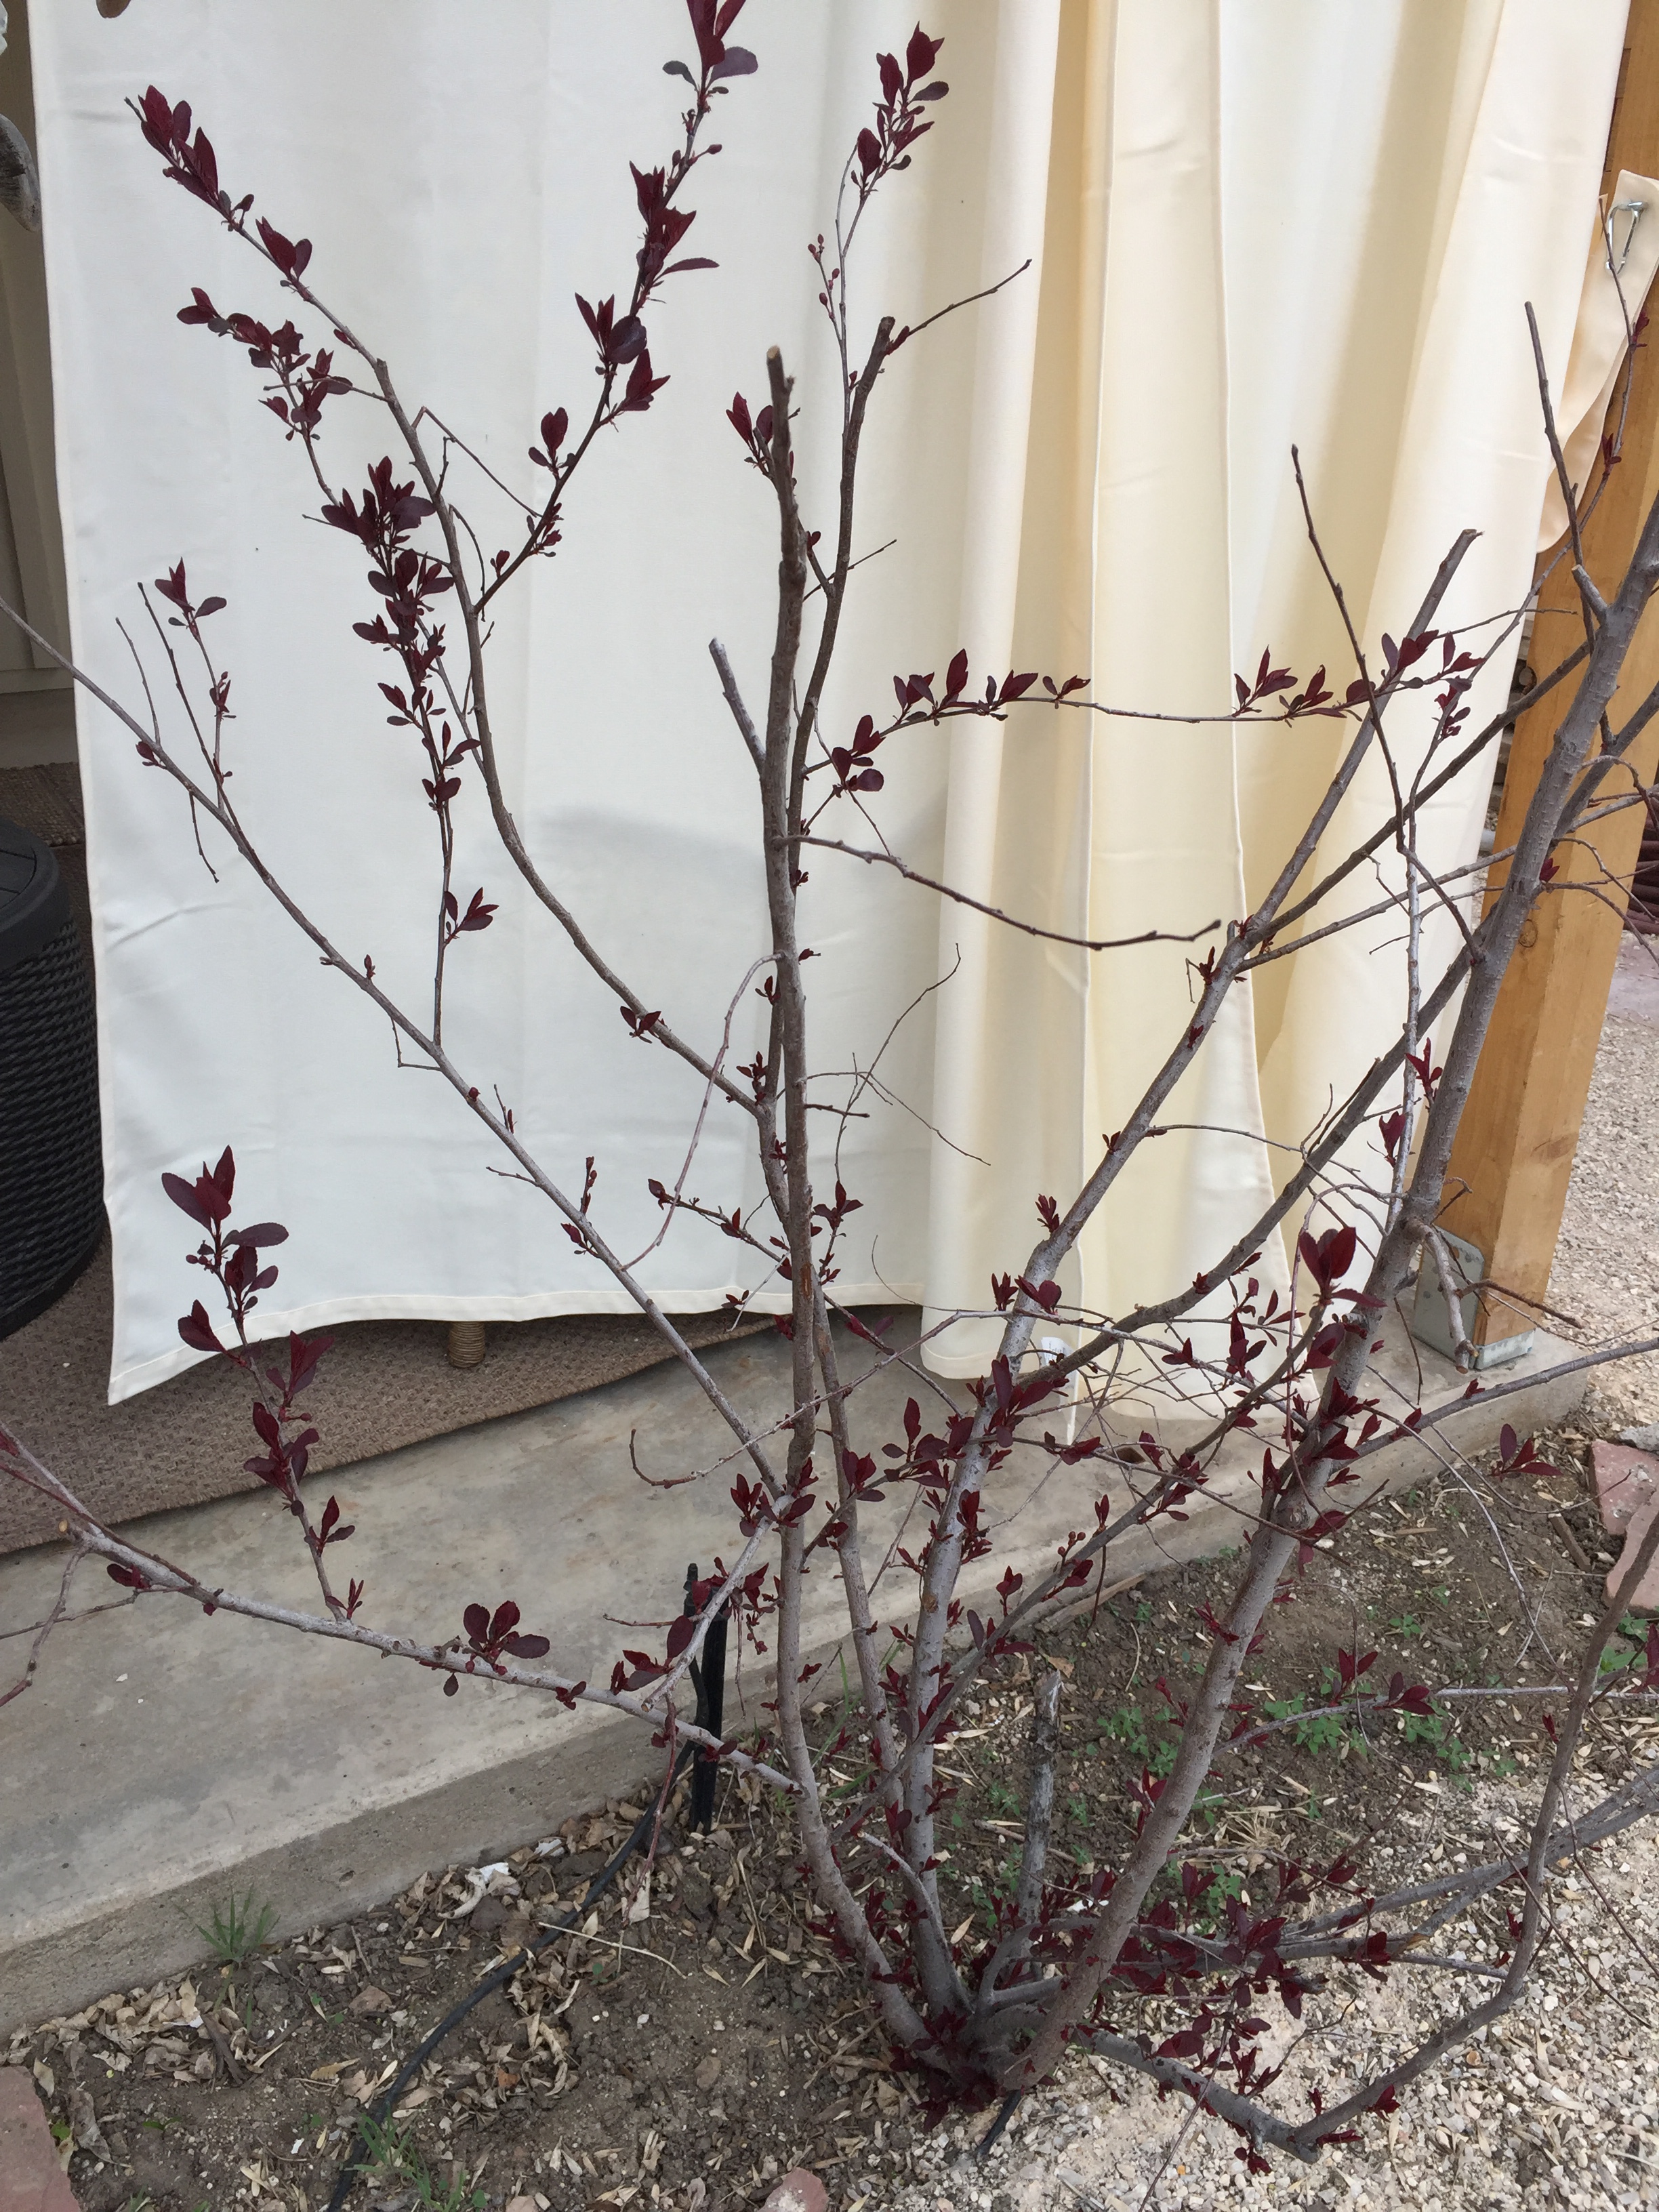
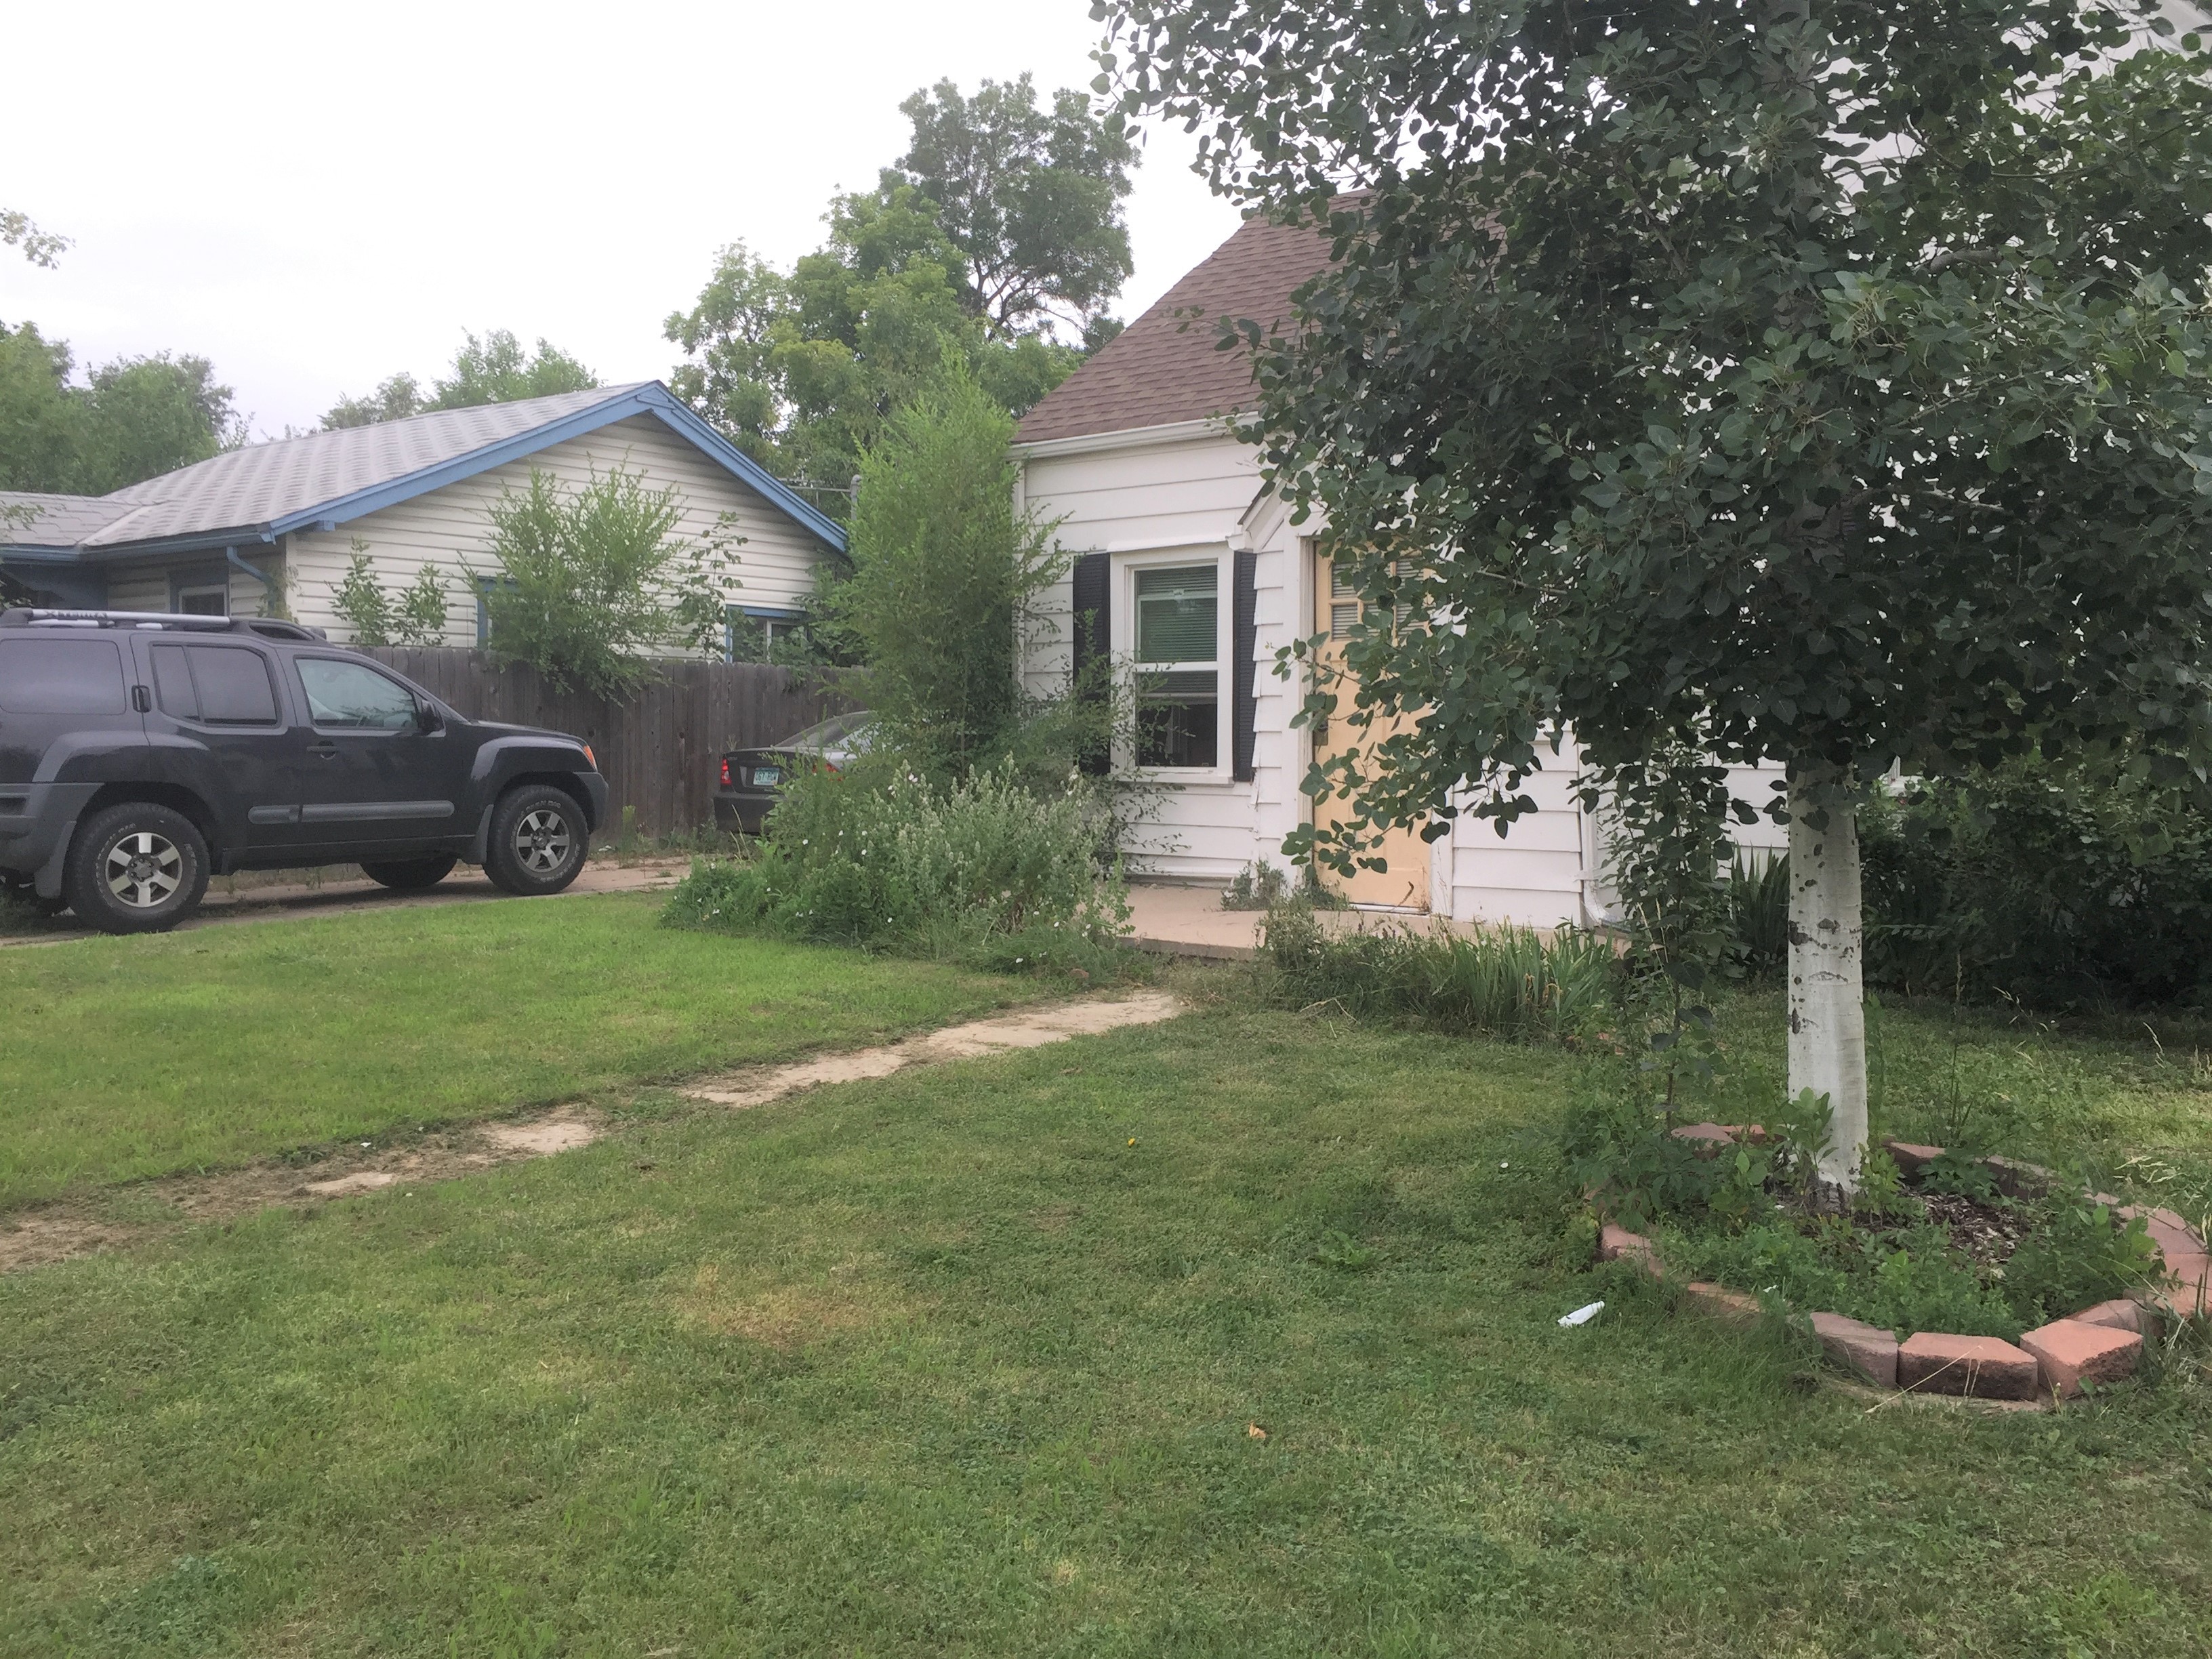
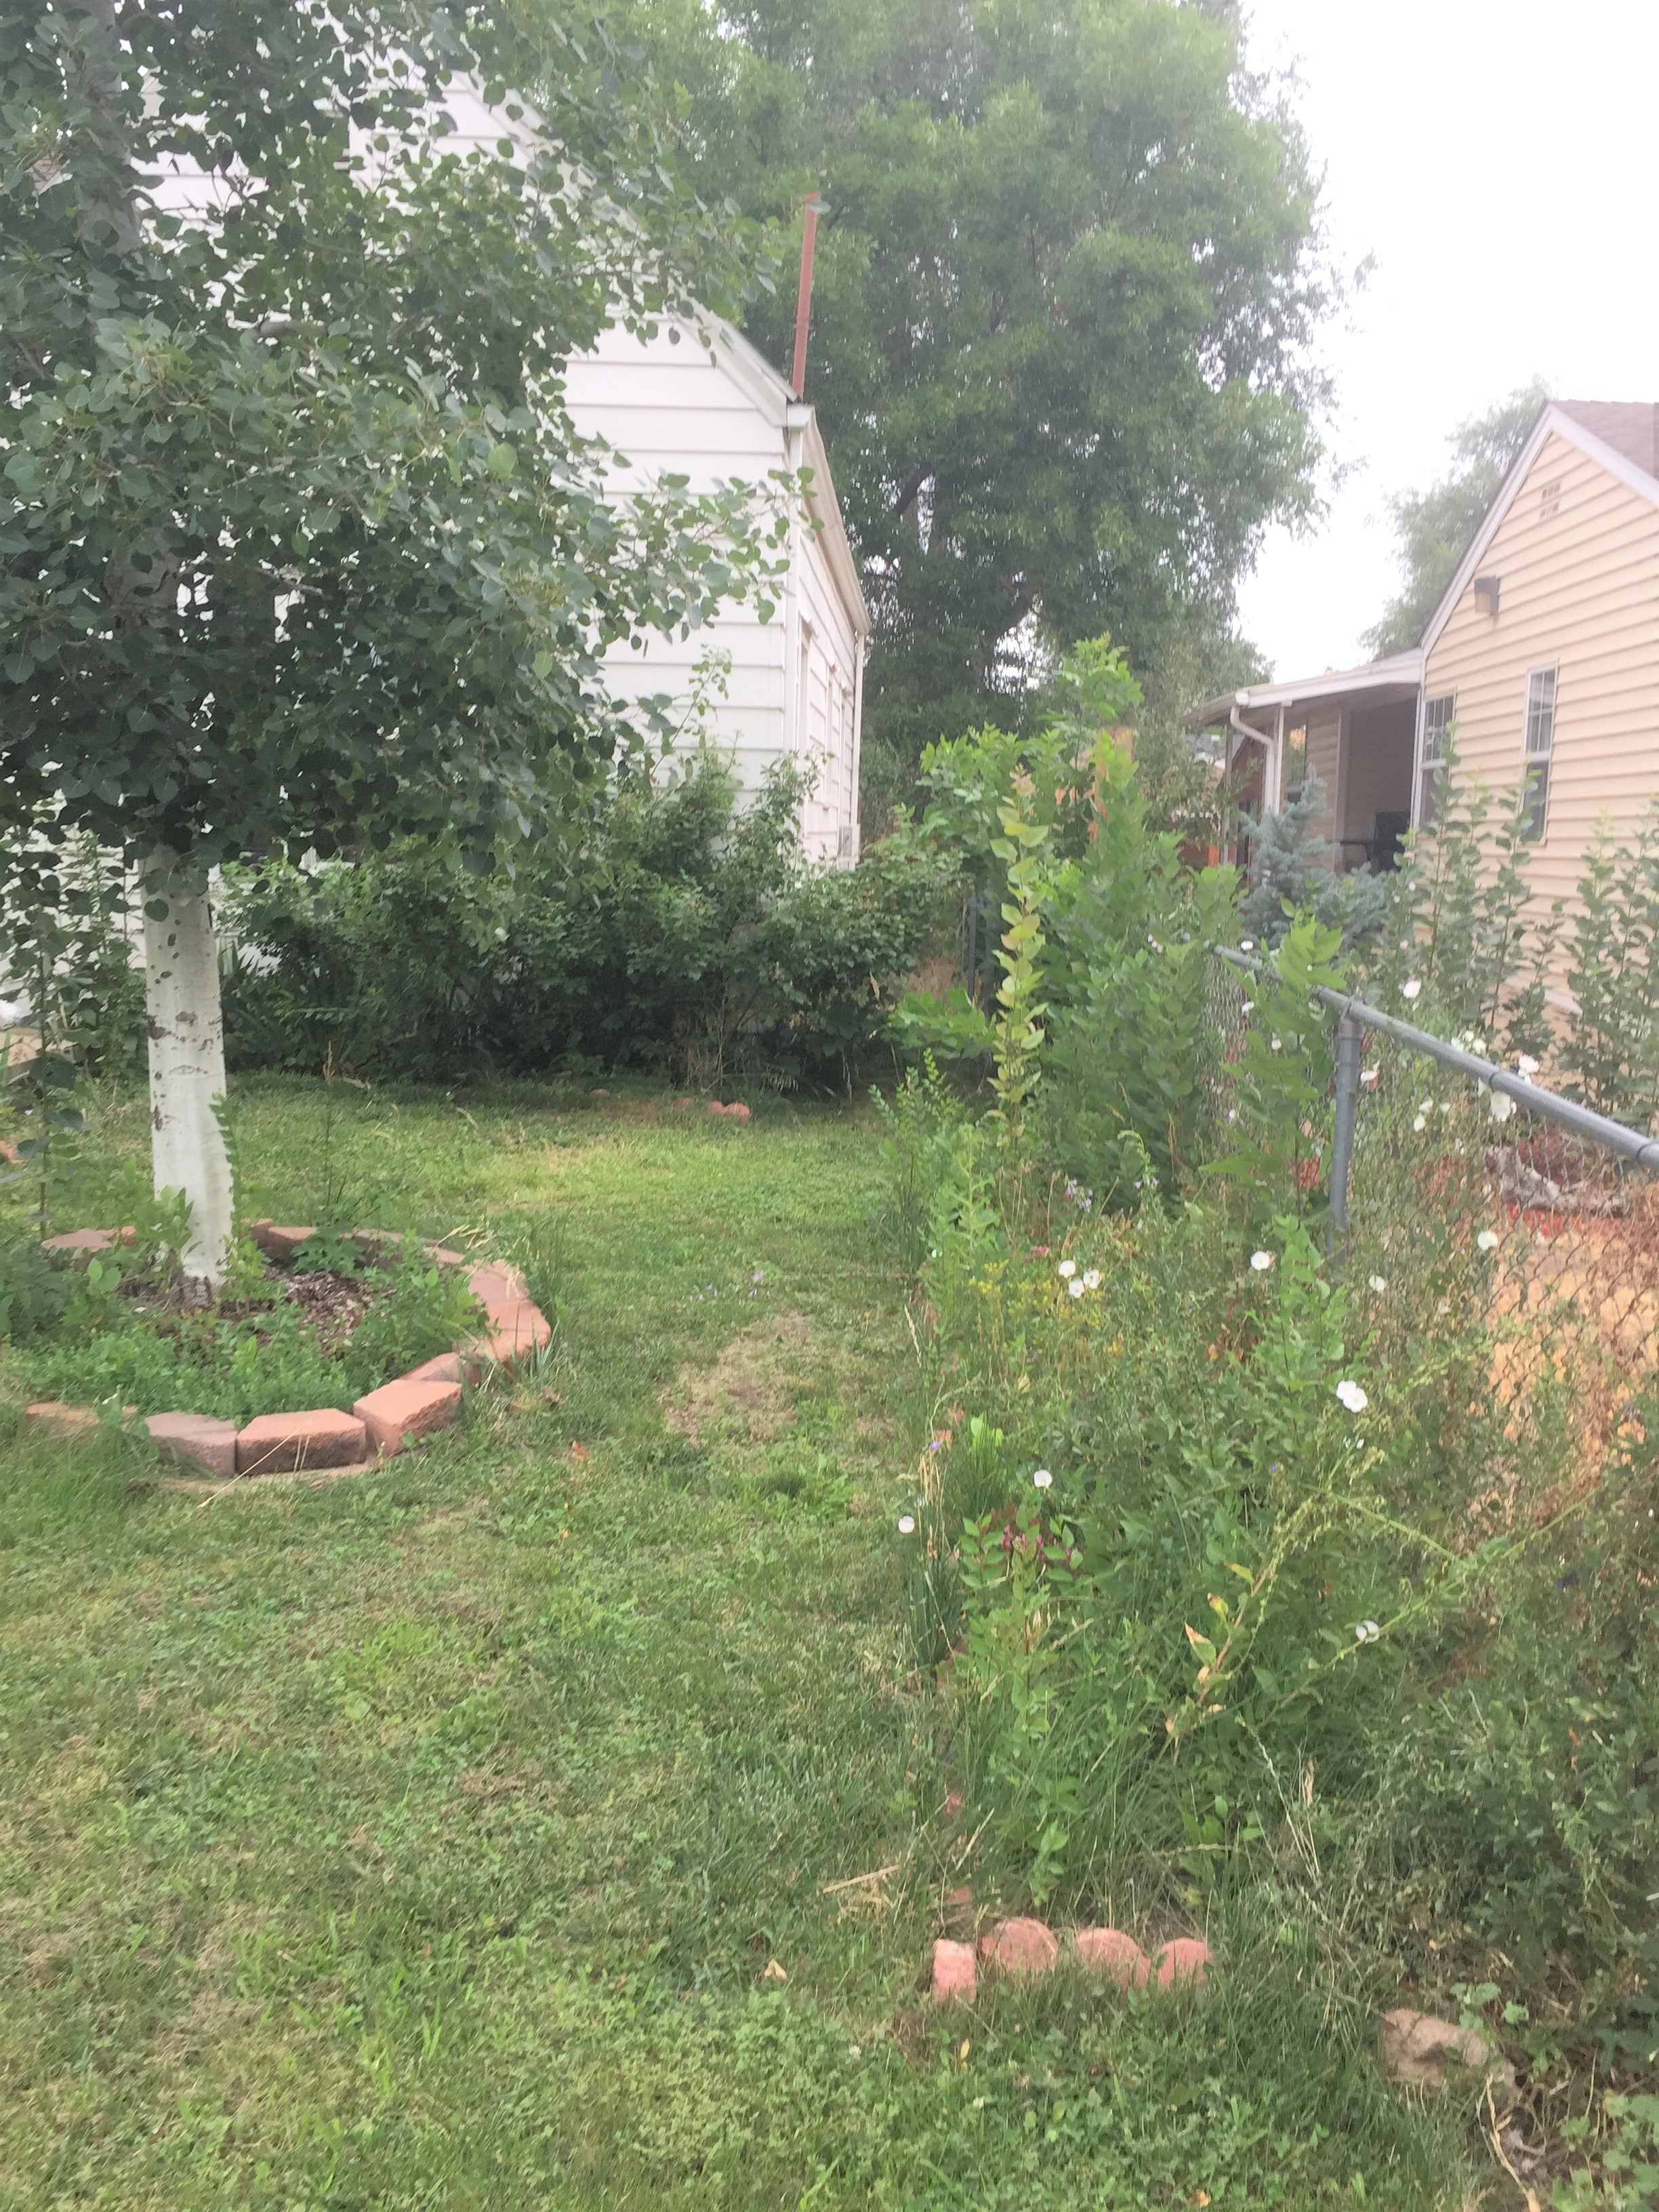
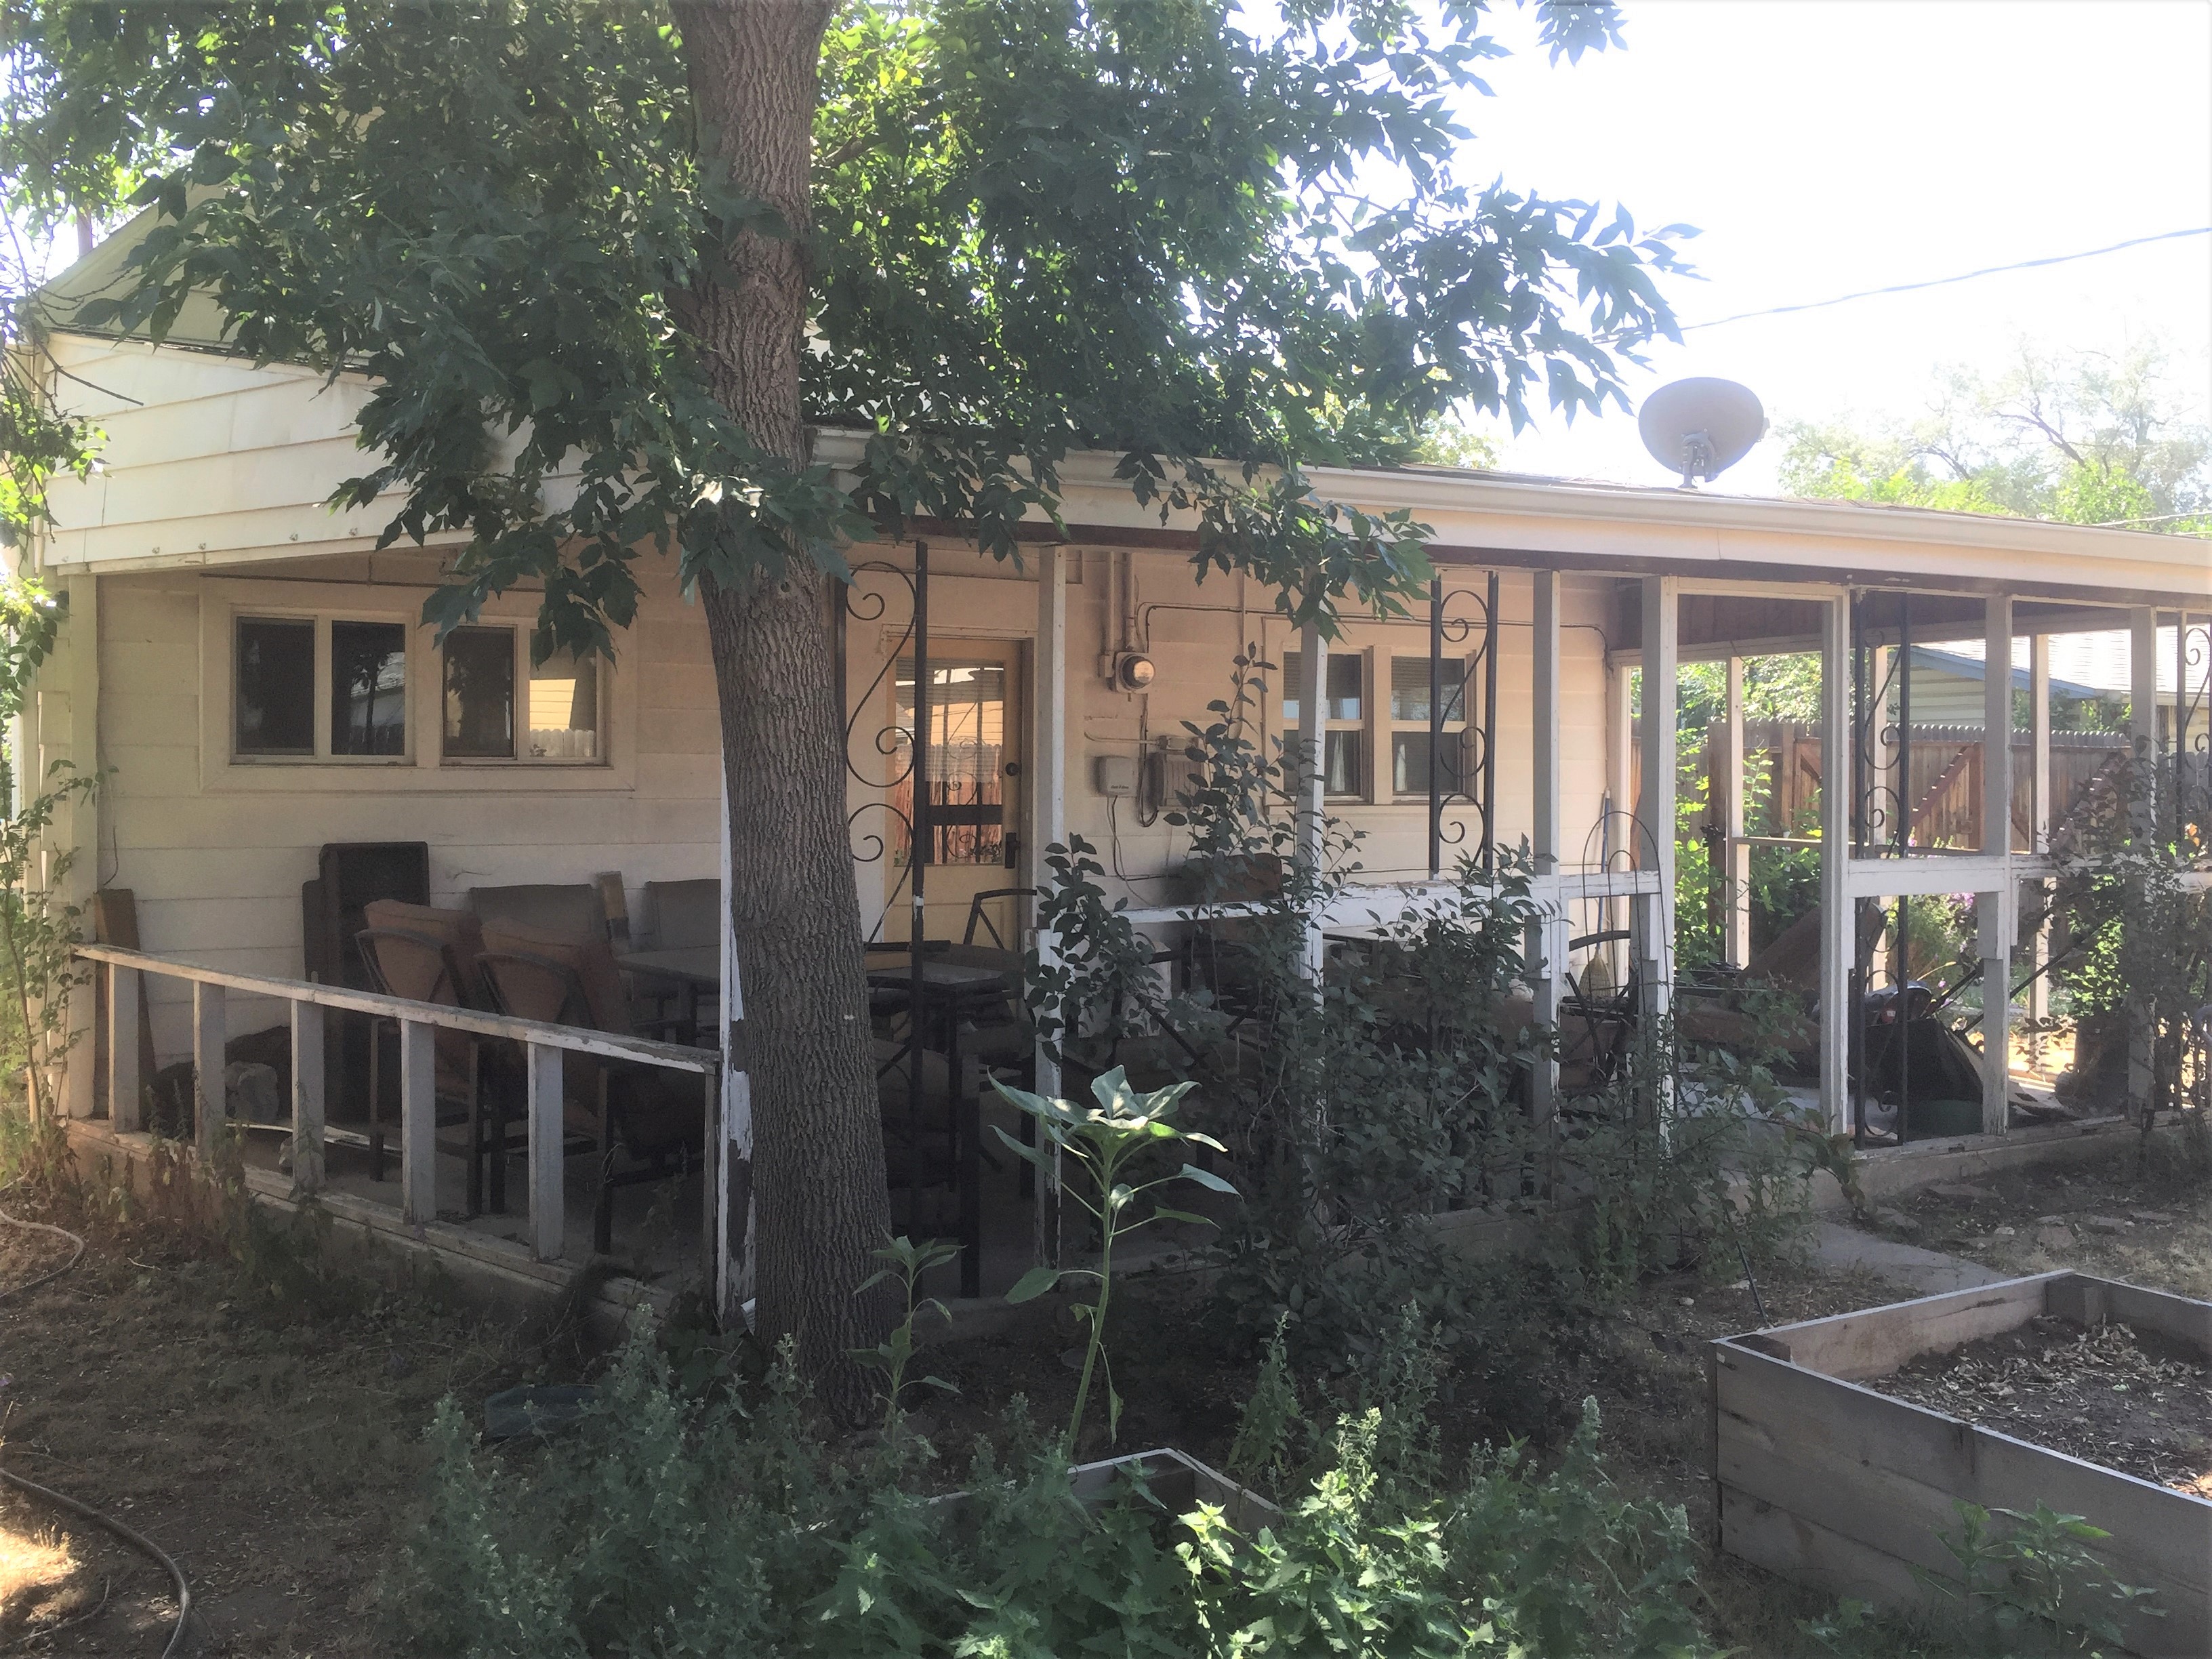
This house has always been in need of some TLC, and I picked away at the upgrades while I had tenants living here. In 2012, I remodeled some of the interior and took down the garage. I removed the dead juniper trees, planted an Aspen tree and threw down some grass seed in the front yard.

The garage (on the left) was in poor shape and I had it taken down in 2012, leaving just a concrete slab.

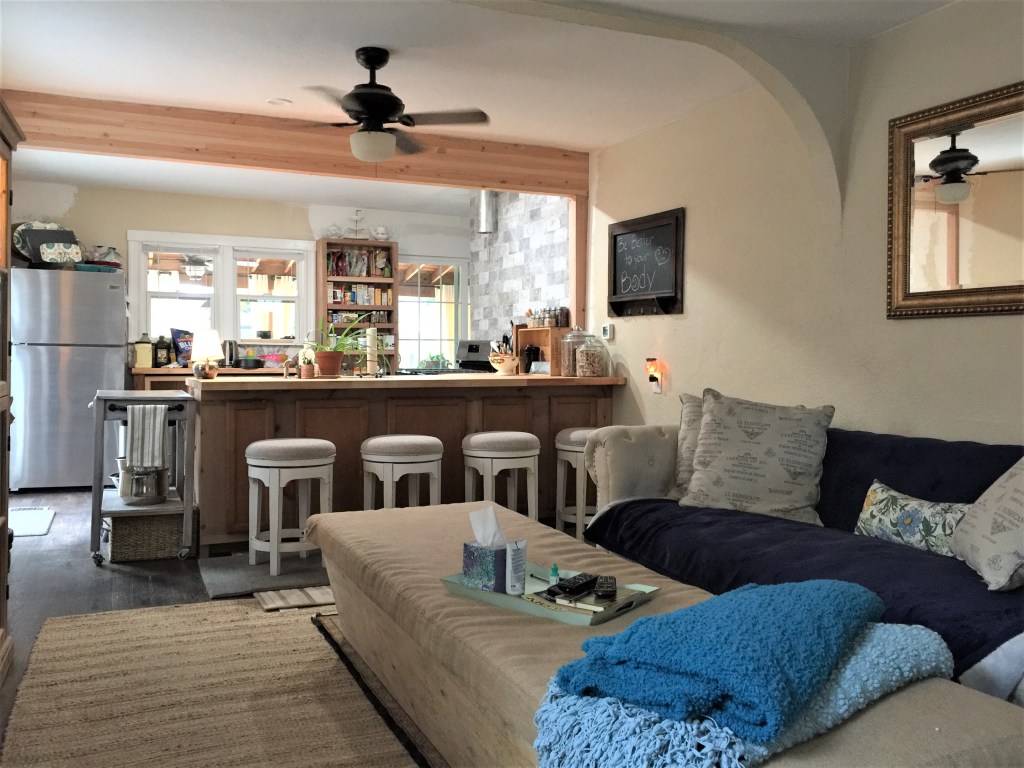
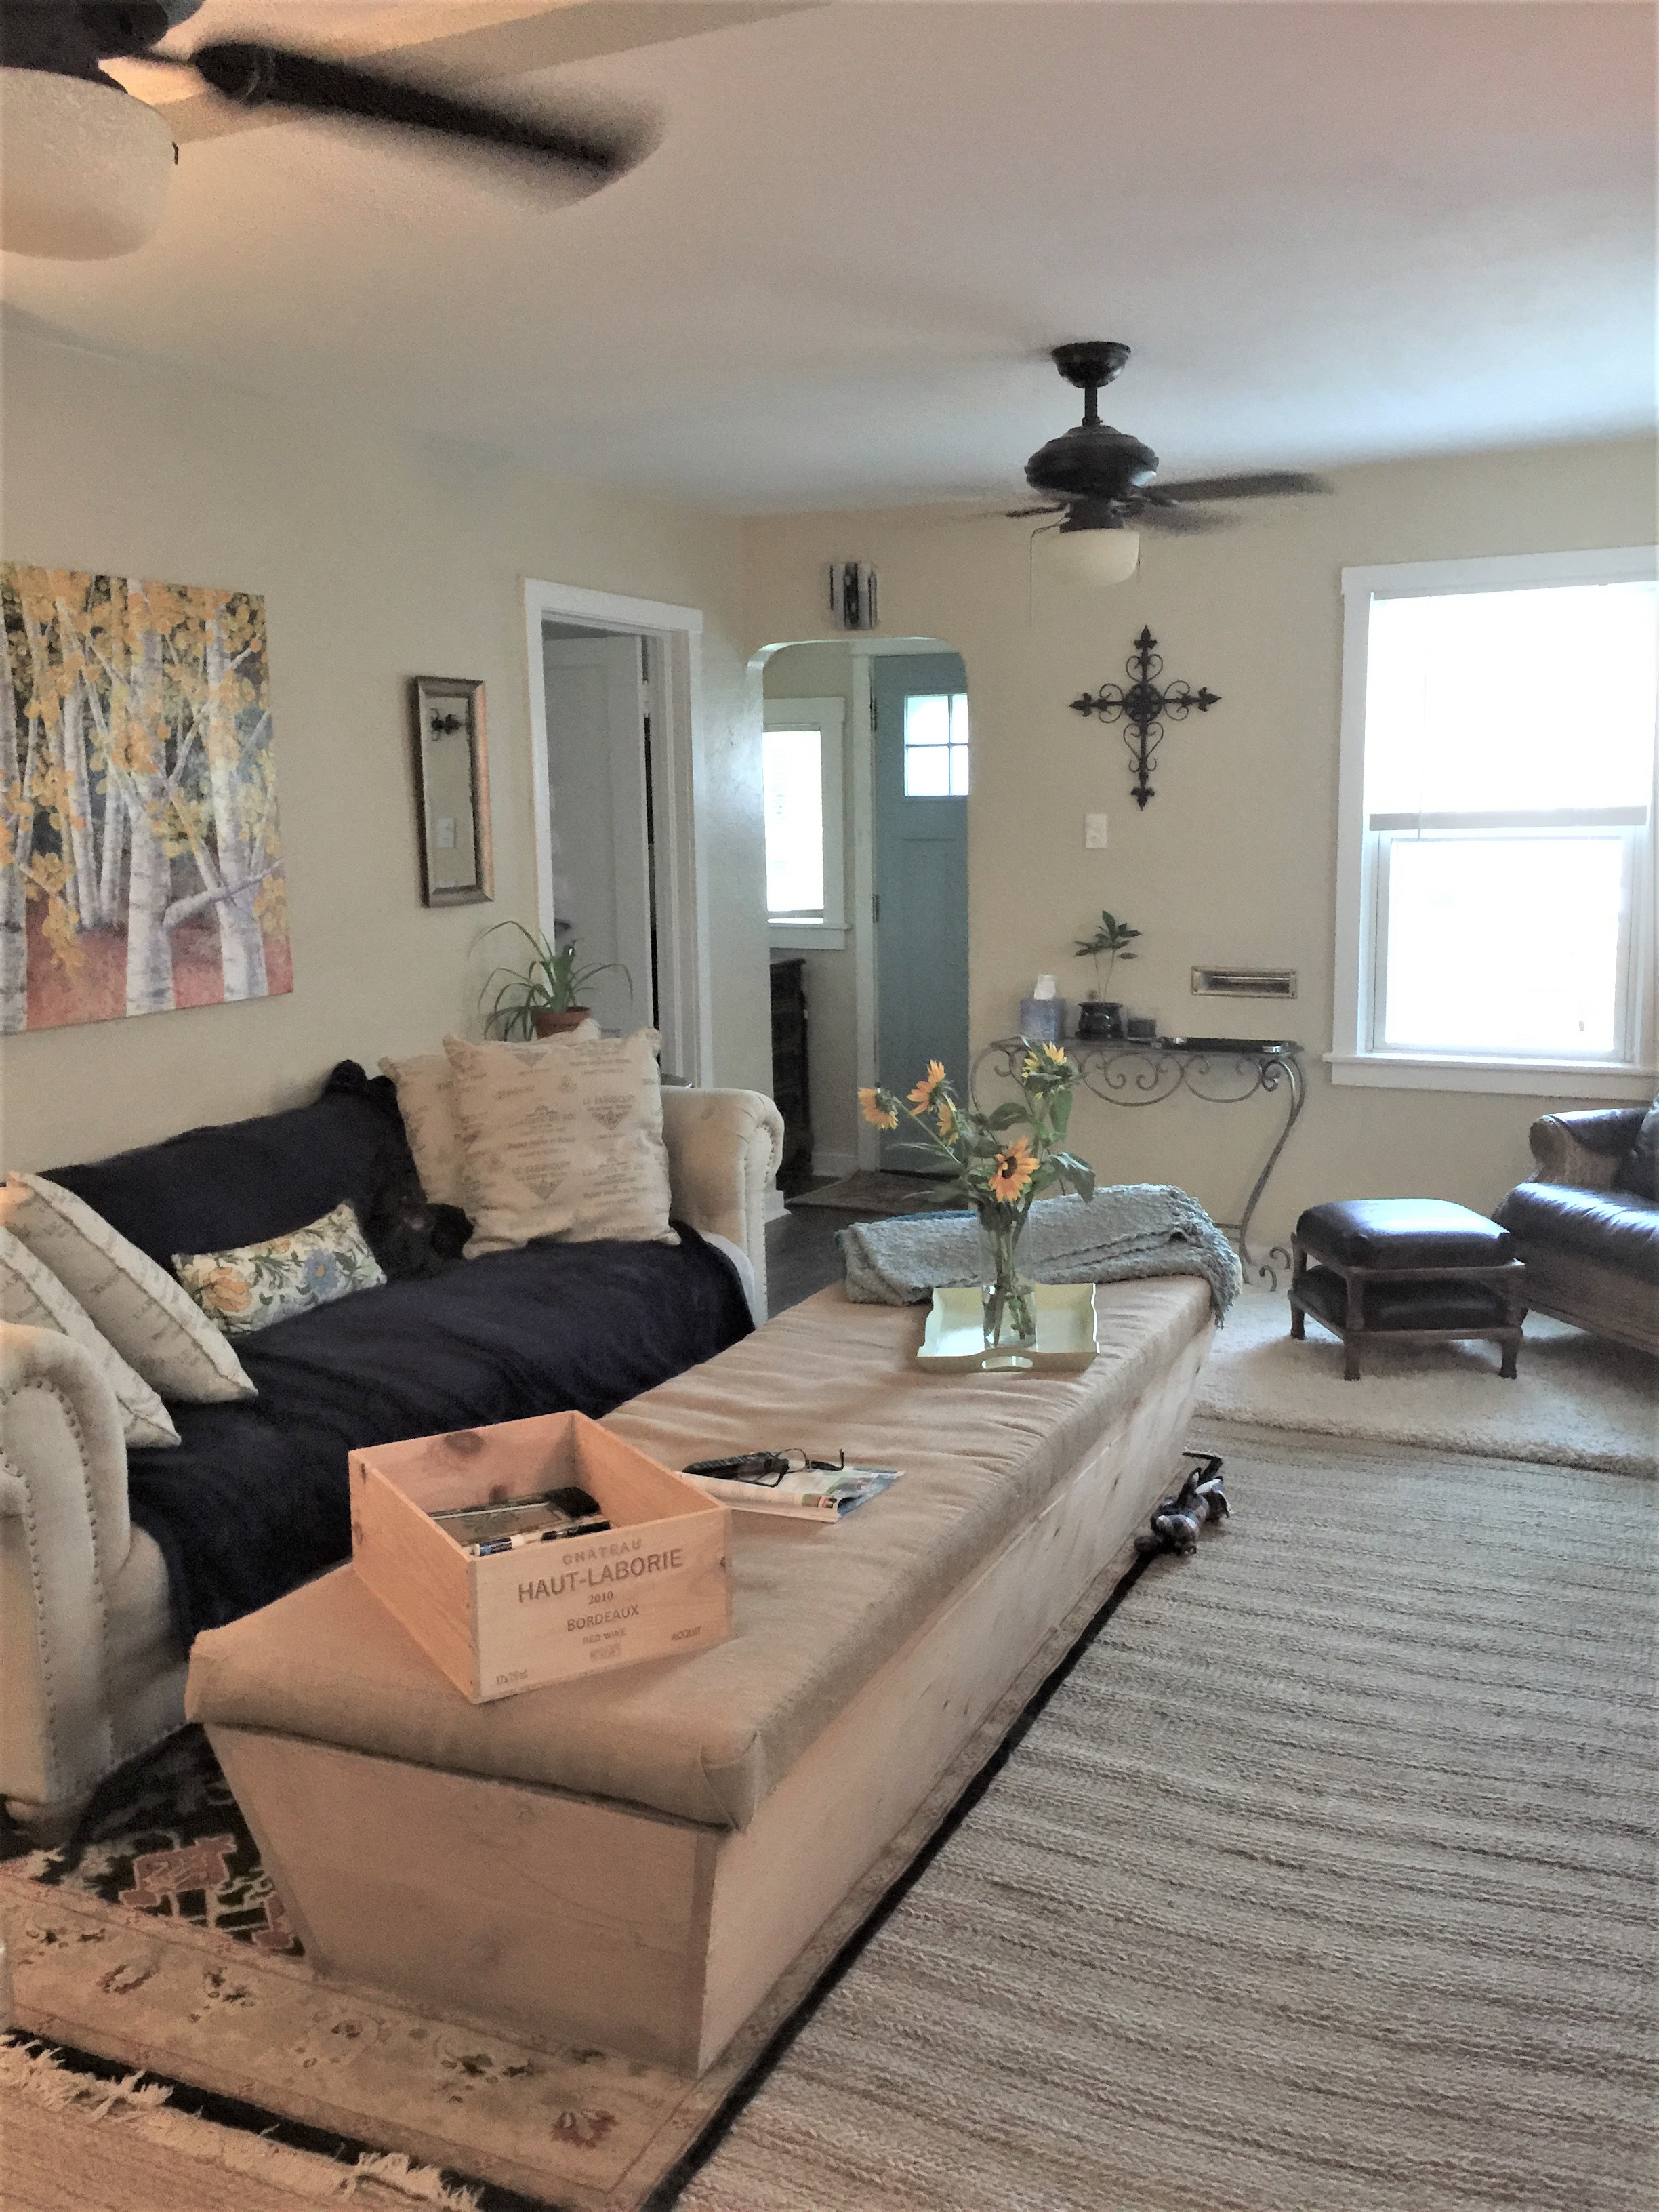
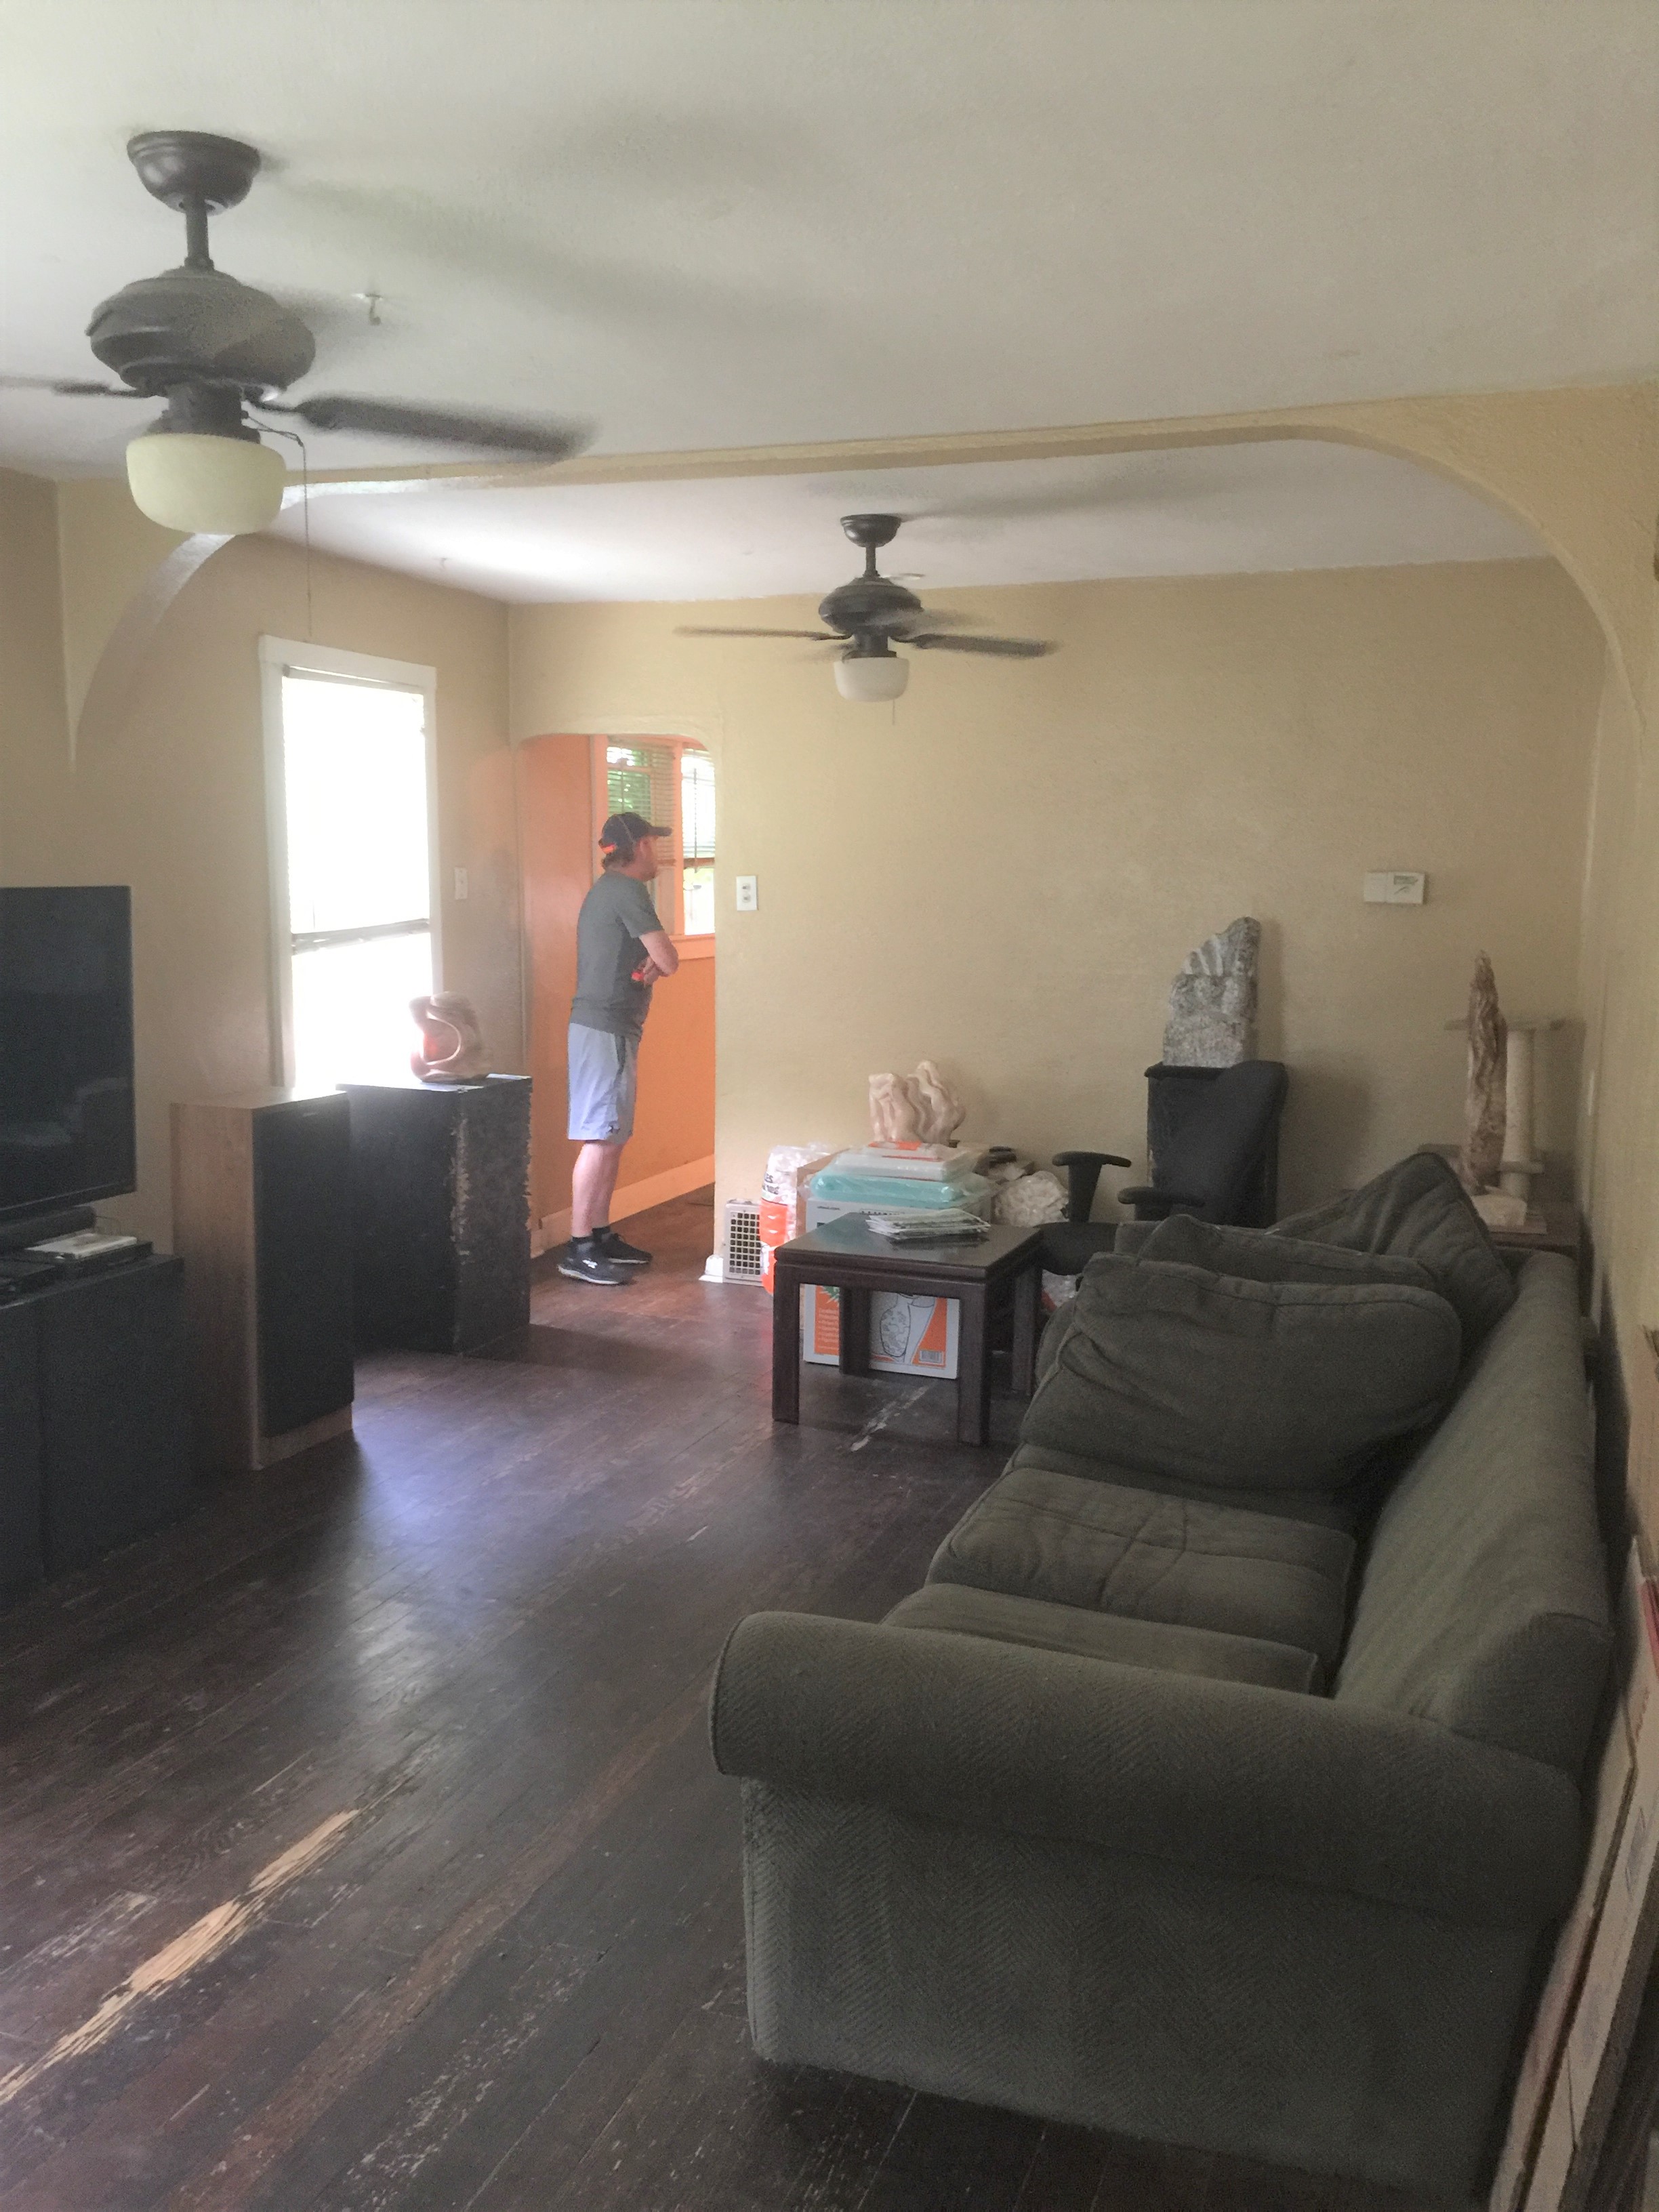
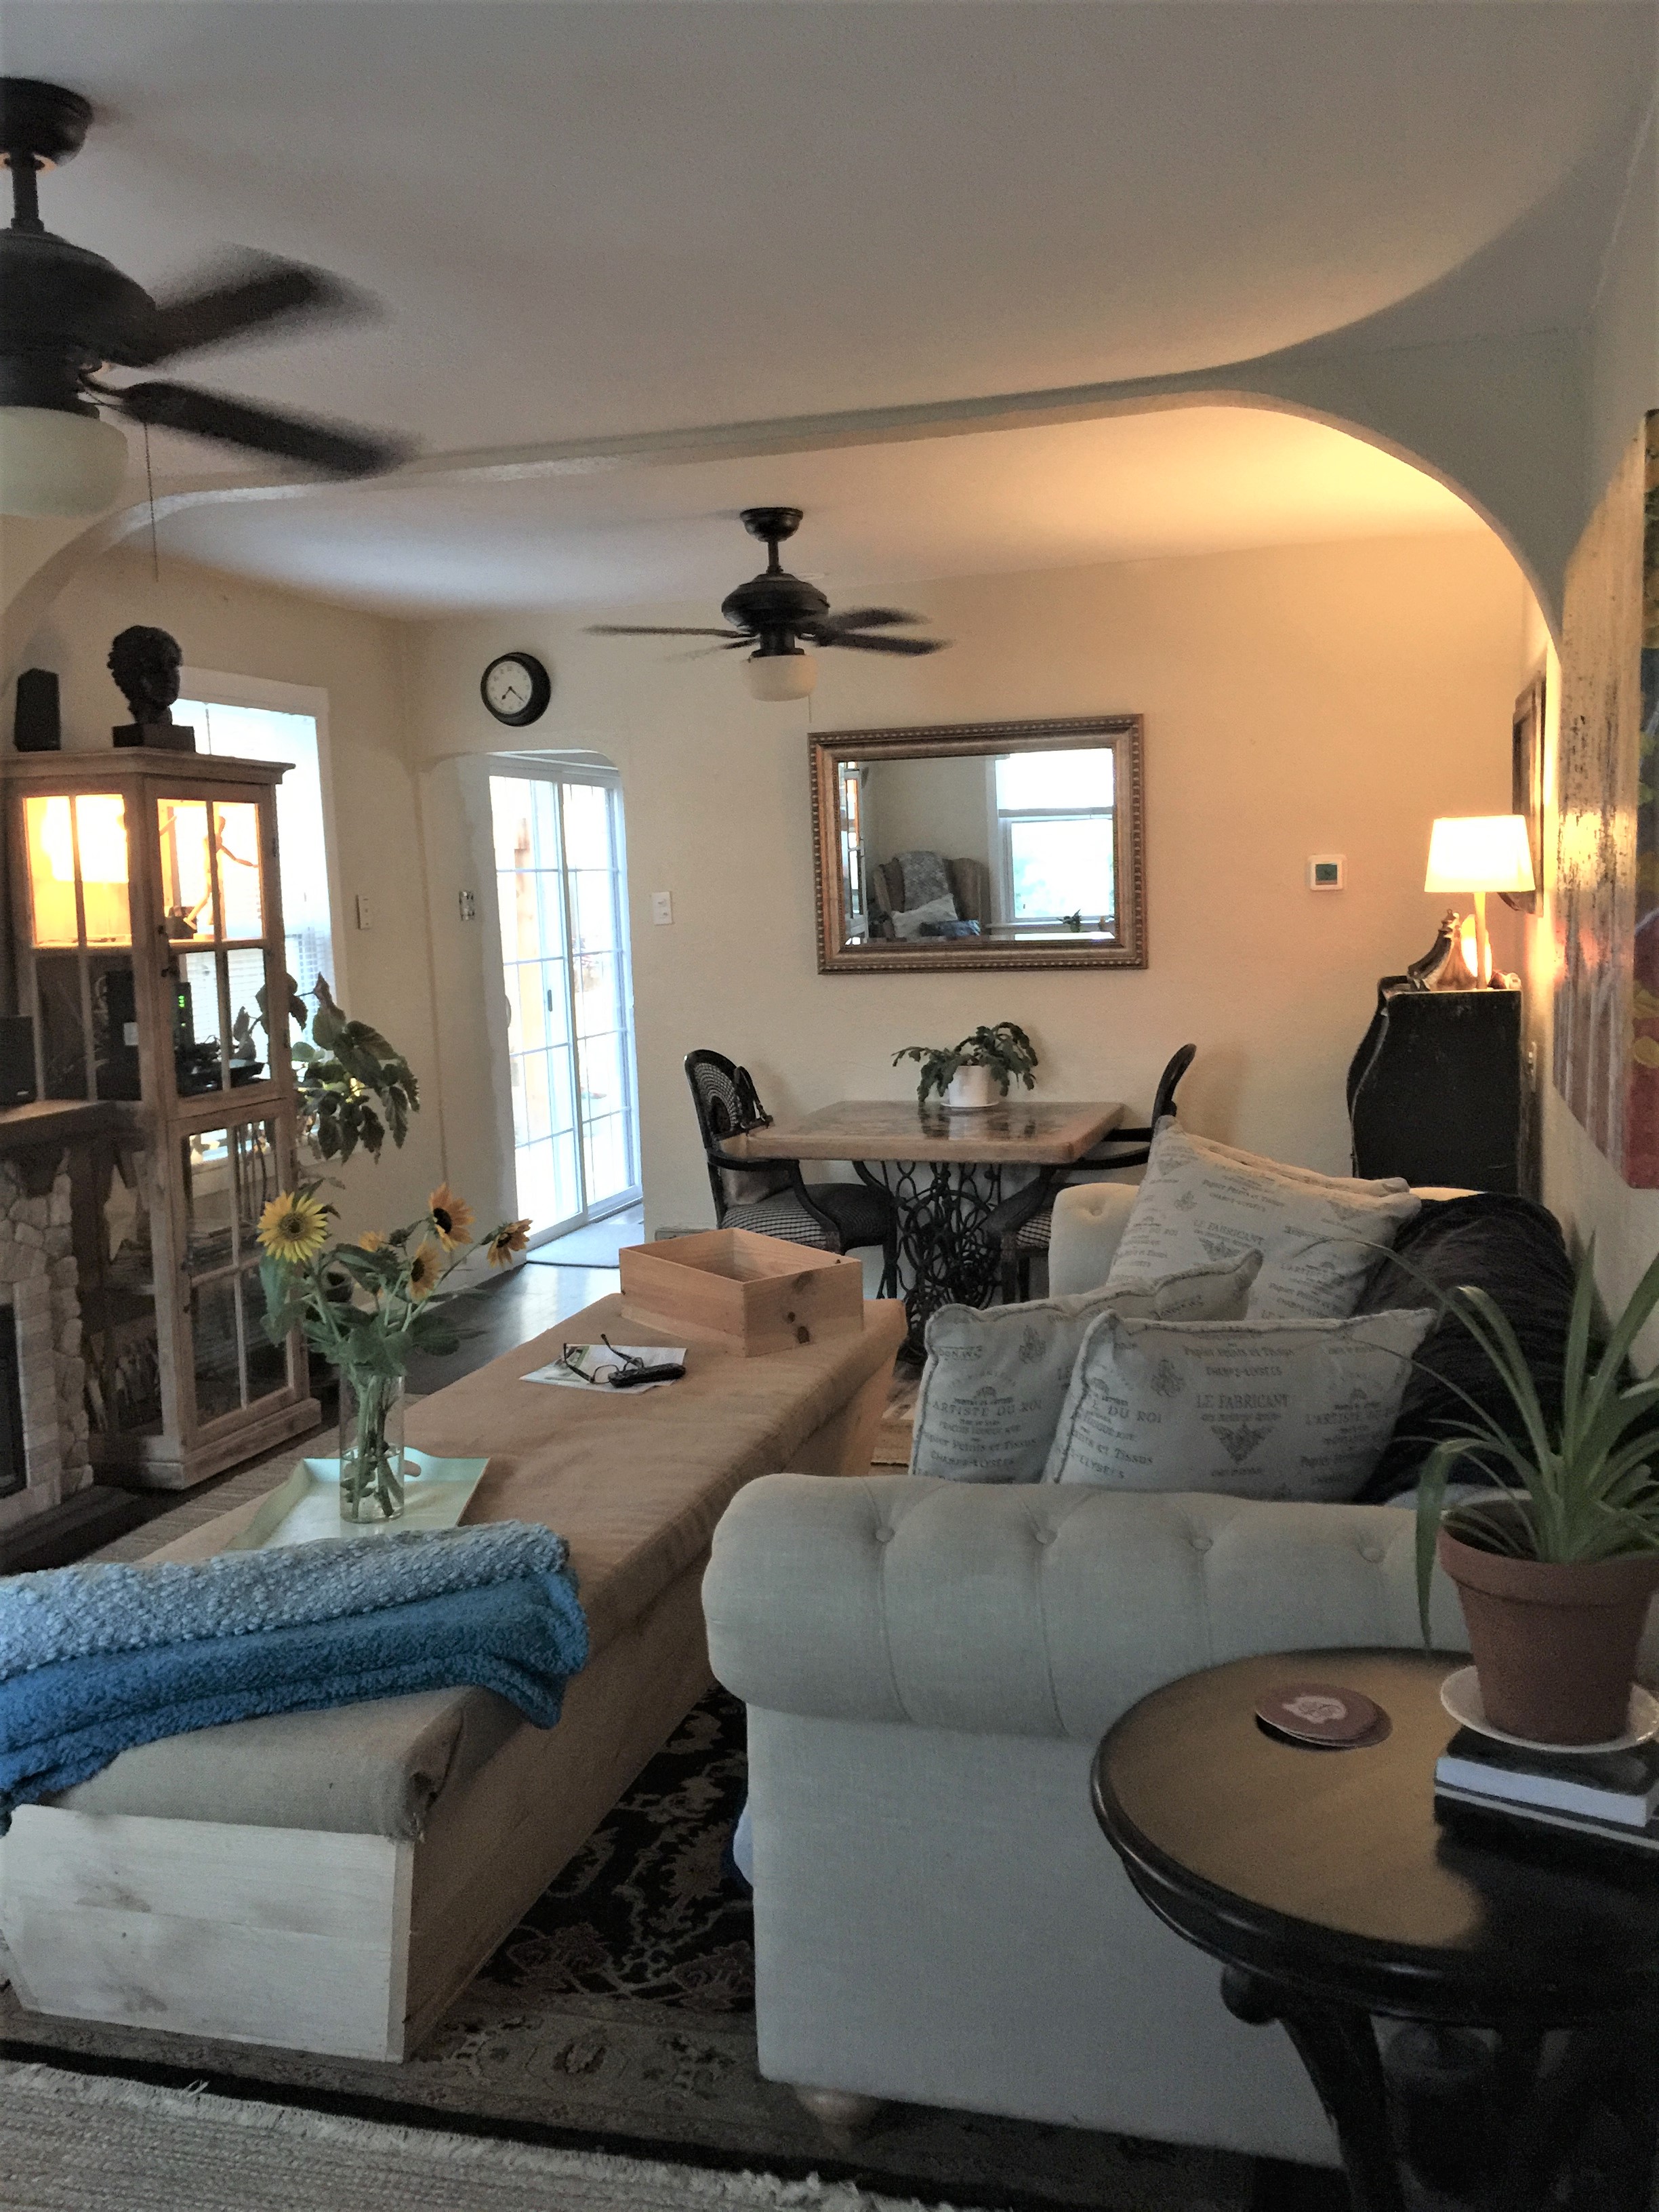
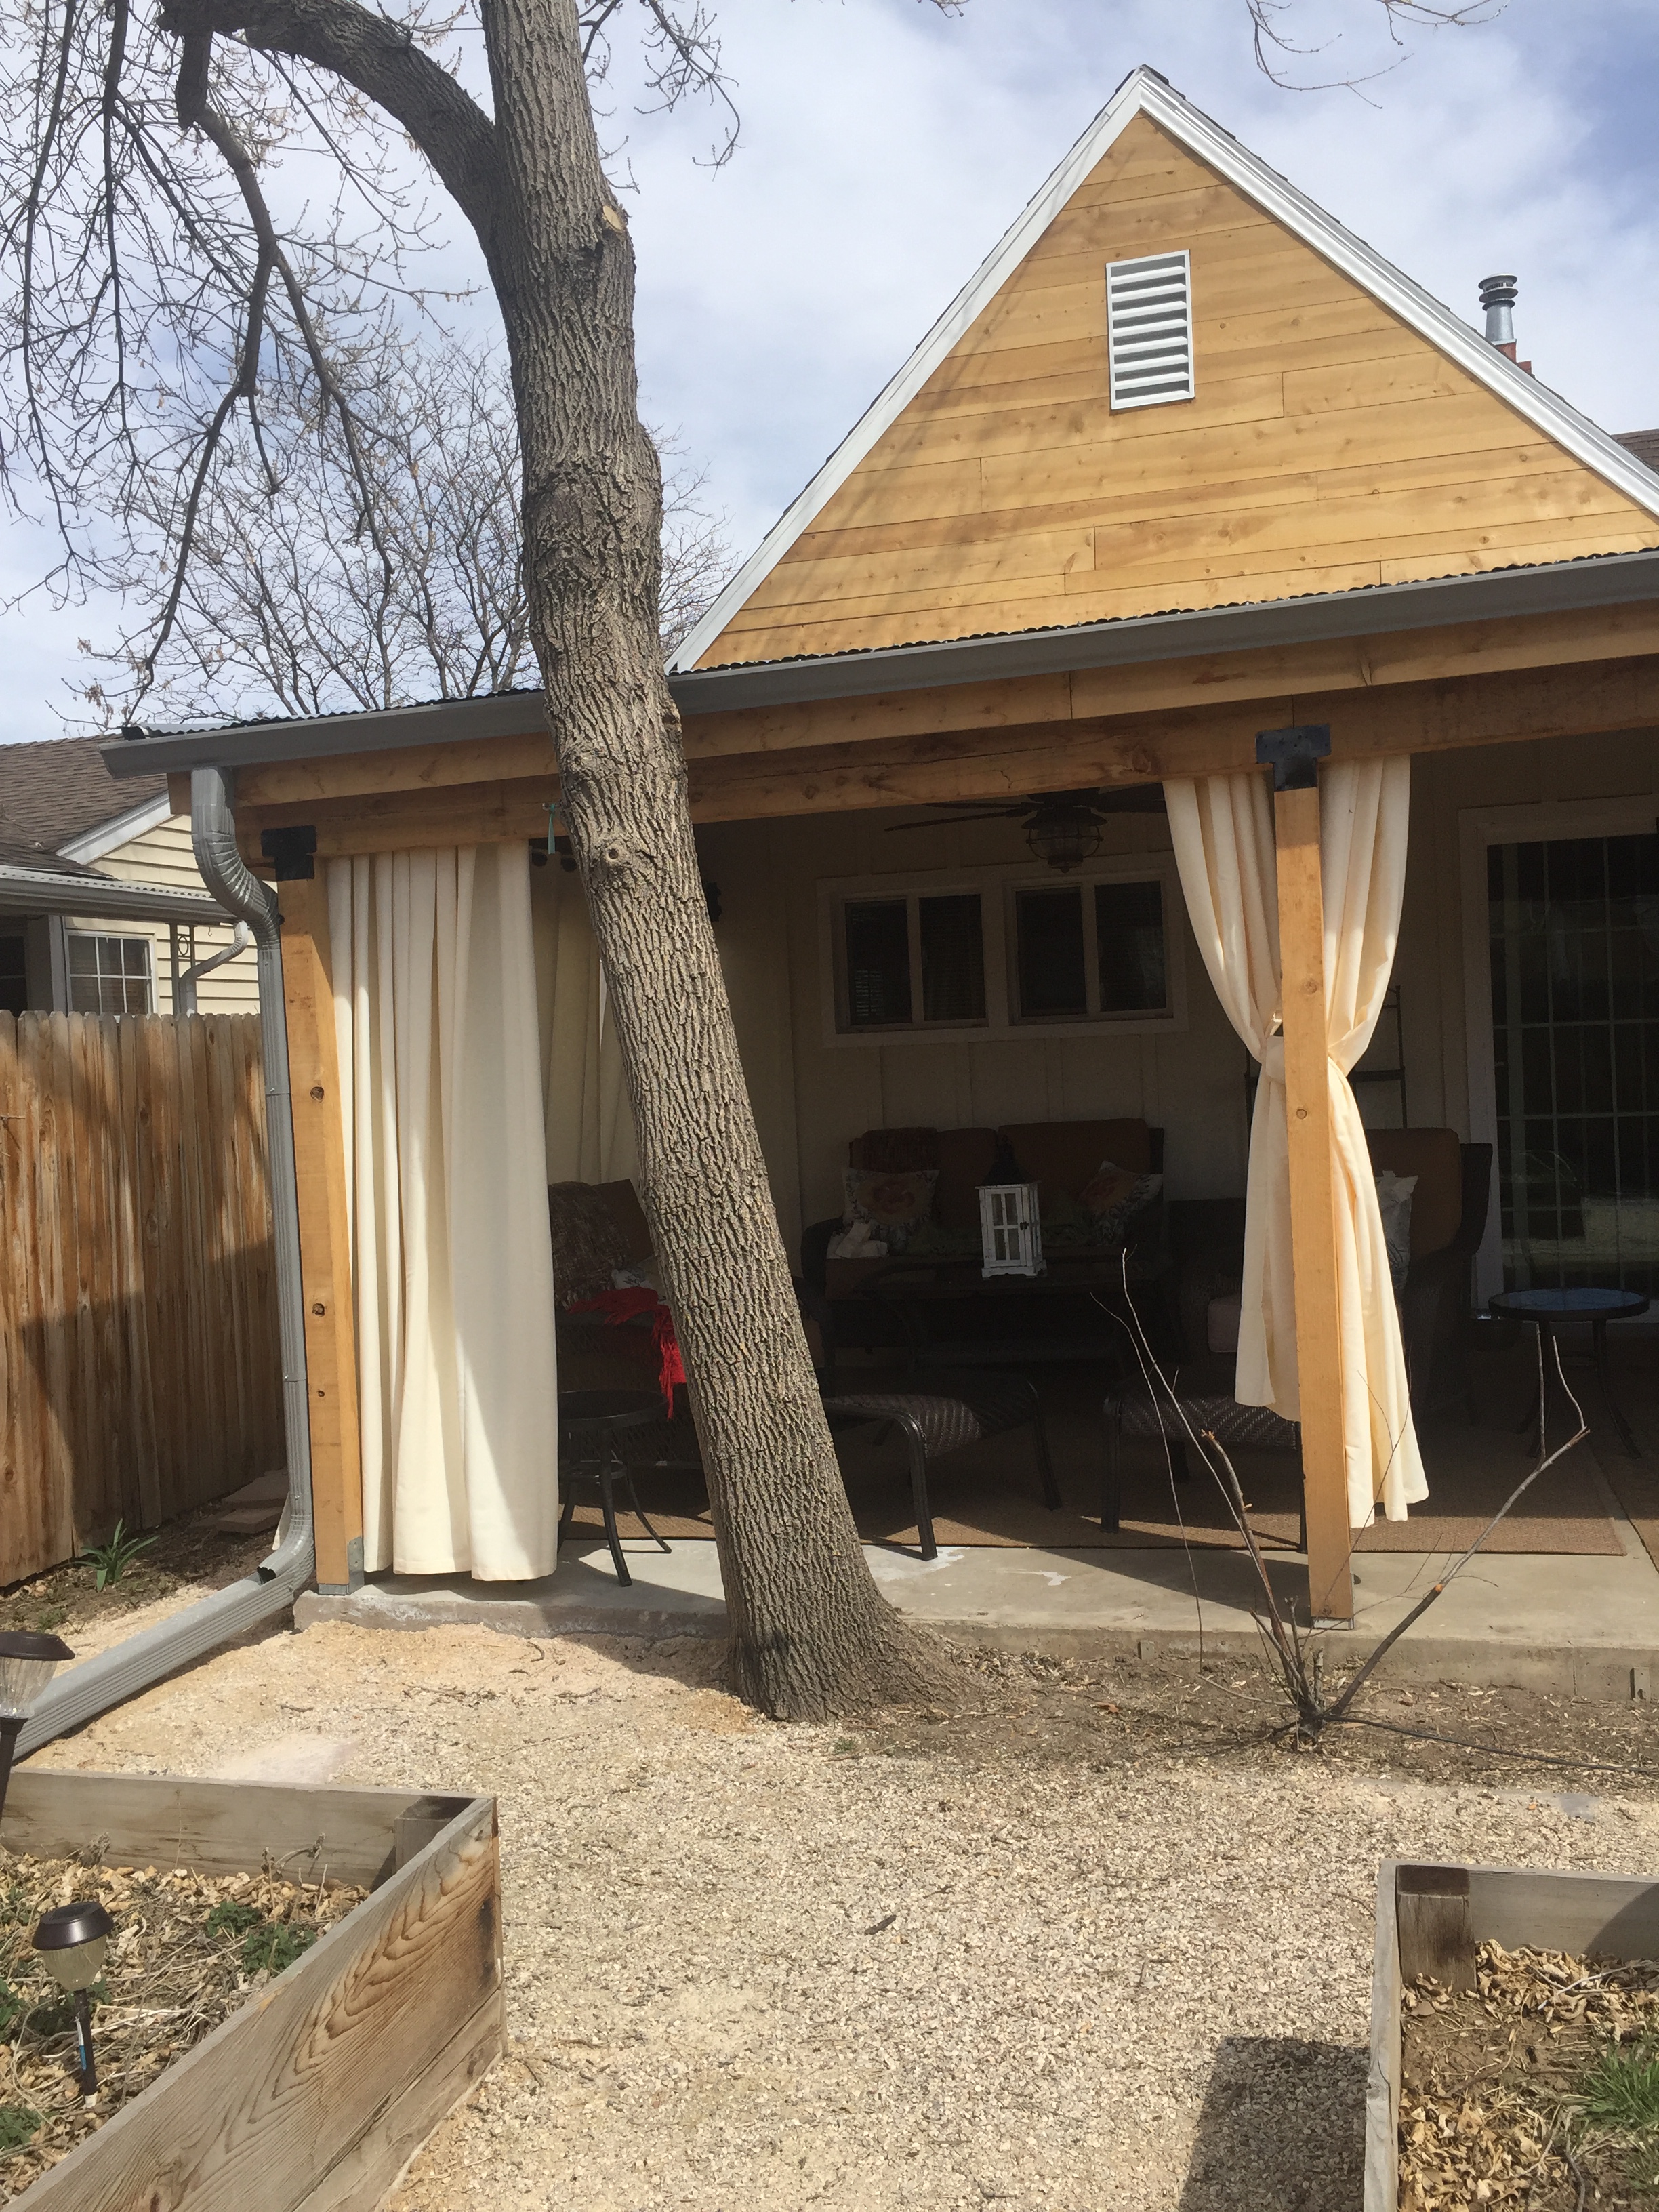
It wasn’t until recently I really thought about what I could do with this house. Once I decided to move in and work on this gem, I began the process of deciding how to proceed. Considering my lifestyle, the neighborhood and budget, I settled on a modern Farmhouse style home.

Dead Juniper trees in the front yard.
Original garage.

You see me convert this awesome bungalow into a charming home this year!

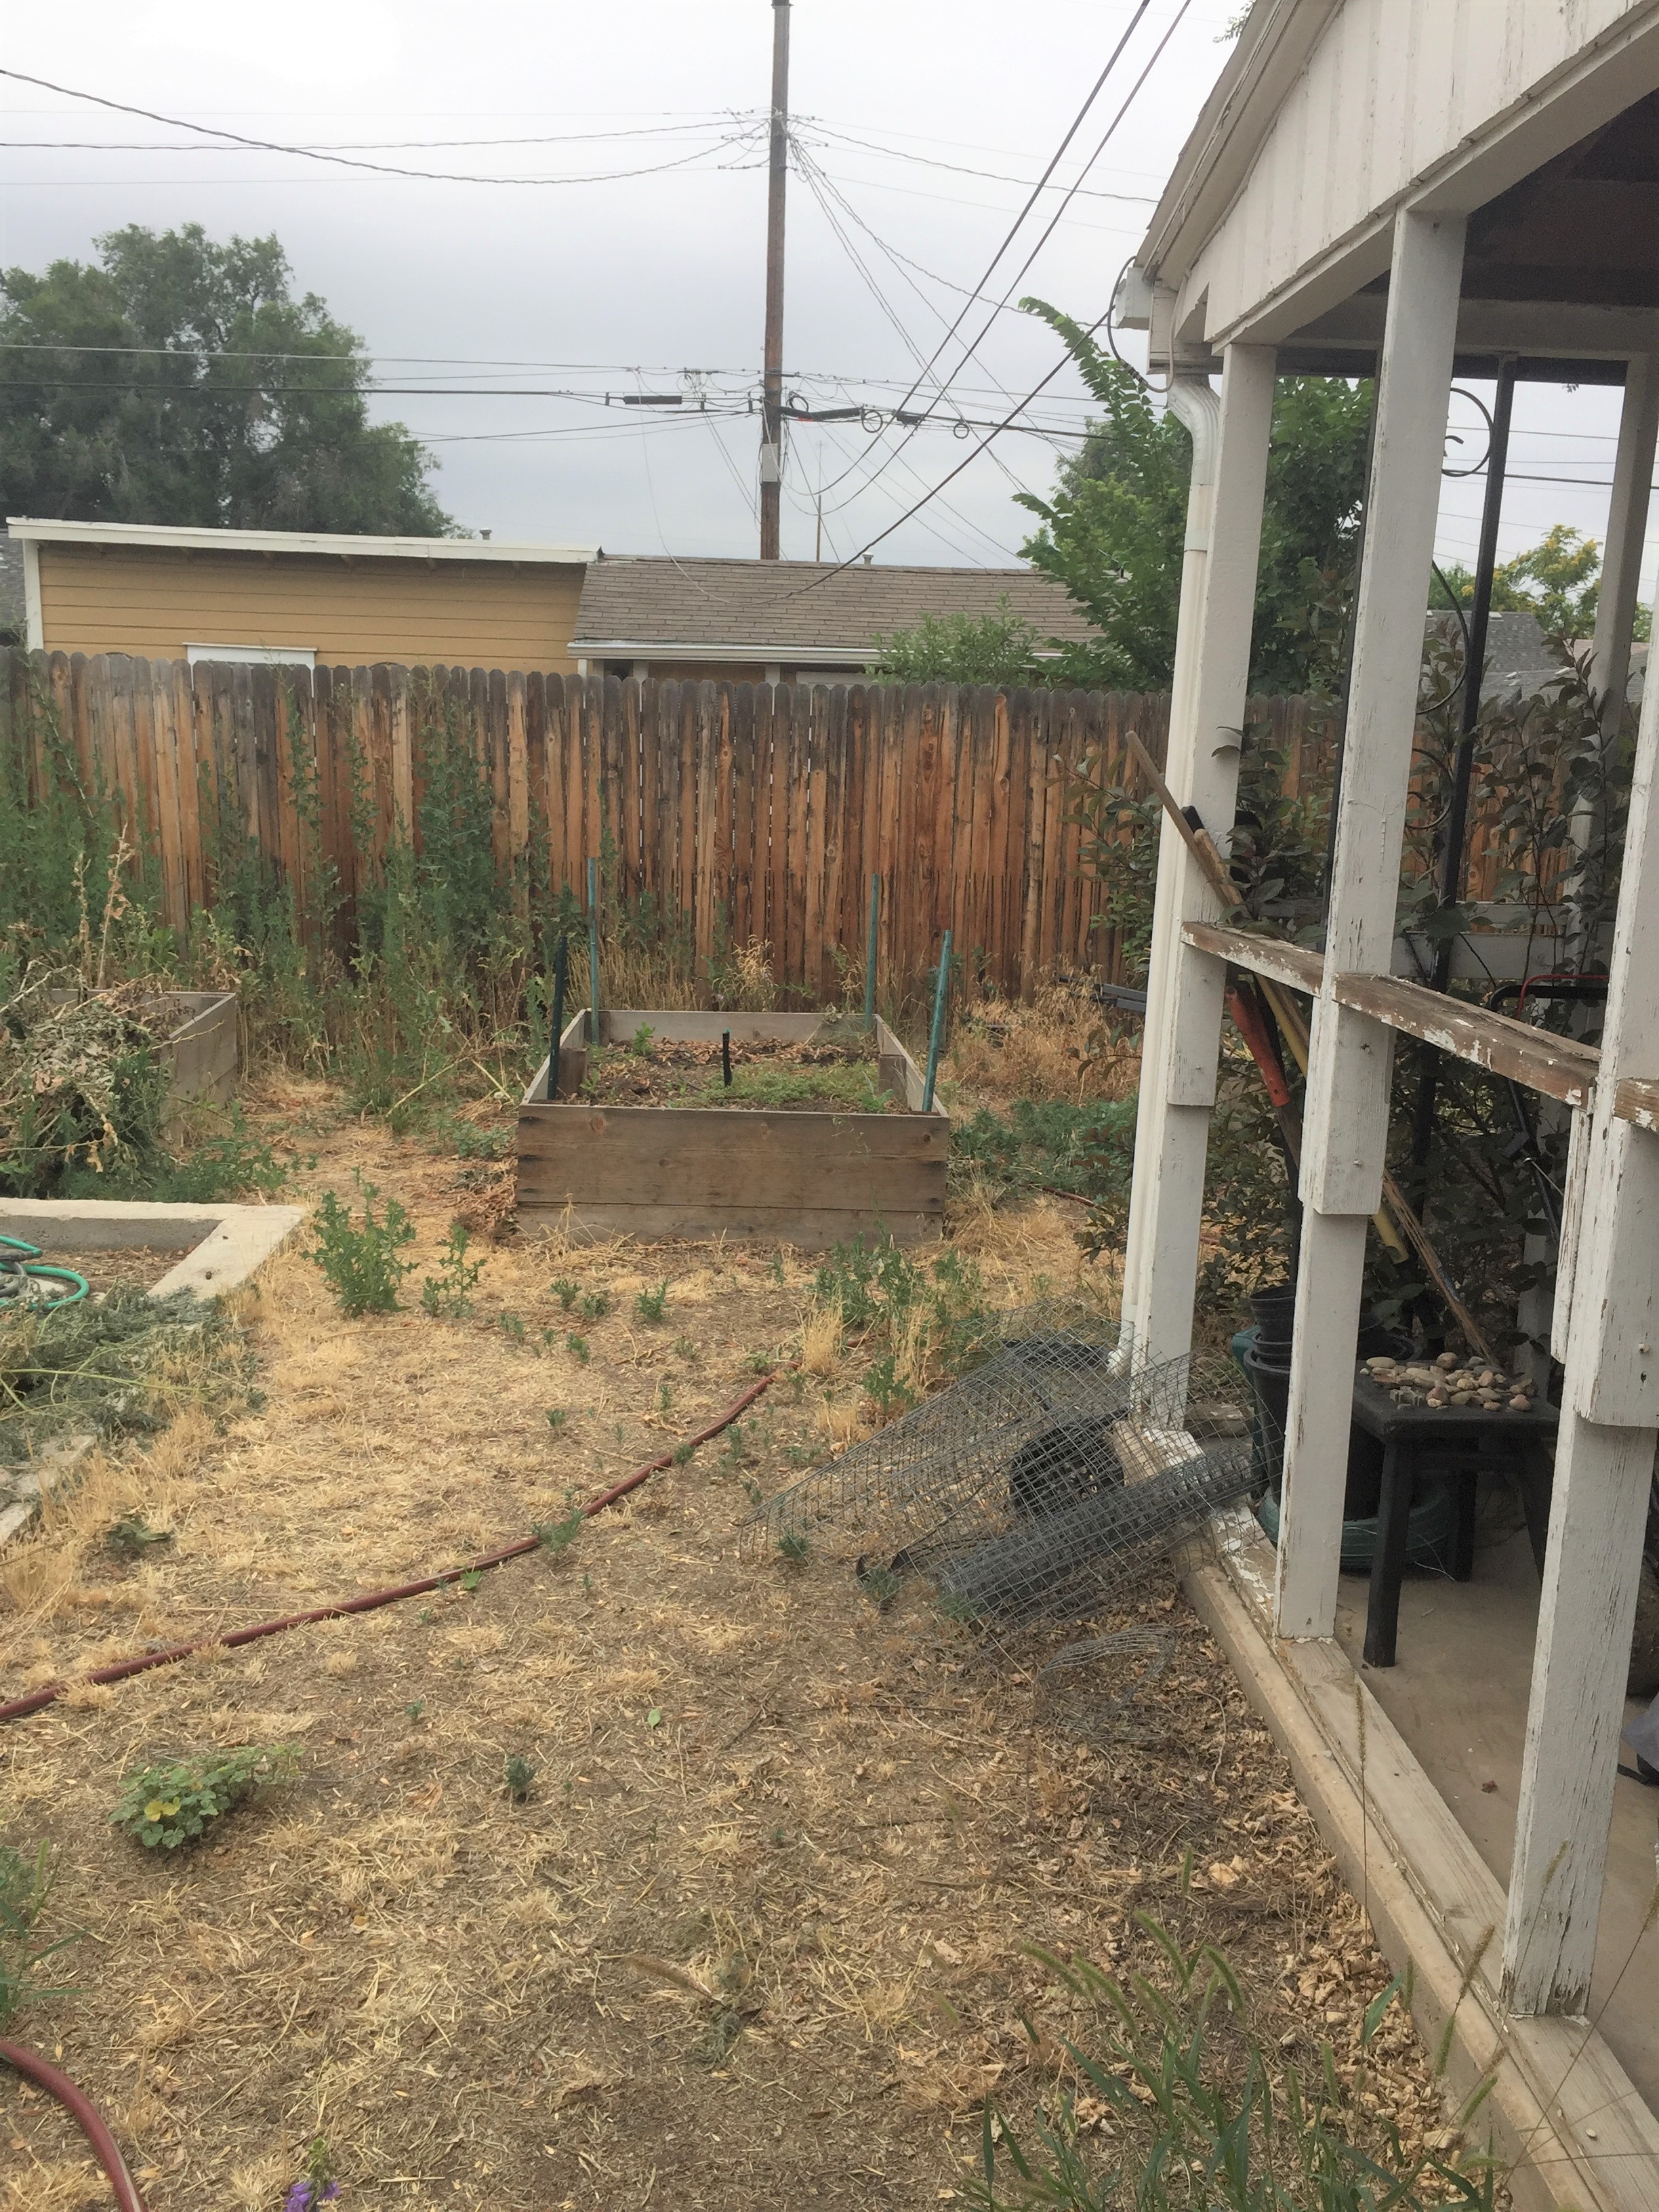
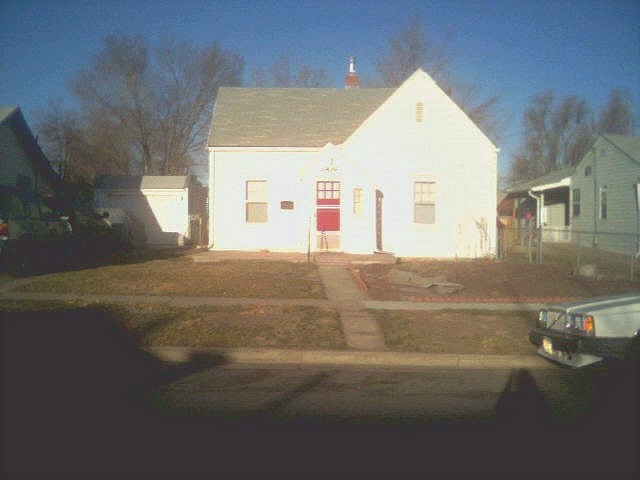
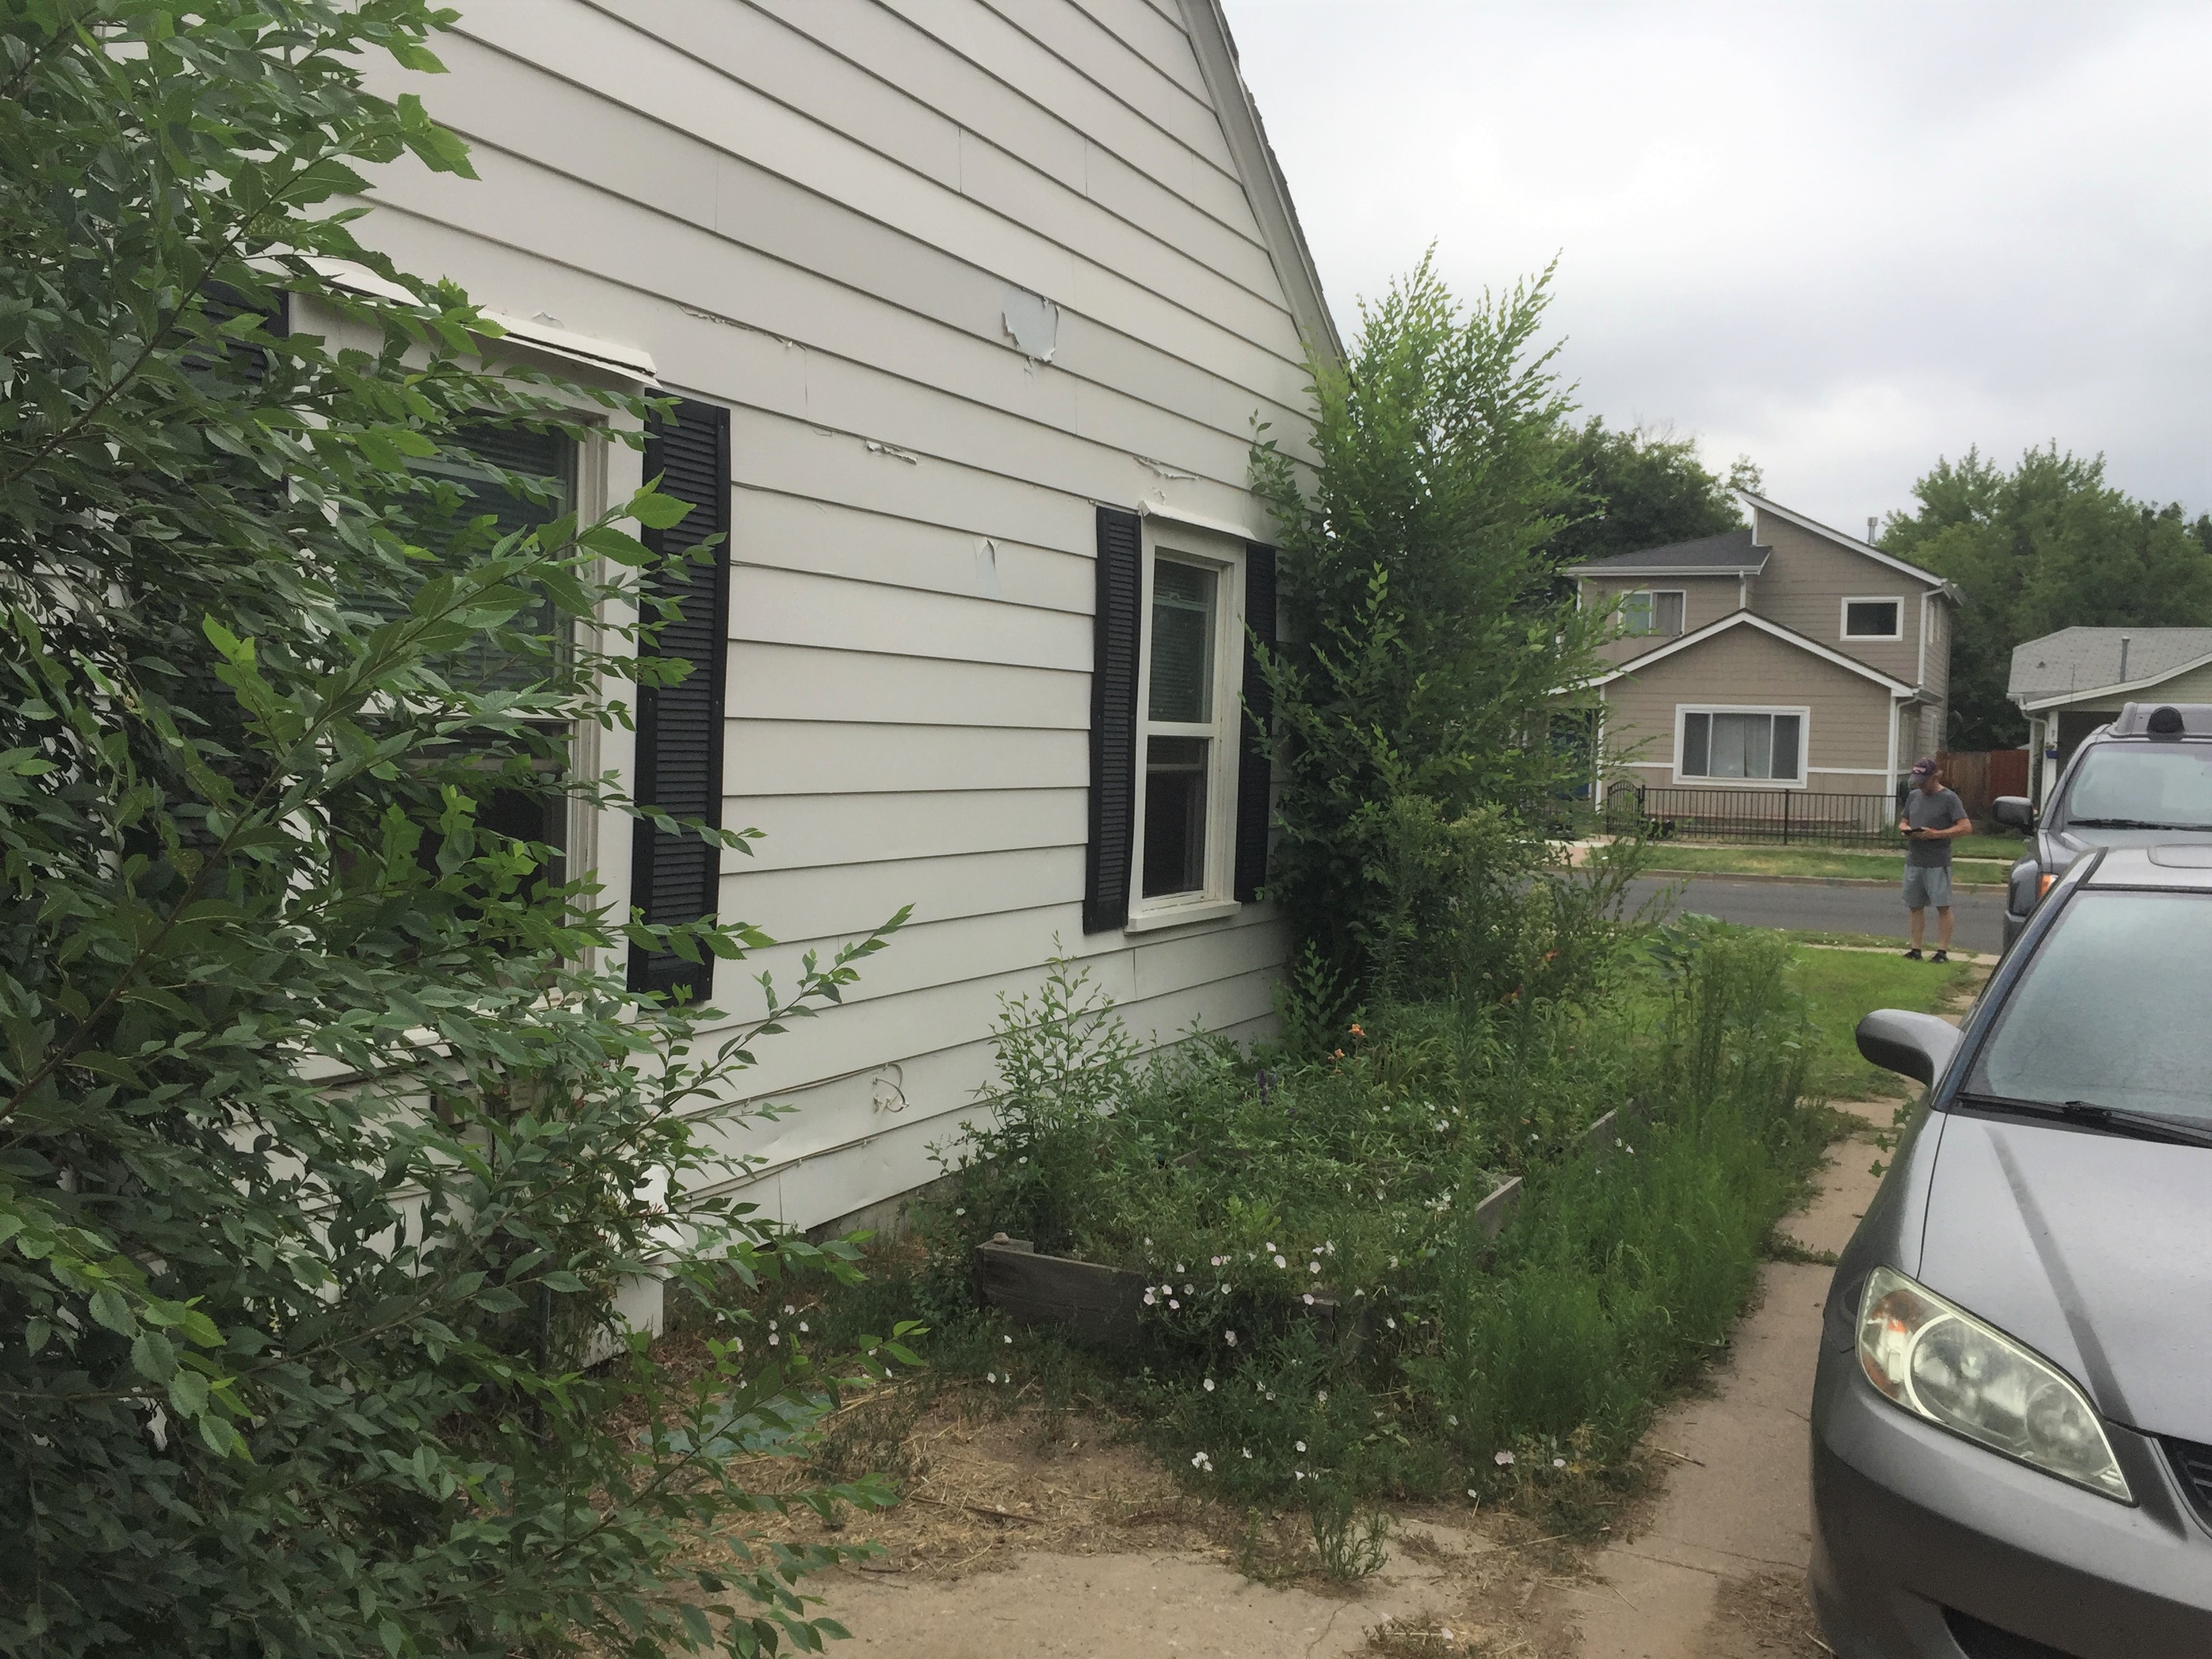
I bought this house in 2005 with long term tenants living here ever since. When the tenants moved out, I got the opportunity to move into this house August 2018 and started the process of renovation, beginning with the exterior. My plan is to create a perfect retirement house!

Its time to update this vintage bungalow.
View from the street. The Aspen tree was planted in 2012.

This is what you see as you park in the driveway and walk to the front door.
Old front door.
North side looking toward the walkway. Chain link fence between me and the neighbors.
South side driveway and garden boxes.
Overgrown garden boxes, volunteer trees and weeds.
Covered back porch with iron scroll and white painted 2×4 posts.
Original concrete slab once had a garage sitting on top.
Overgrown garden boxes and weeds.
Sprinkler system was installed in 2017.
North view of back yard.
North side of house walkway.
I like the tongue and groove cedar paneling on the ceiling, the florescent light fixtures
not so much.
Back porch looking South.
South view of the back porch.
The original back door with utilities mounted in full view!

Now, to make the exterior interesting!

The first thing I had to do was to take out the concrete porch and walkway from the city sidewalk to the front of the house.
Where the concrete walkway used to be.
My awesome neighbor split the cost of a new cedar fence with me. We both are happy to see the chain link fence gone!
The new fence looks clean and tidy.
I also had the walkway made wider, 4′.
Garden boxes are removed and a stubborn tree stump dug out.
This whole landing, where the concrete porch was, sat higher than the rest of the yard.
This is just ugly and beat up. I can’t wait to turn this space into a feature instead of an eyesore outside my kitchen window!

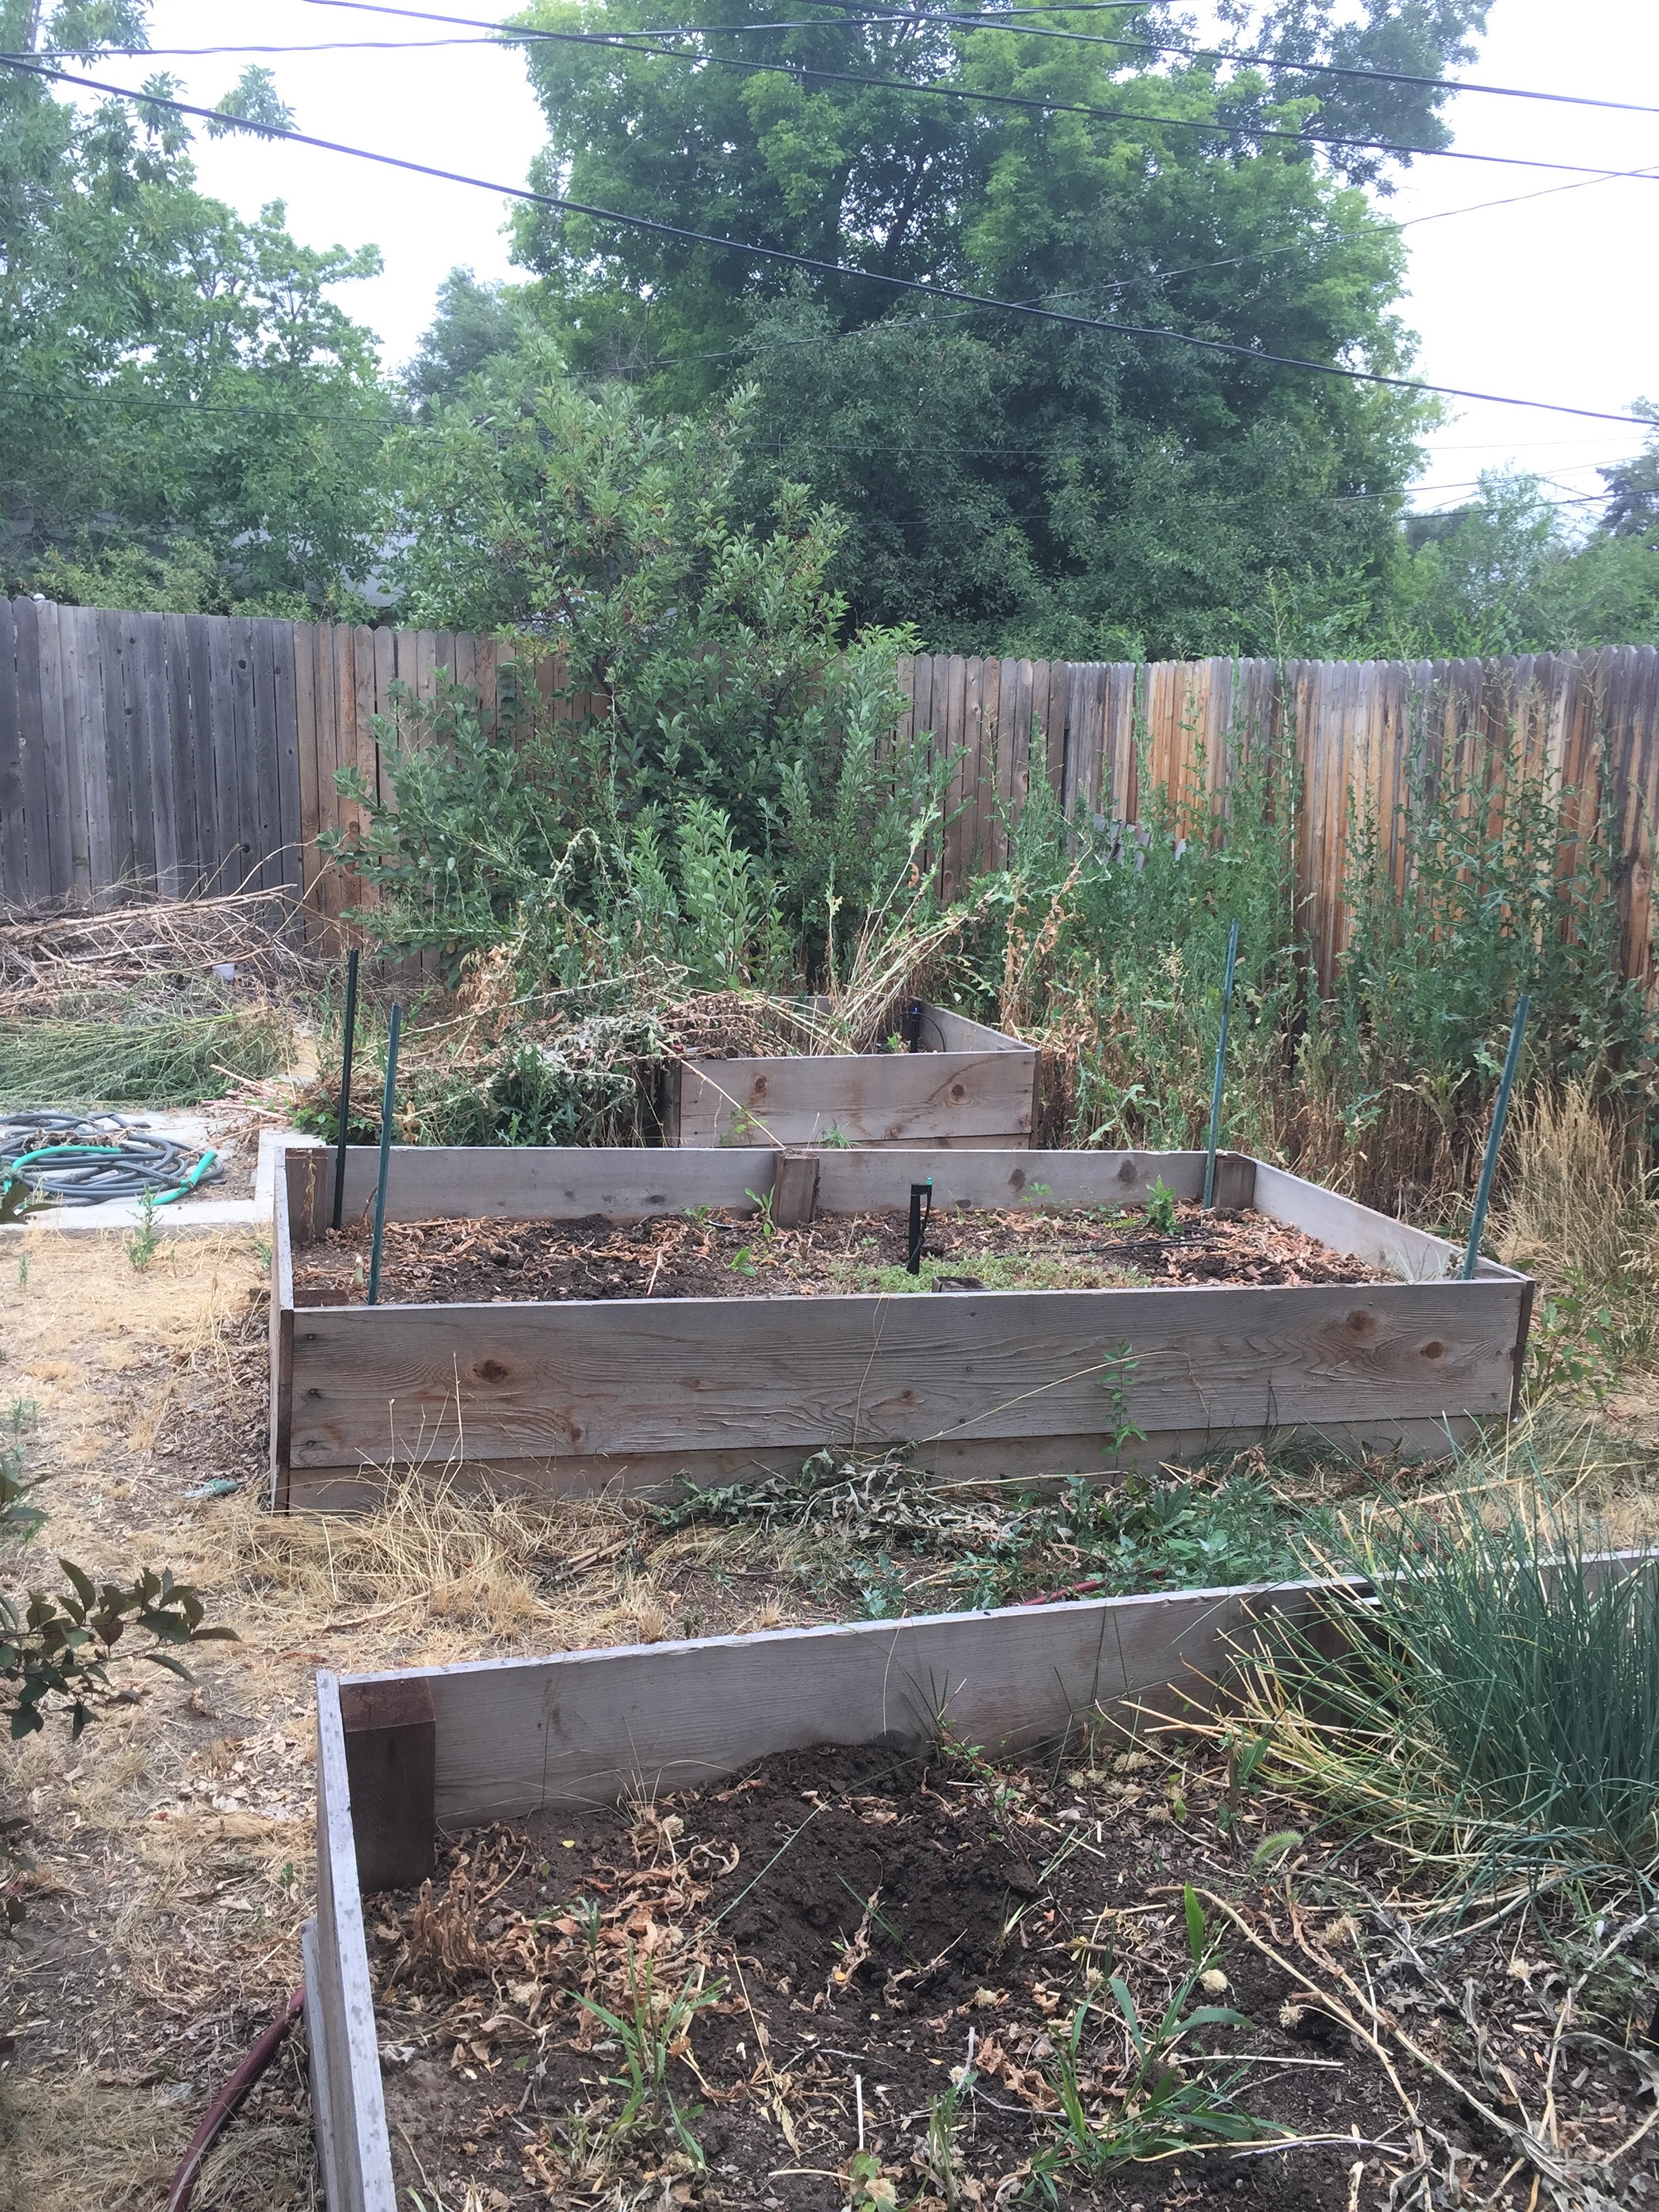
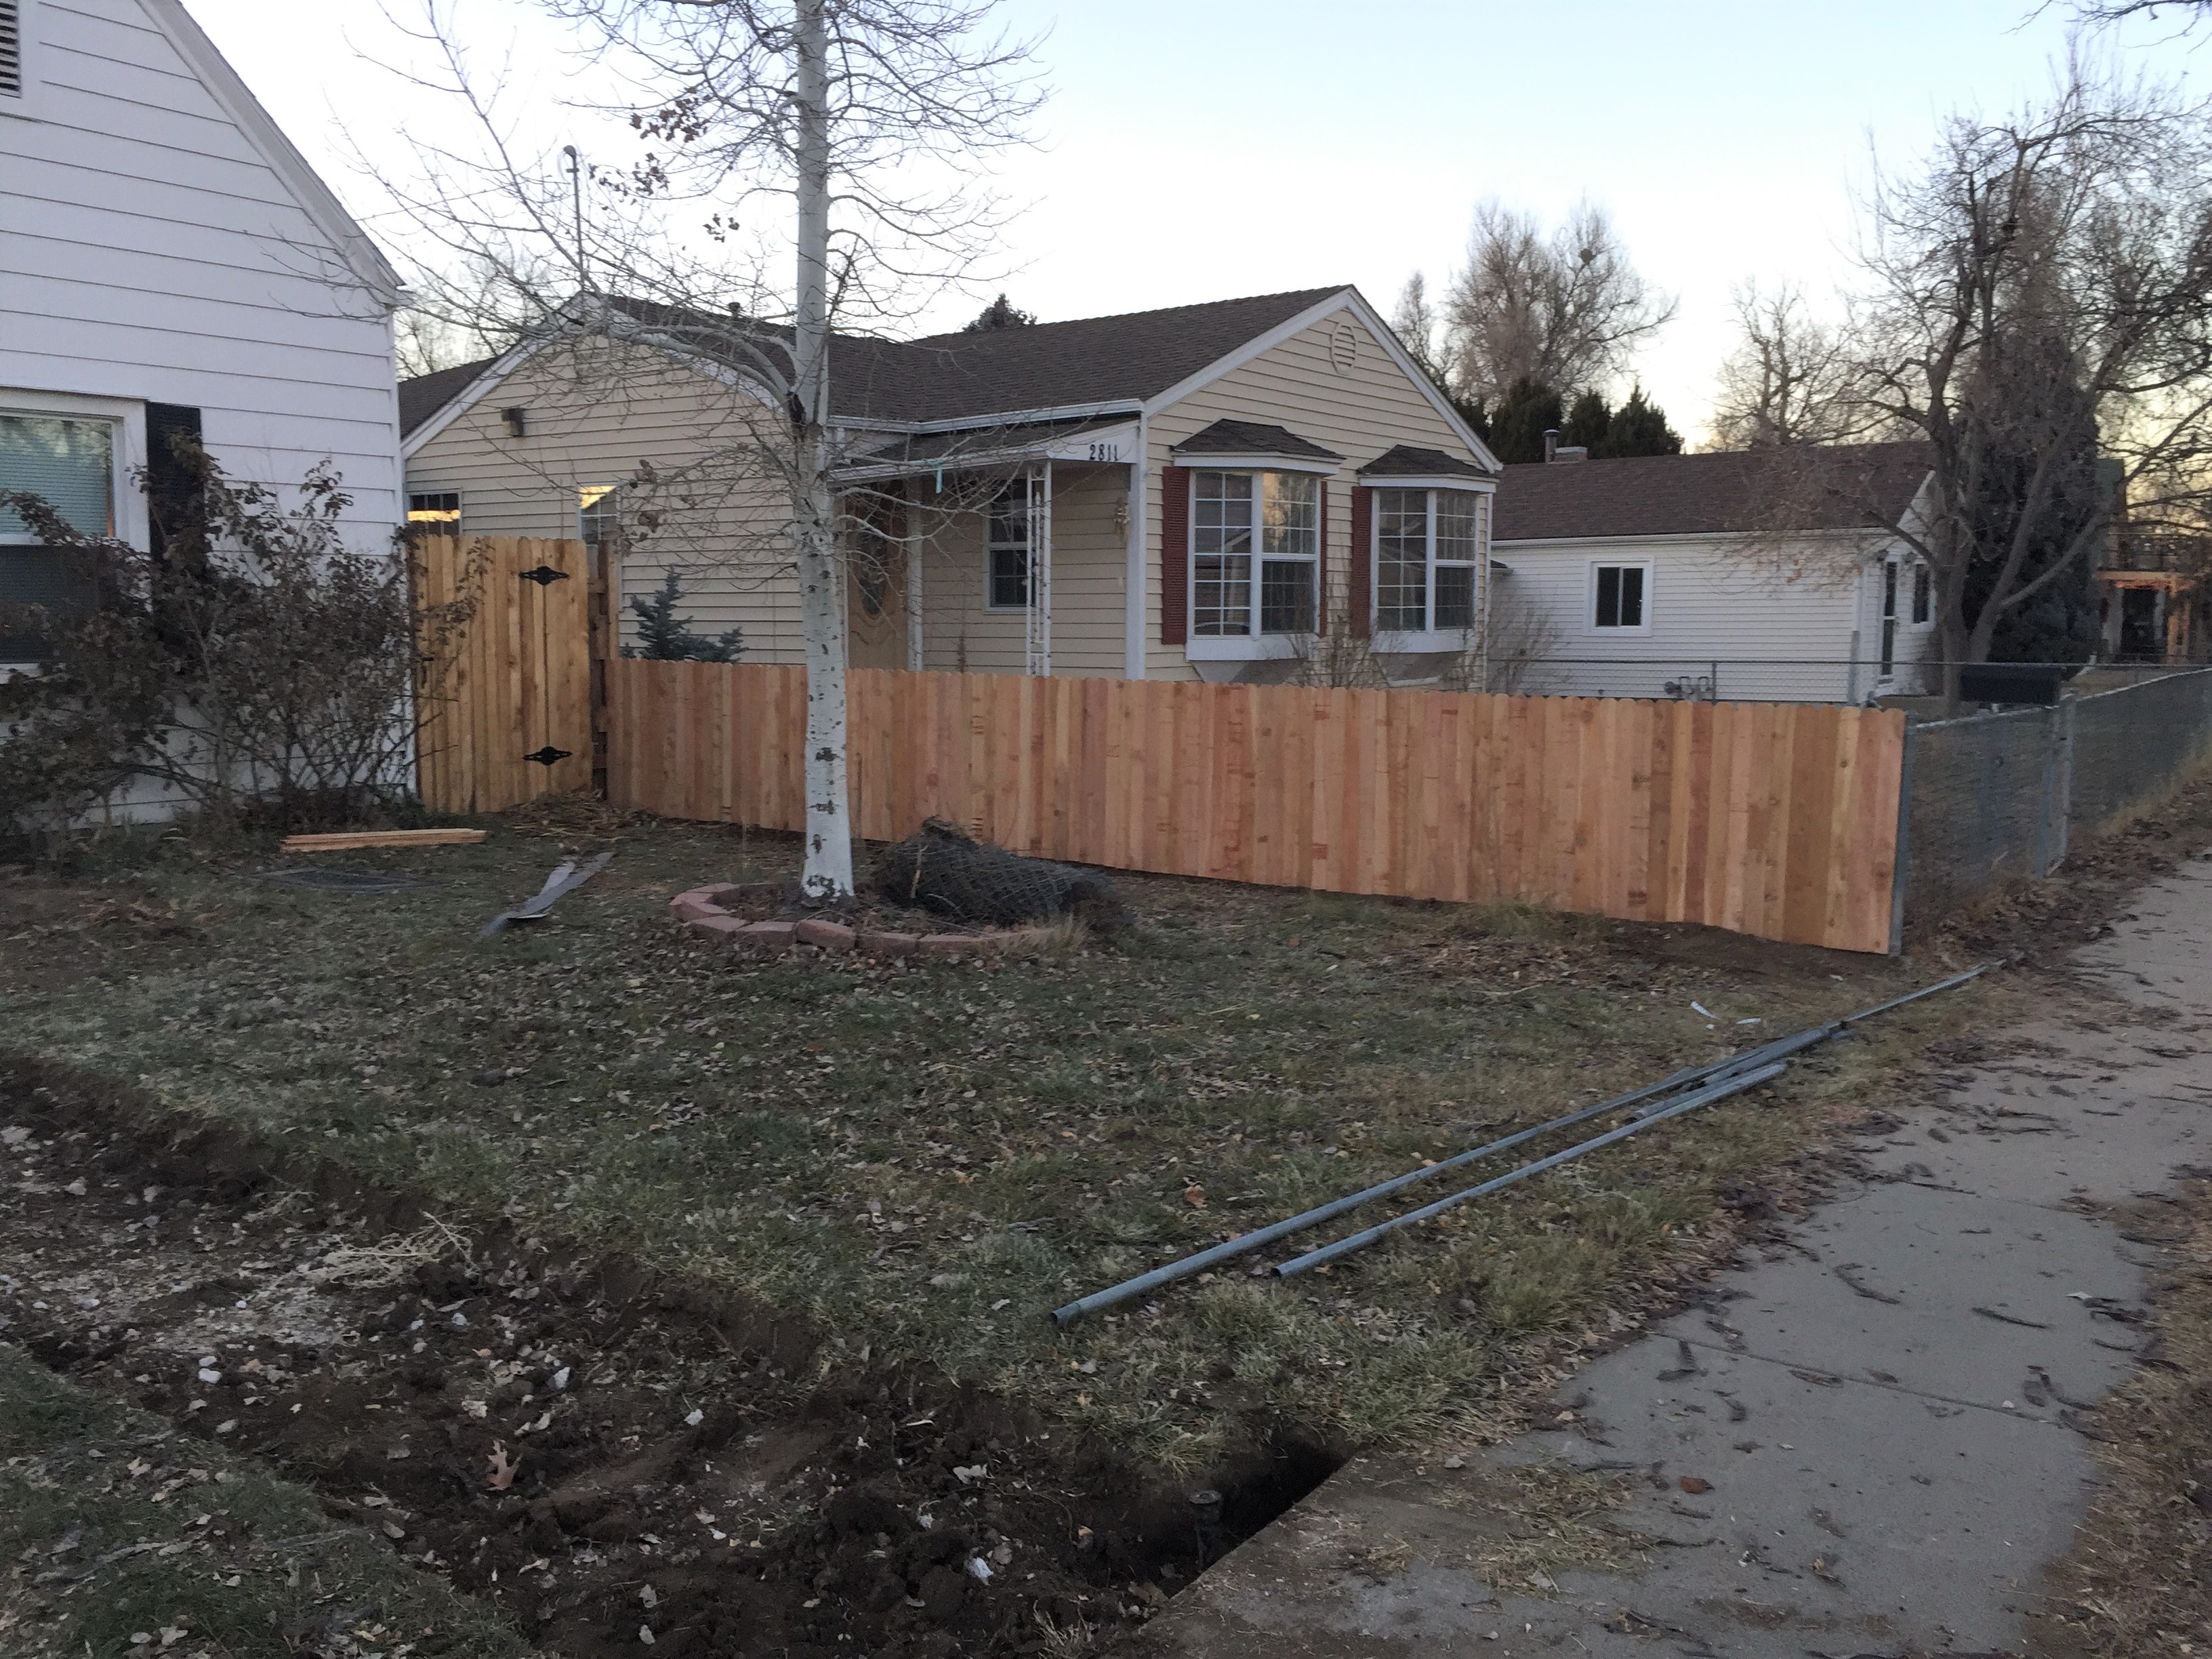
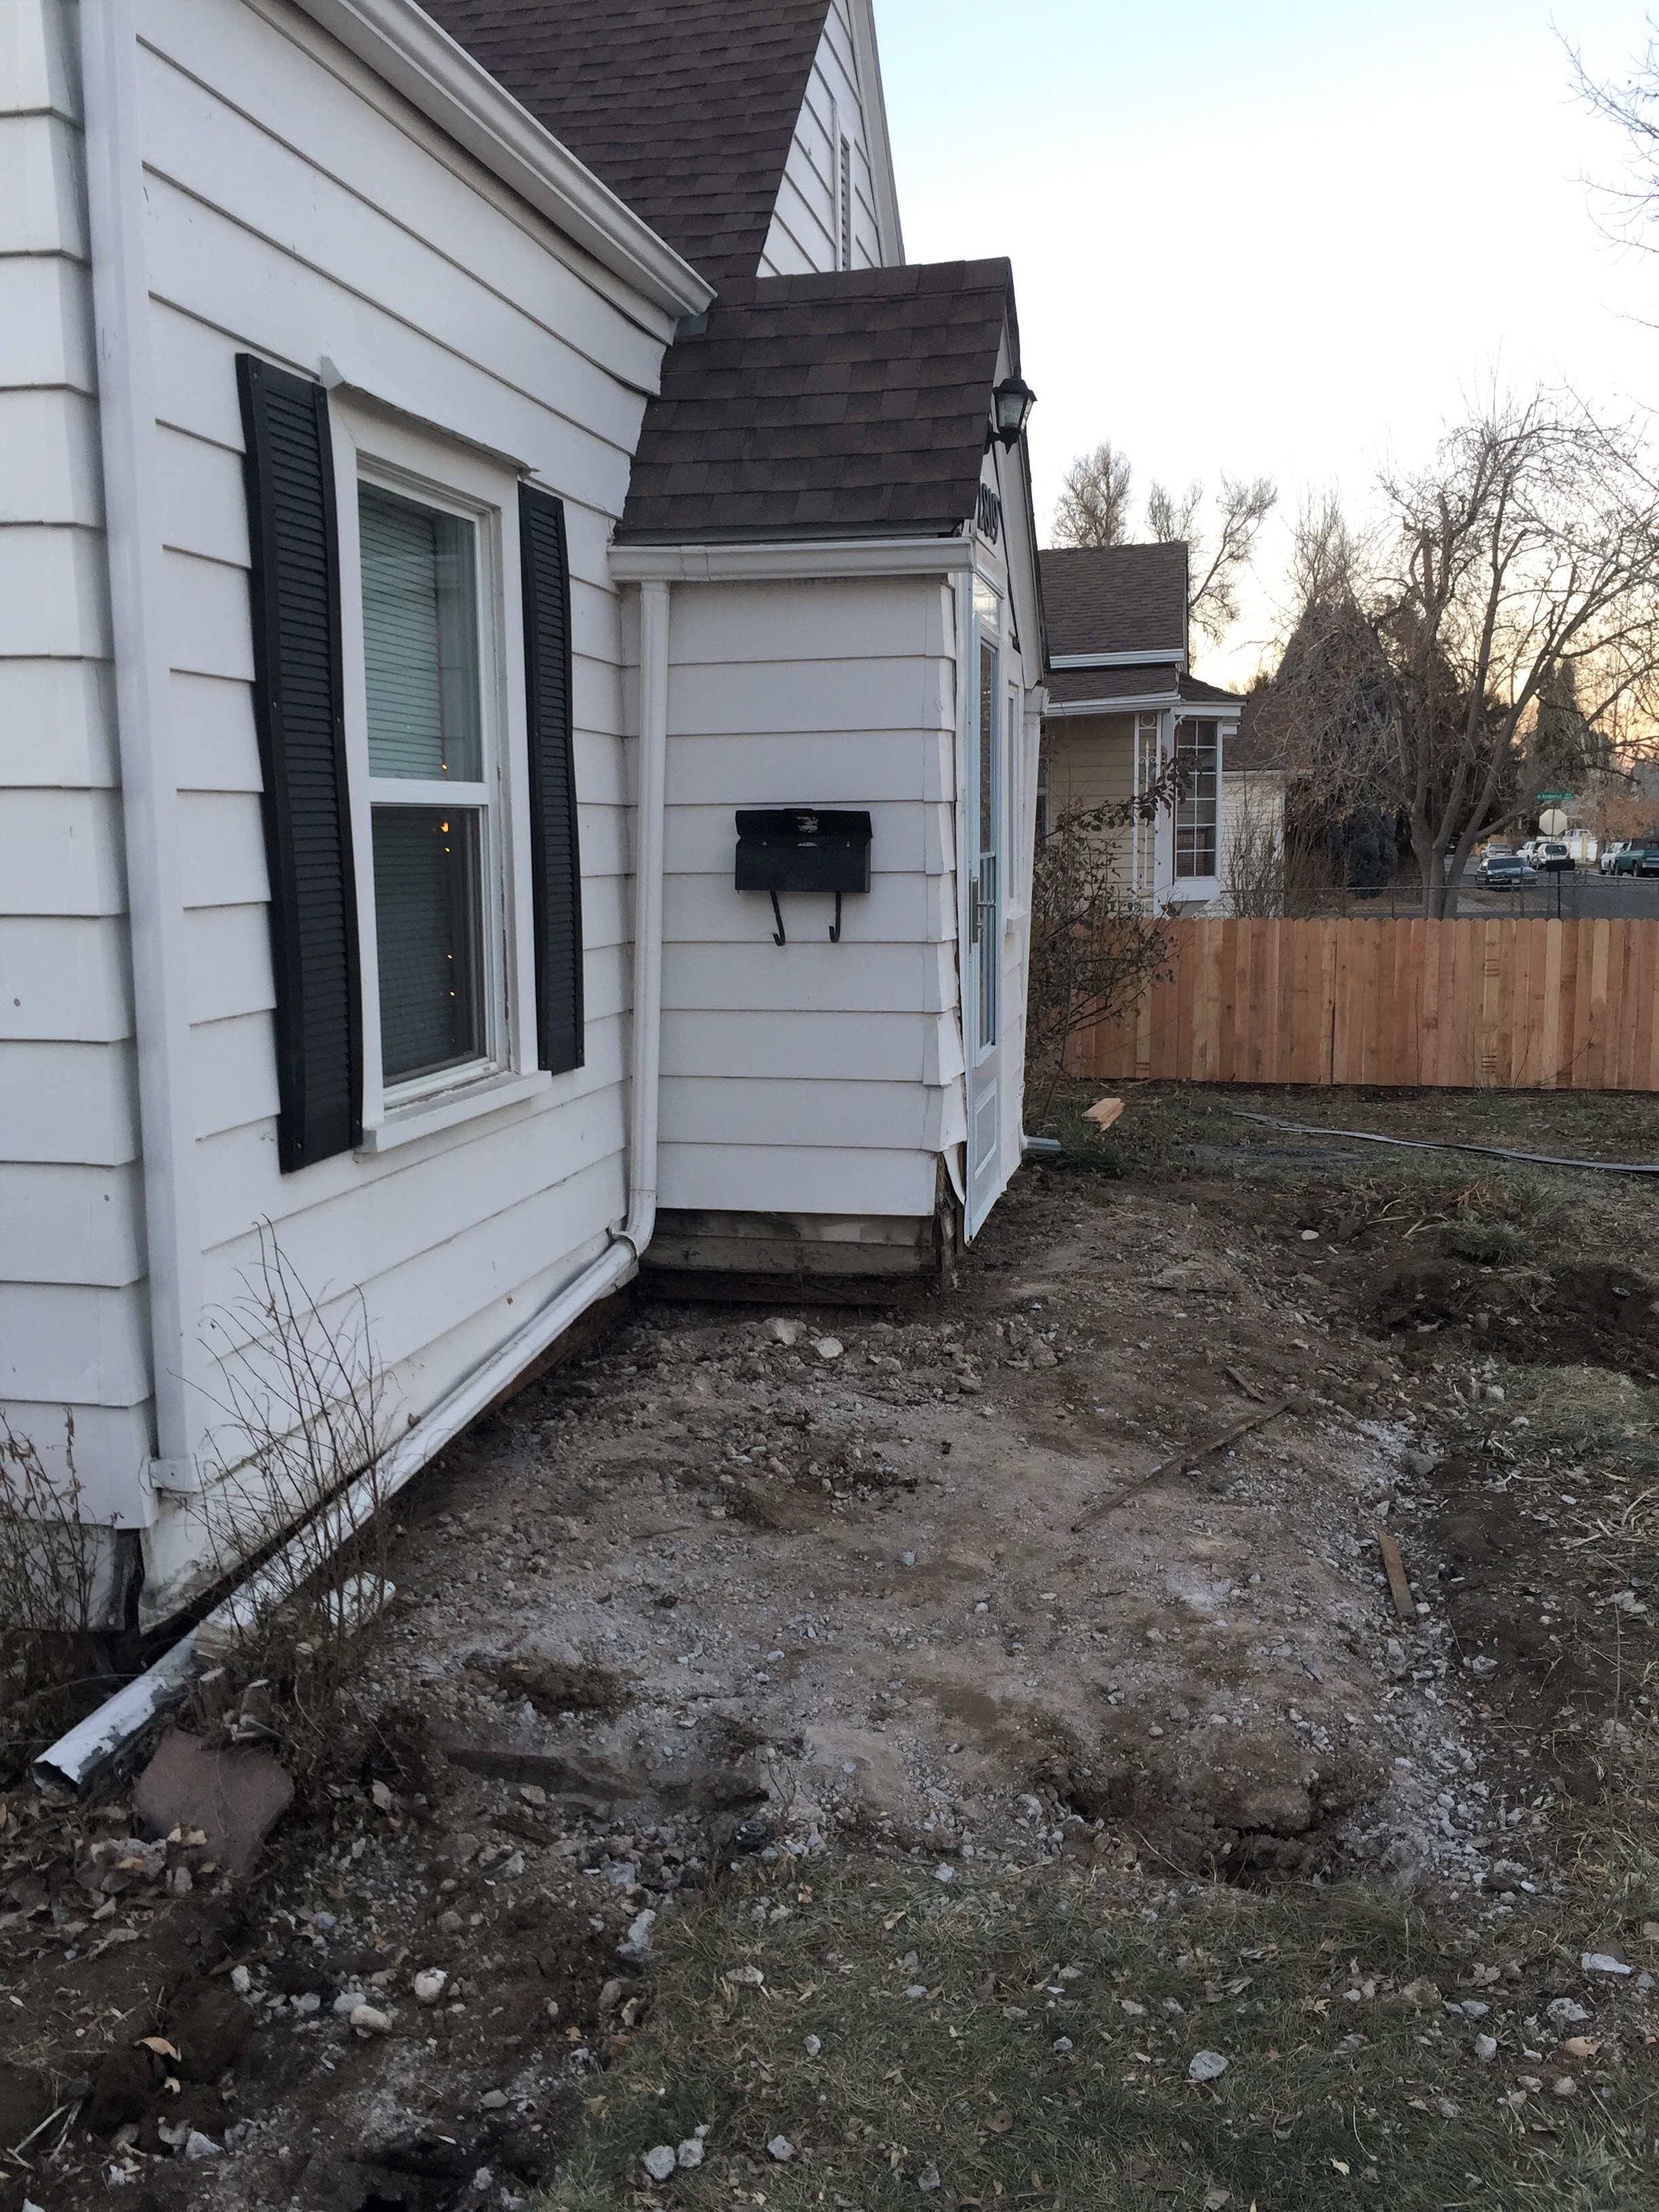
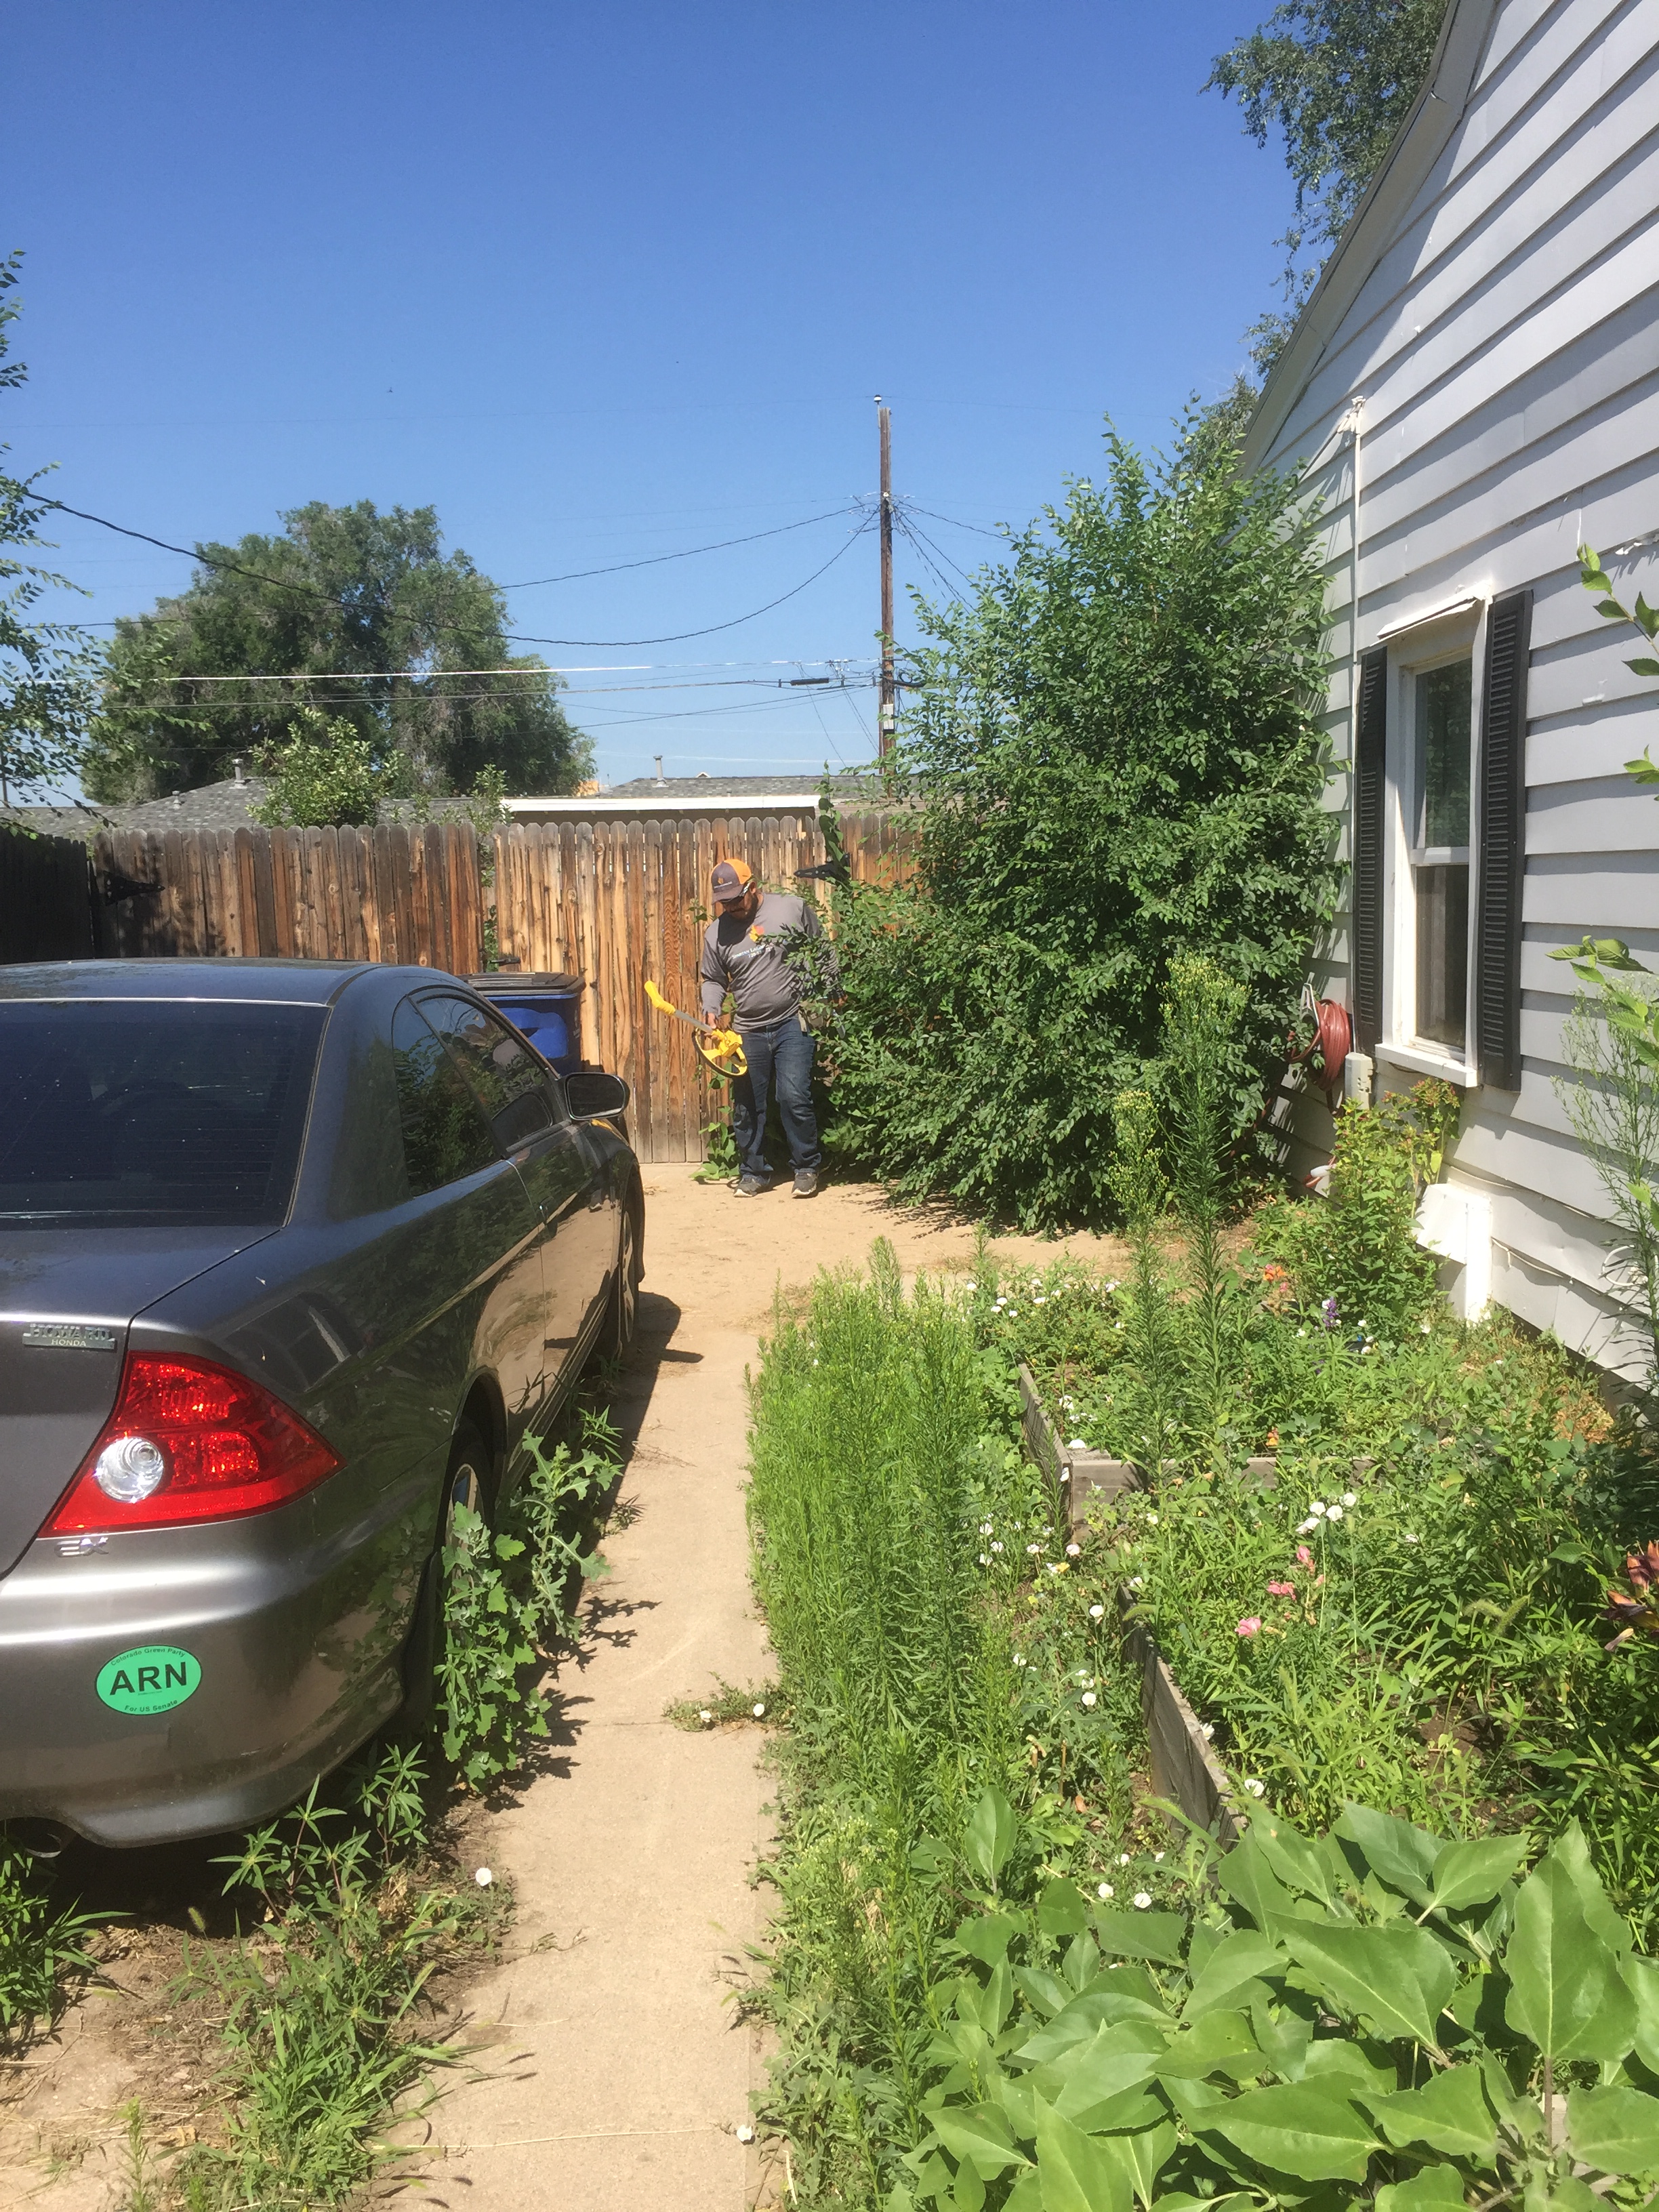
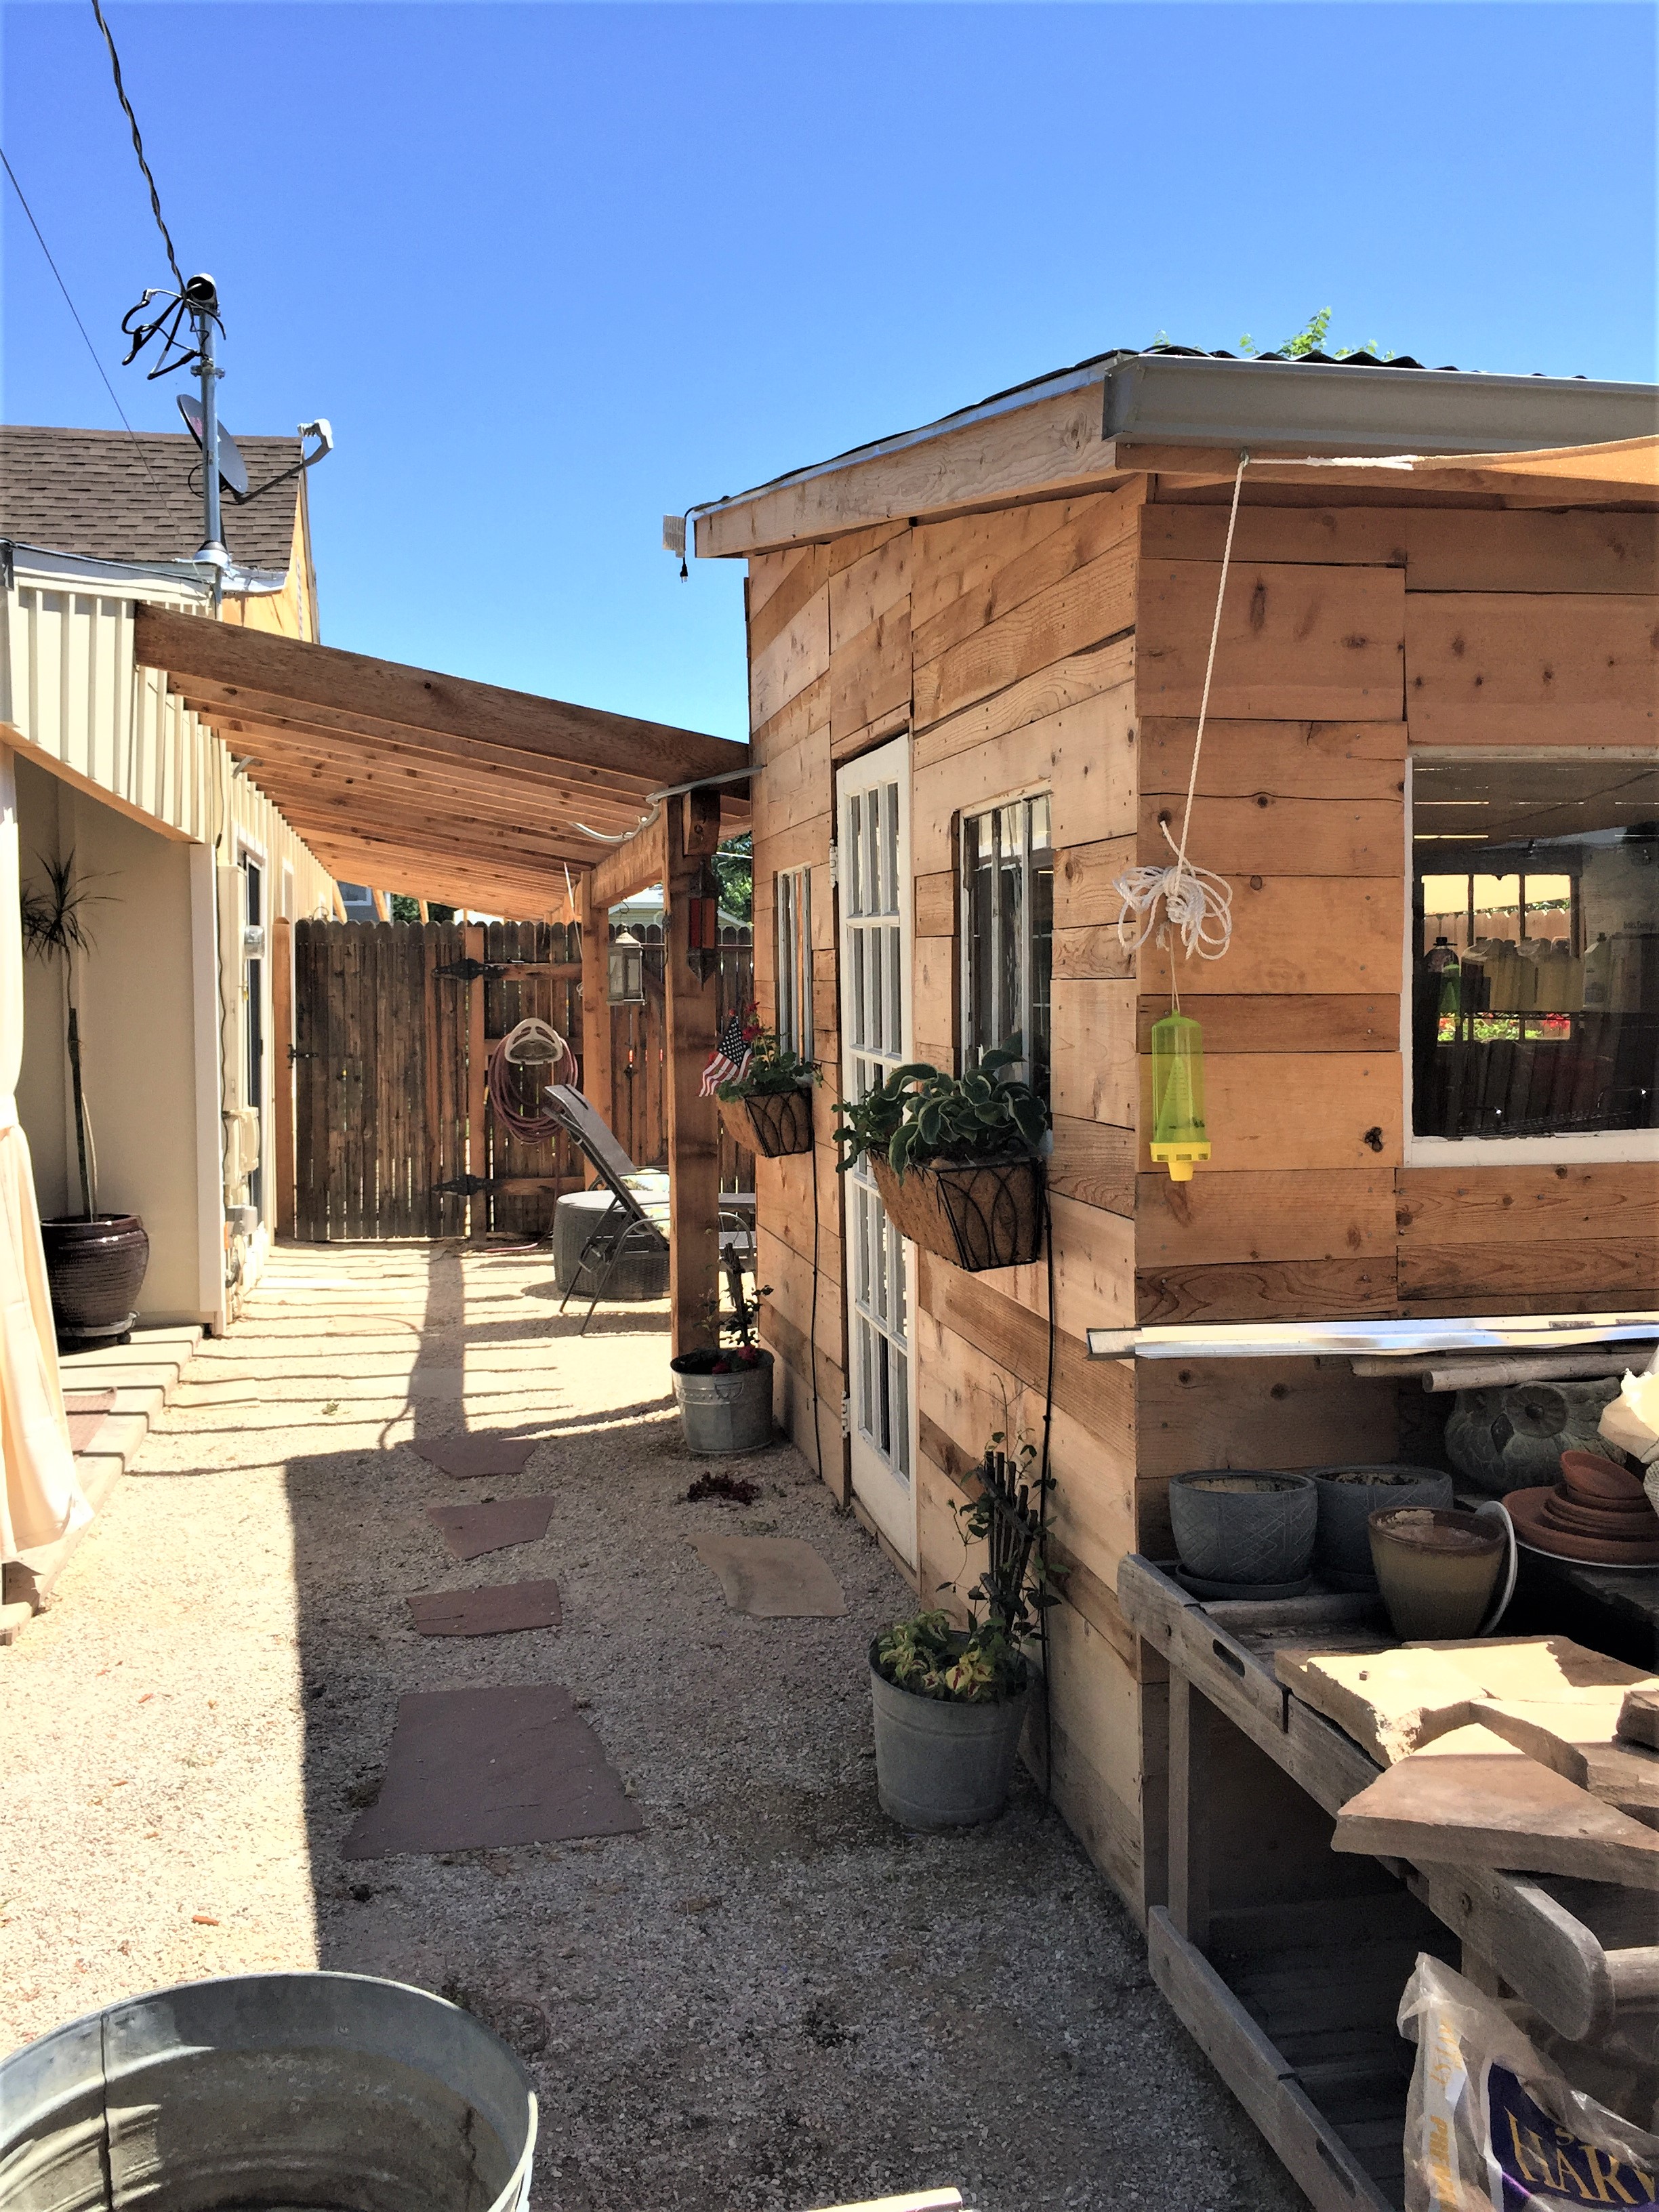
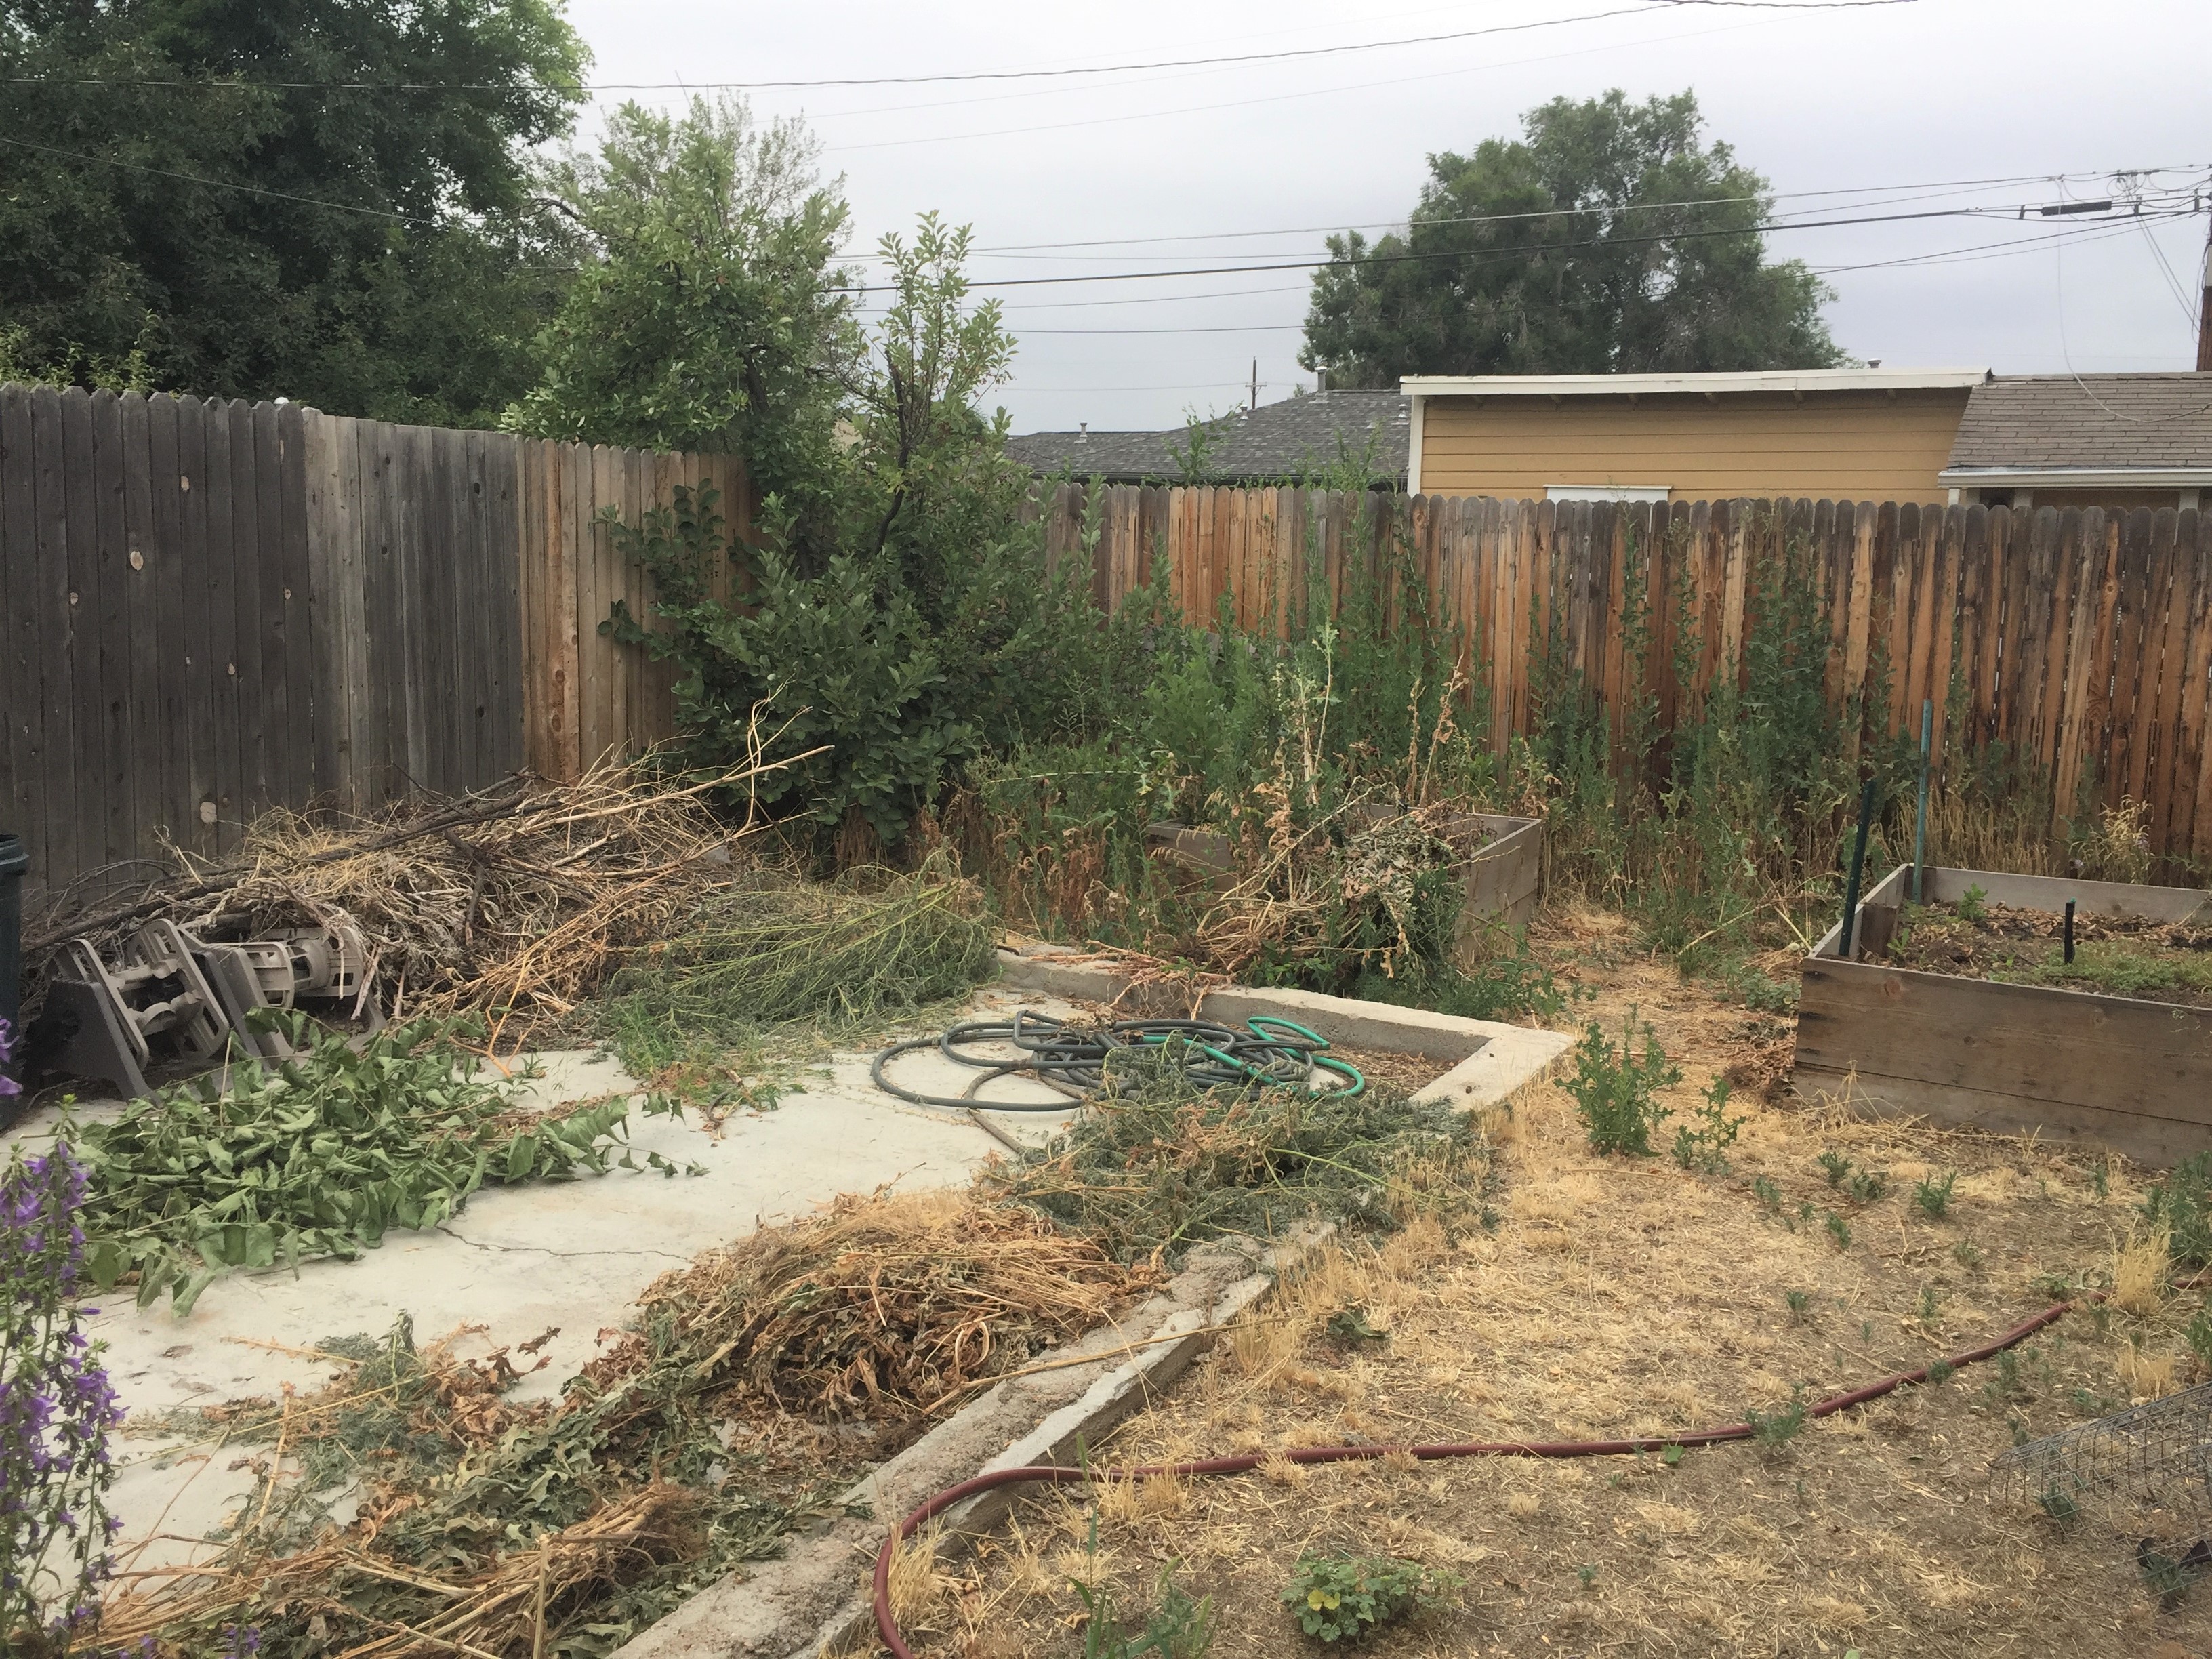
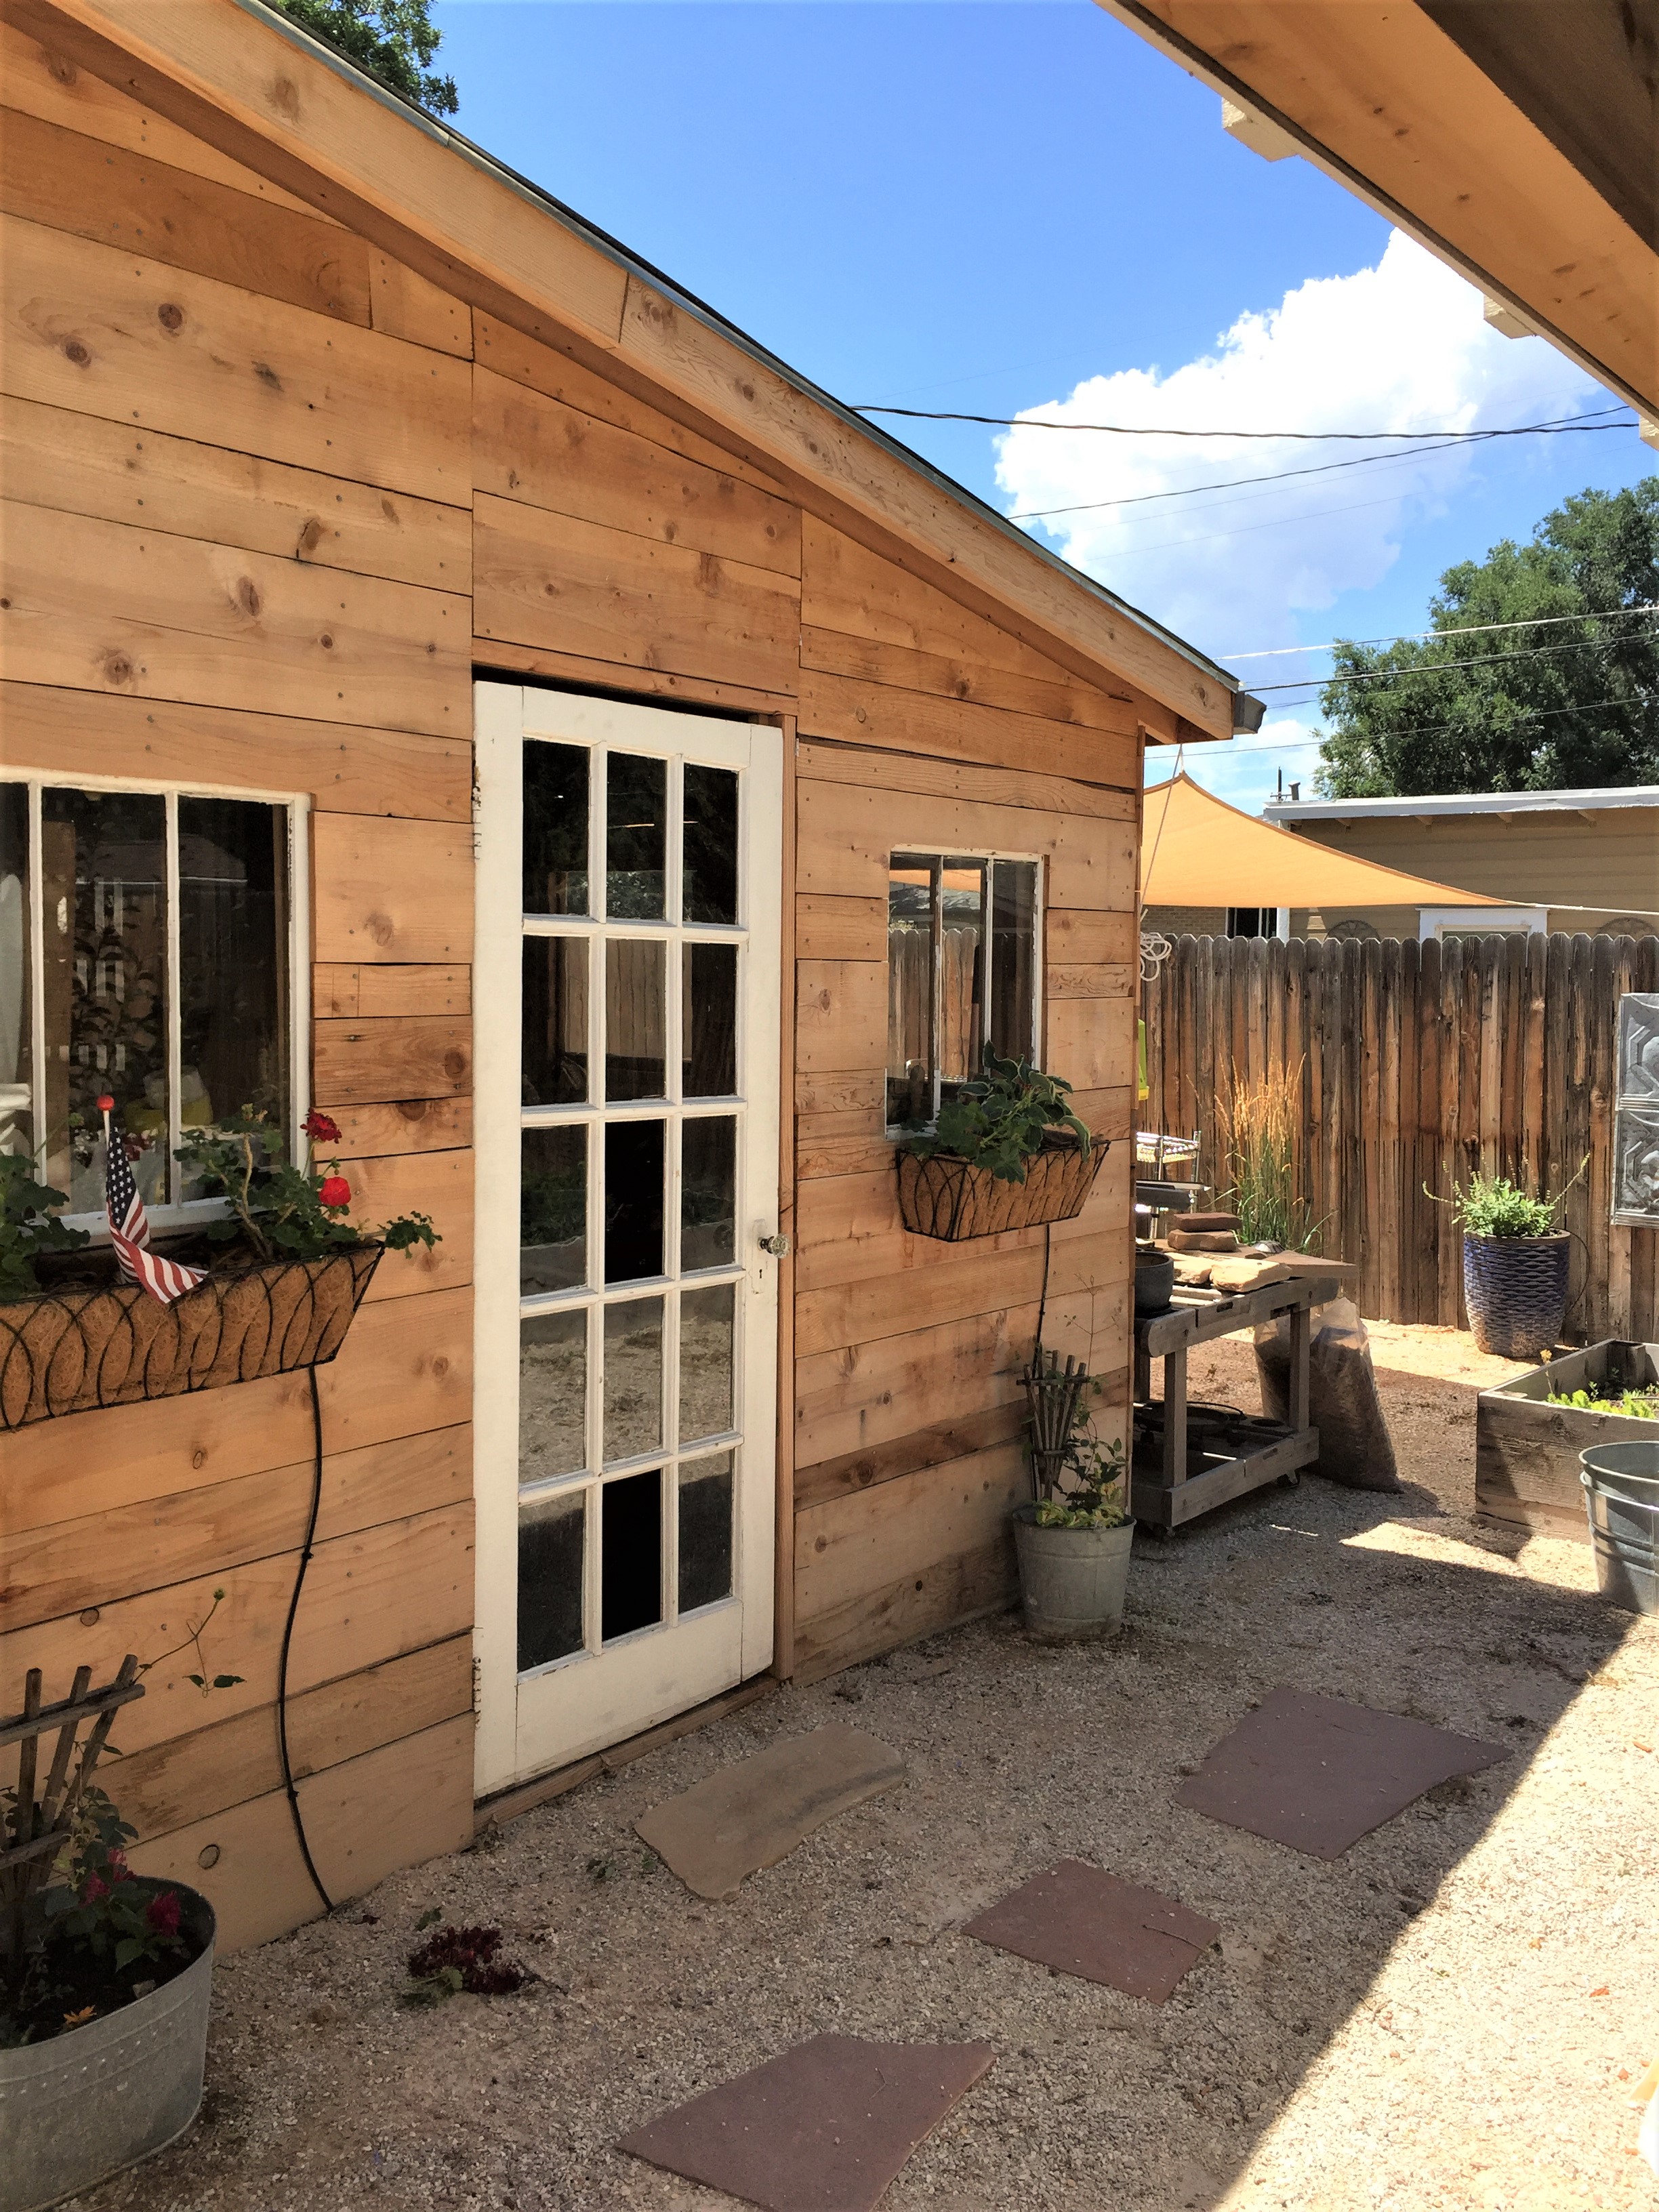
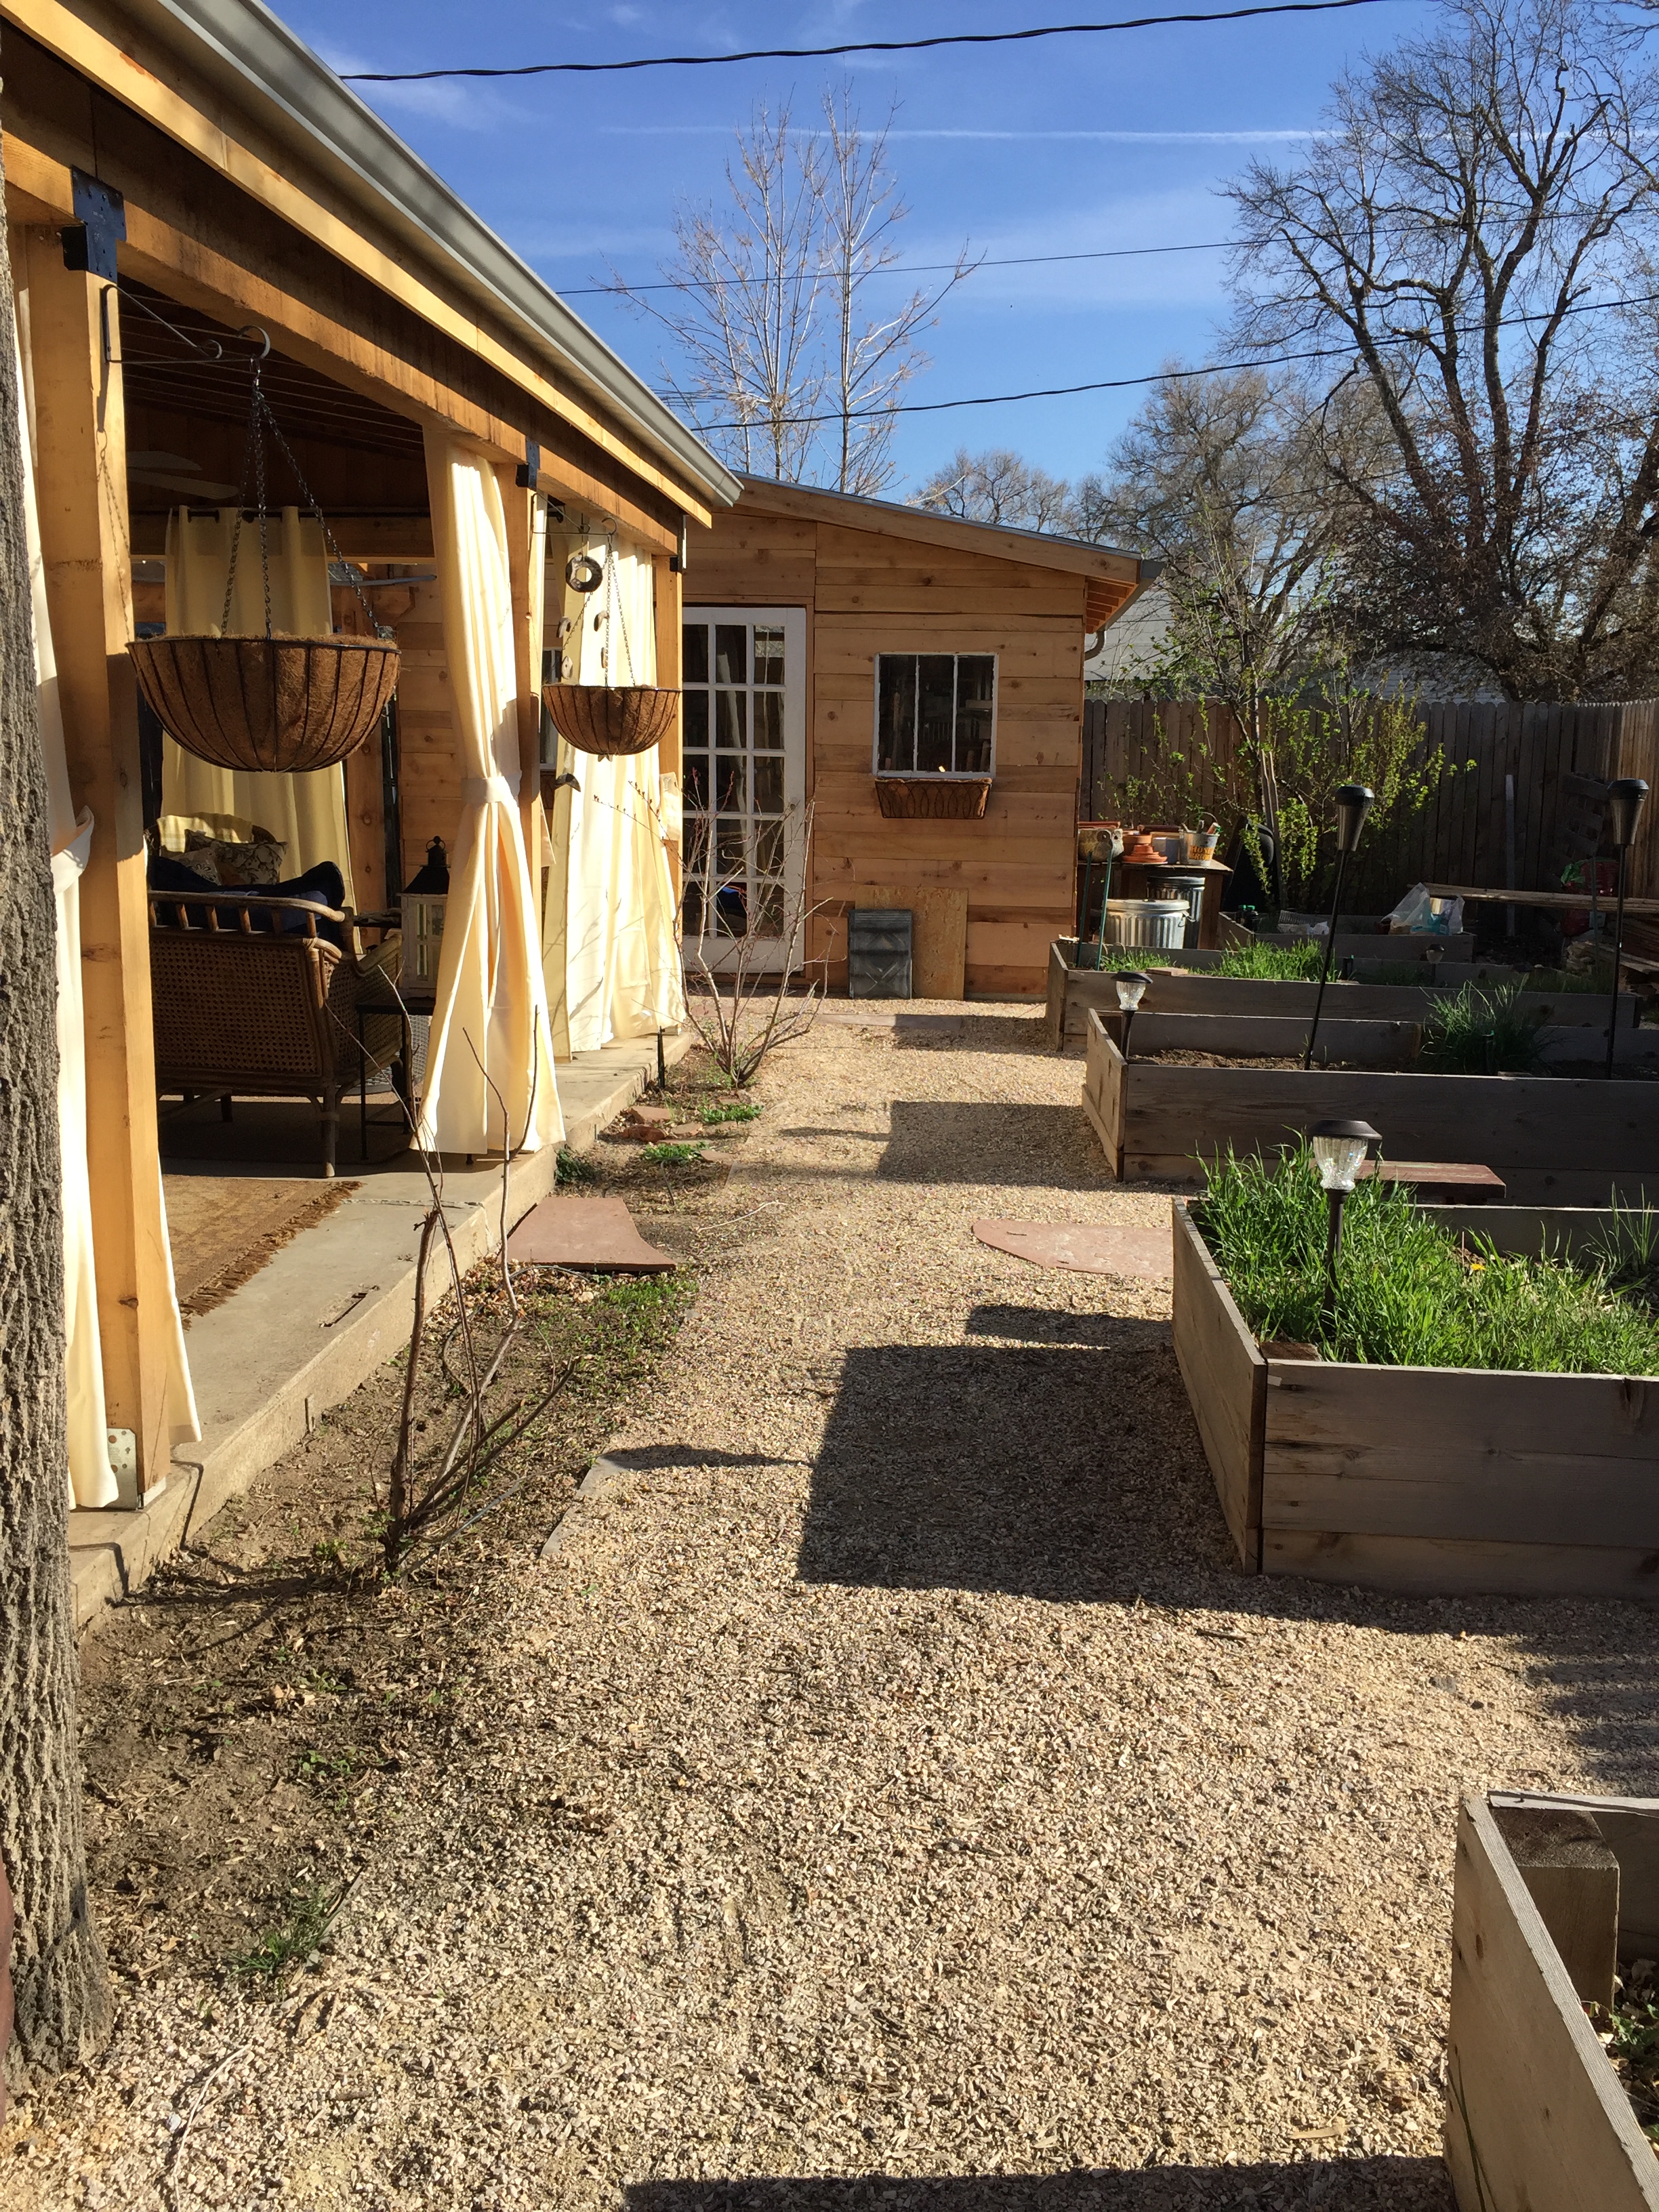
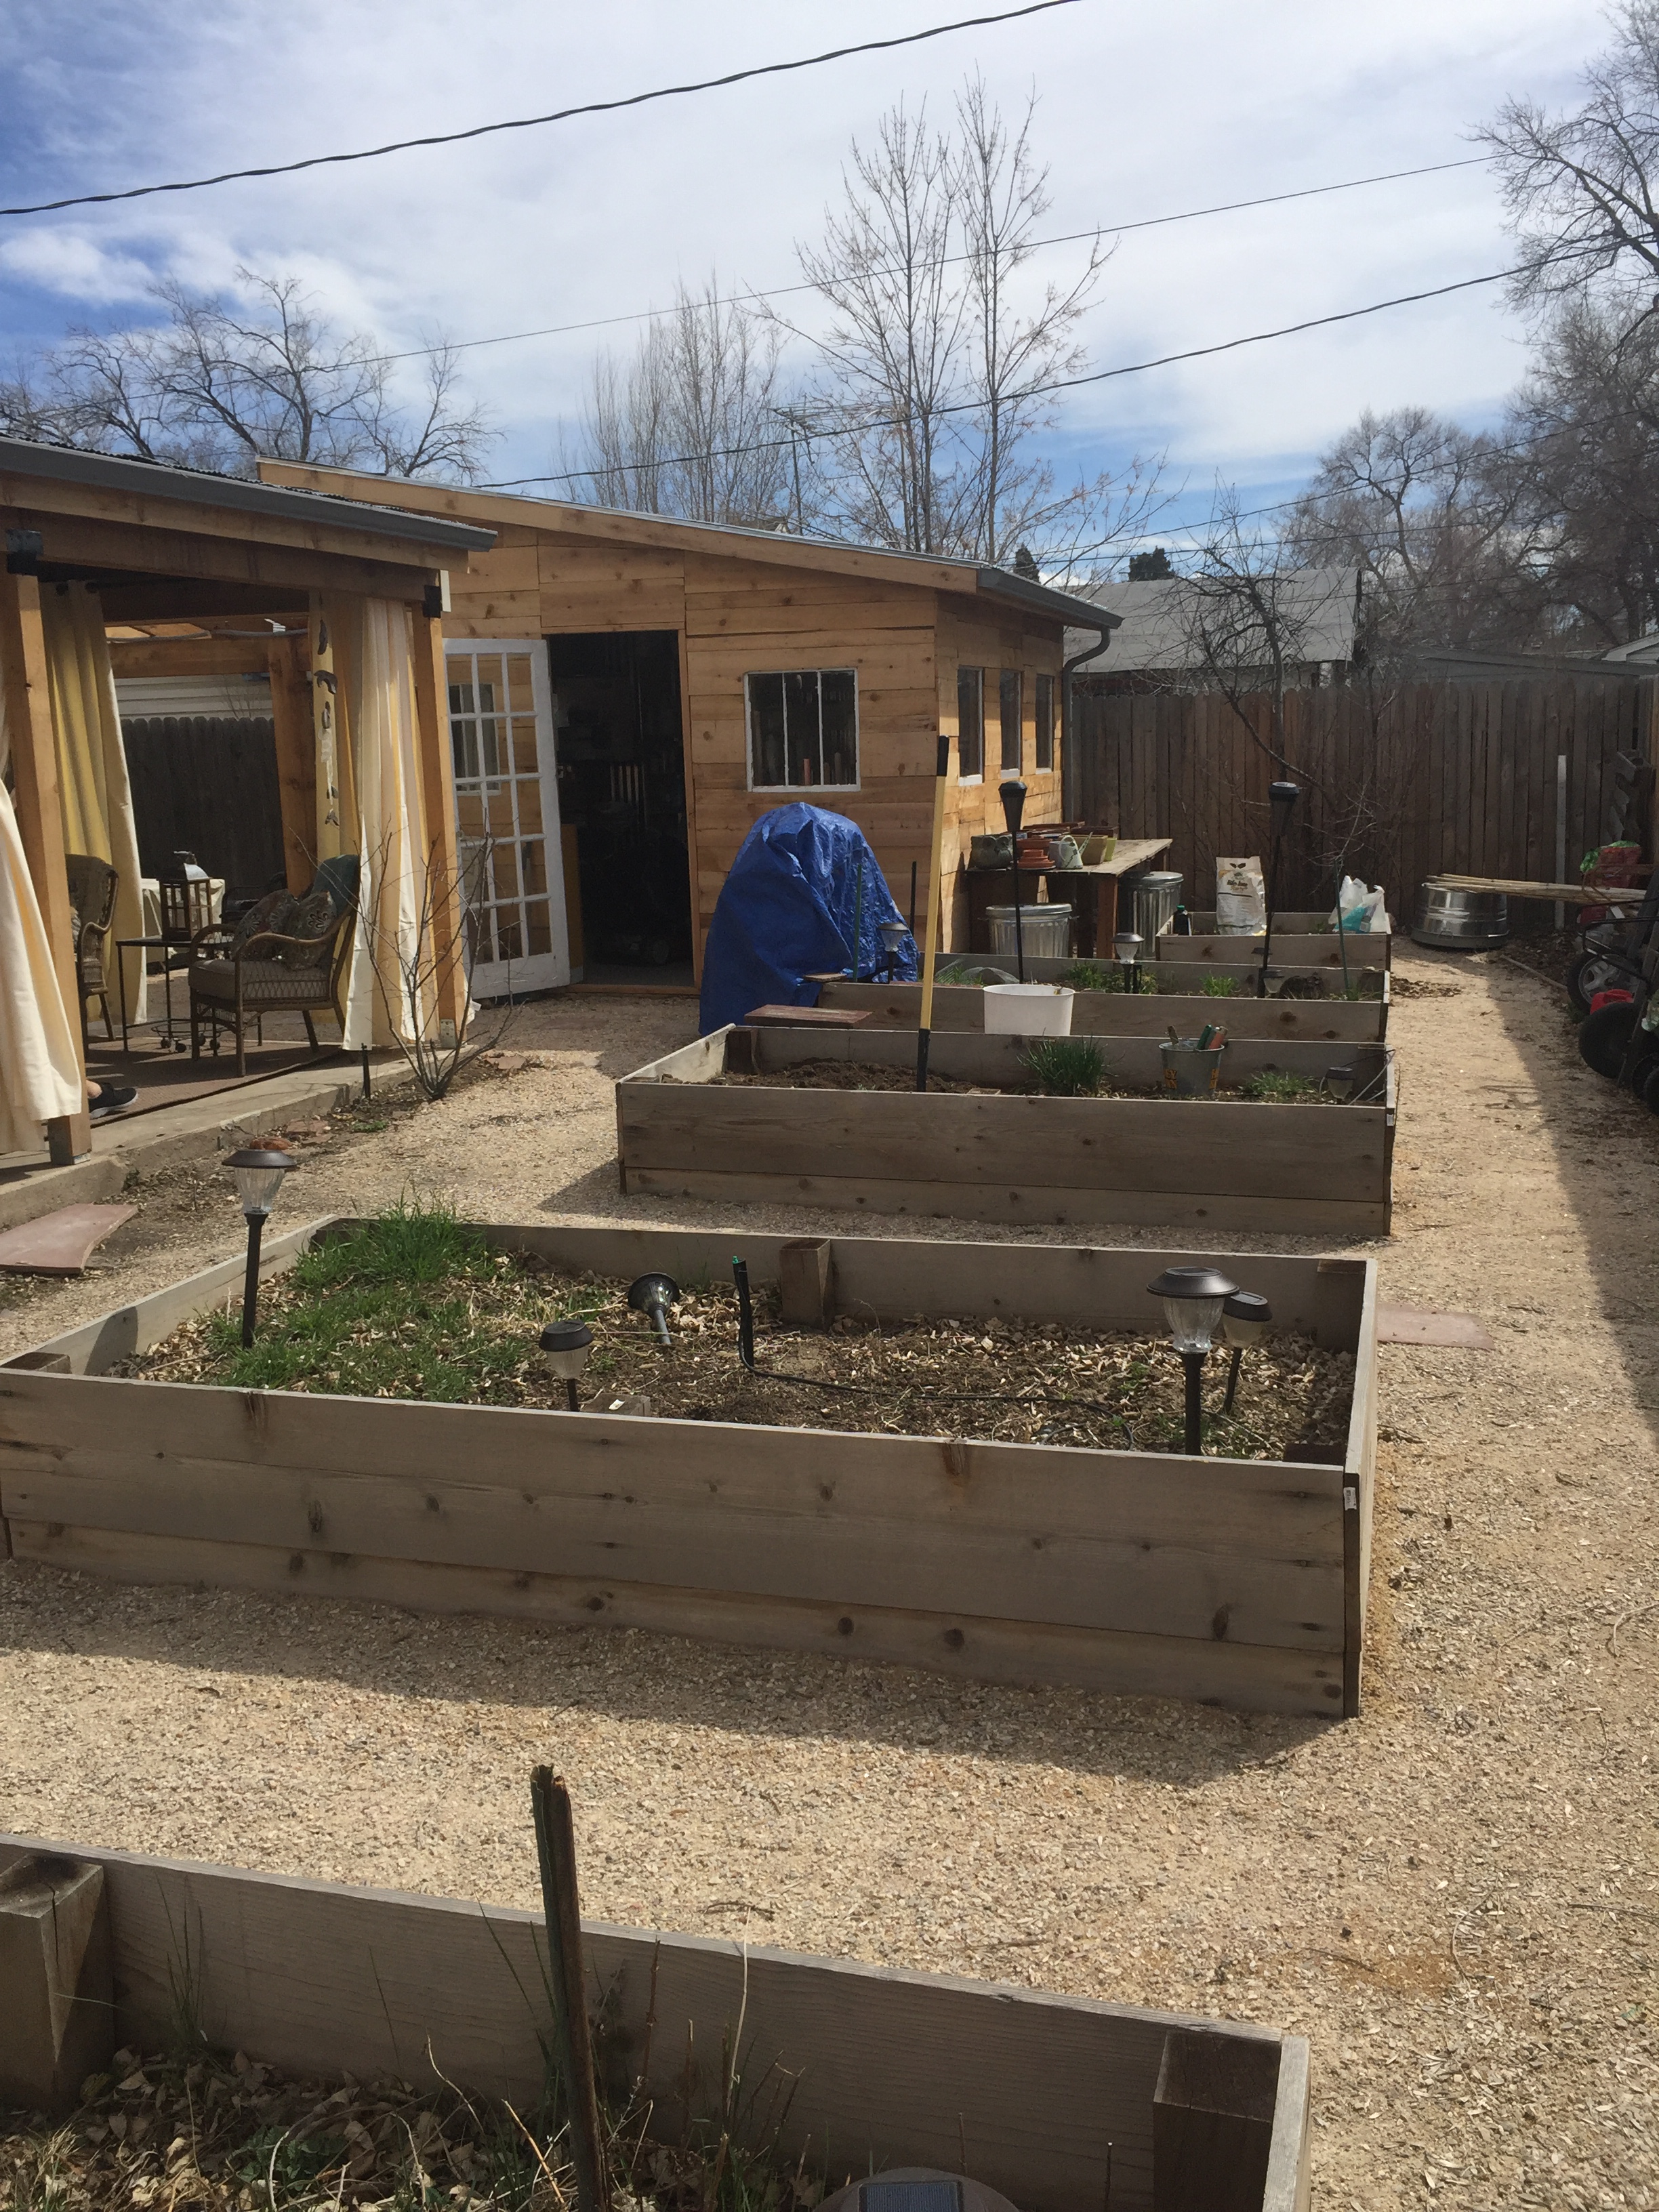
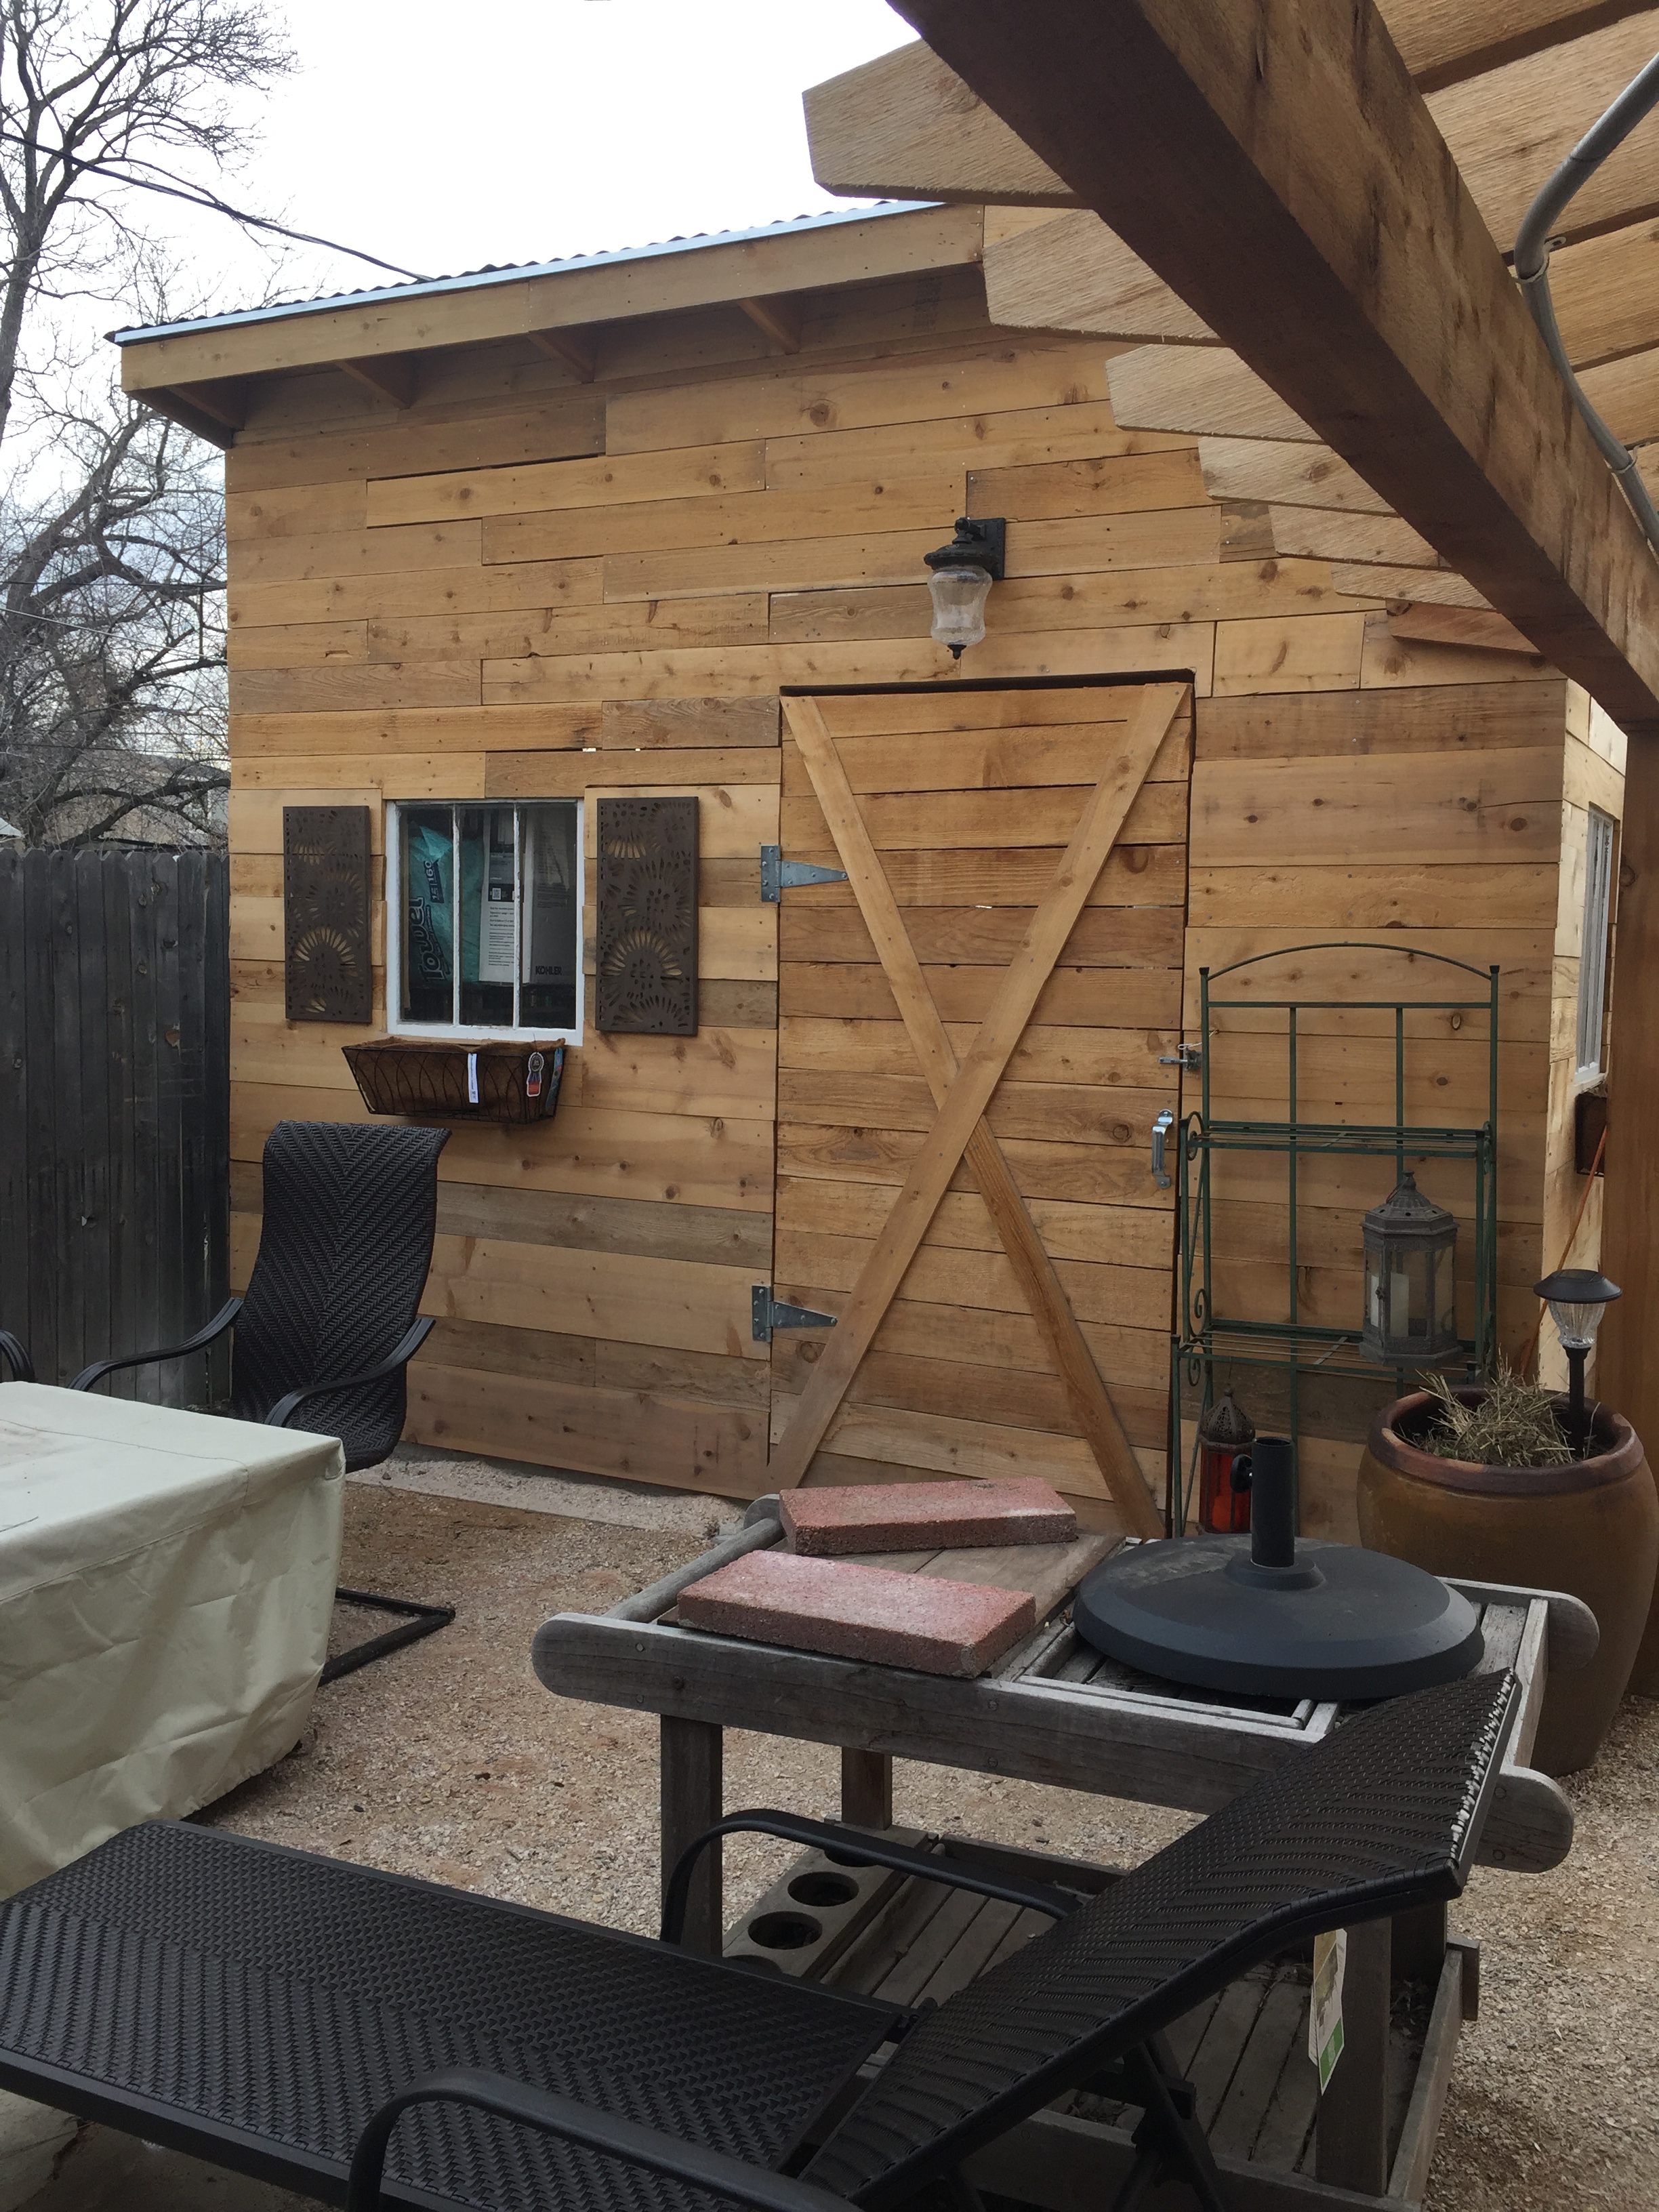
The old slab where the garage once stood is badly cracked. I used about half the slab (on the right) as a base for a garden shed with an added concrete ramp for my wheel barrow! The rest of the concrete will come out and be replaced with Breeze, my wonder material!

These guys work hard! Landscaping and construction is physical work and I appreciate the help getting these projects knocked out!

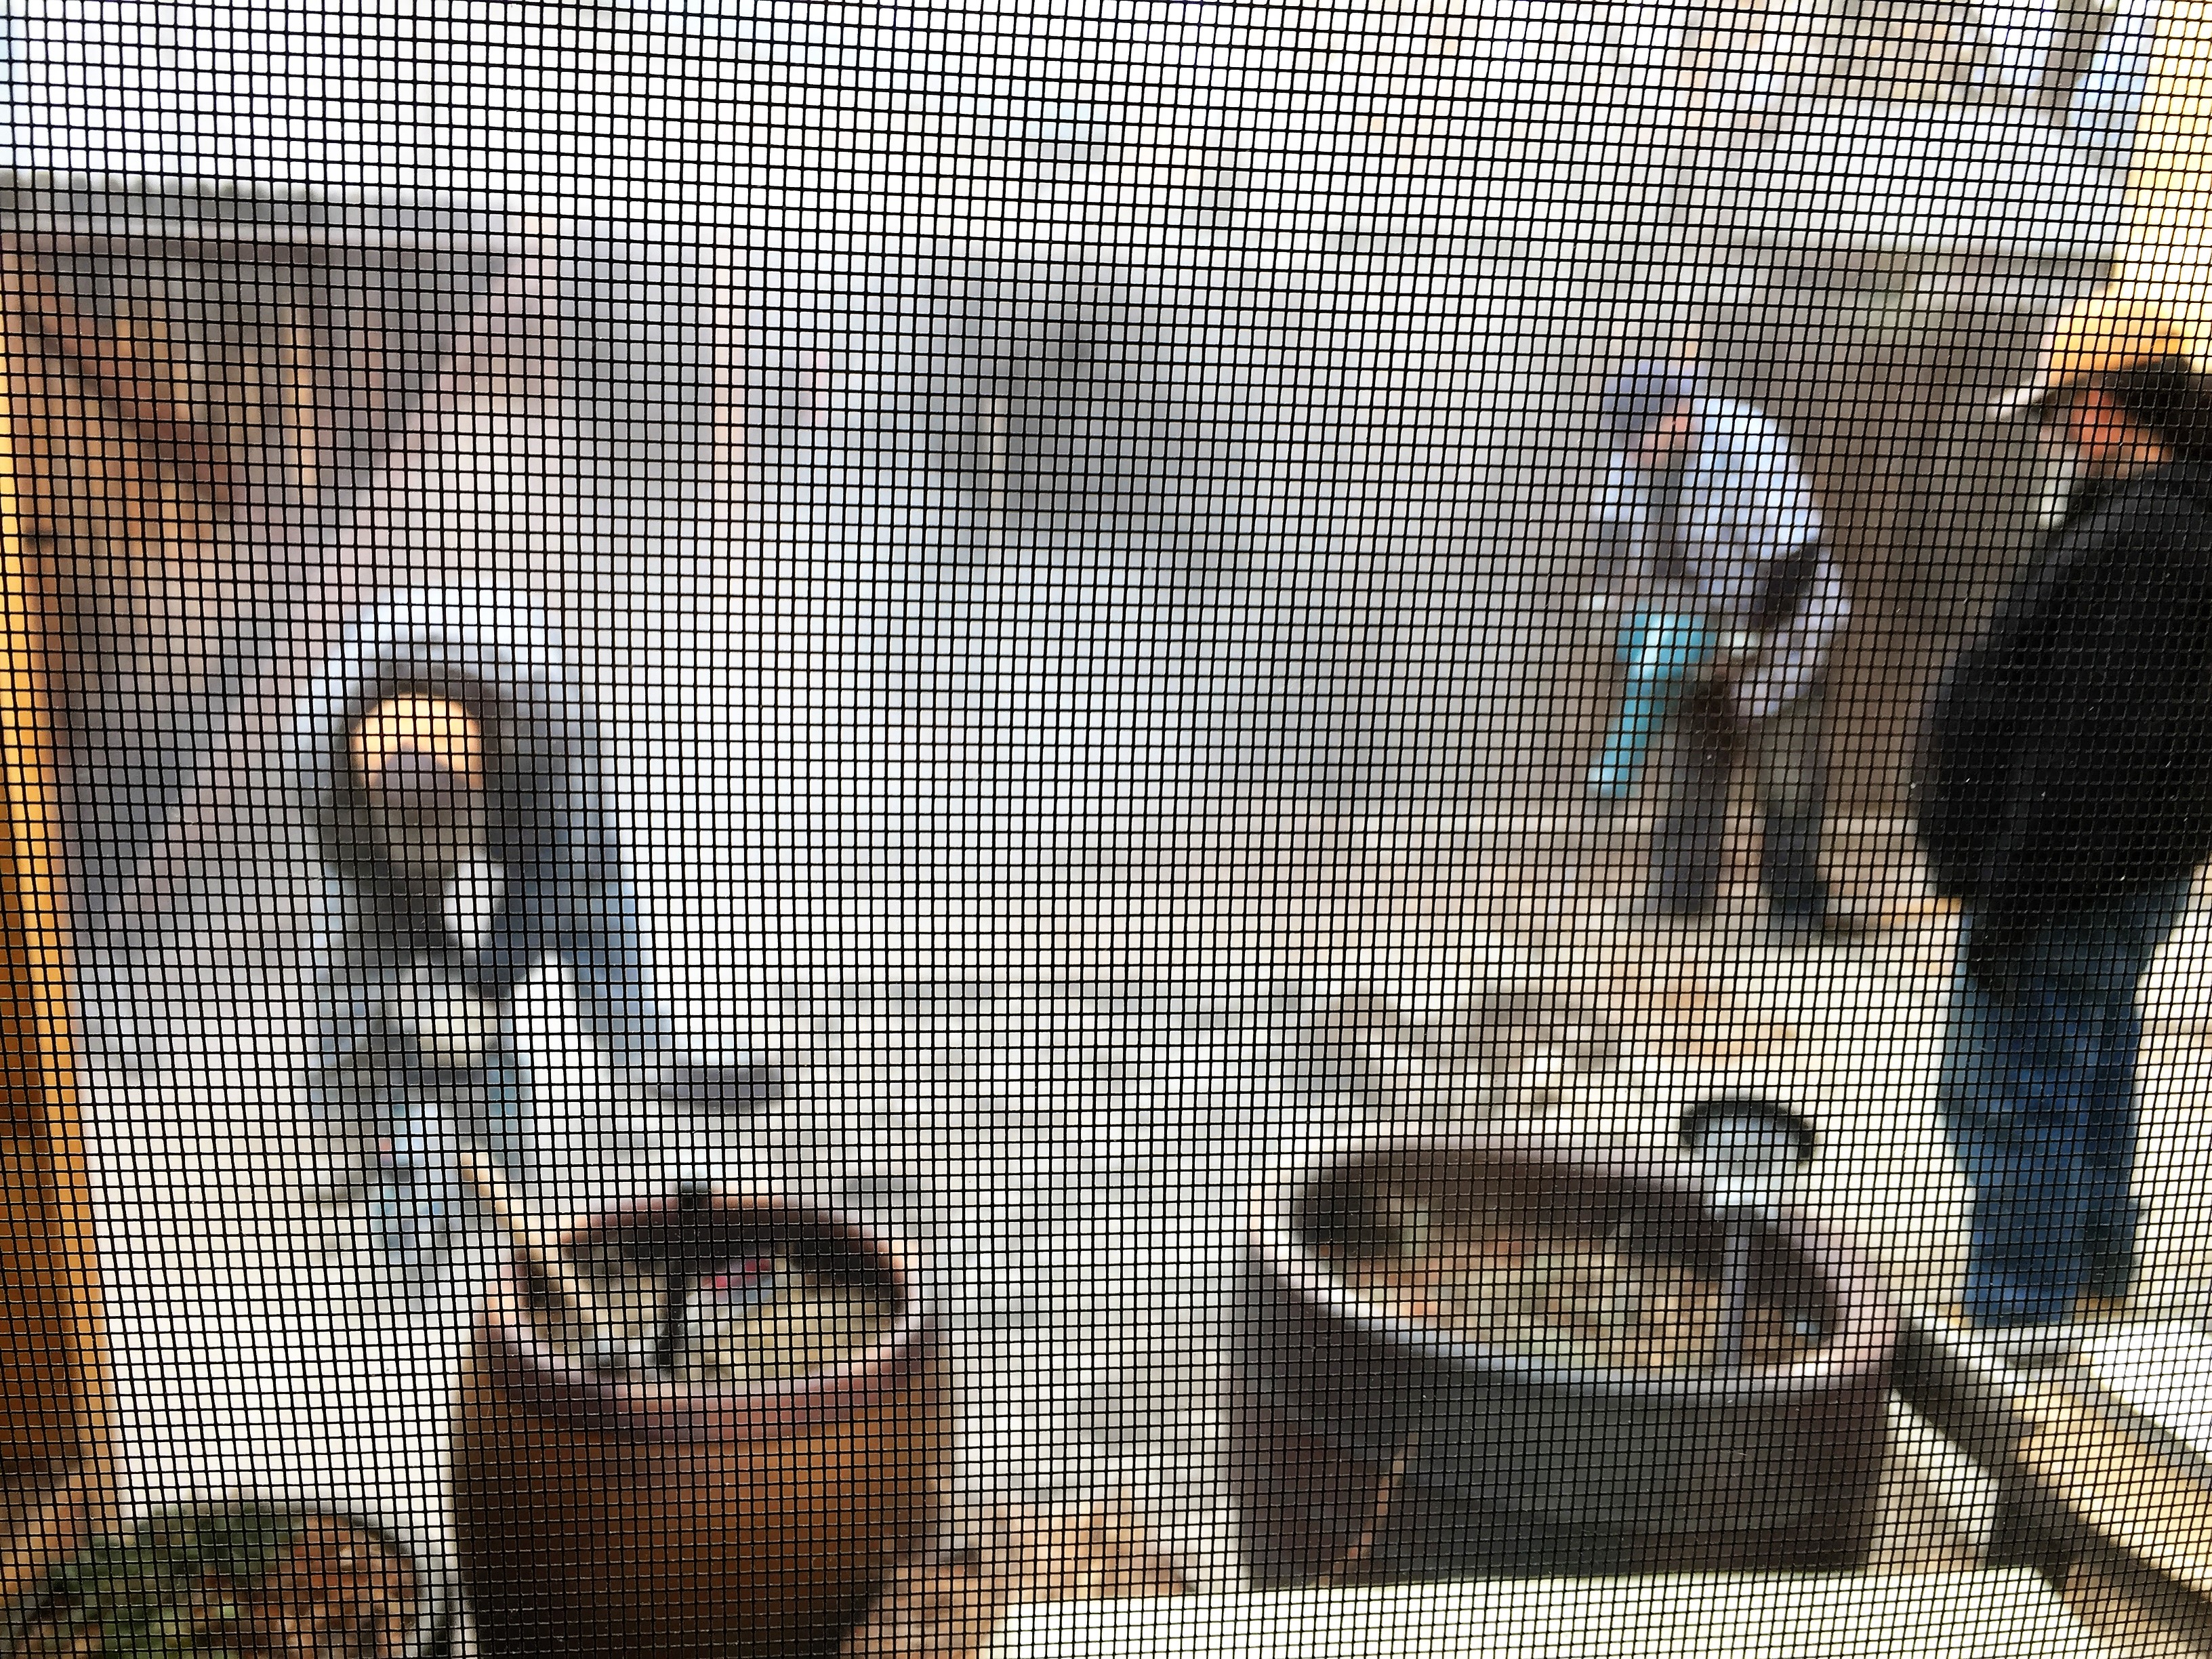
The jackhammer was super loud, so I took this pic through the window (and screen). These are the guy’s at Spartan Landscaping breaking up the concrete. Perfect way to start my morning…

Then weed barrier and Breeze.
The yard is a rubik’s cube right now until I get everything done and can start the fun part of decorating and setting up!

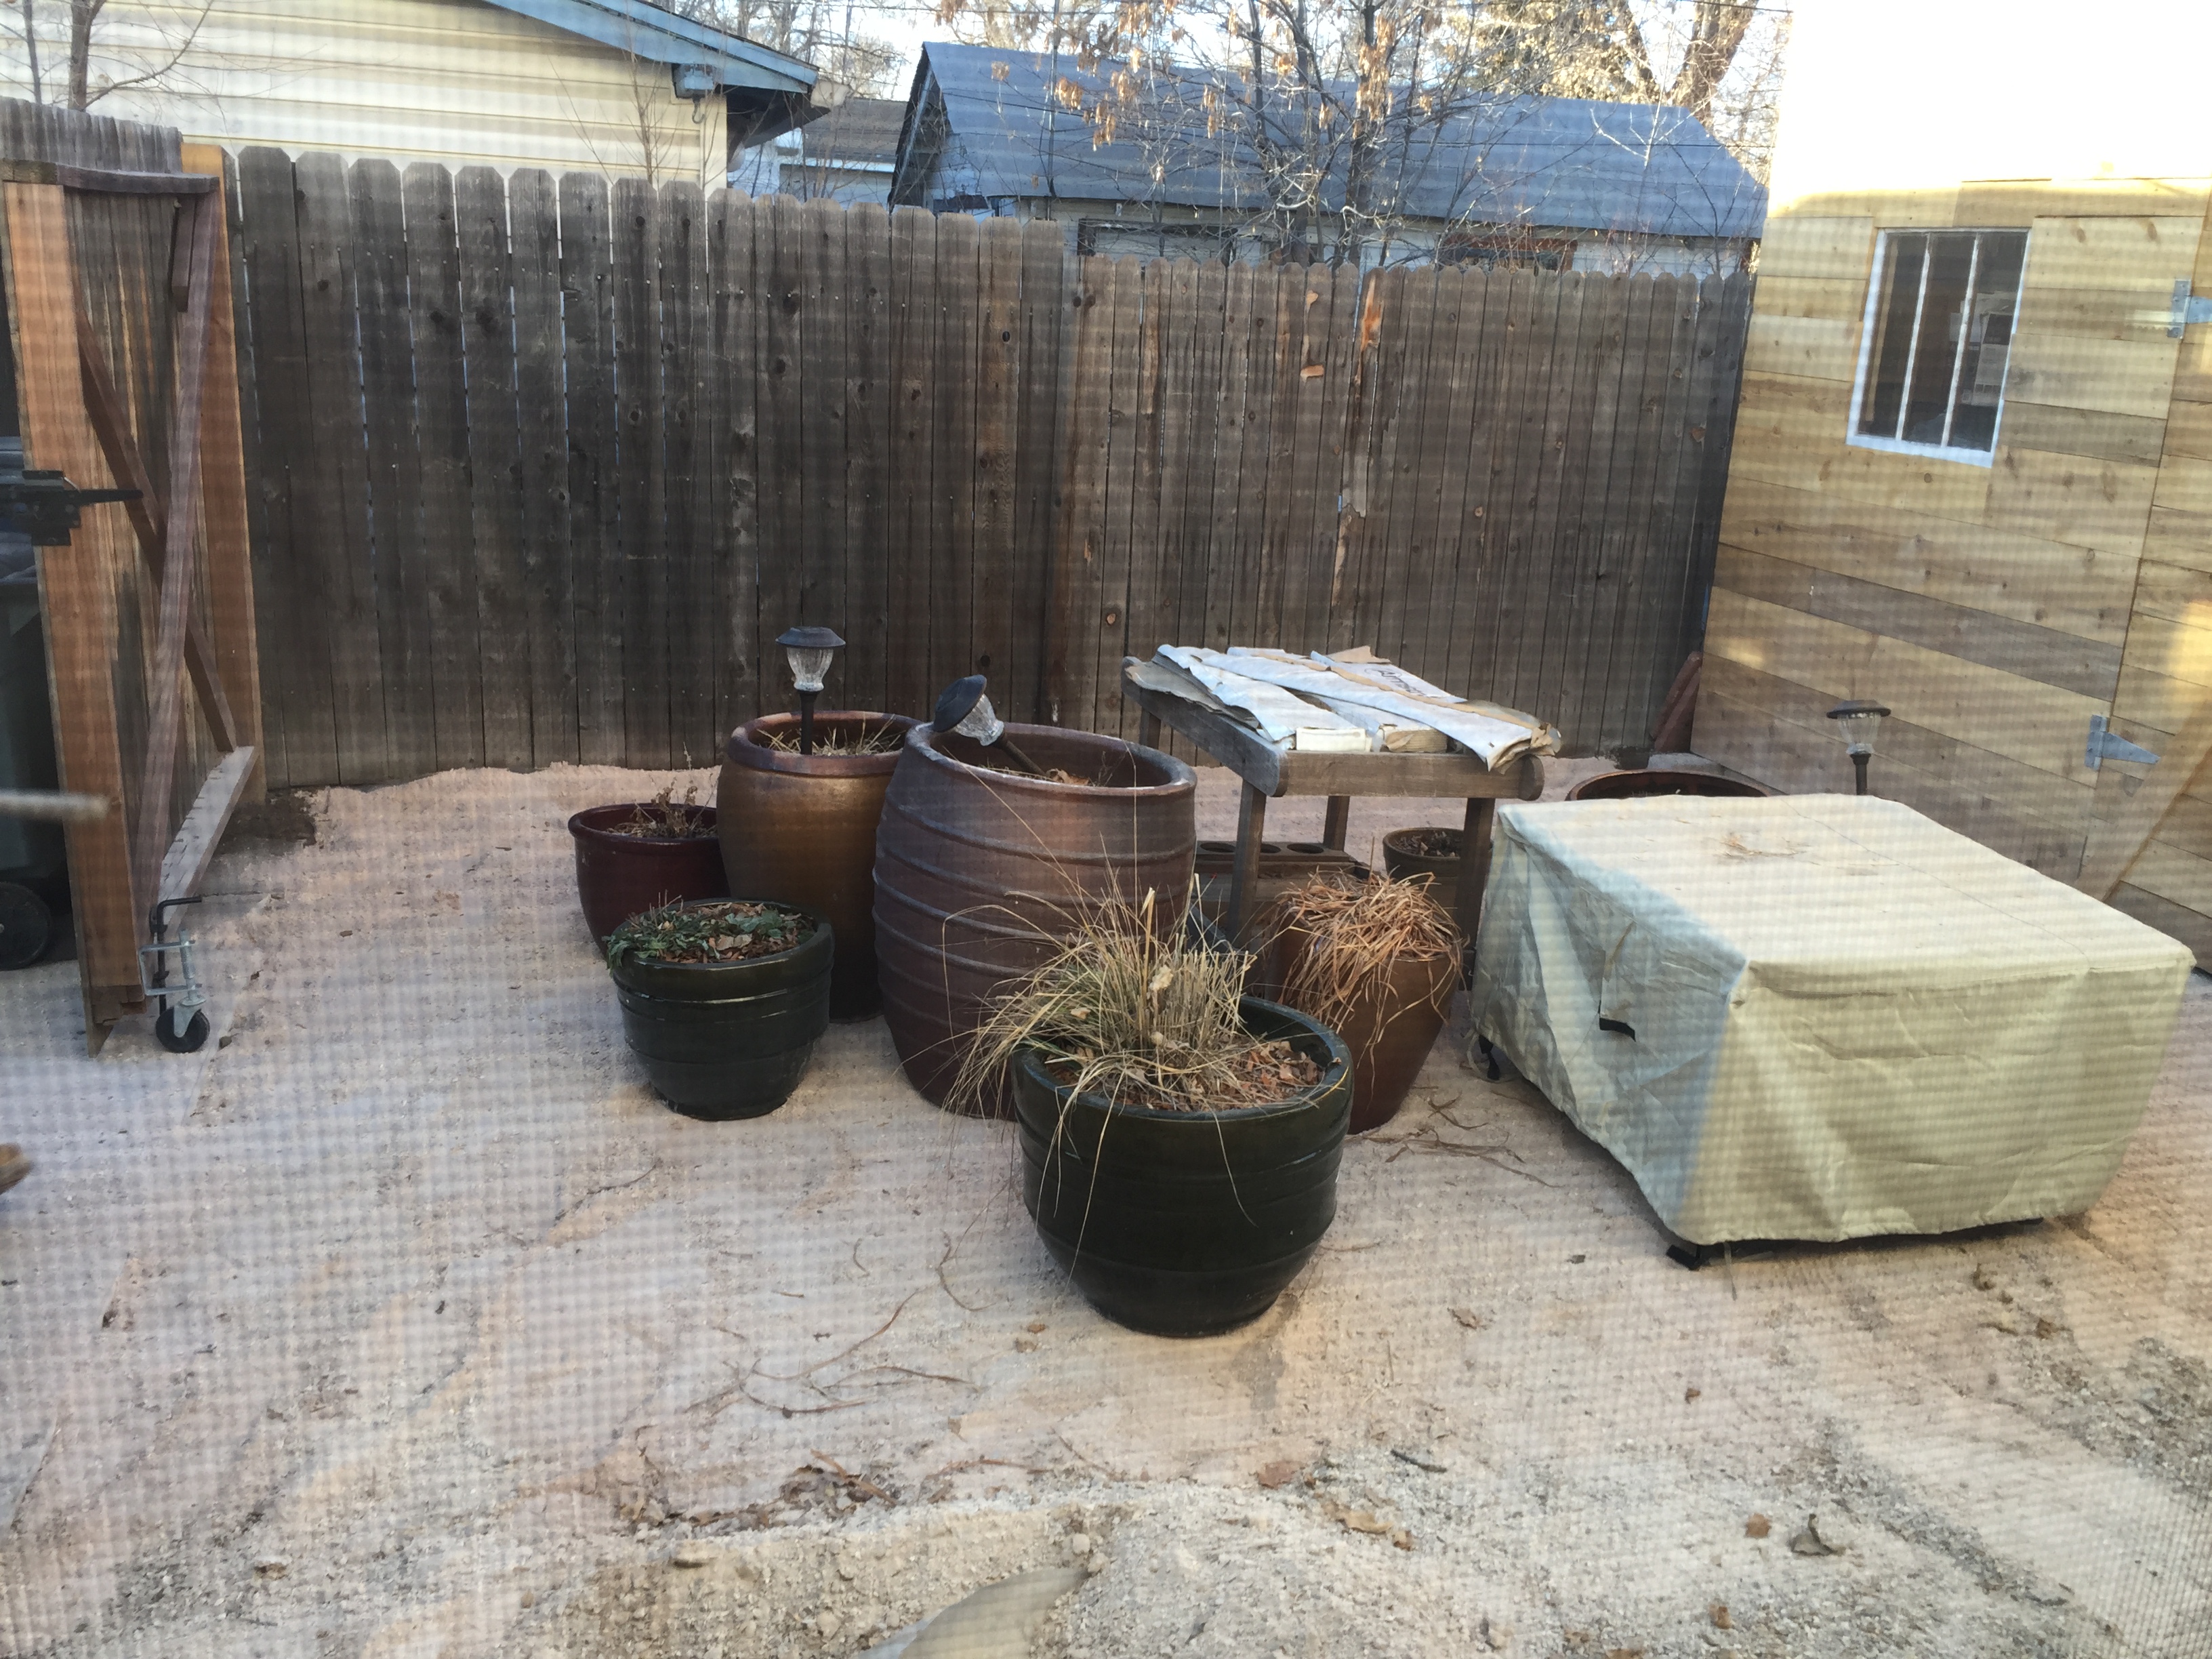
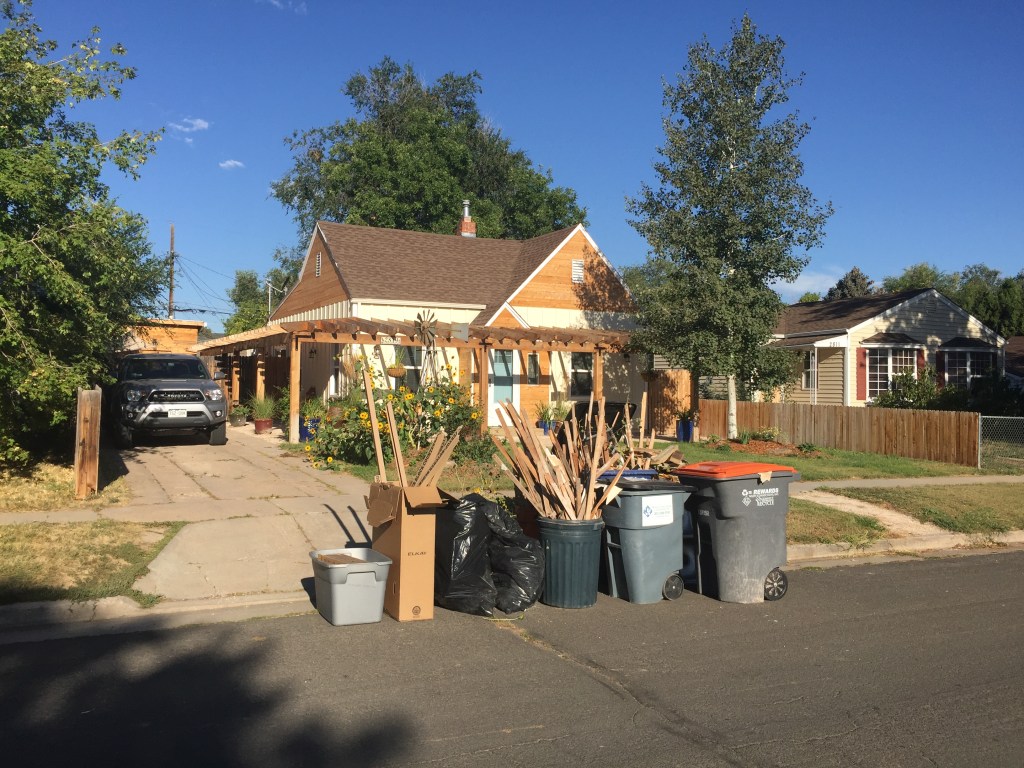
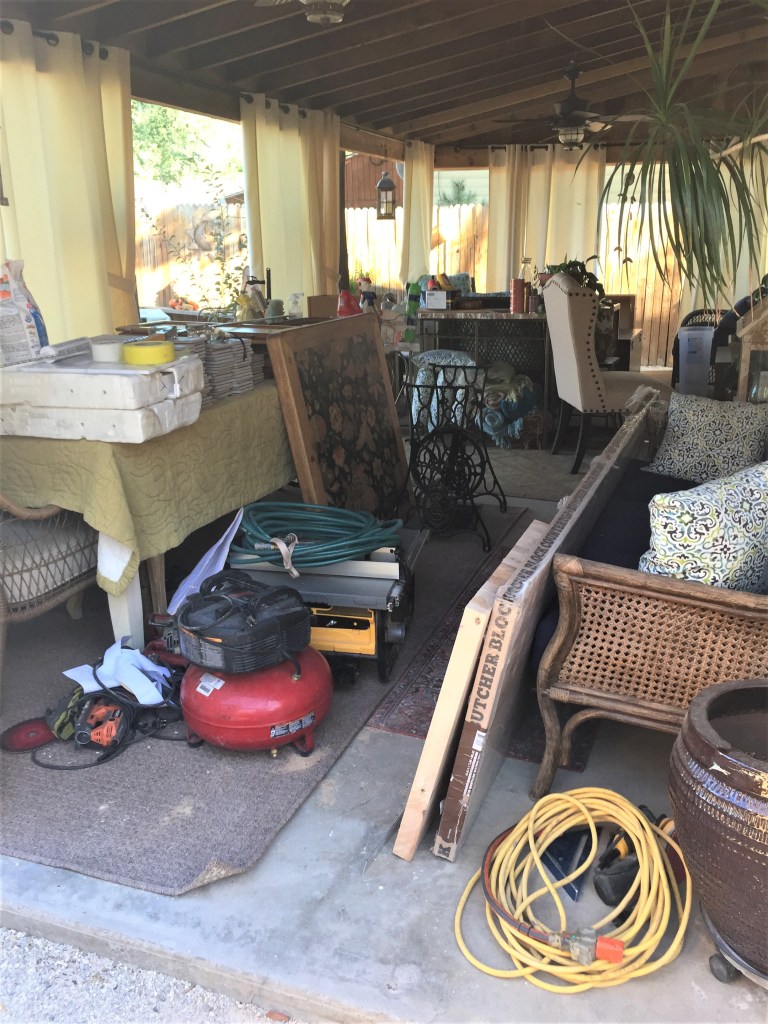
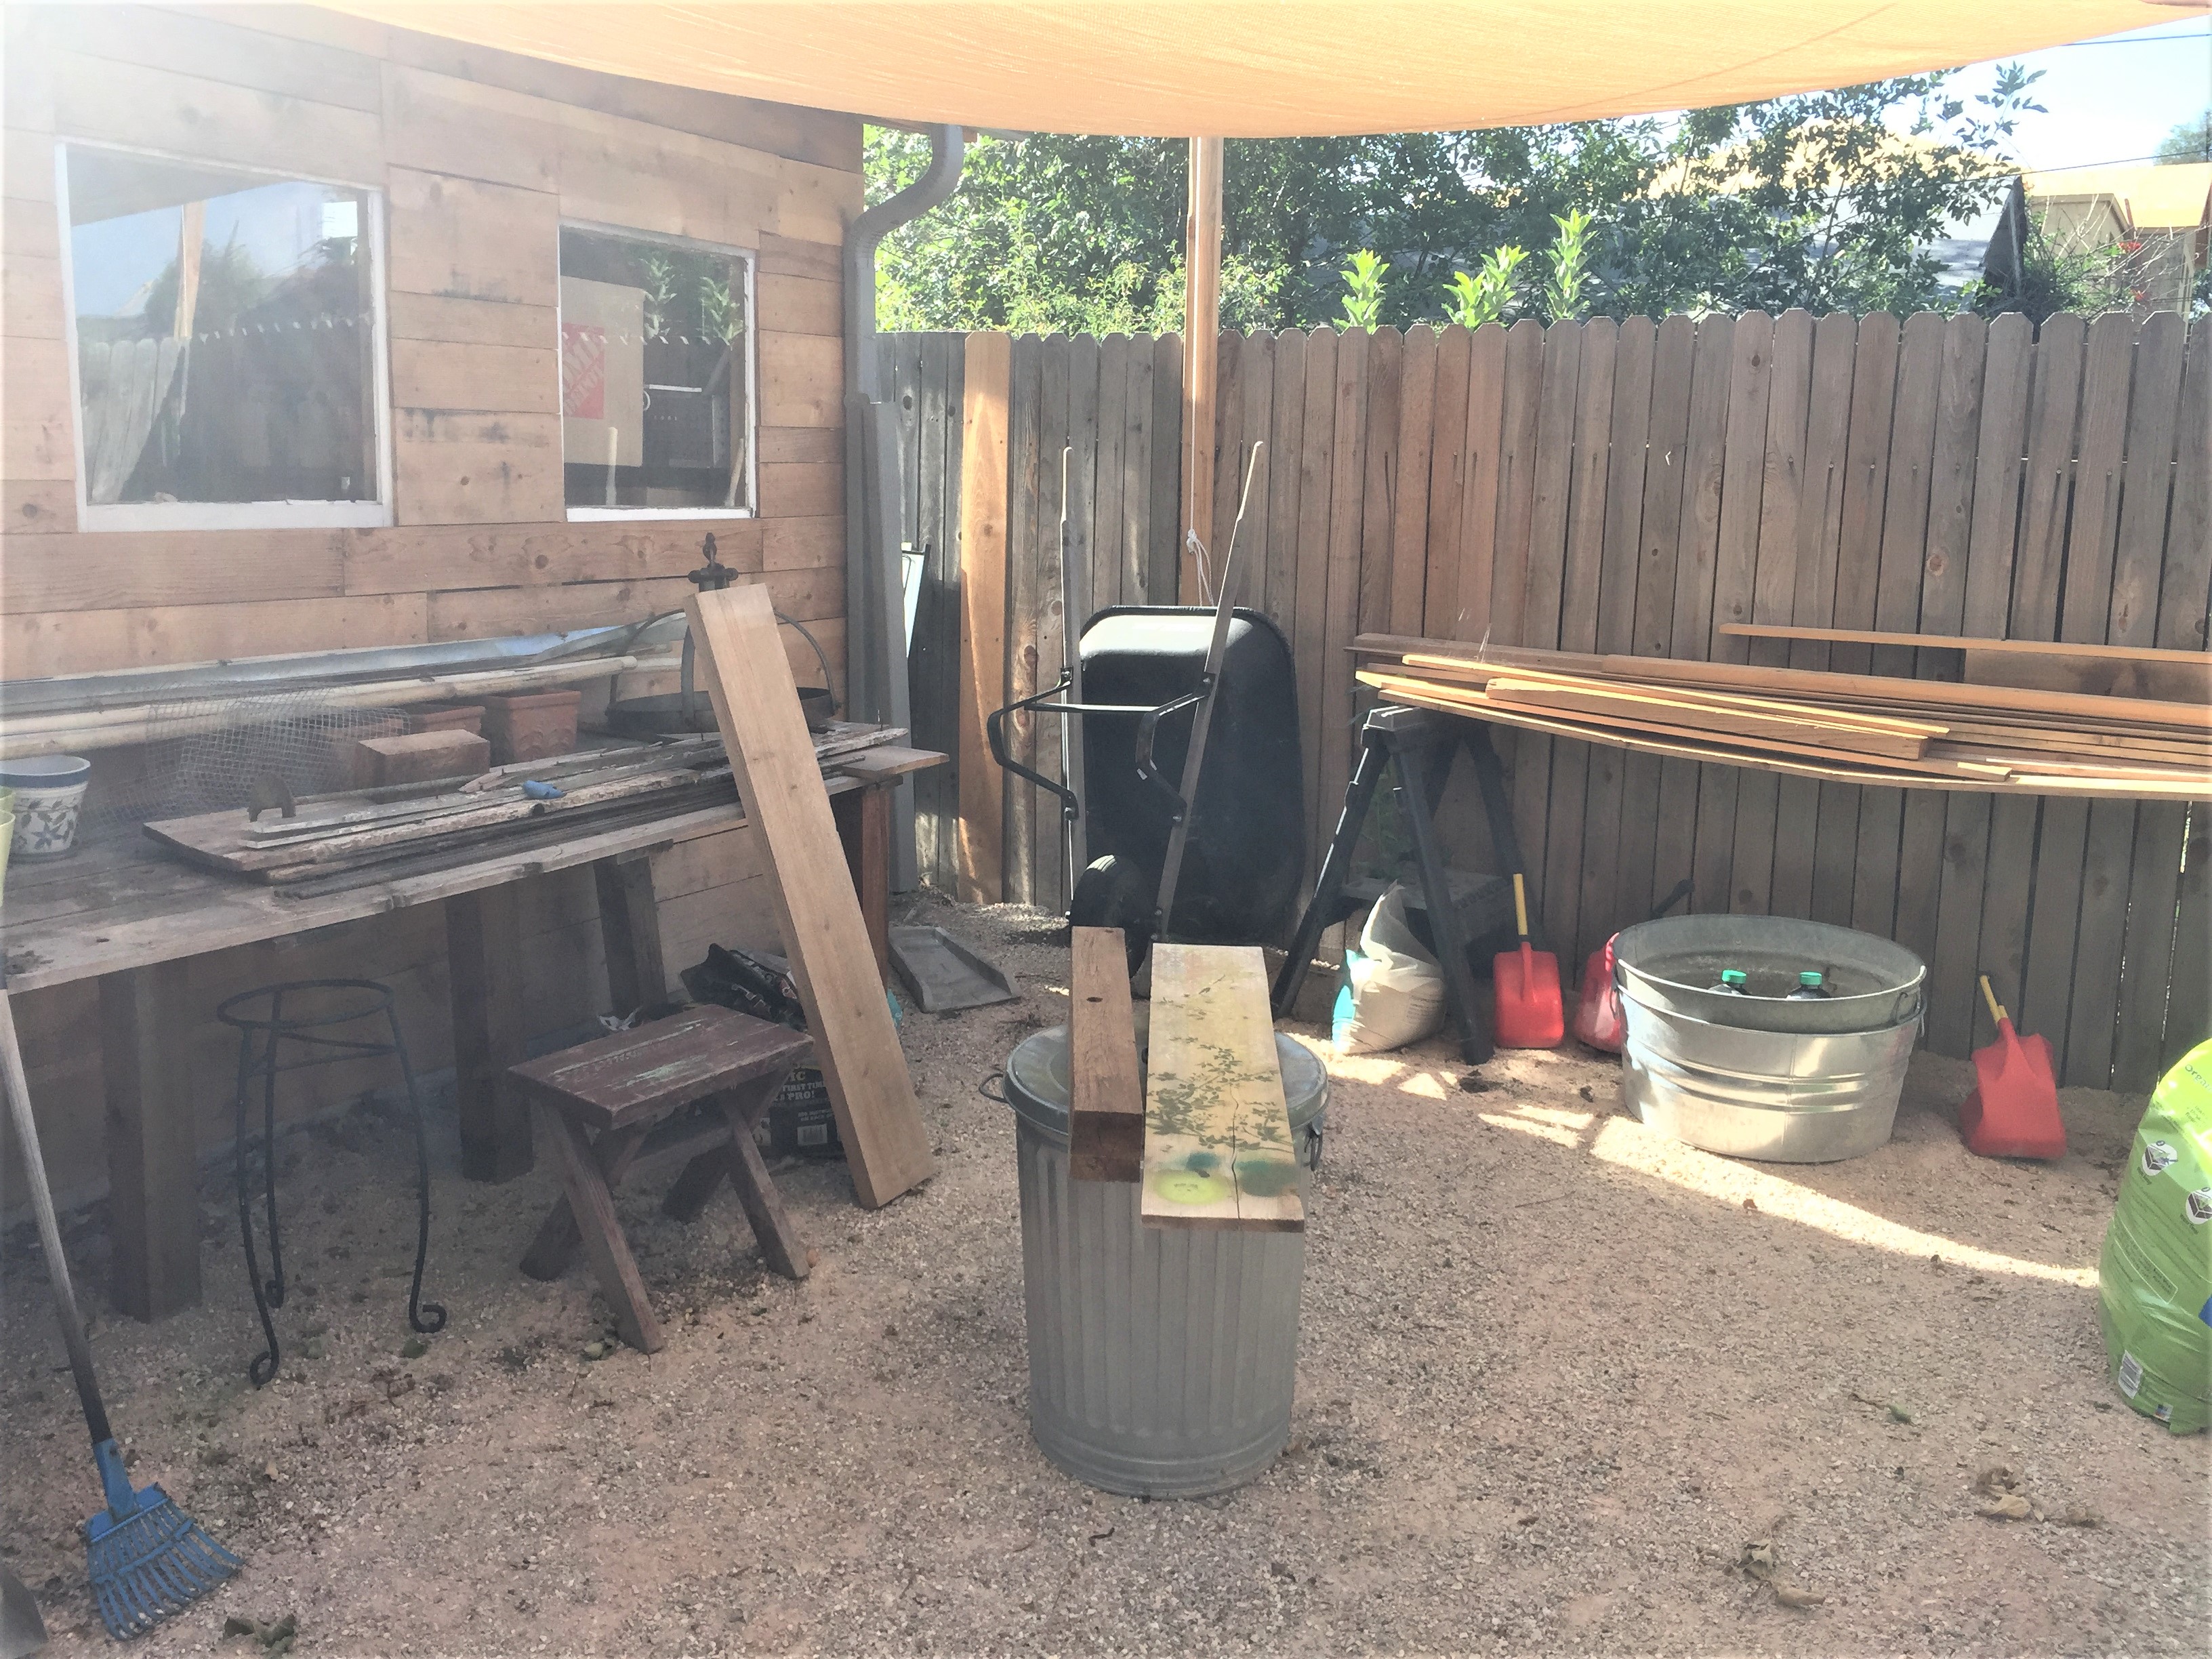
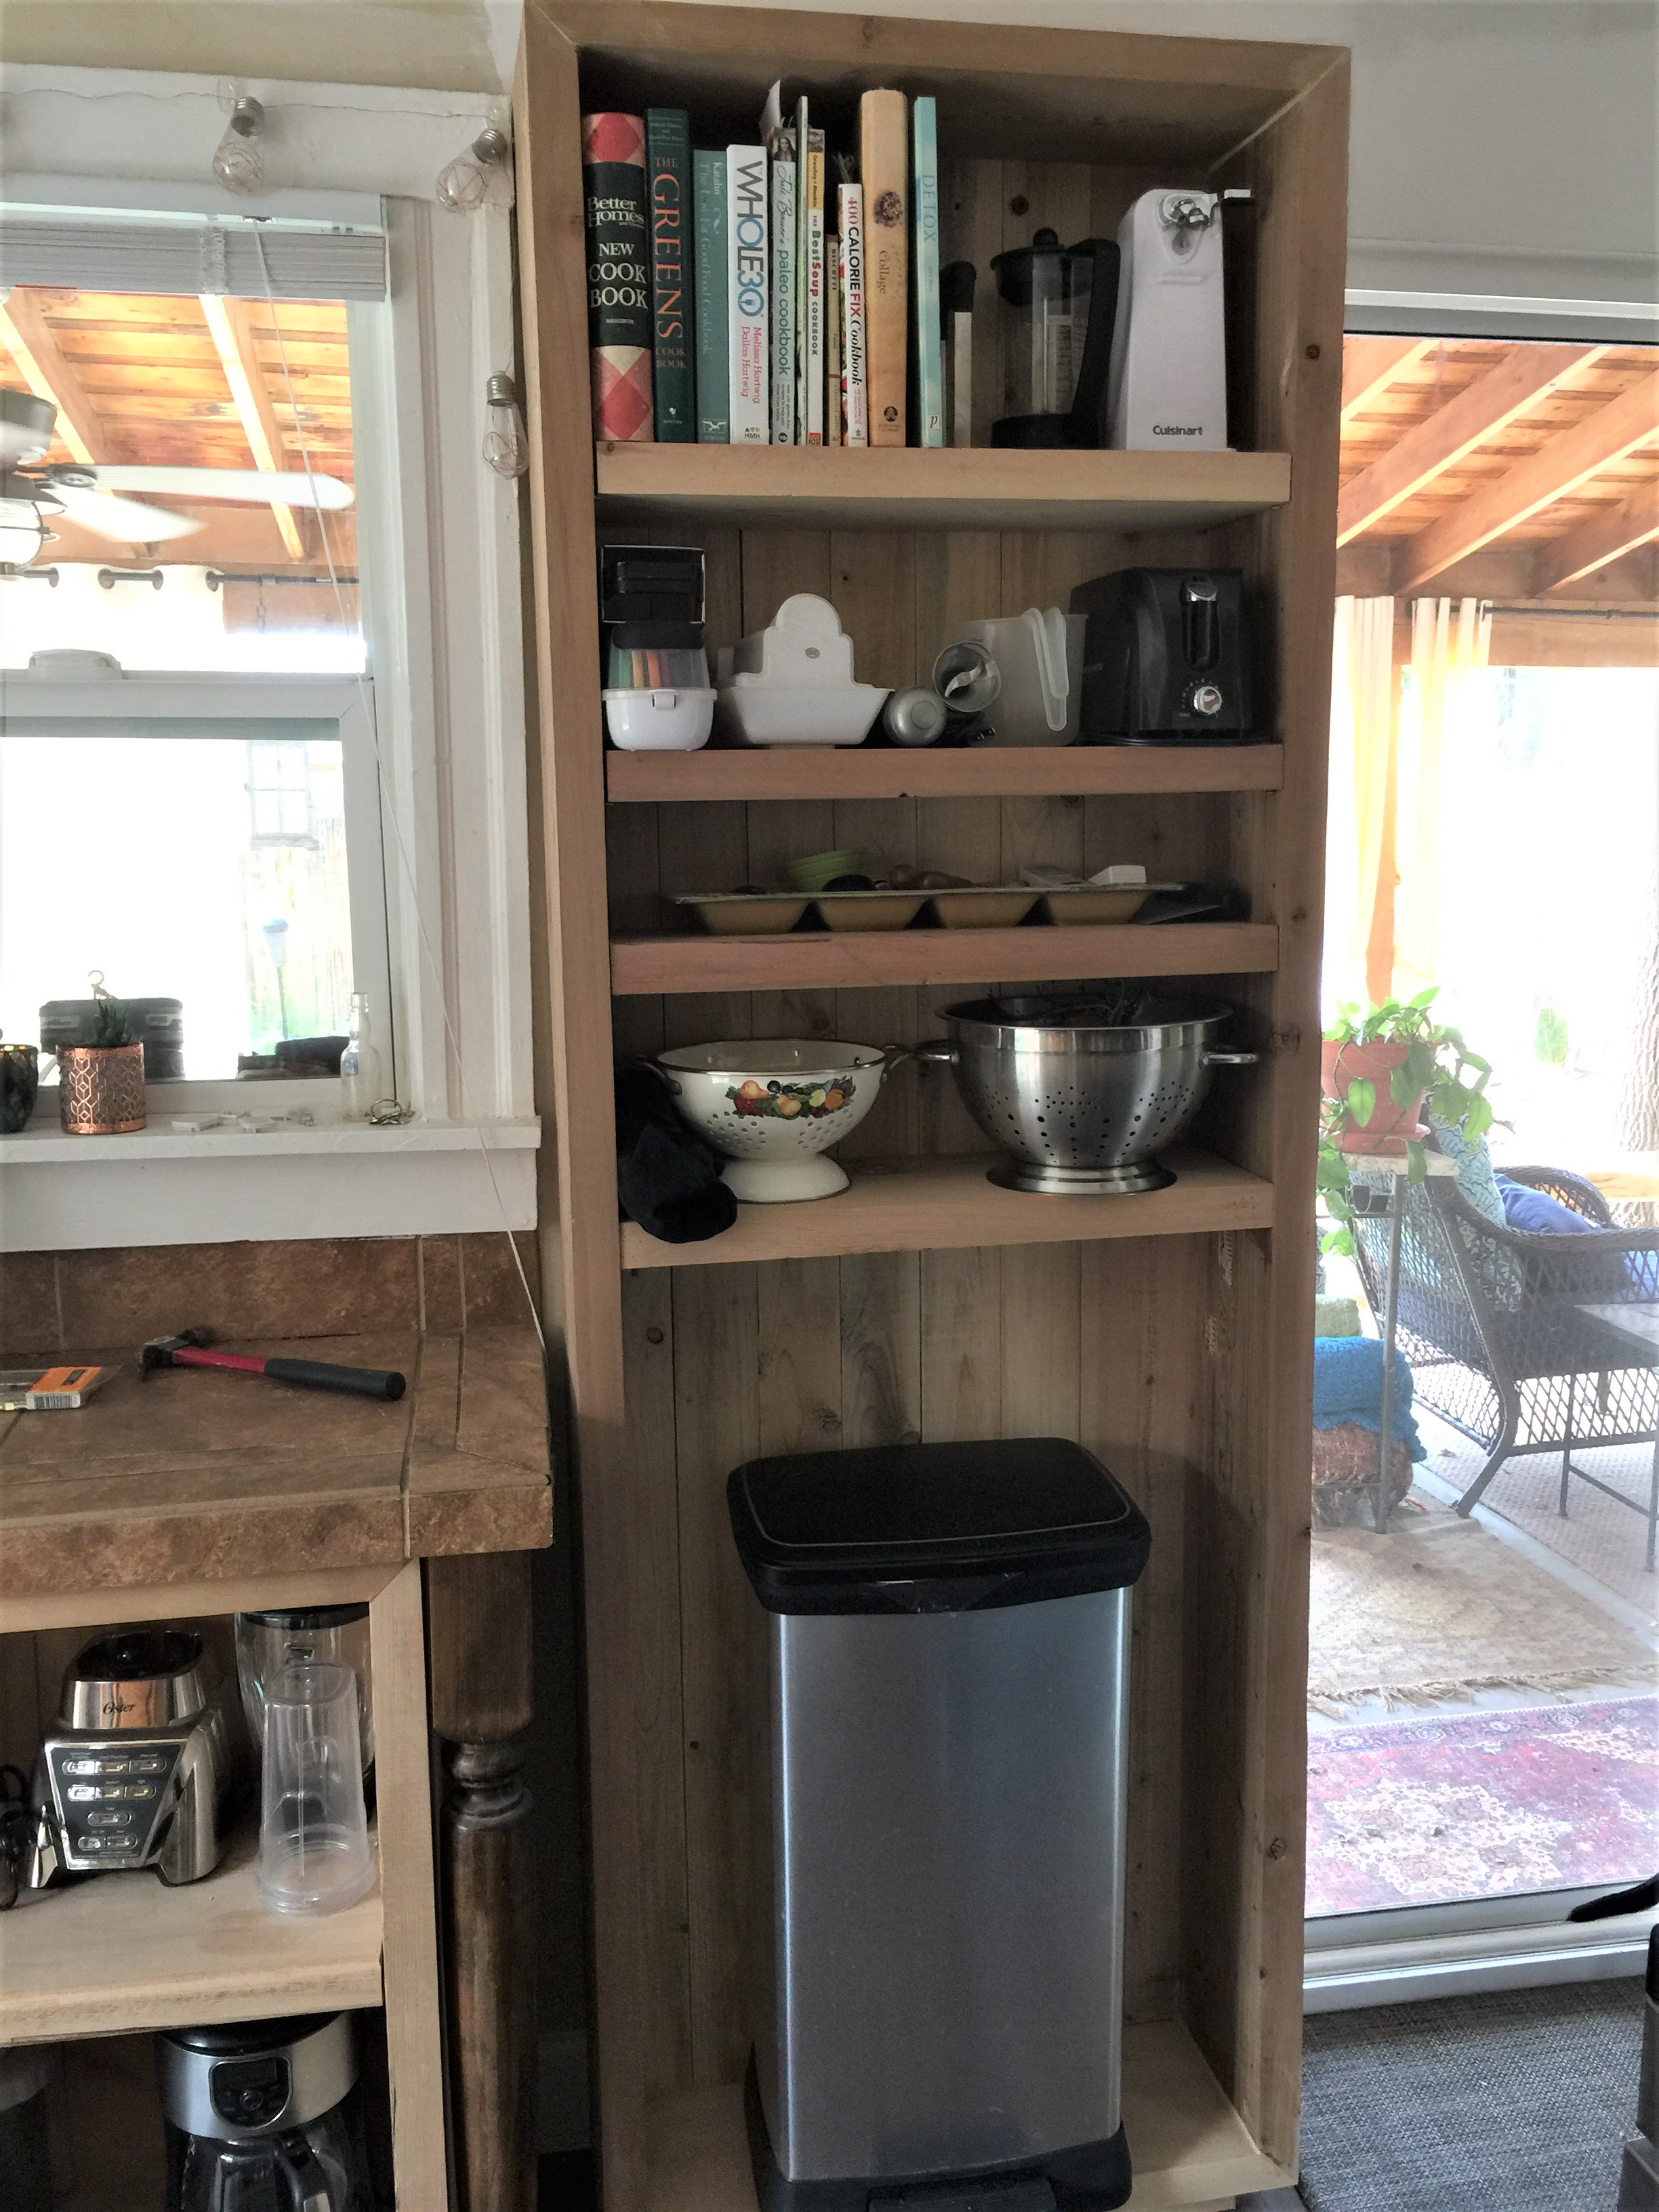
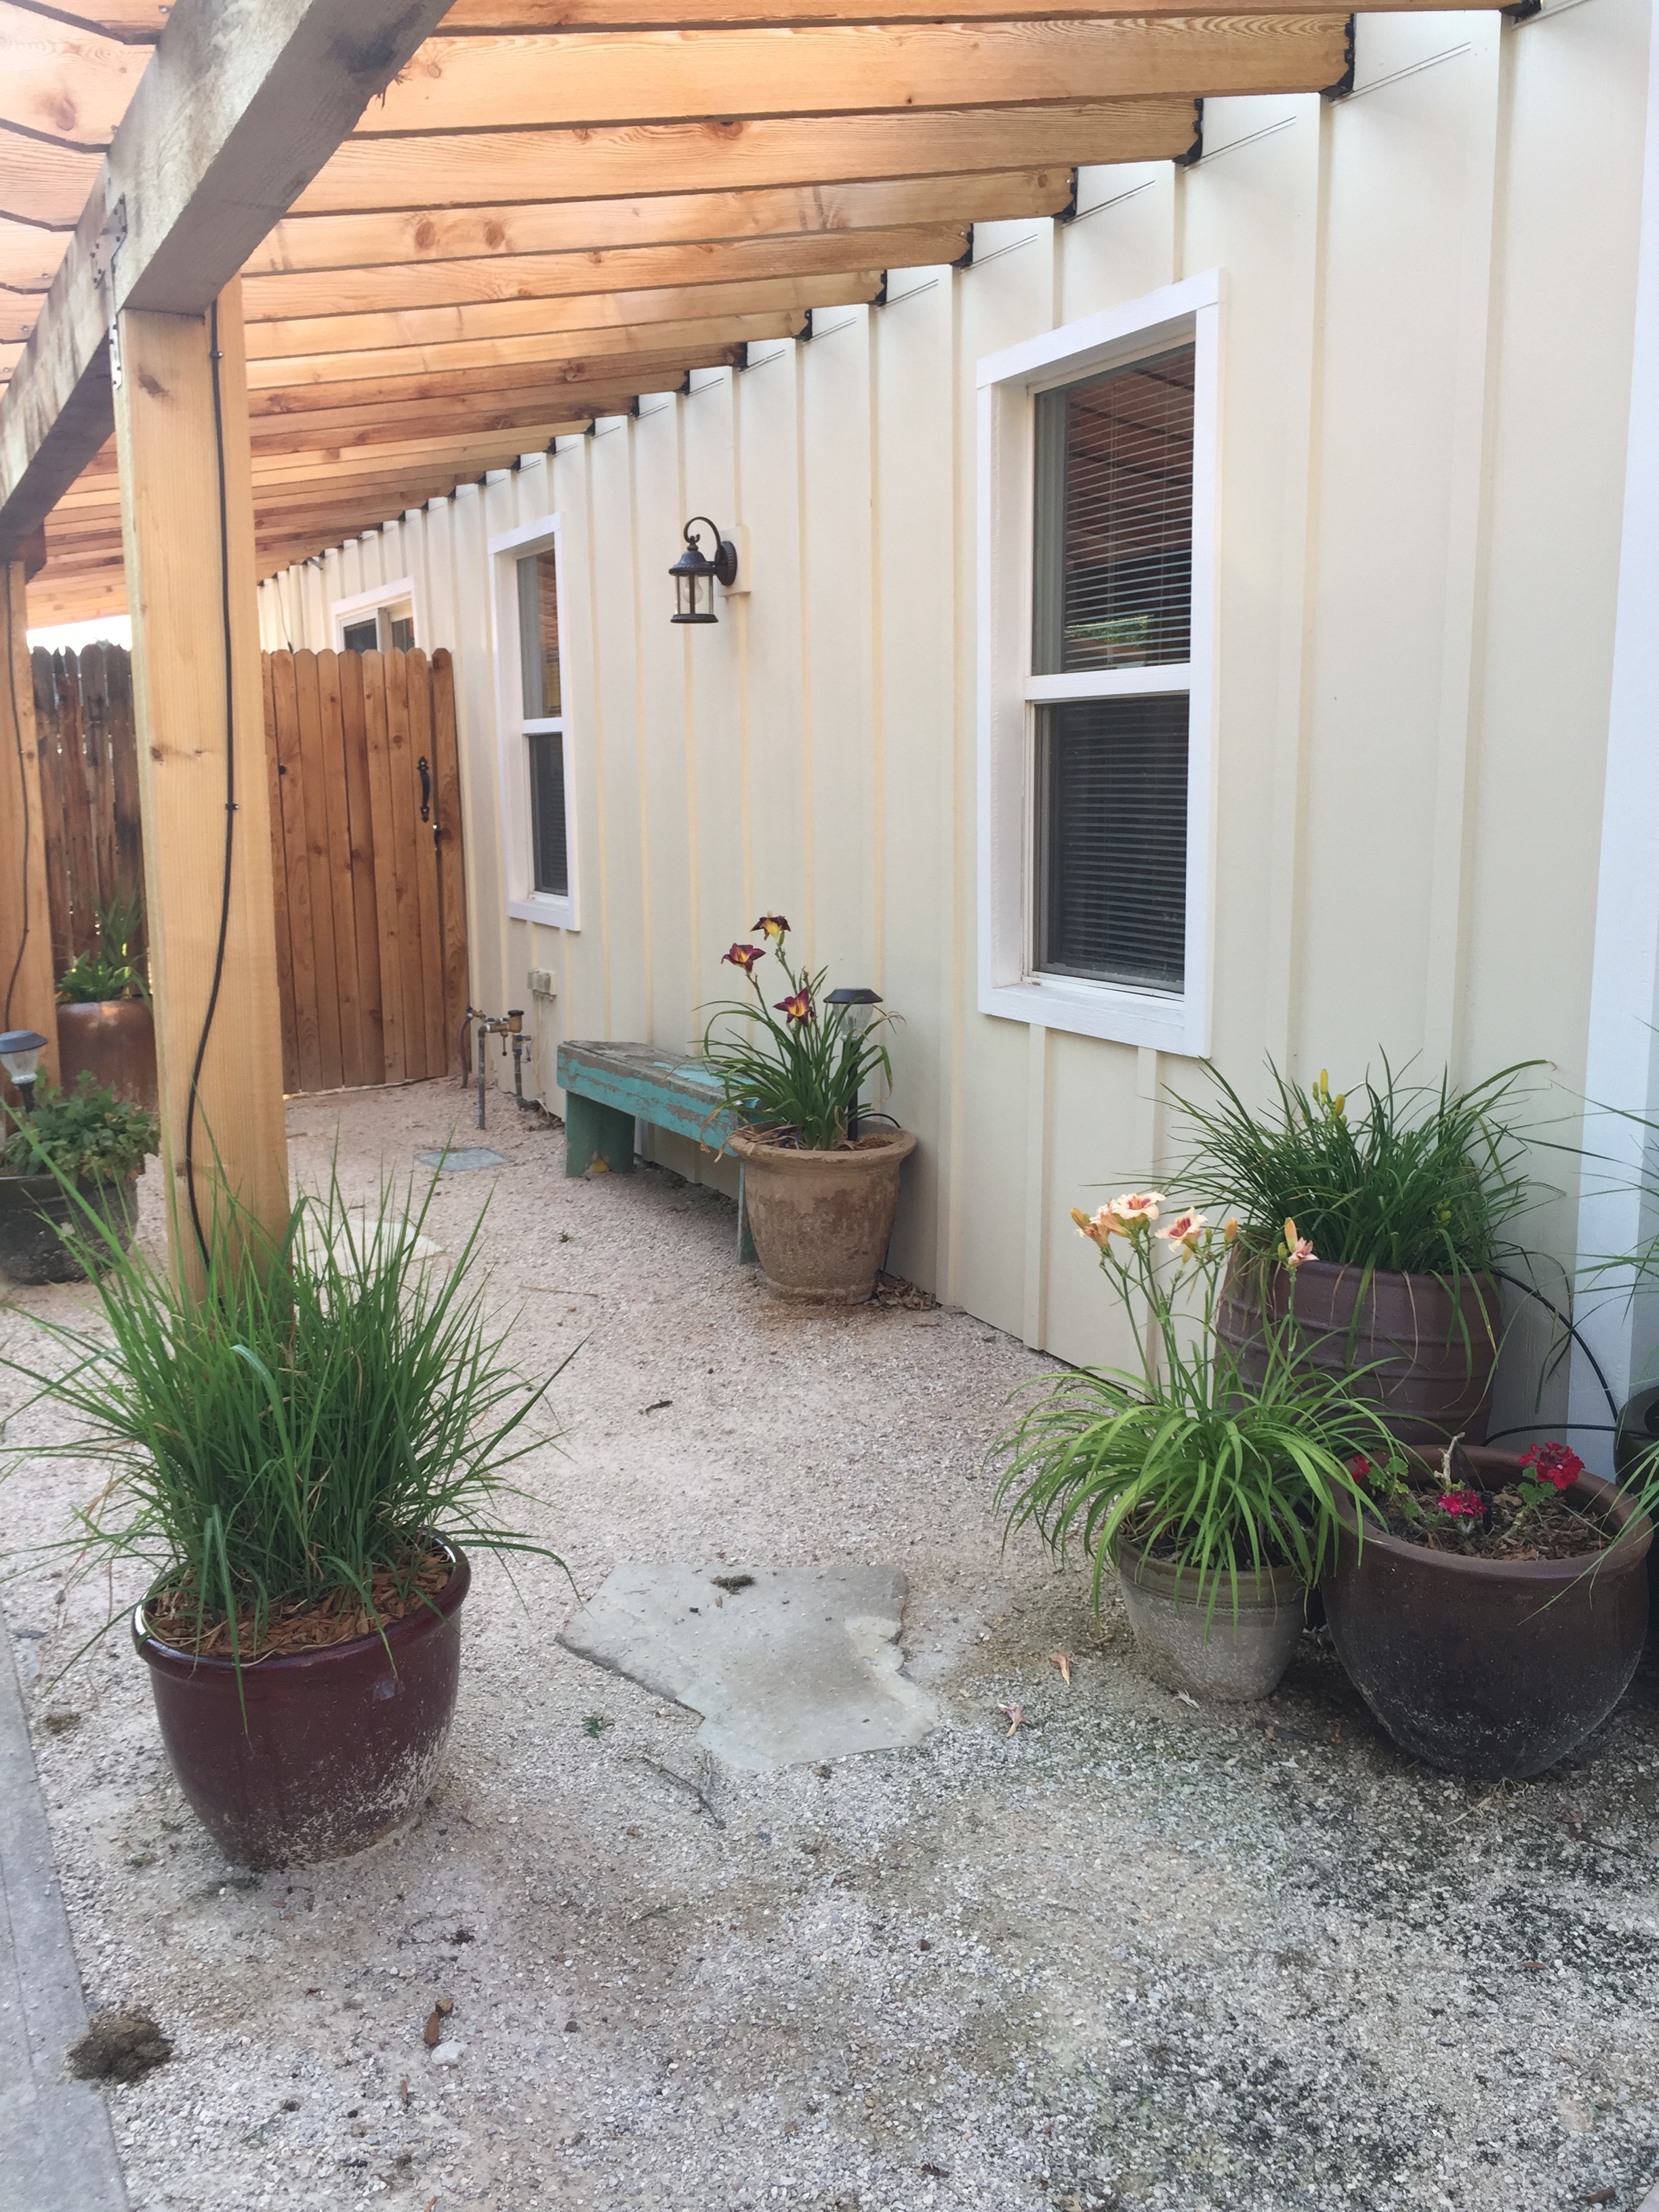
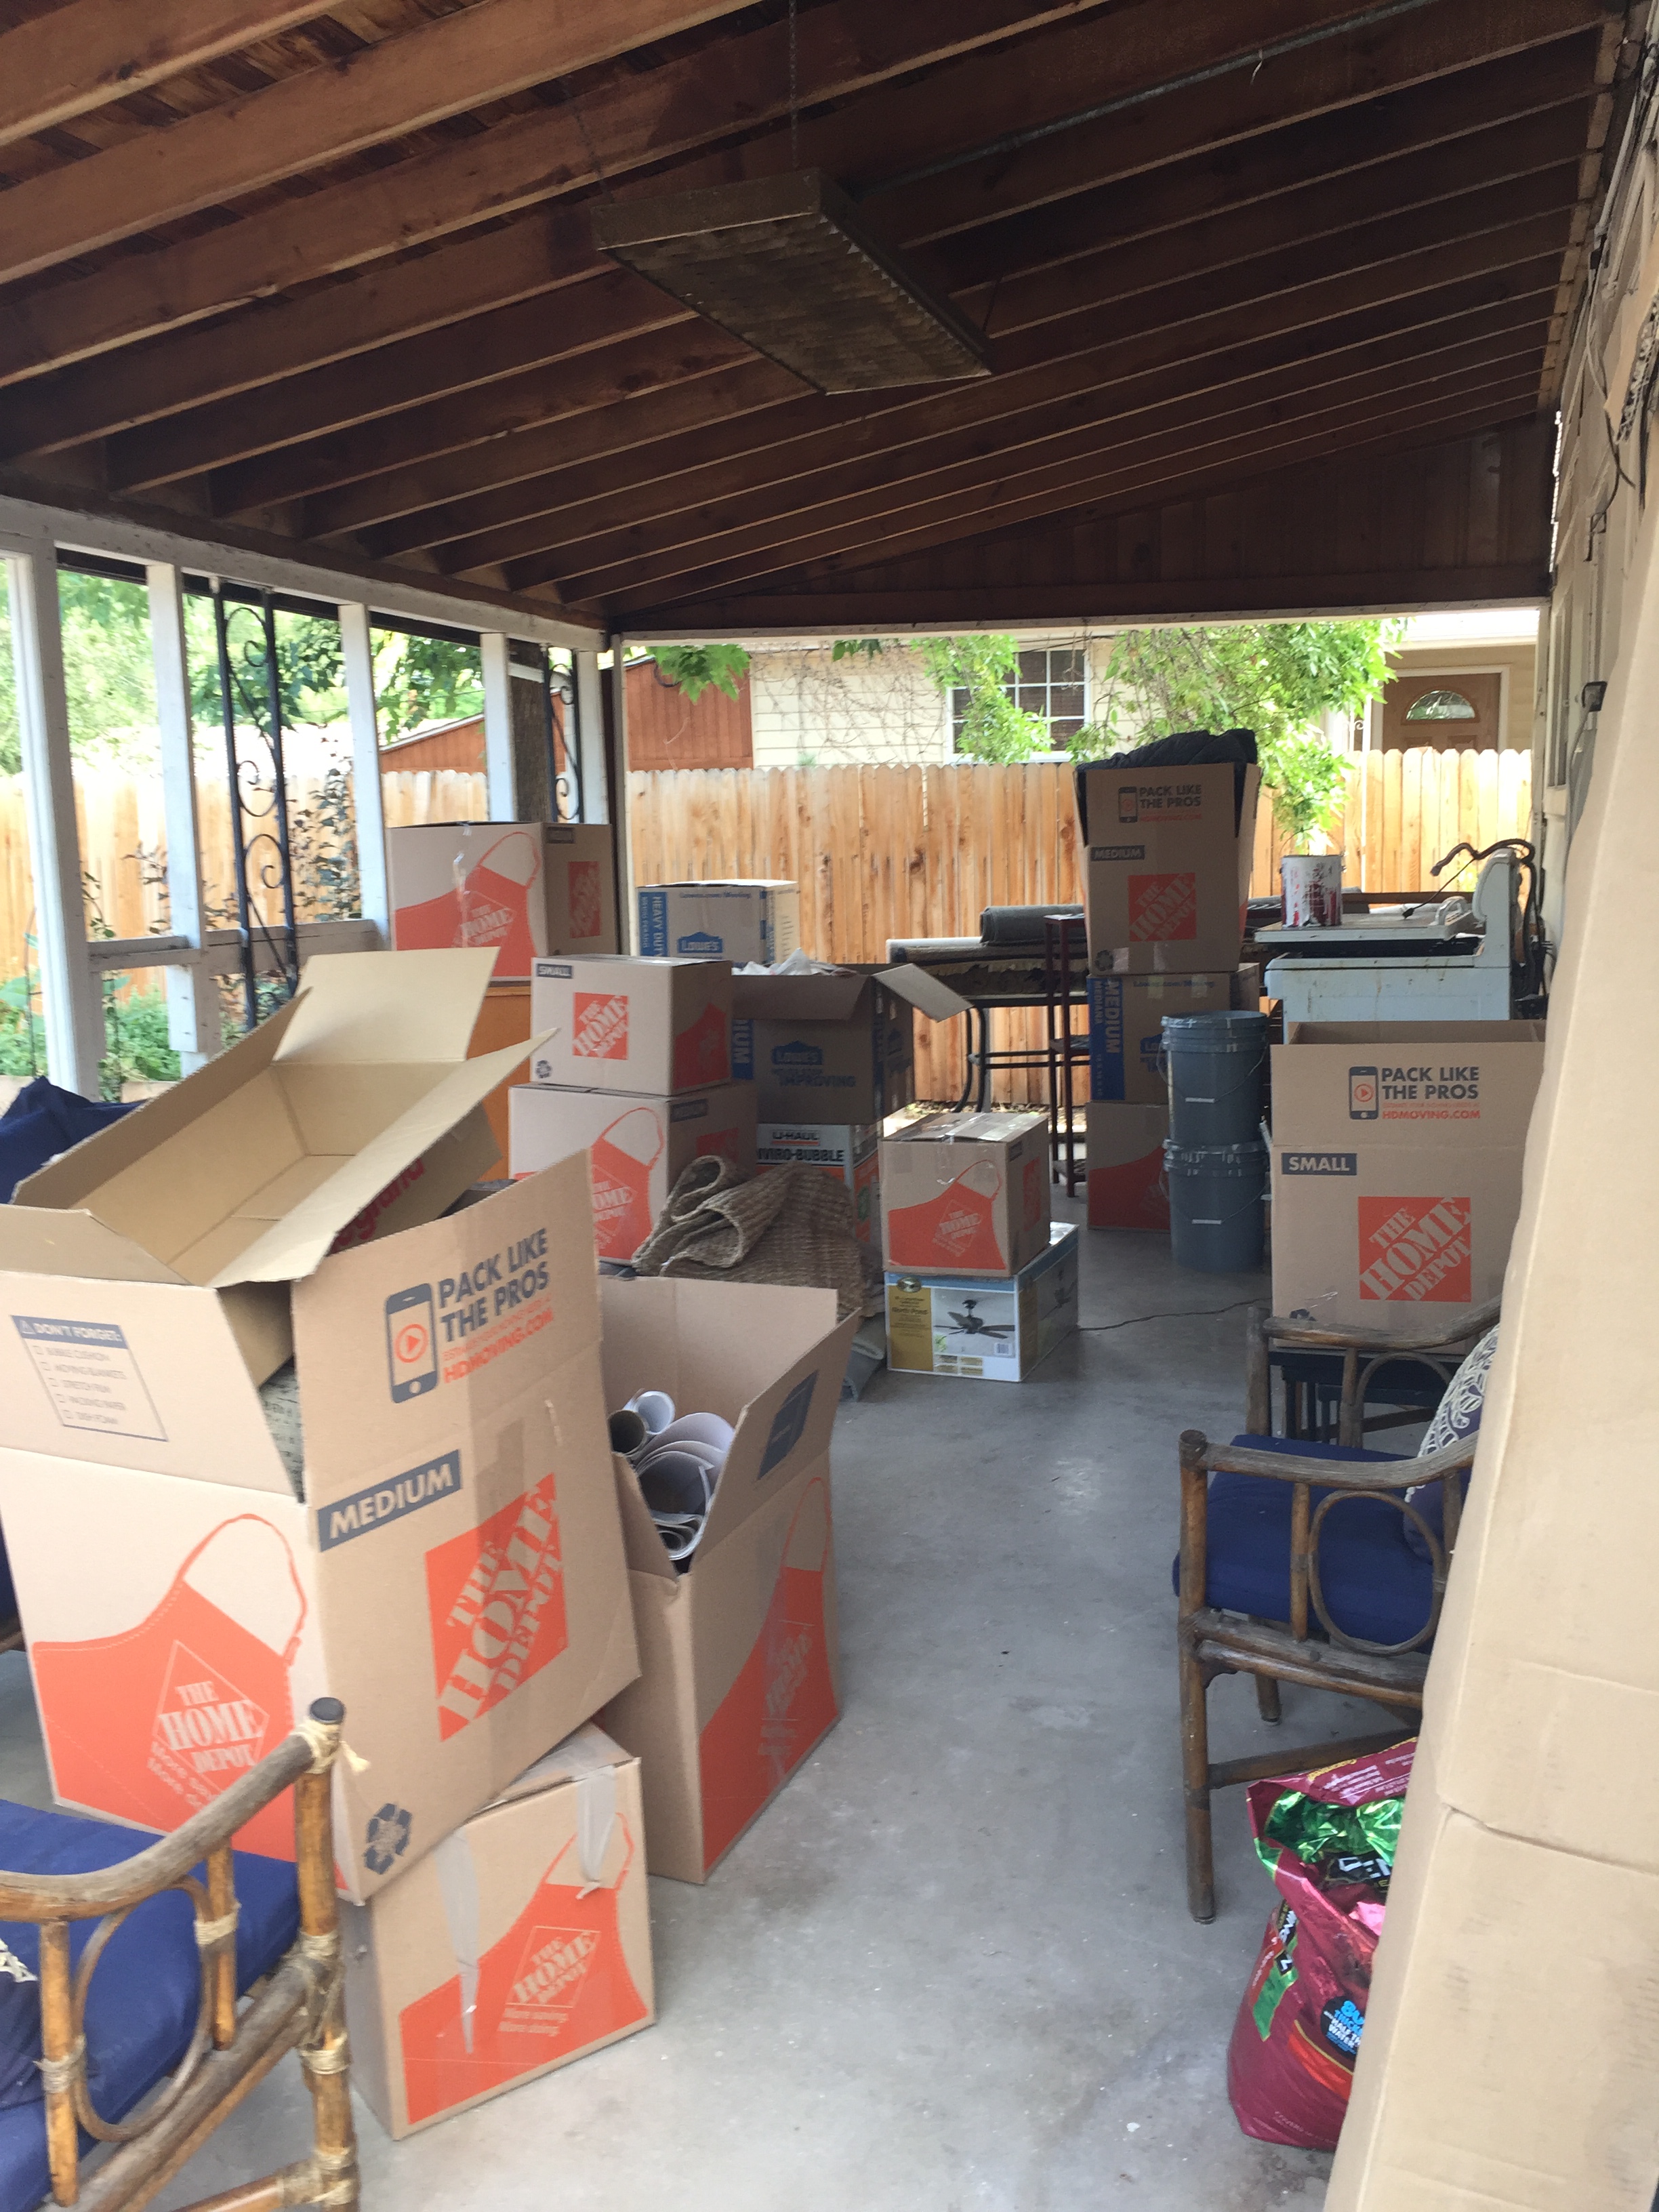
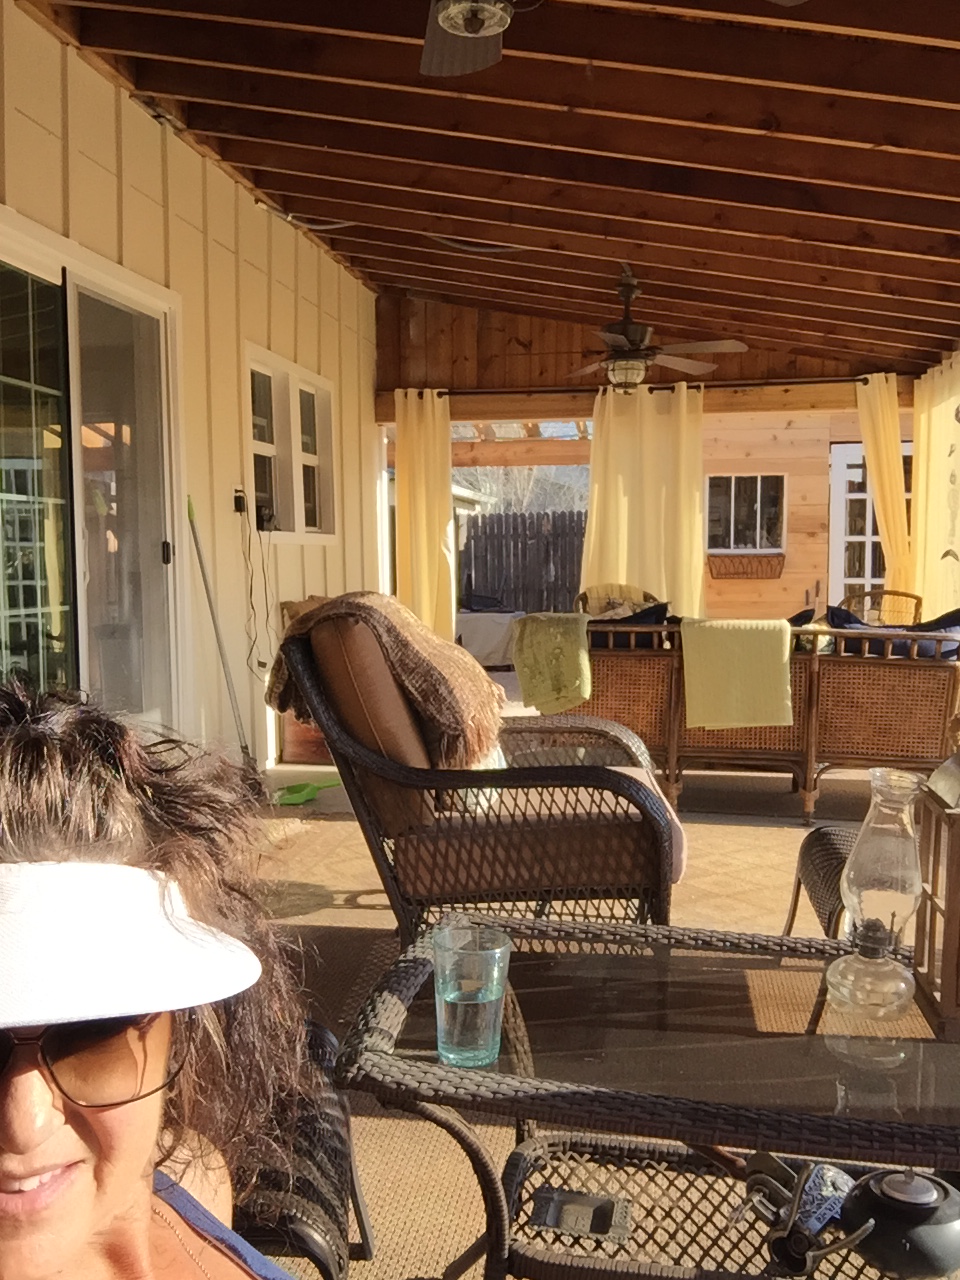
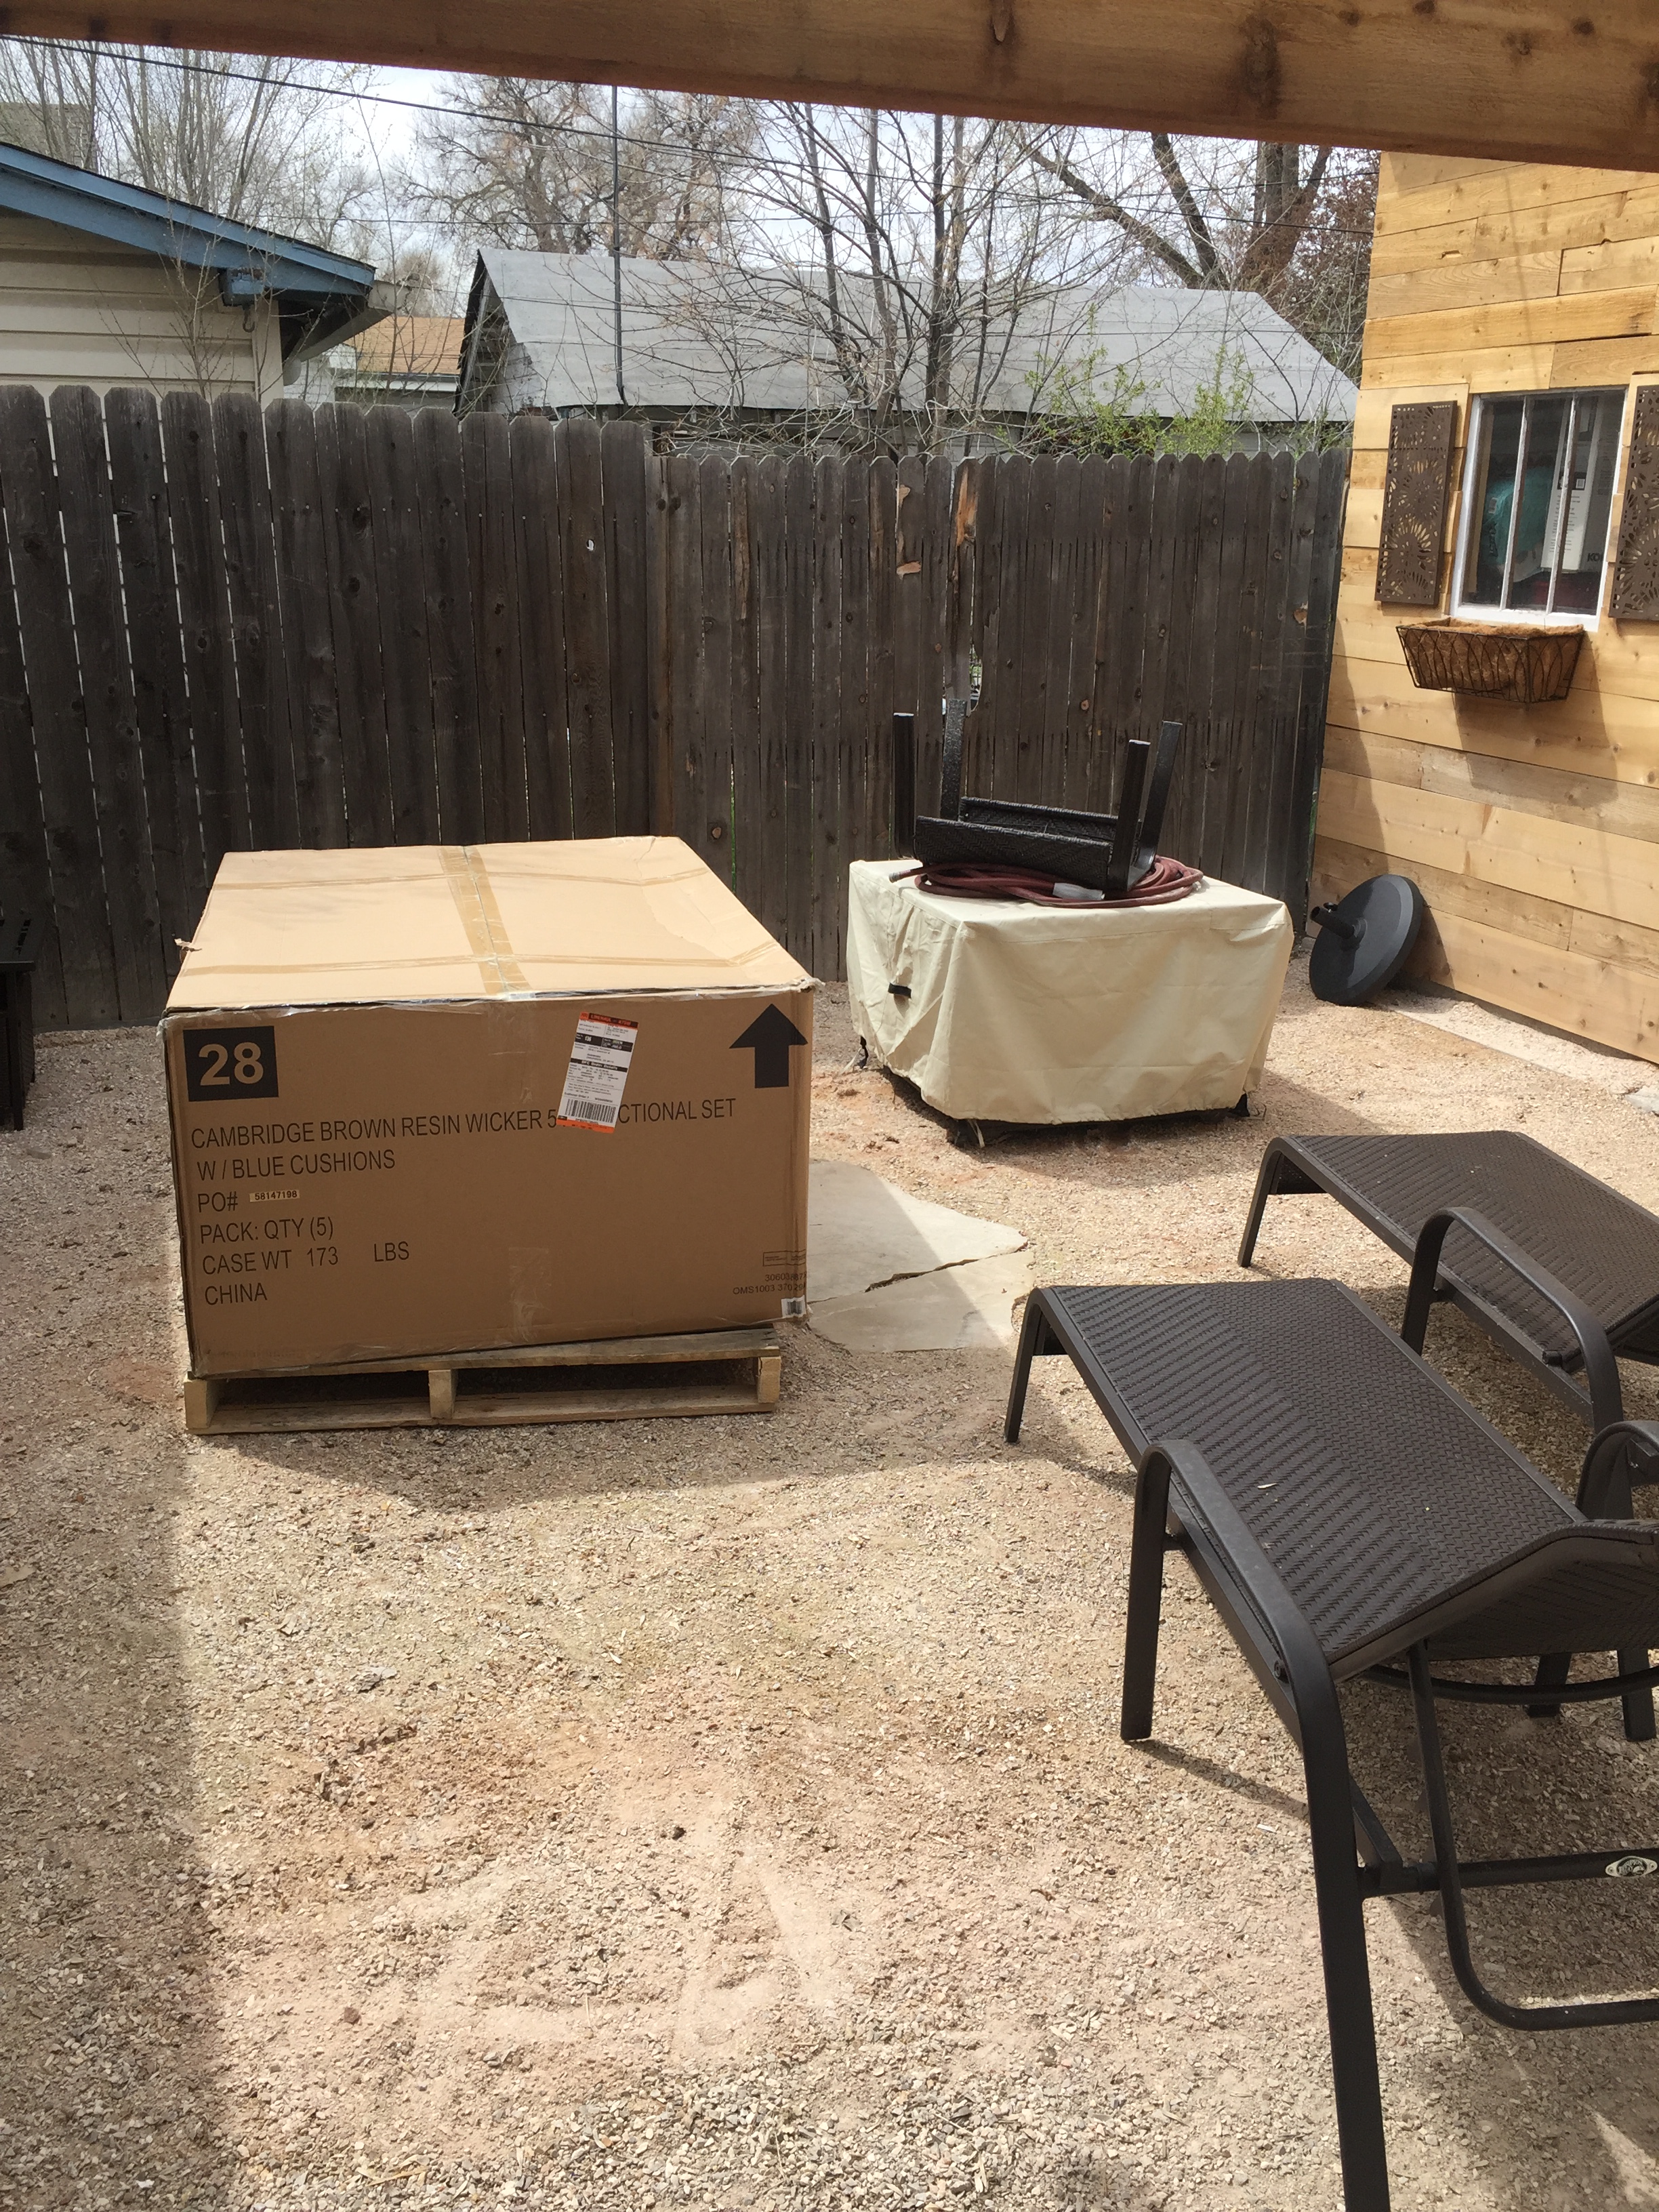
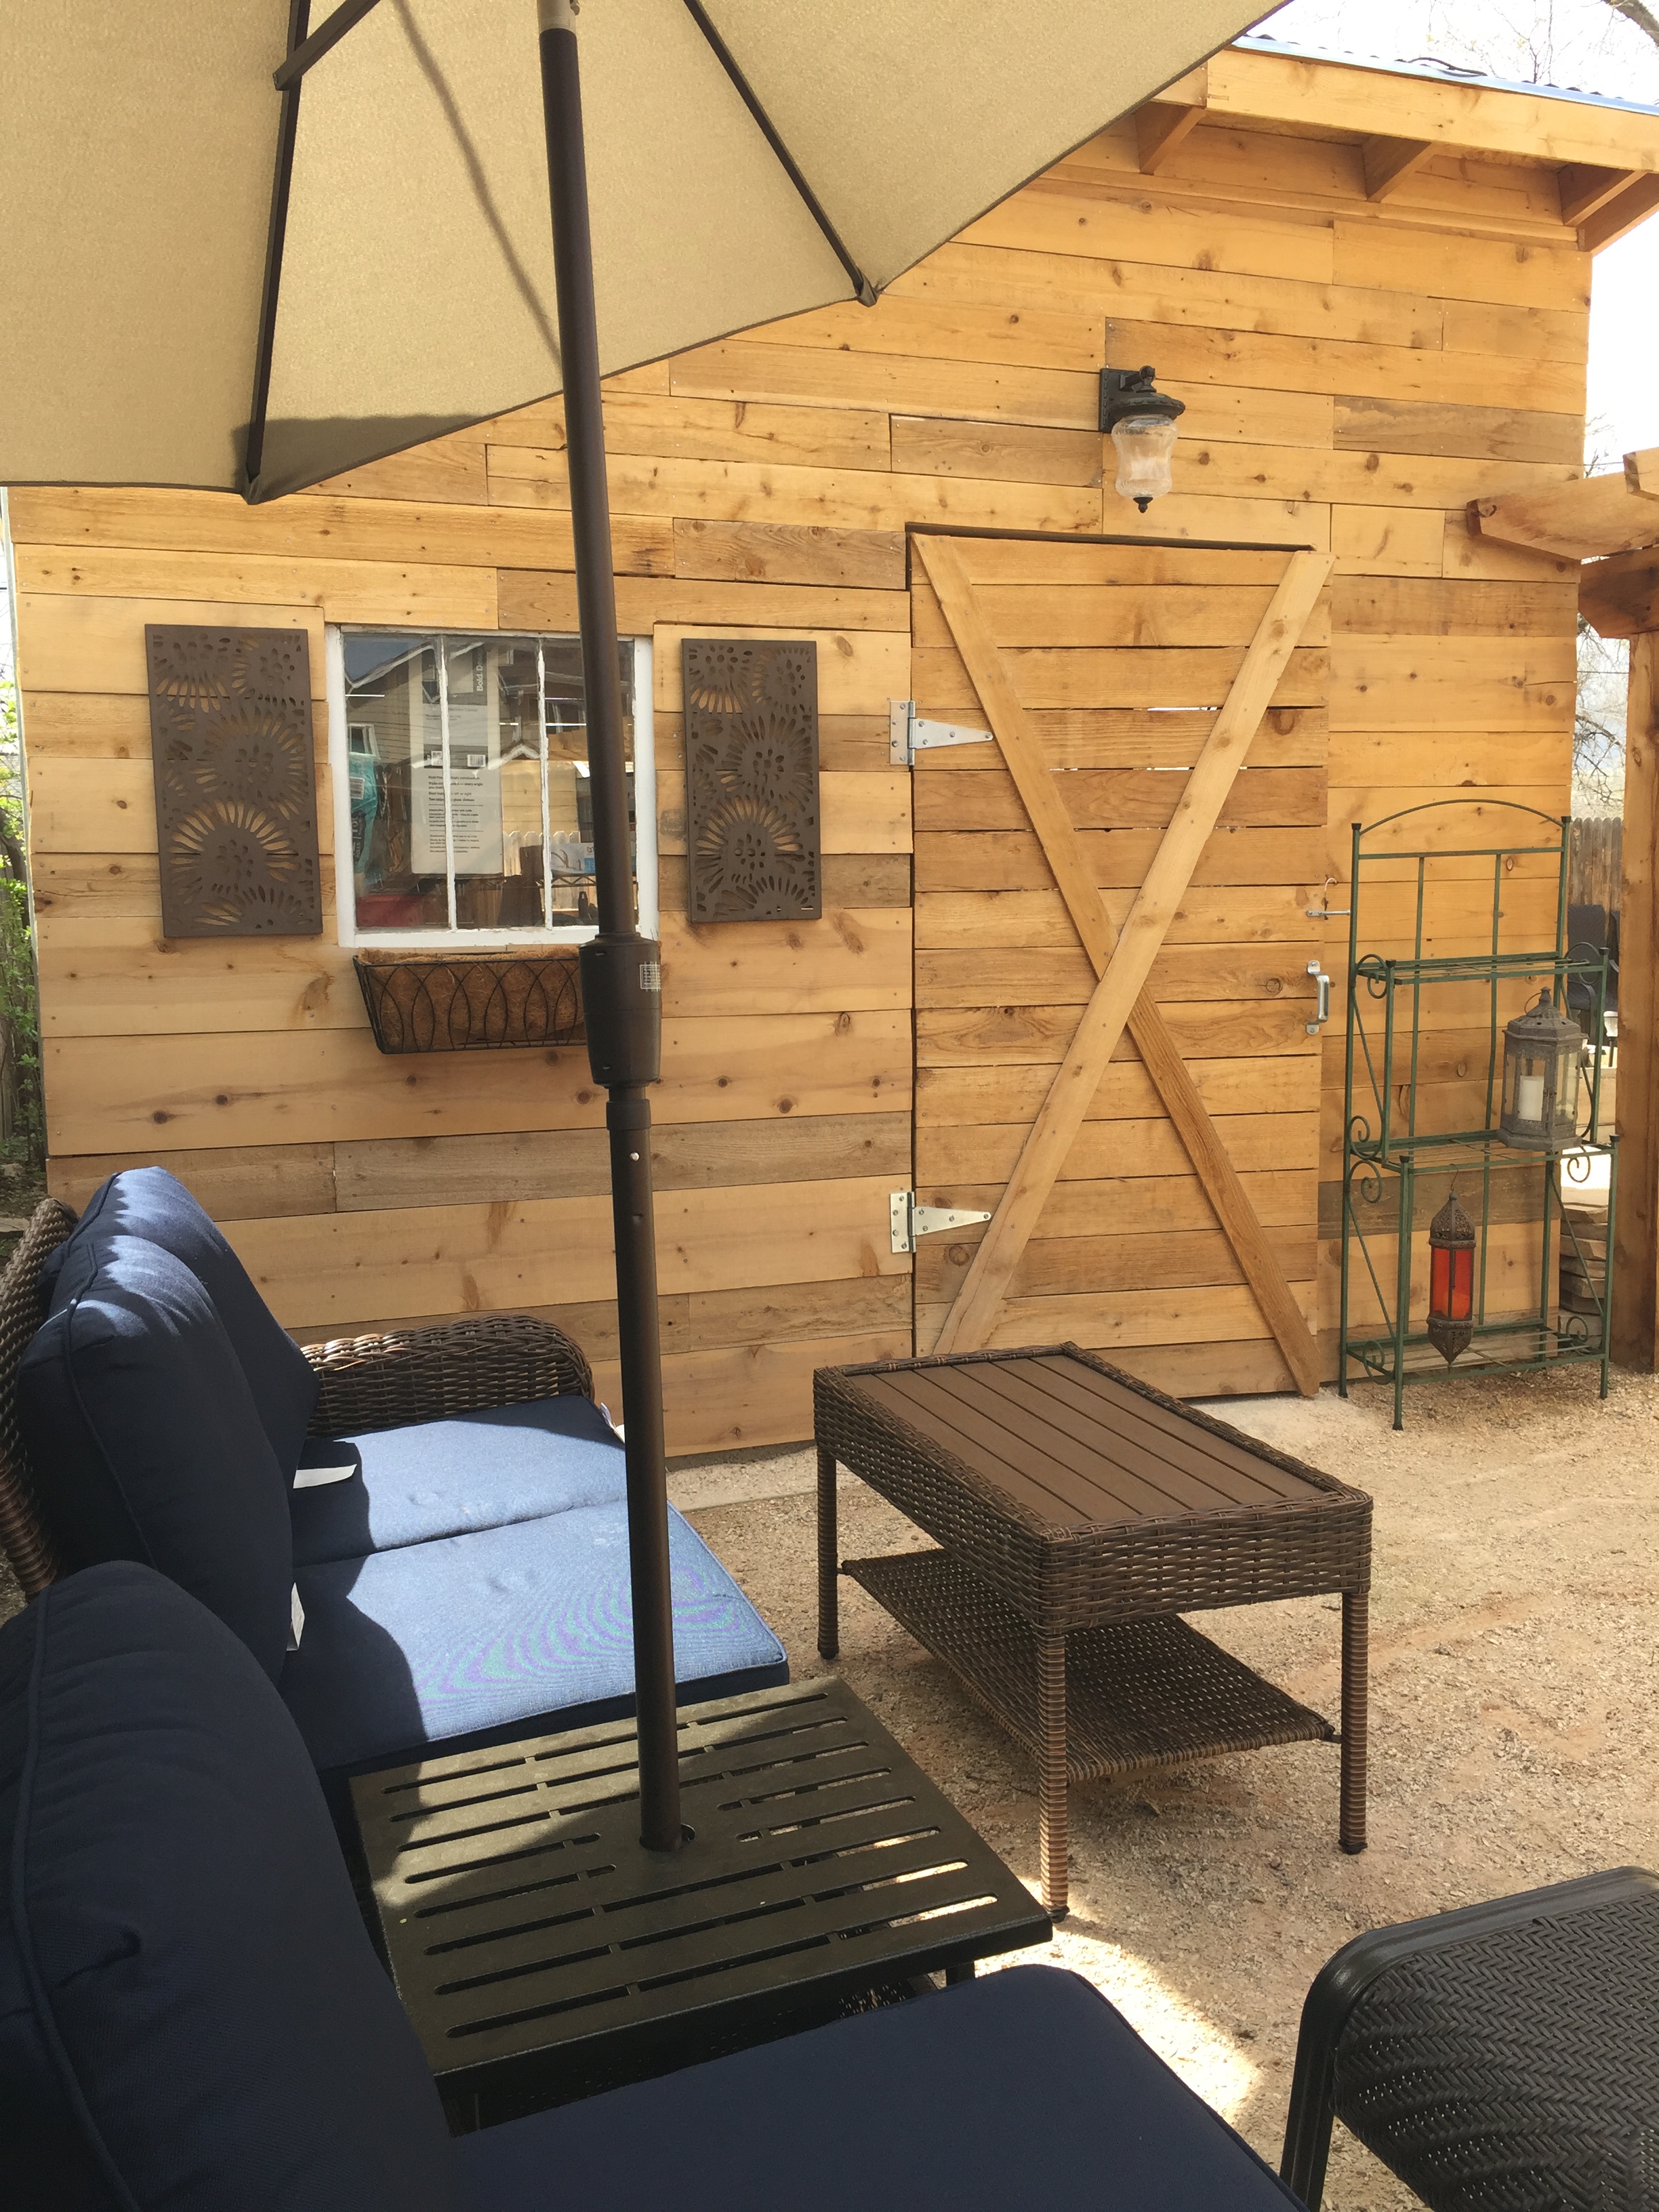
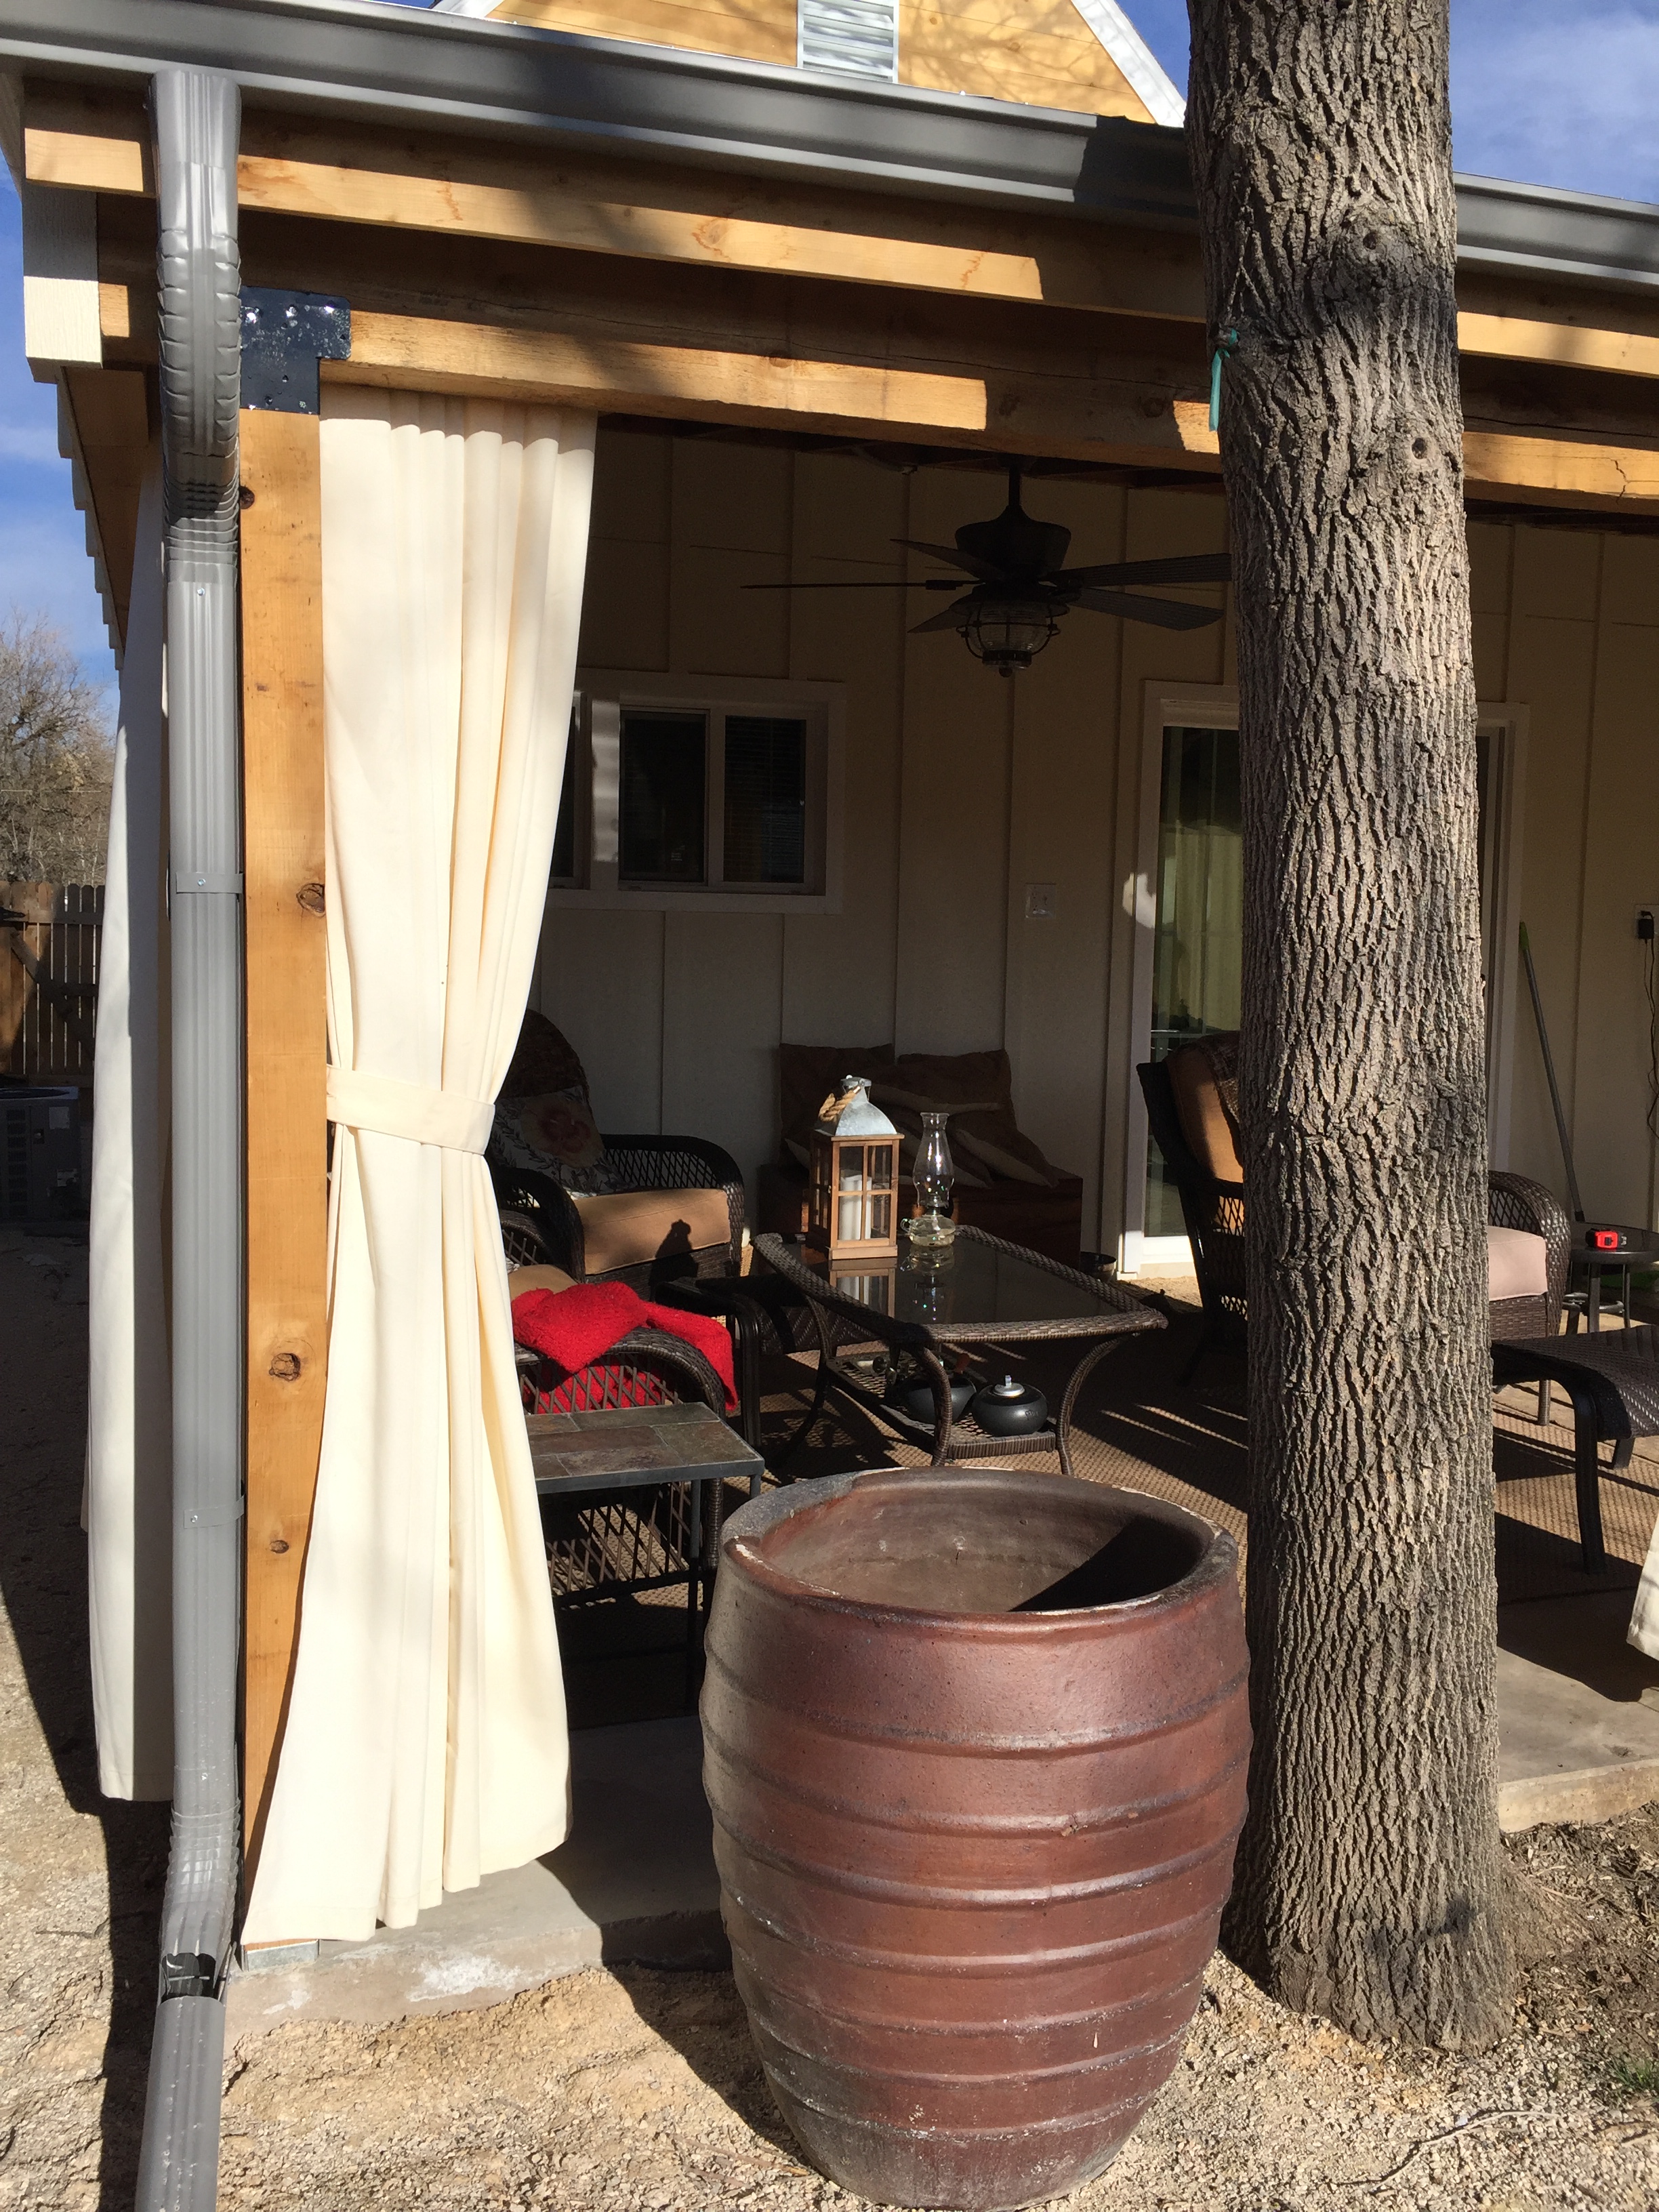
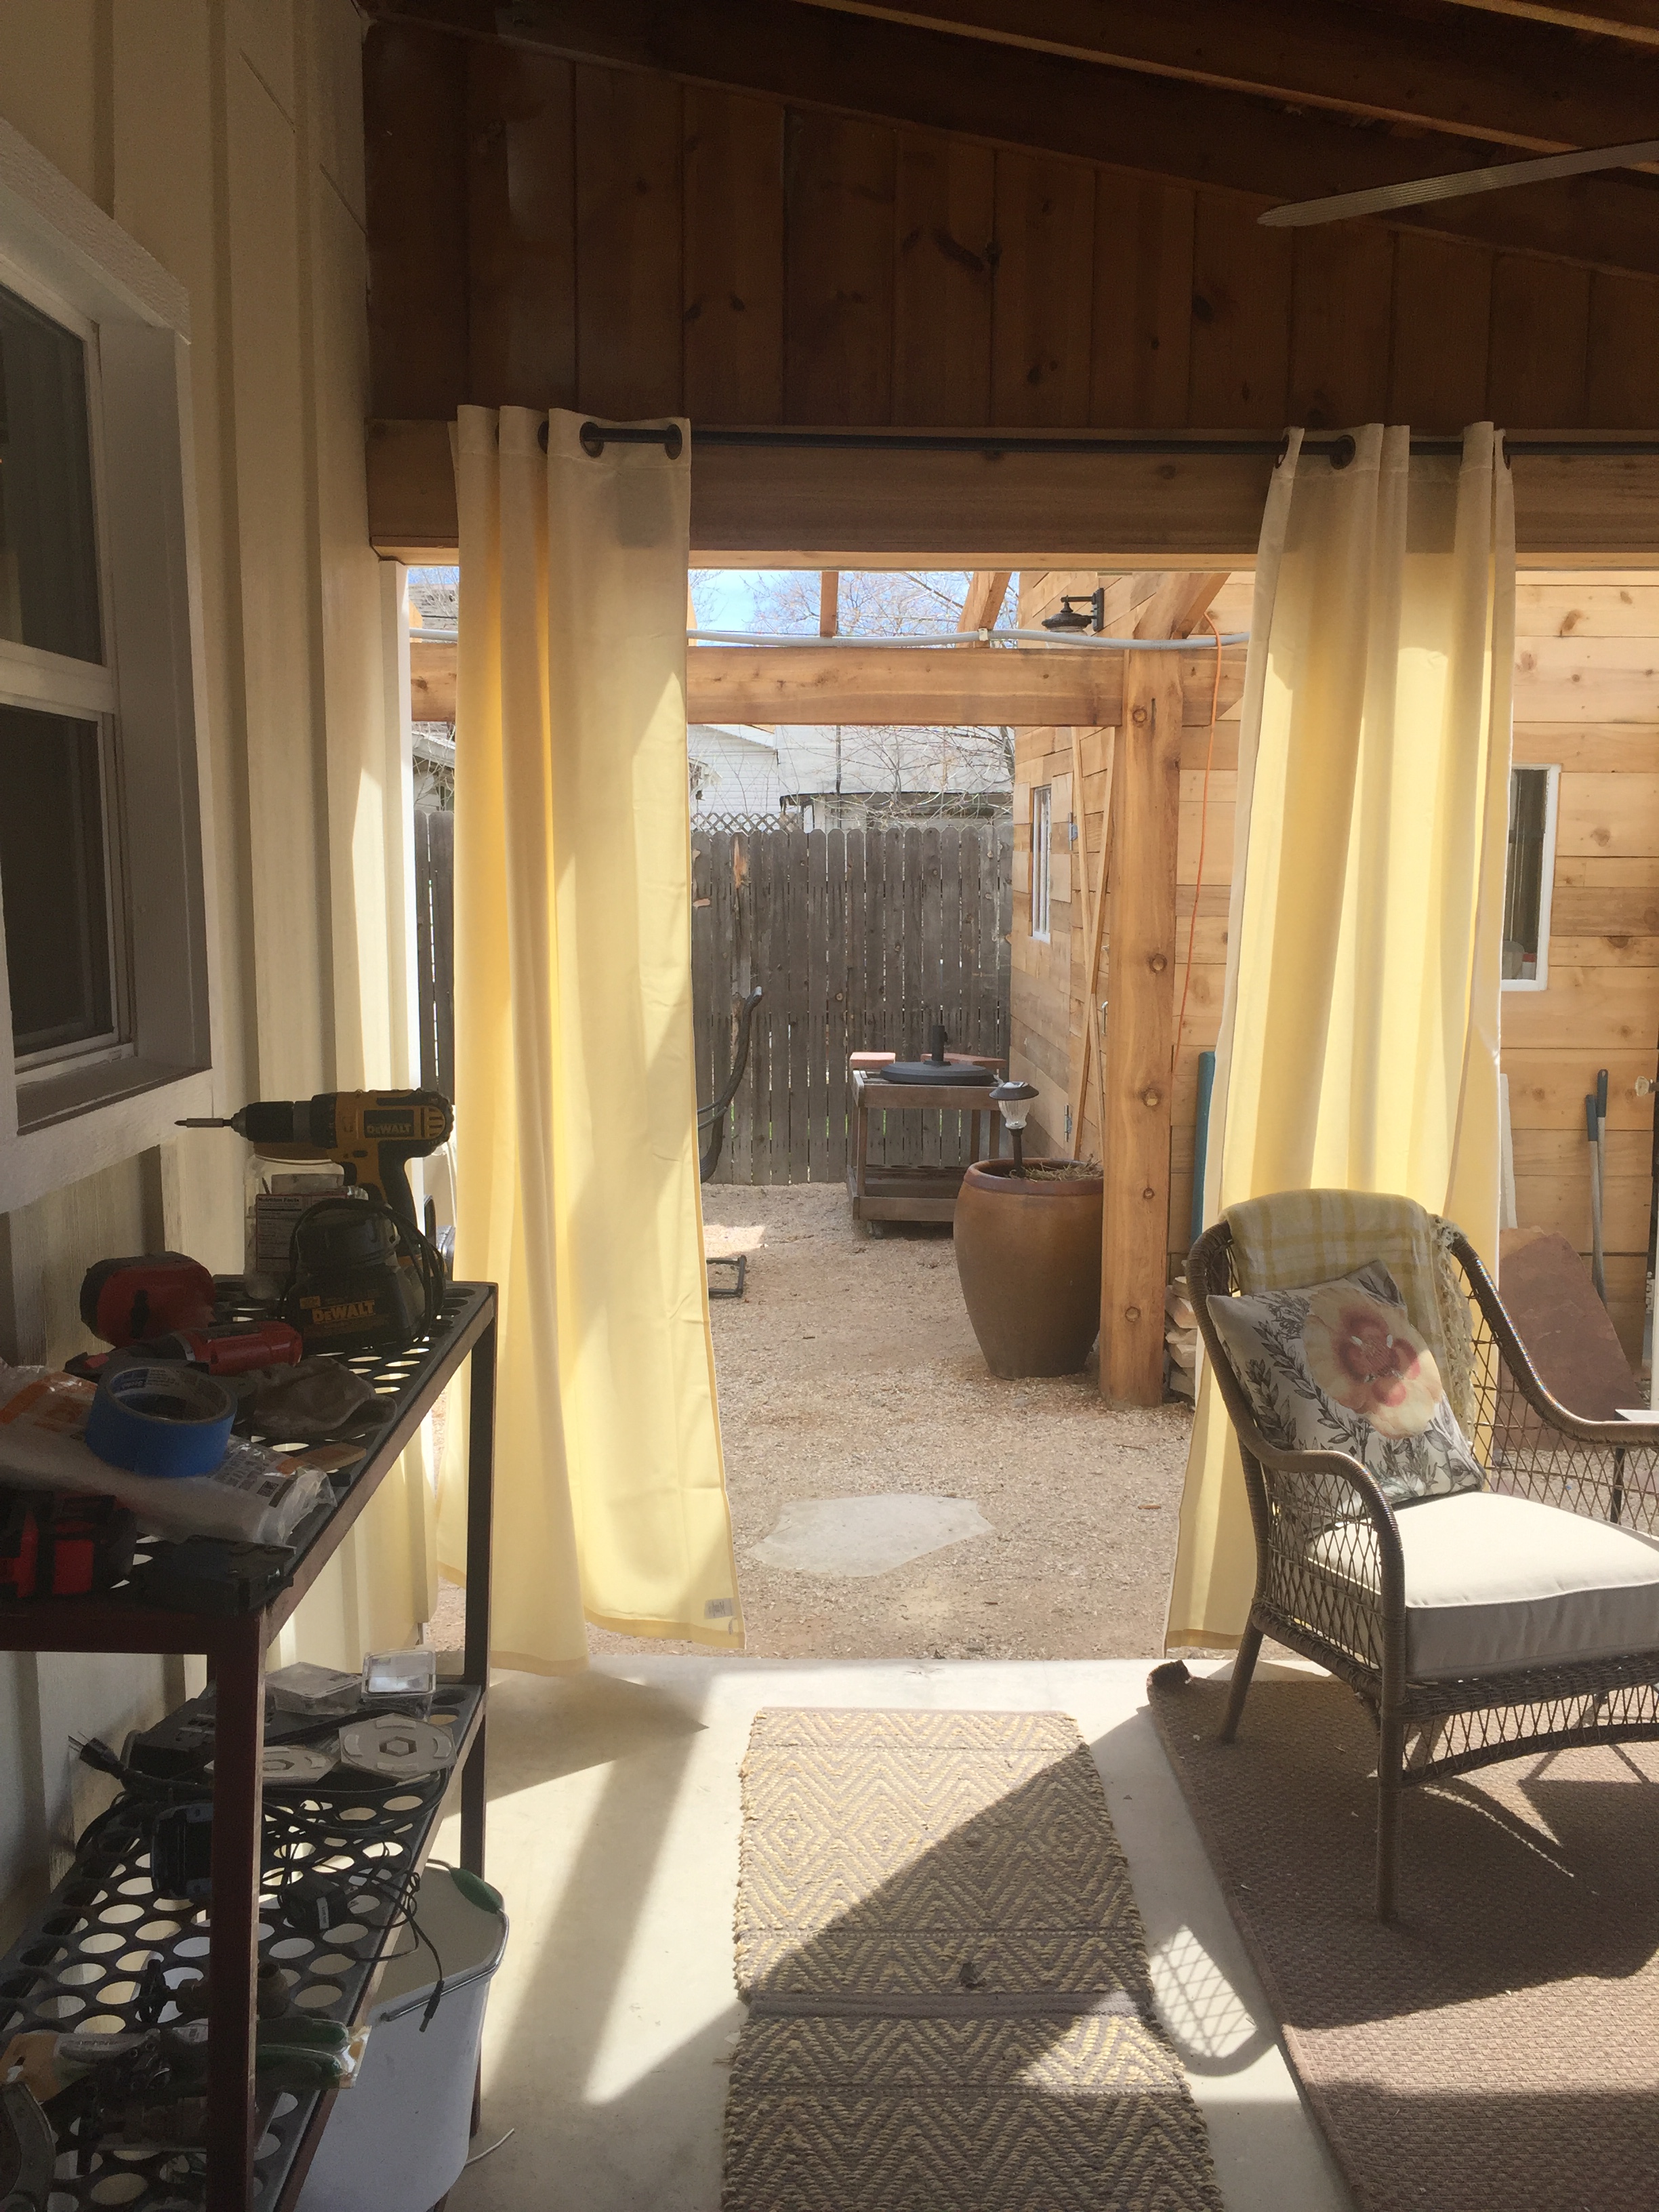
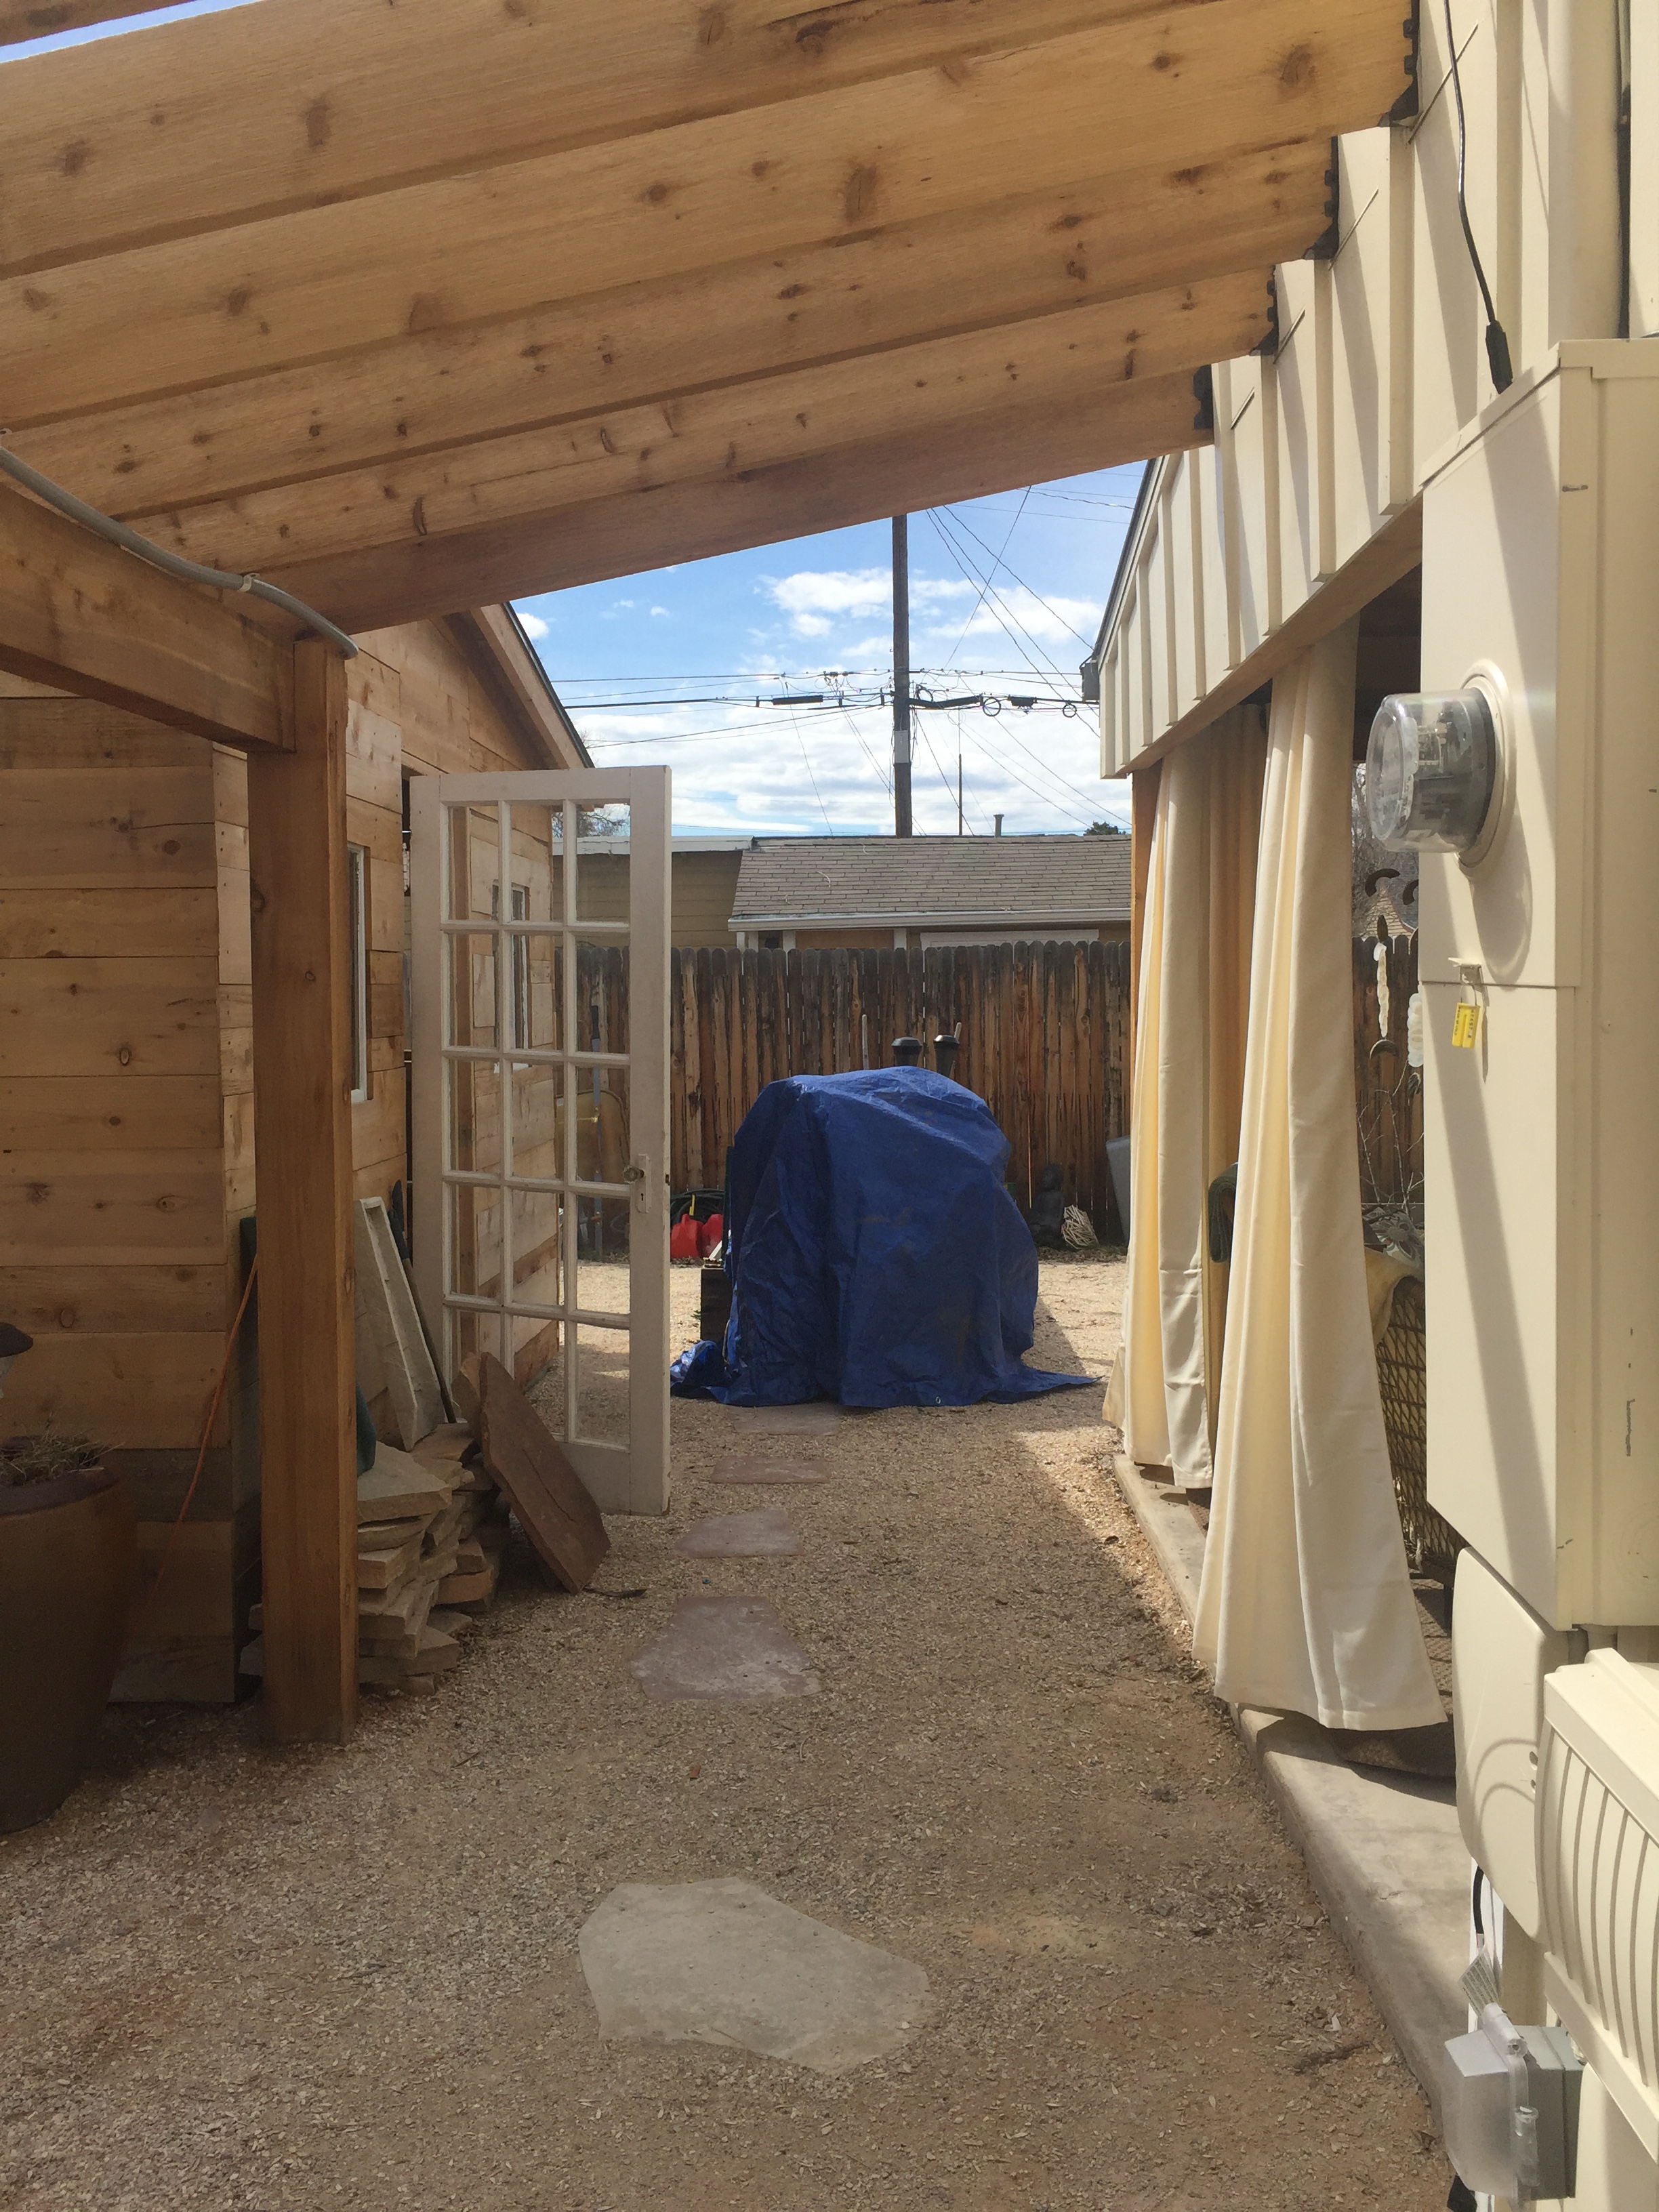
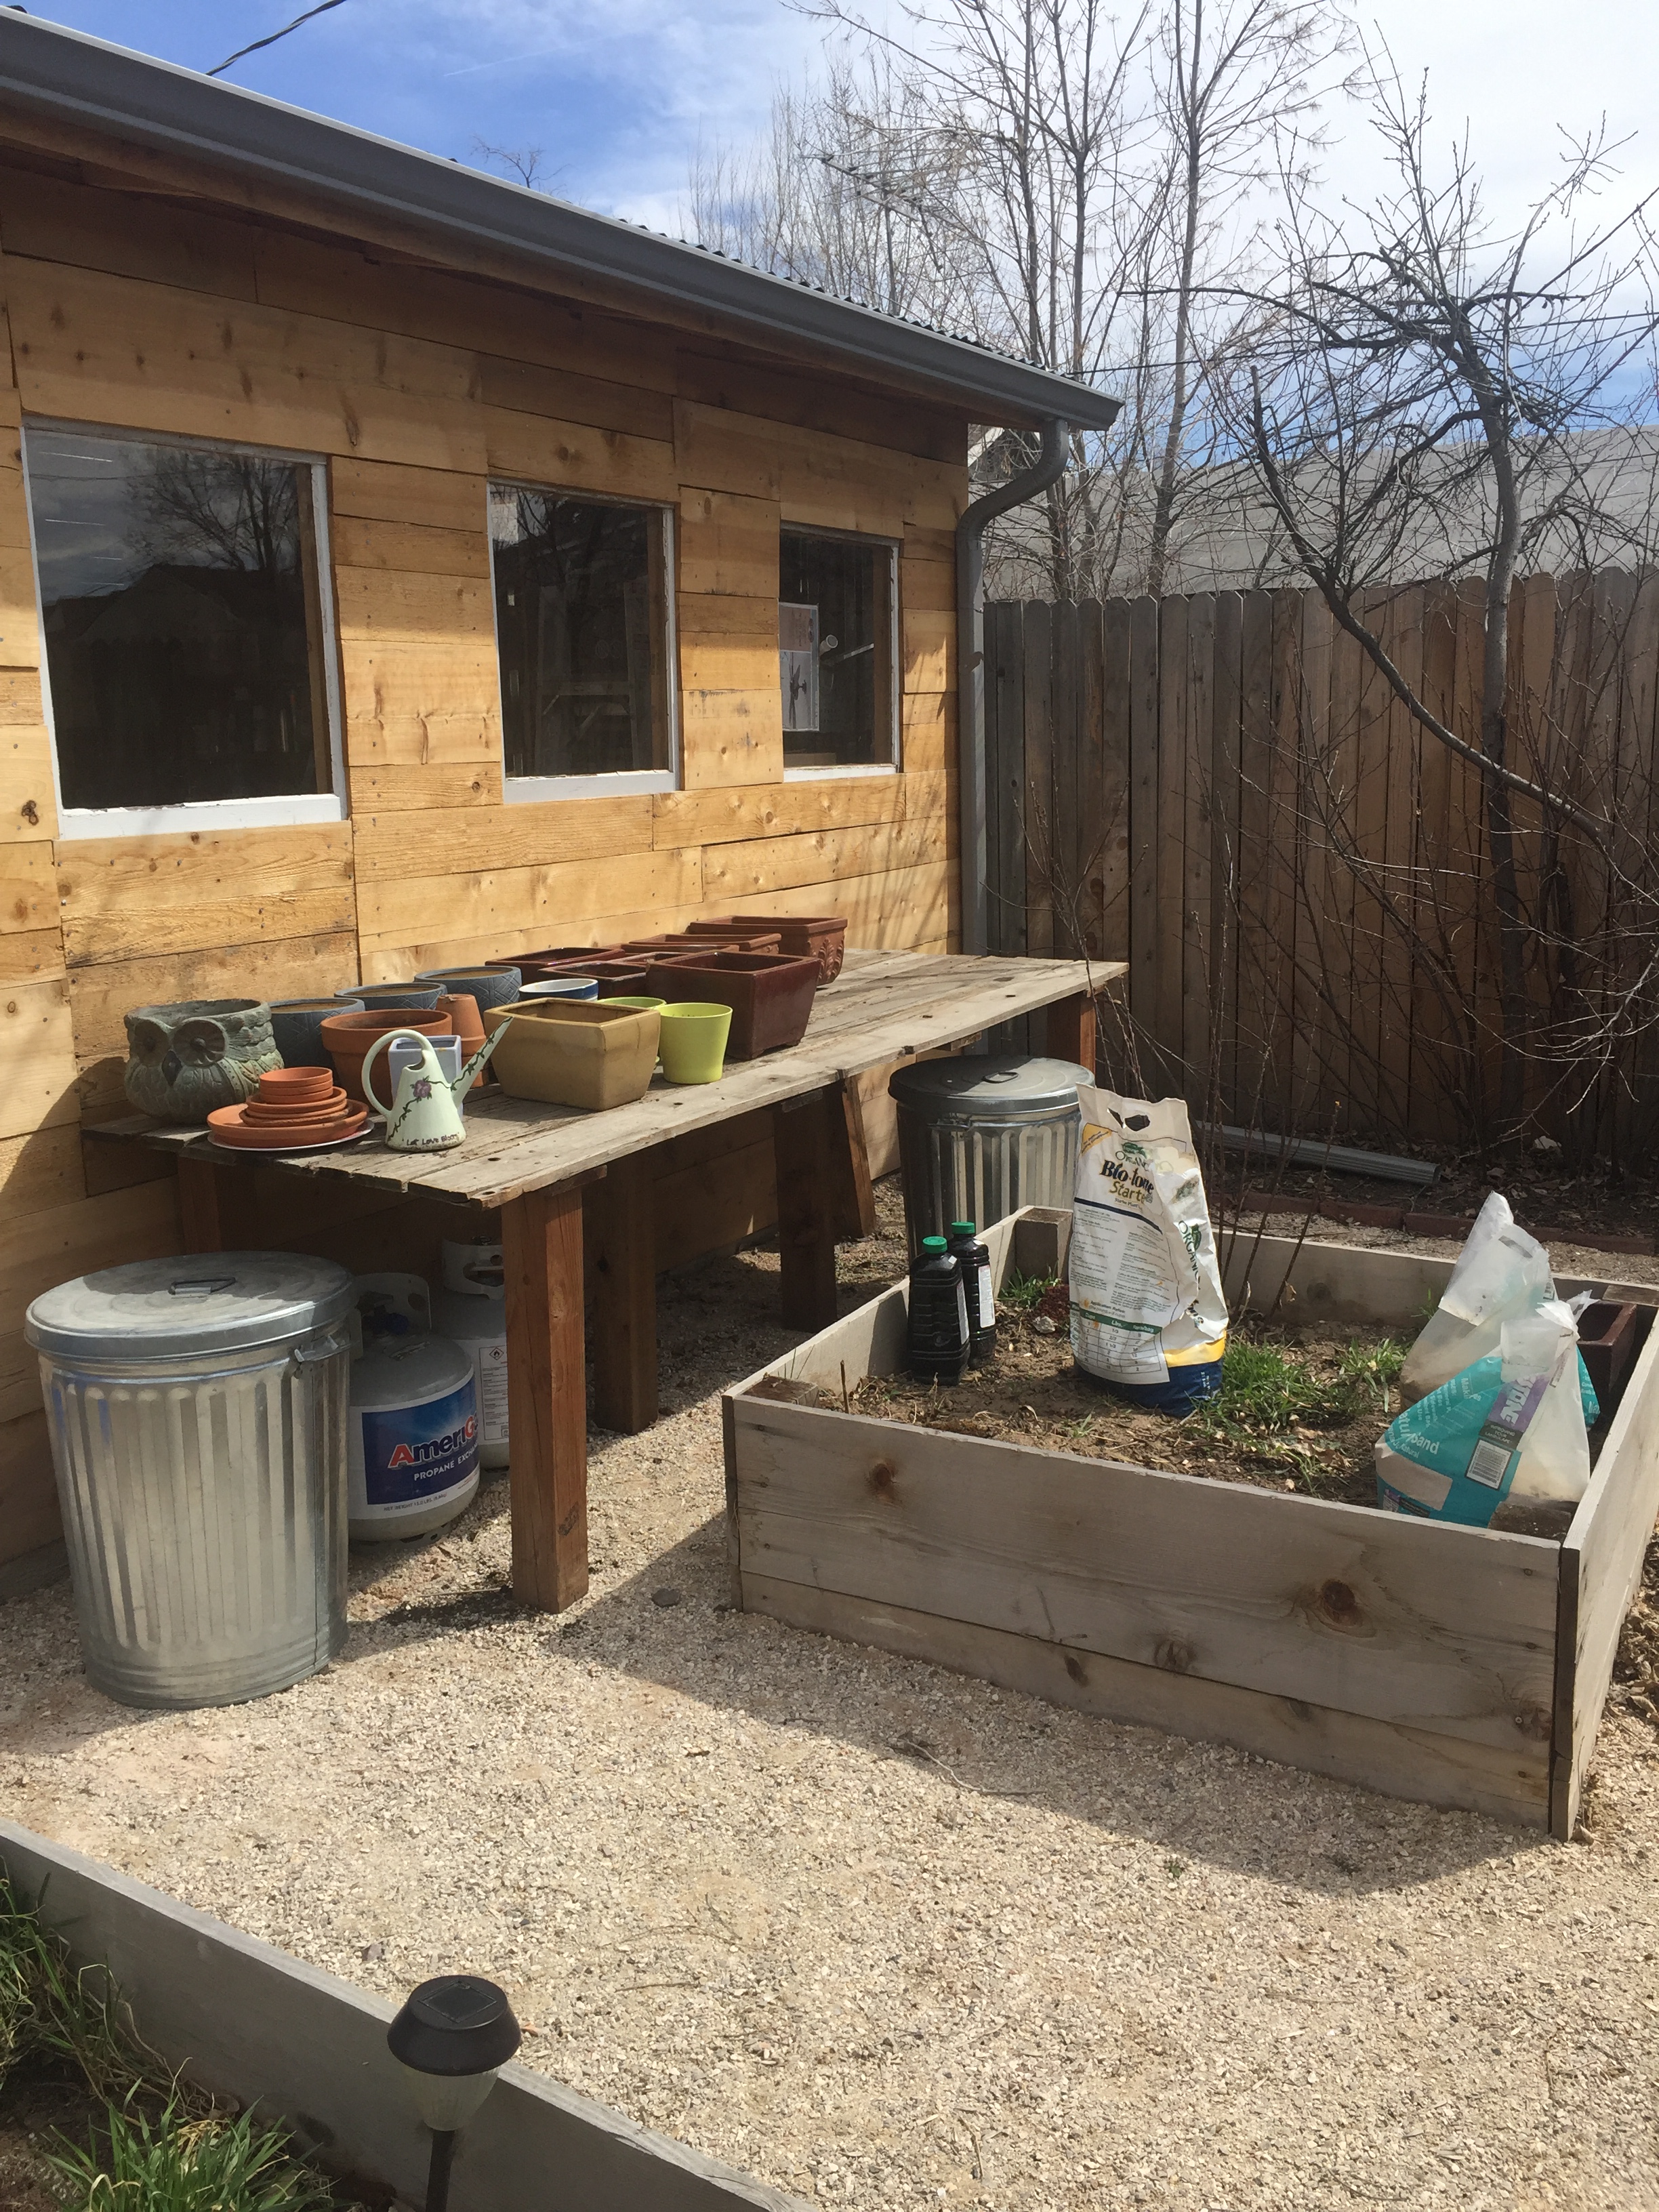
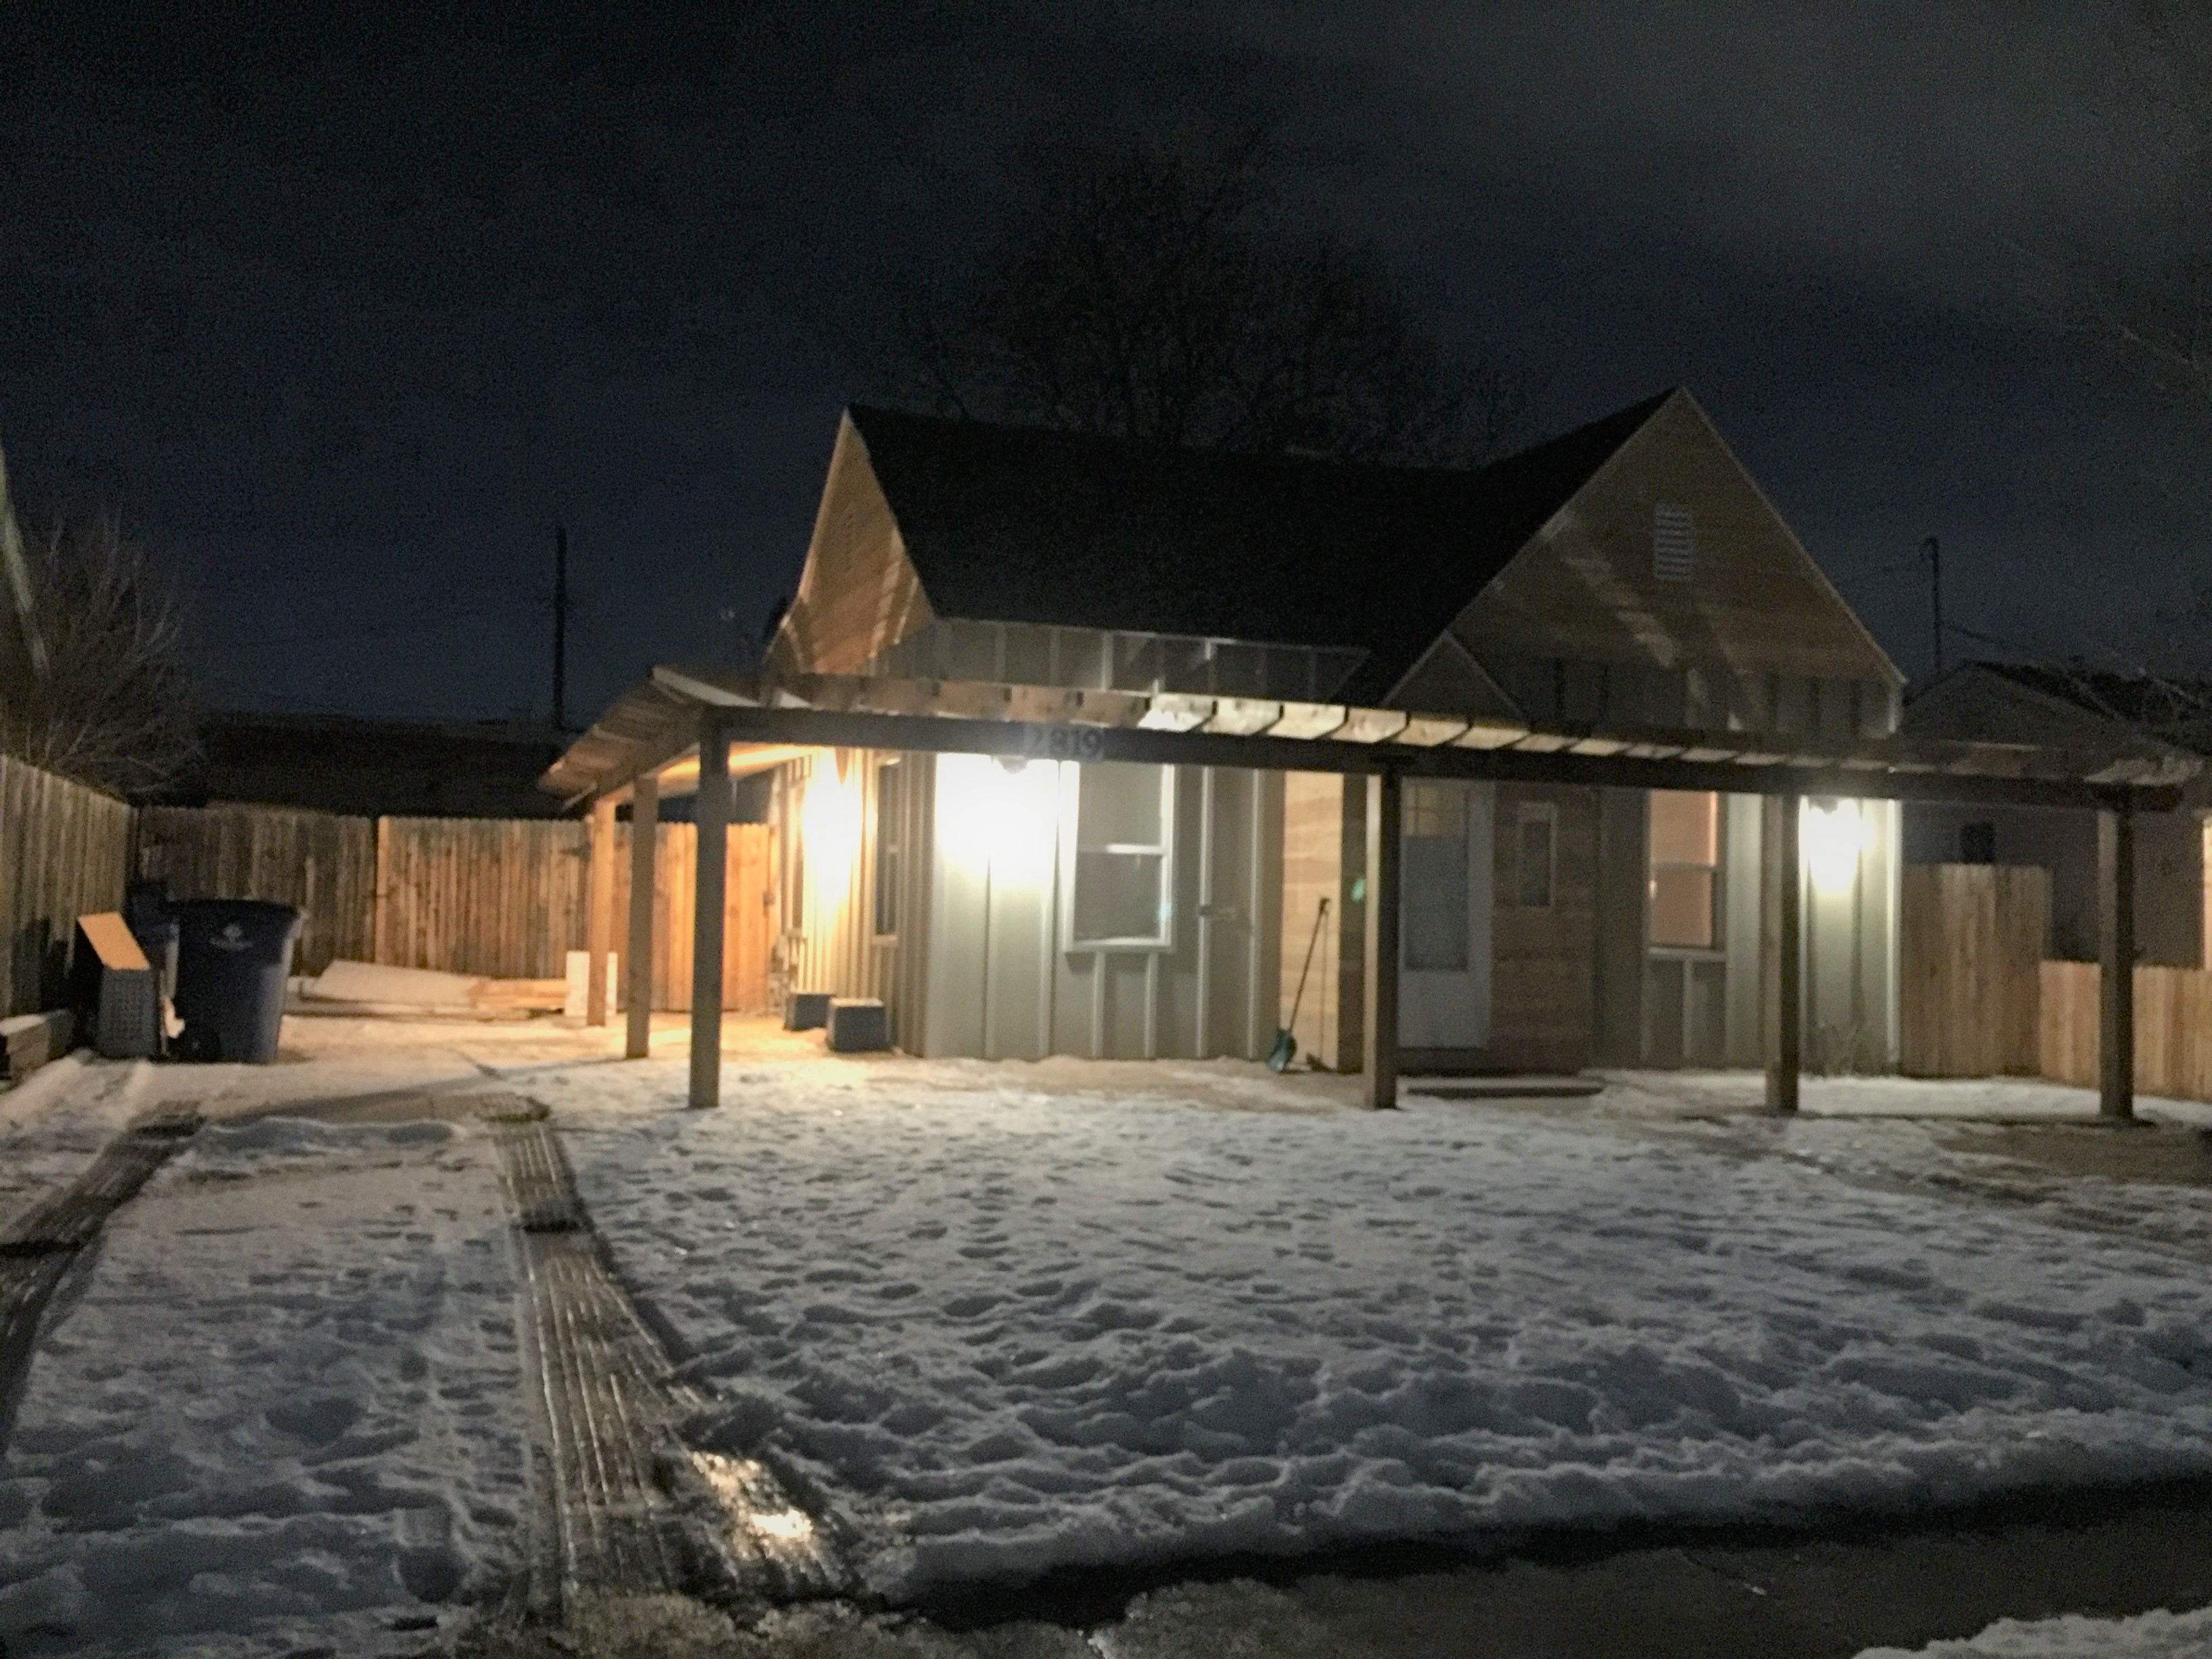
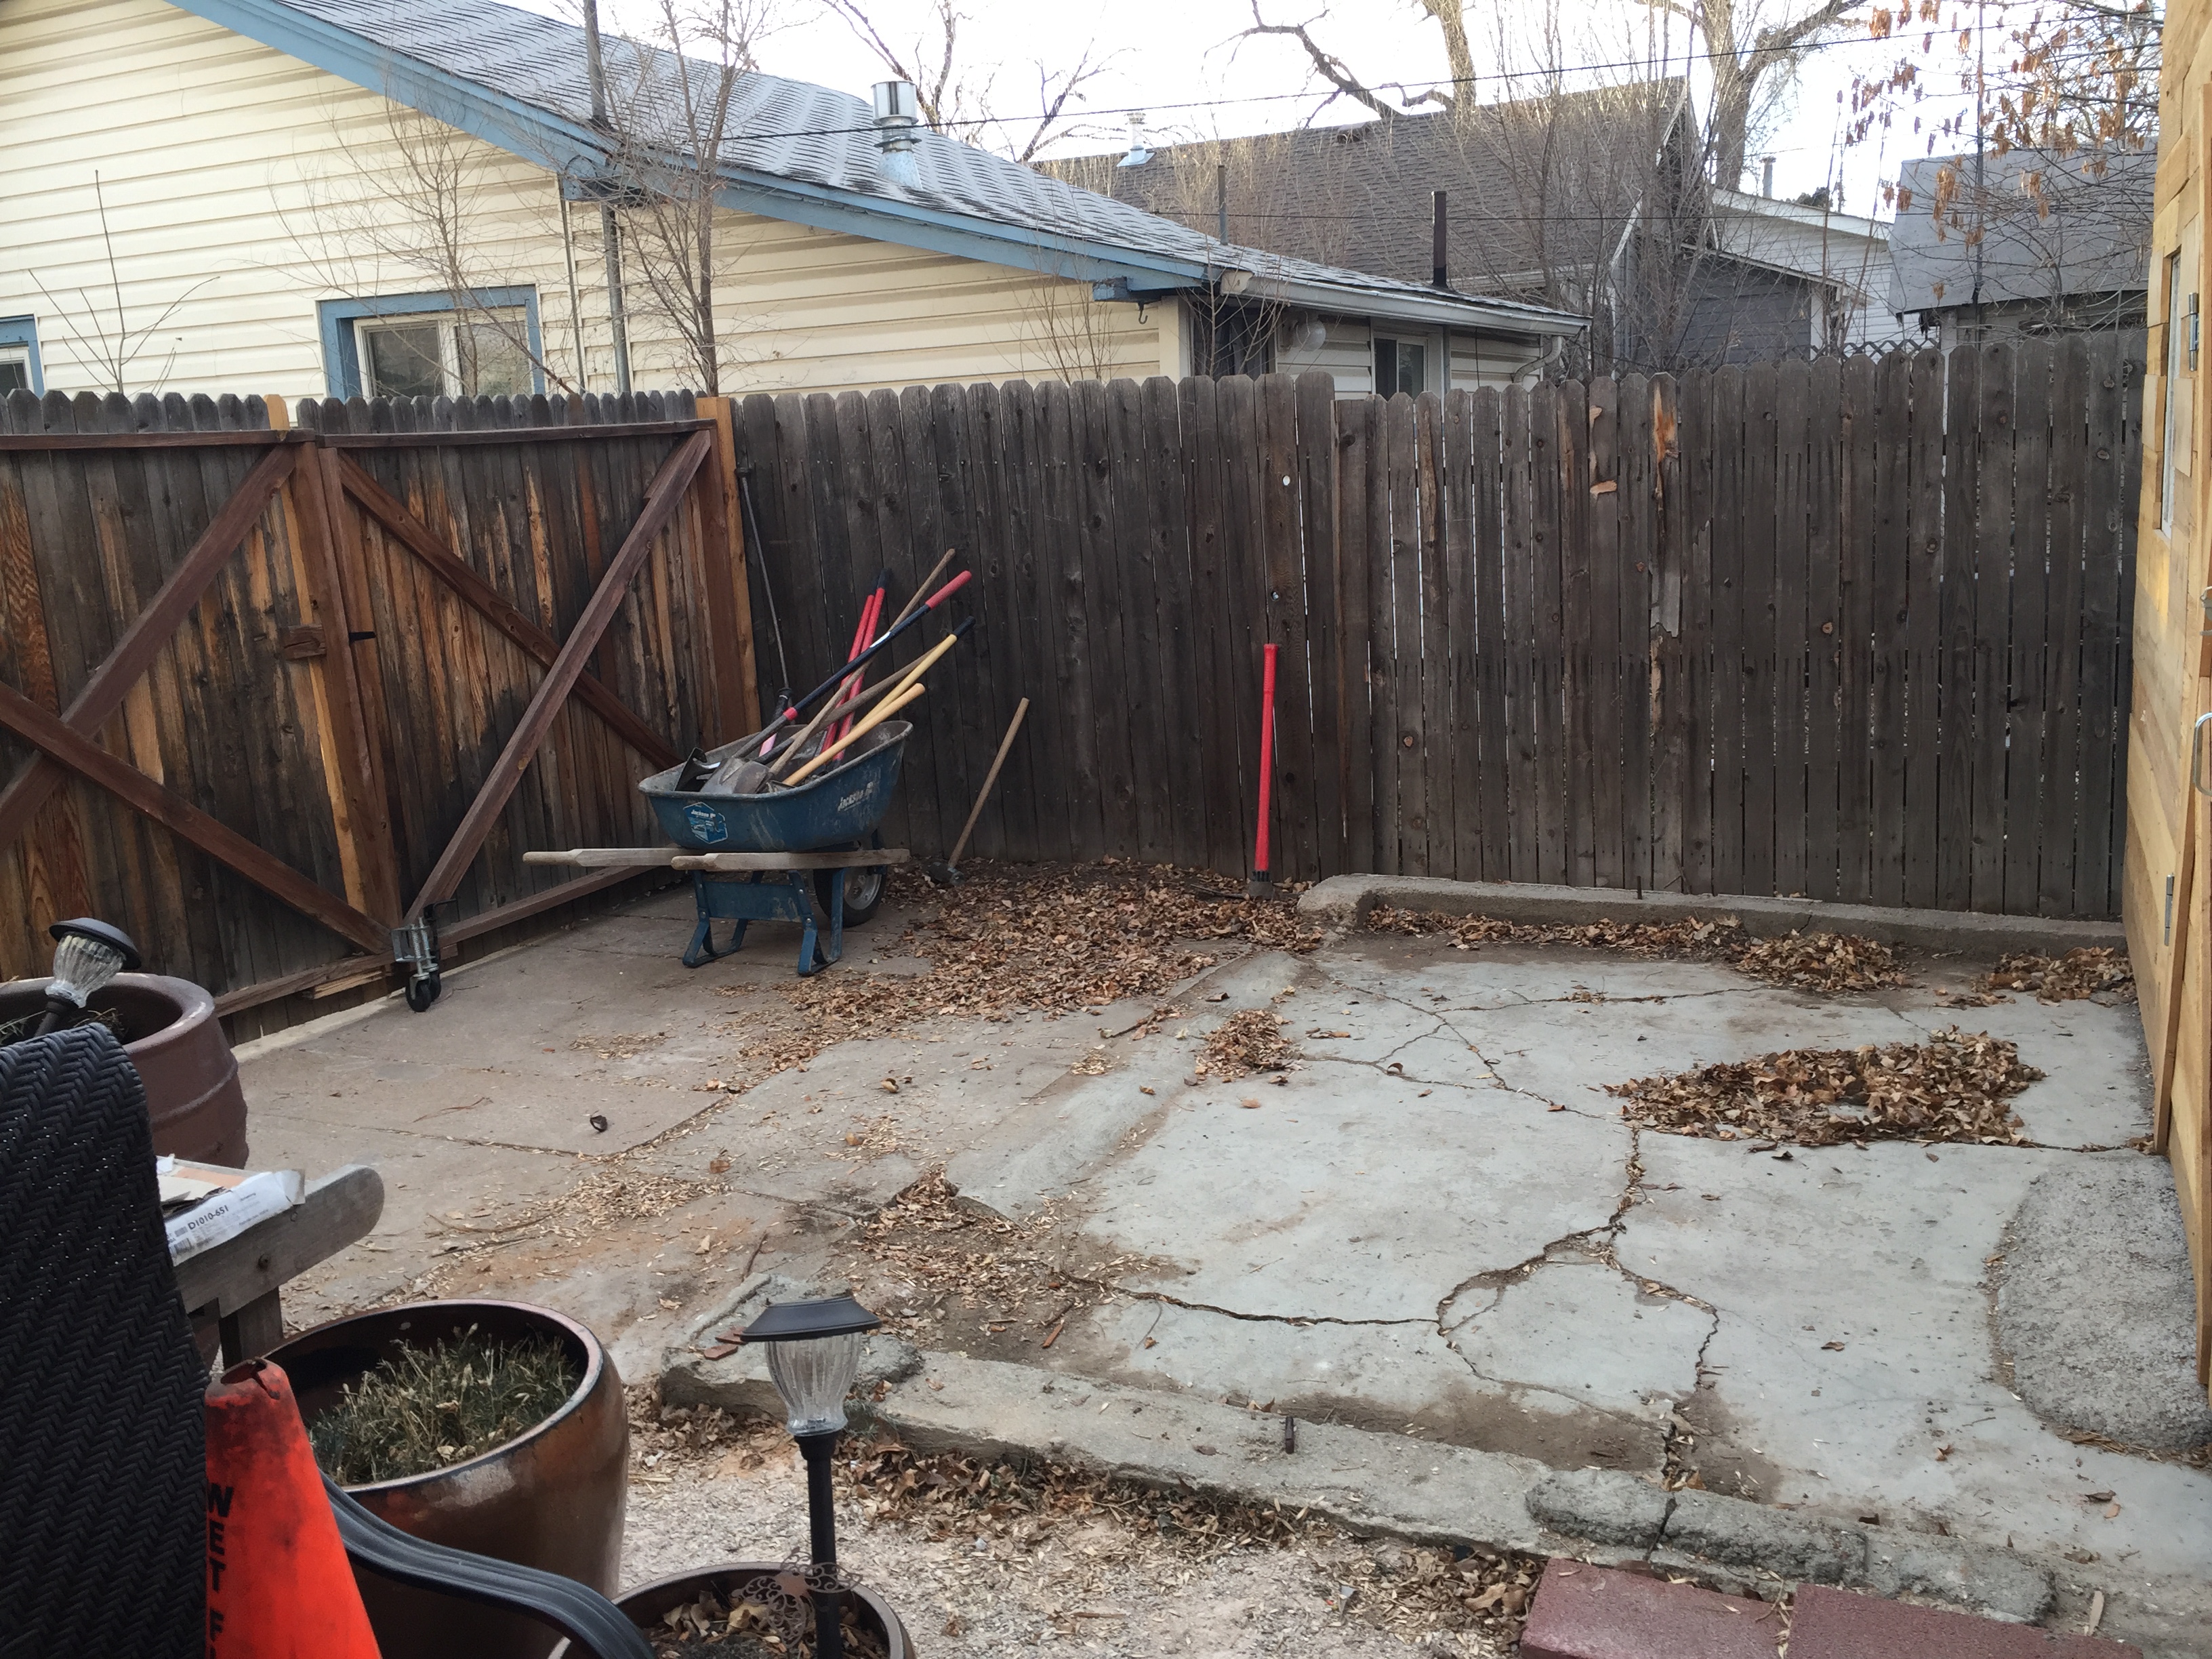
Temporarily using this space for all my big planter pots and fire pit until the siding is up on the house. Then, I’ll place the pots around the front and side yard of the house under the arbor.

I took an opportunity to get away from all the construction to go look for flagstone. I bought this 1/2 pallet of flagstone steppers.
And a 5′ x 18″ x 6″ step for the front door. The step was $275, but worth it to make the front door look more welcoming. It turns out, I’ll need a 2nd step for the front.
Once the concrete was removed, we discovered there was no foundation under the entry. That’s not what you want to find!
The excavation shows things previously unknown. I like to say ” Everything takes longer and costs more than expected” And this project reinforces my theory.

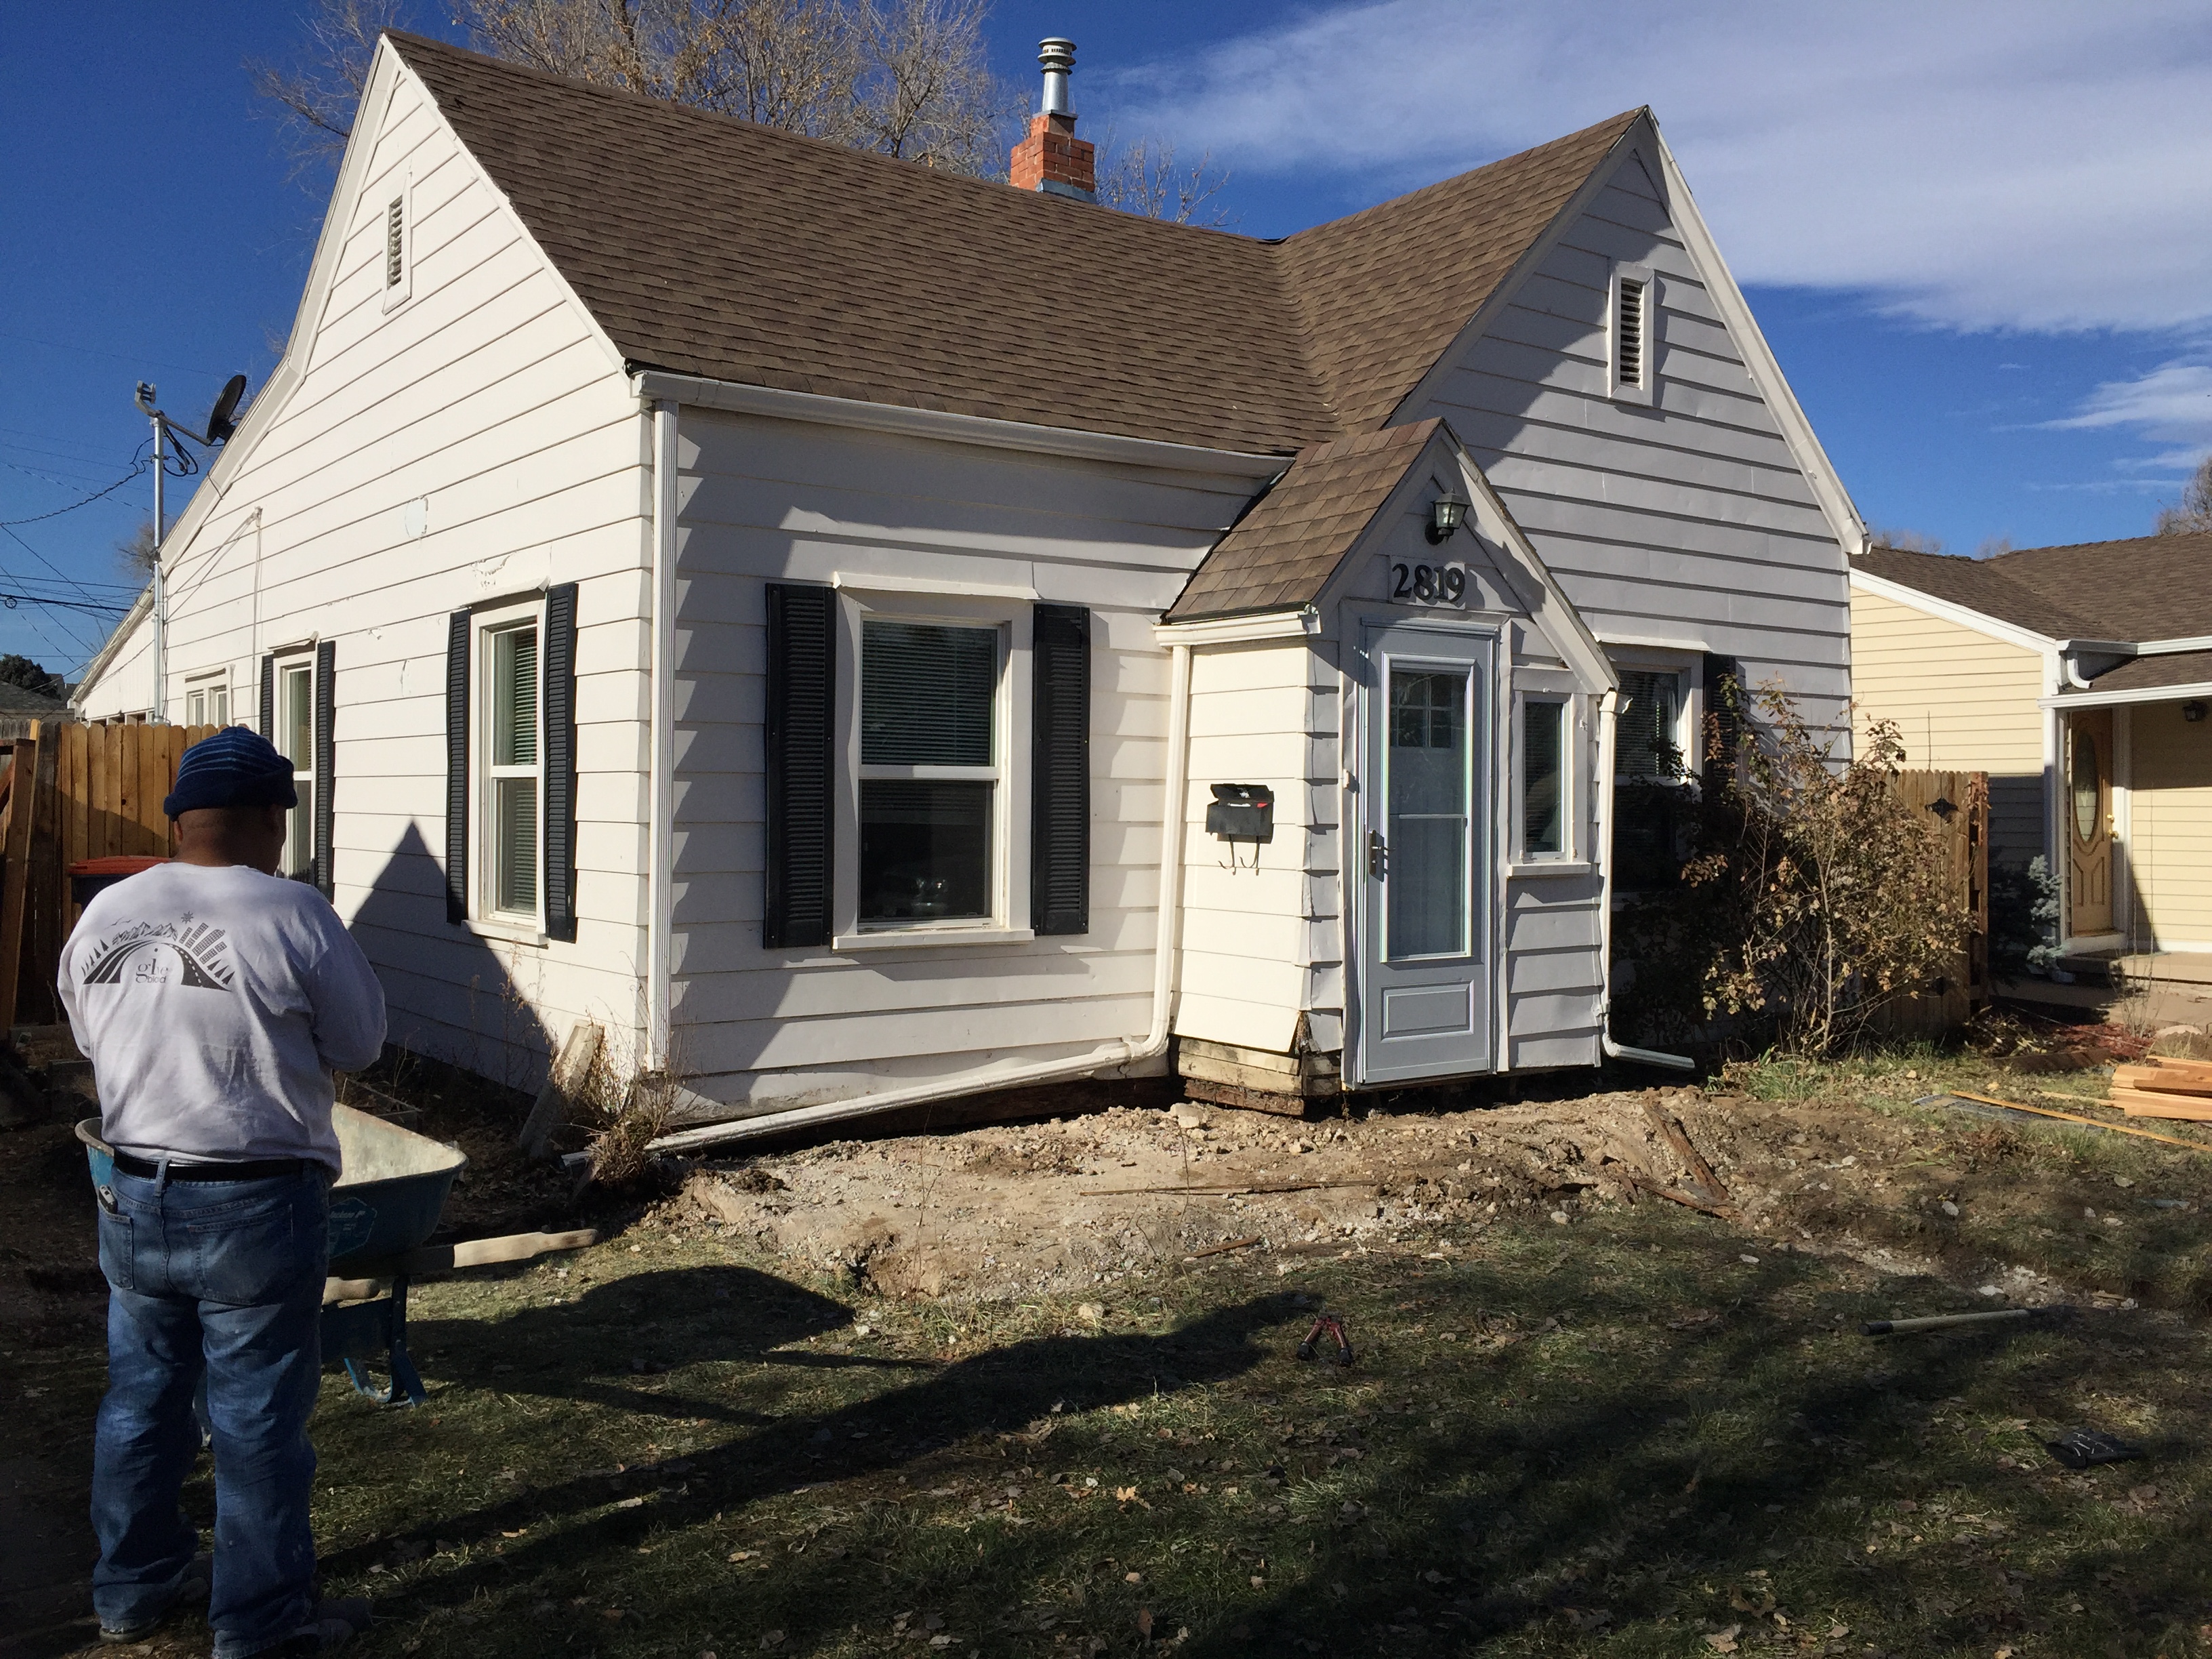
David poured concrete with wood footers to support the front entry. Once it cured, he added wood supports between the entry and the concrete footer, then wrapped it with moisture barrier. In the 2 days the entry had no support, my wood floors inside were falling through the bottom of the porch inside. Geez!

Reinforced entry with moisture barrier. You can see the original wood siding at the side and bottom of the entry.

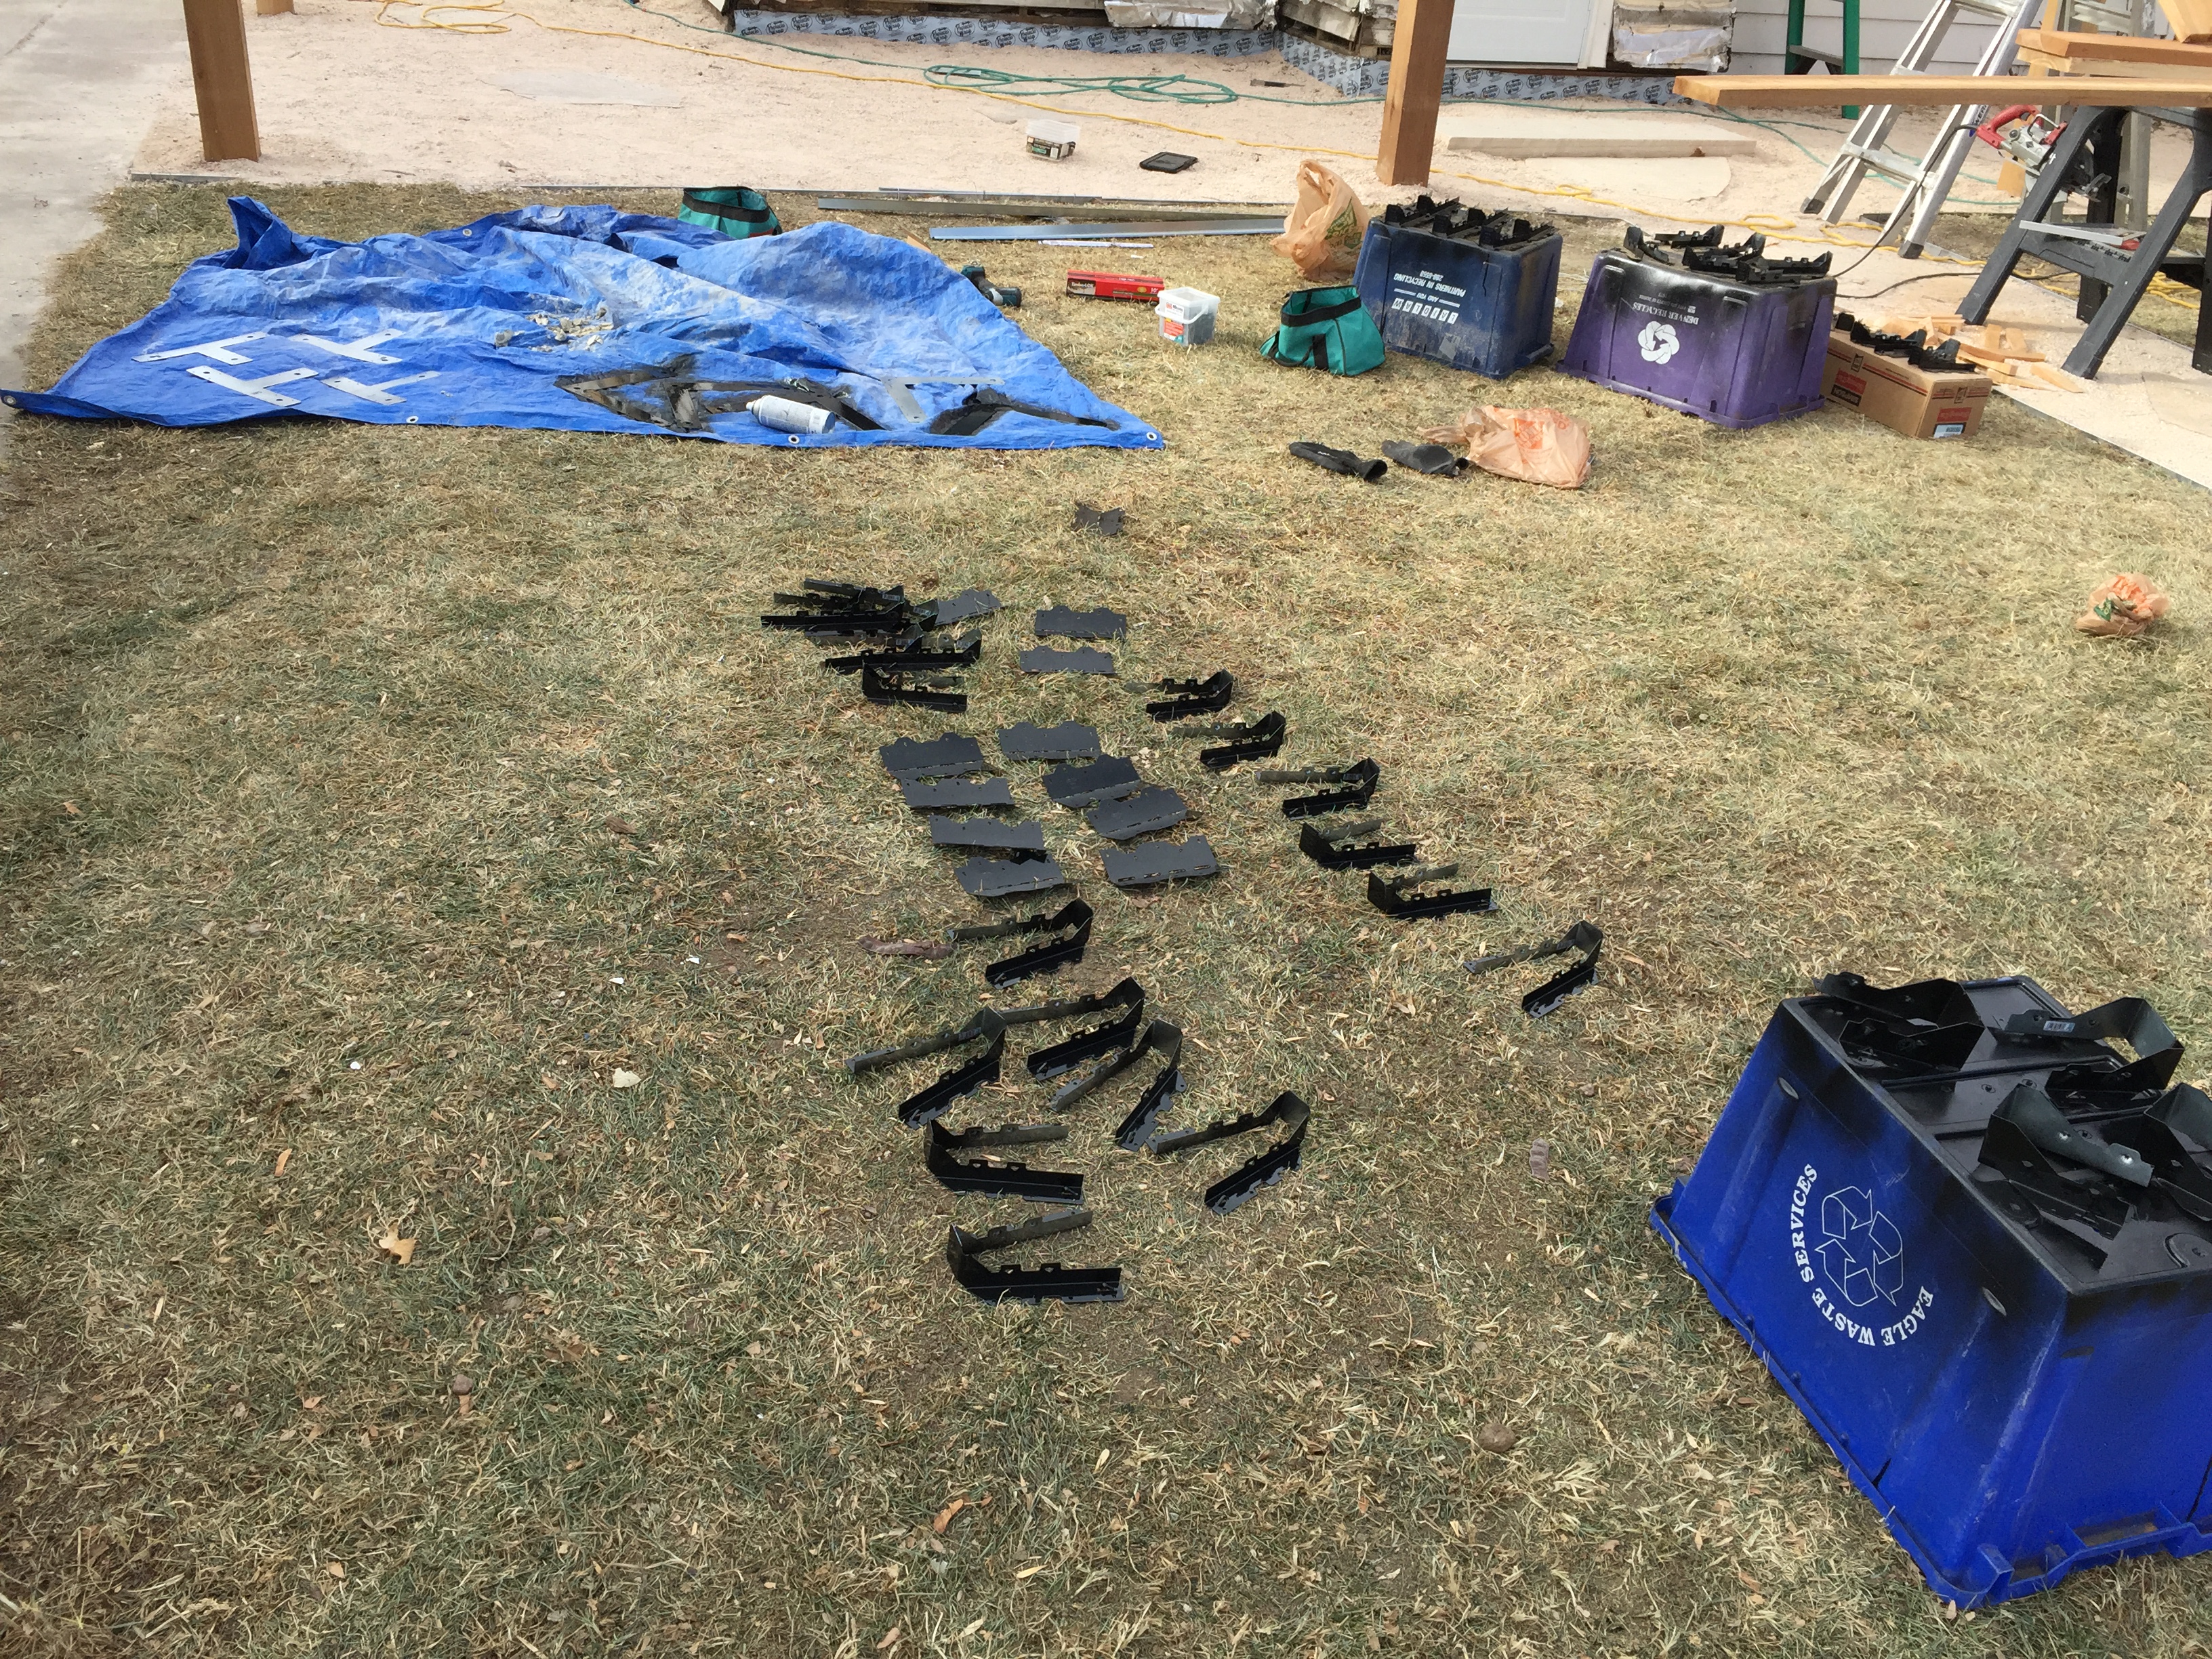
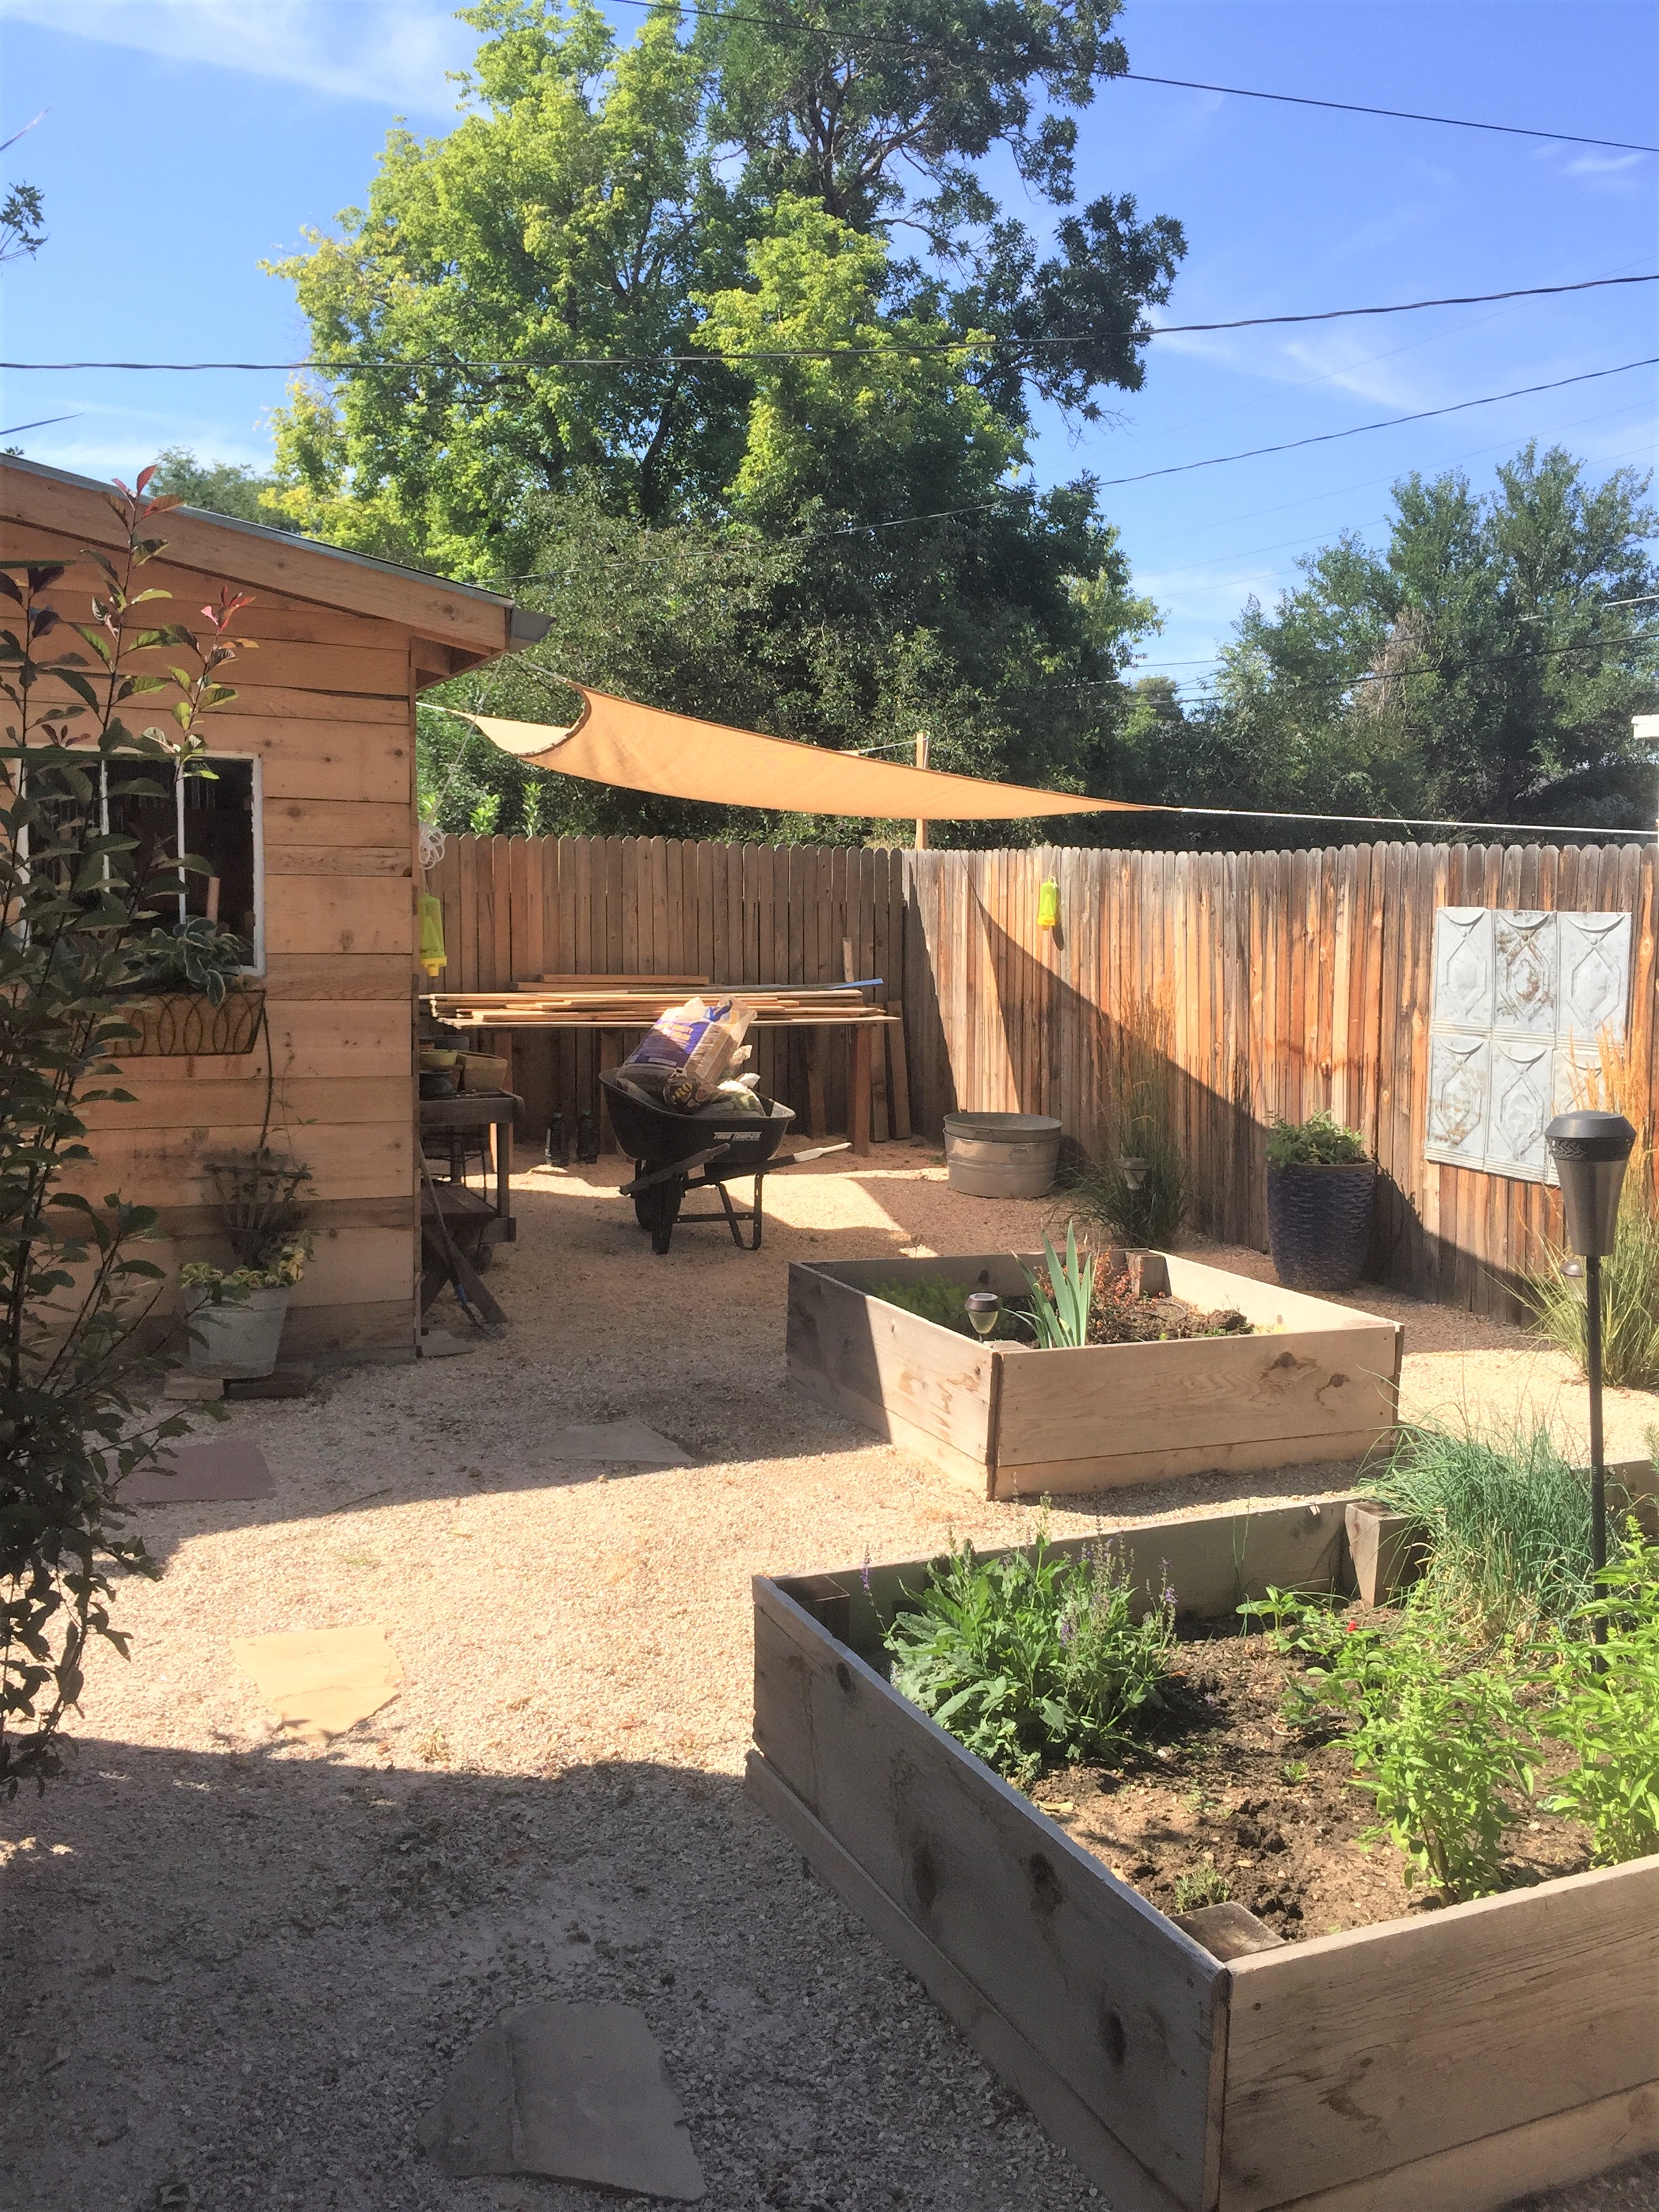
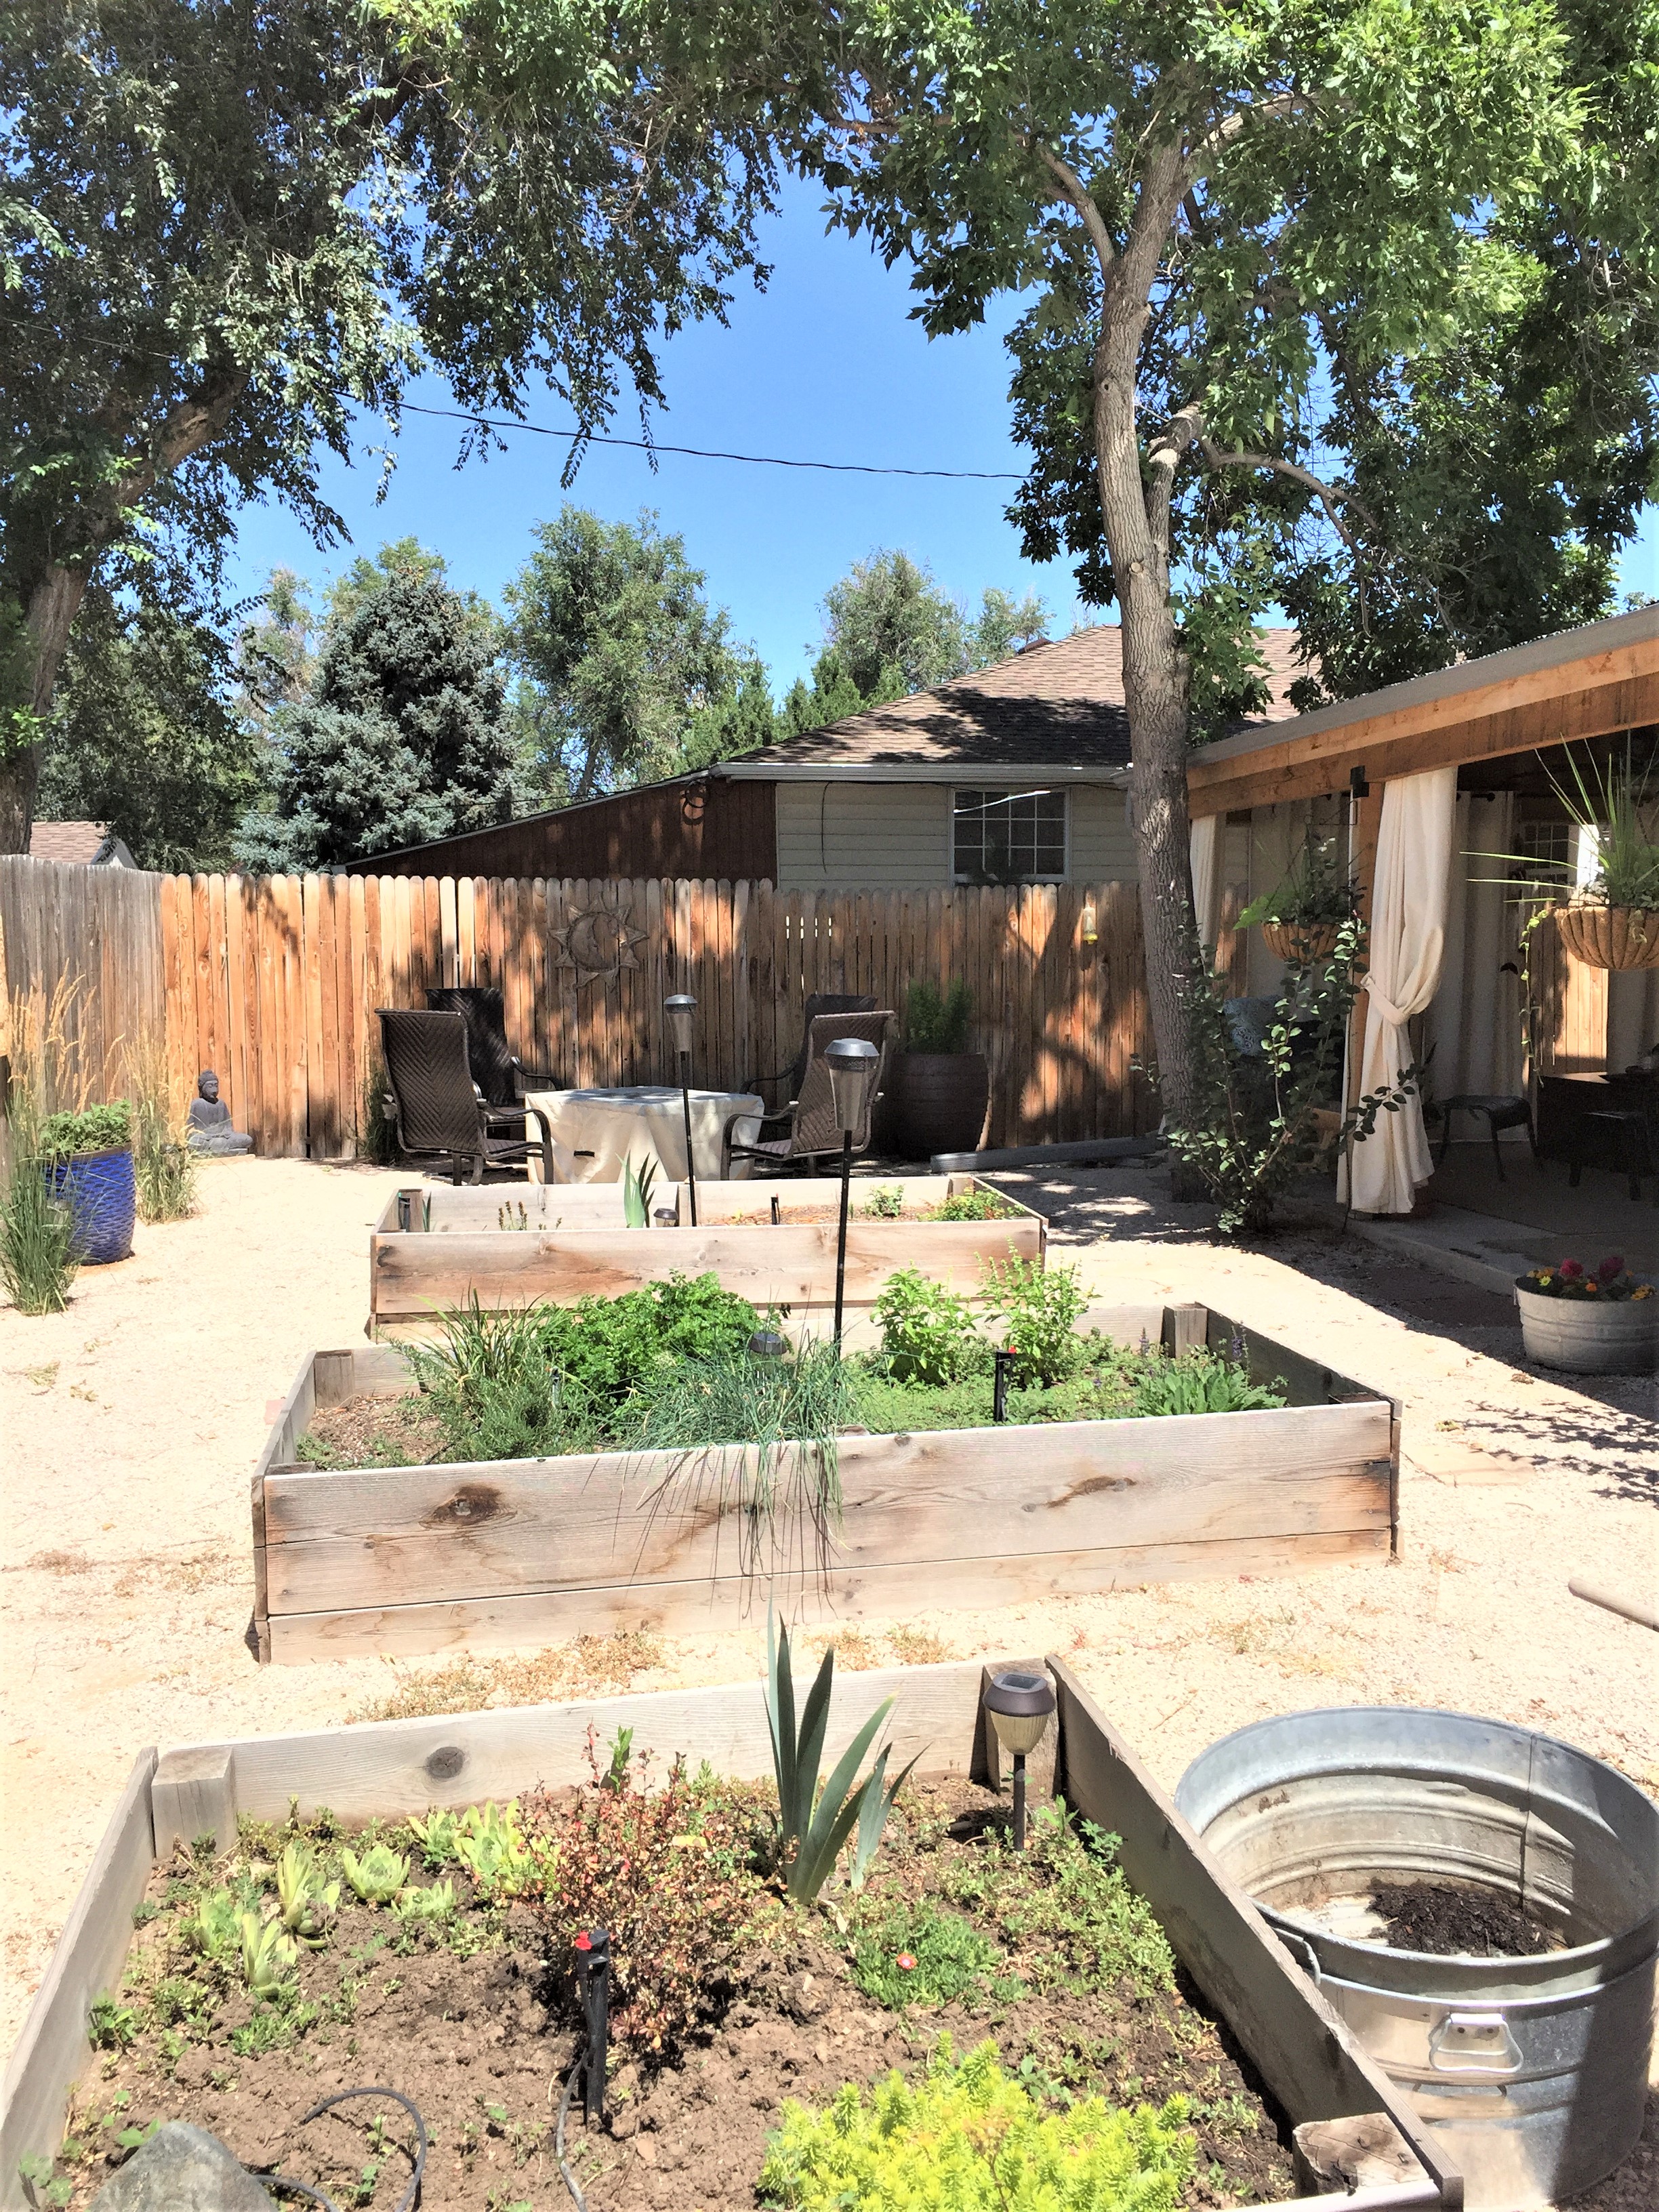
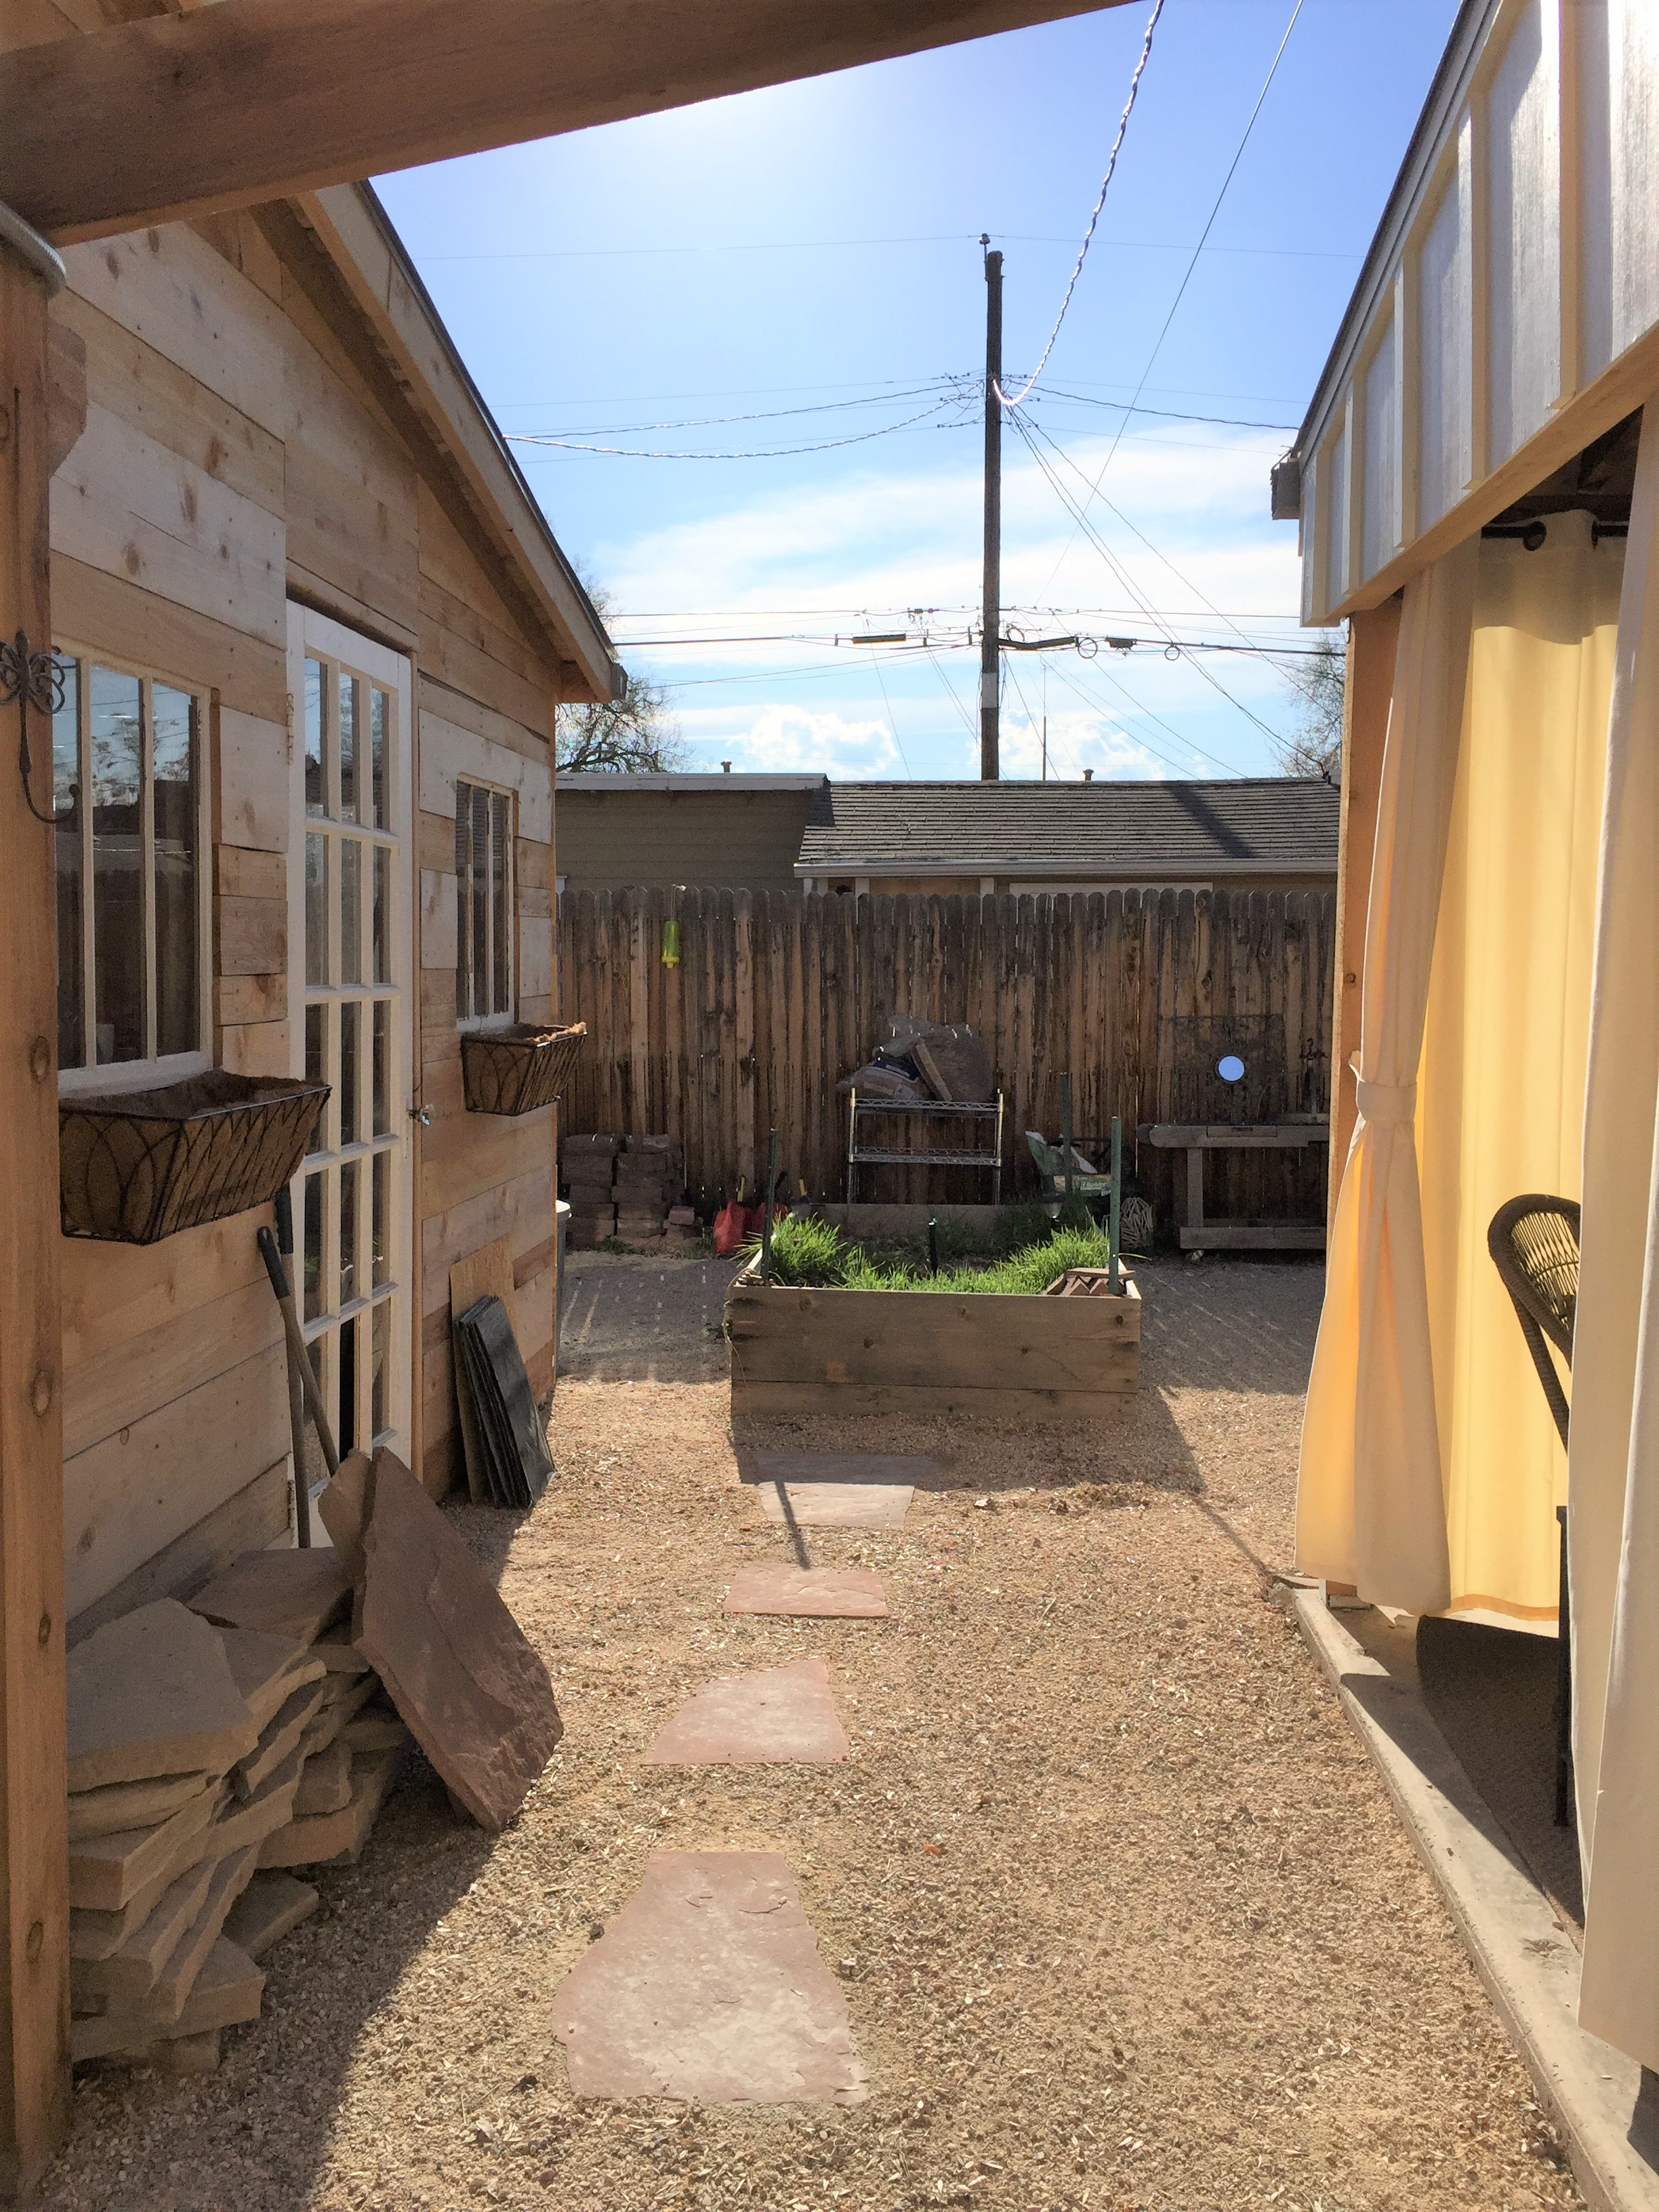
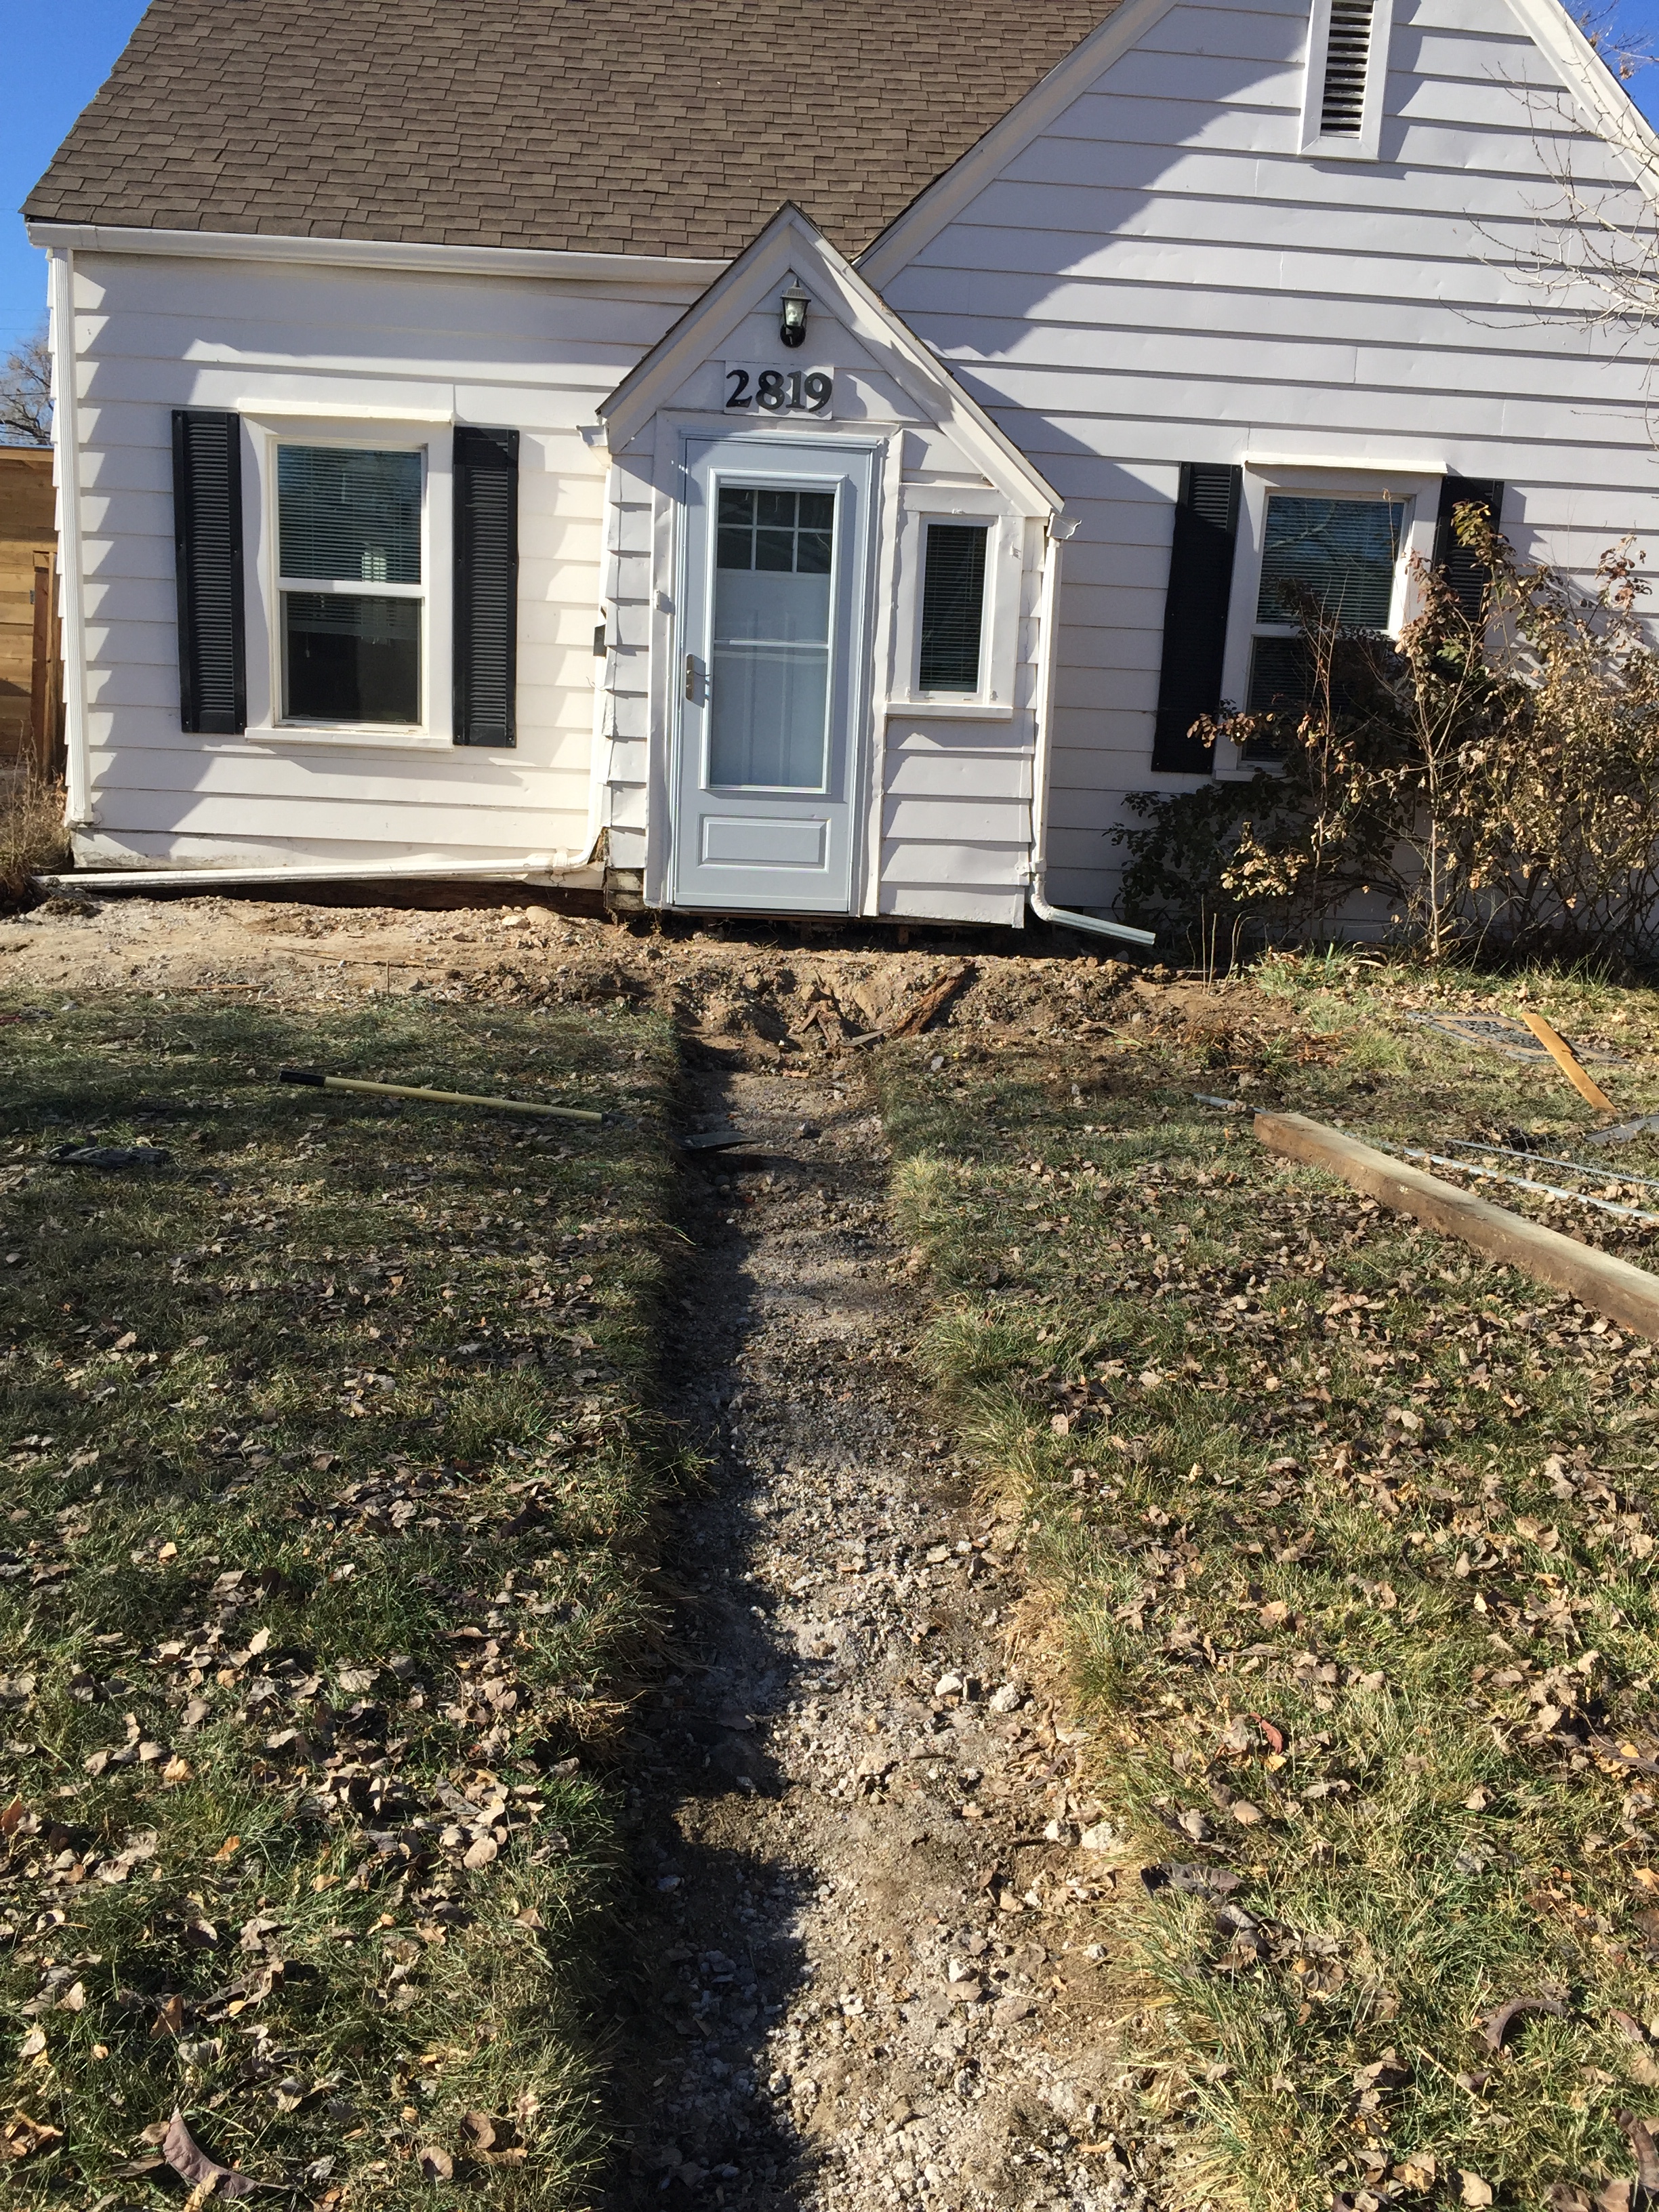
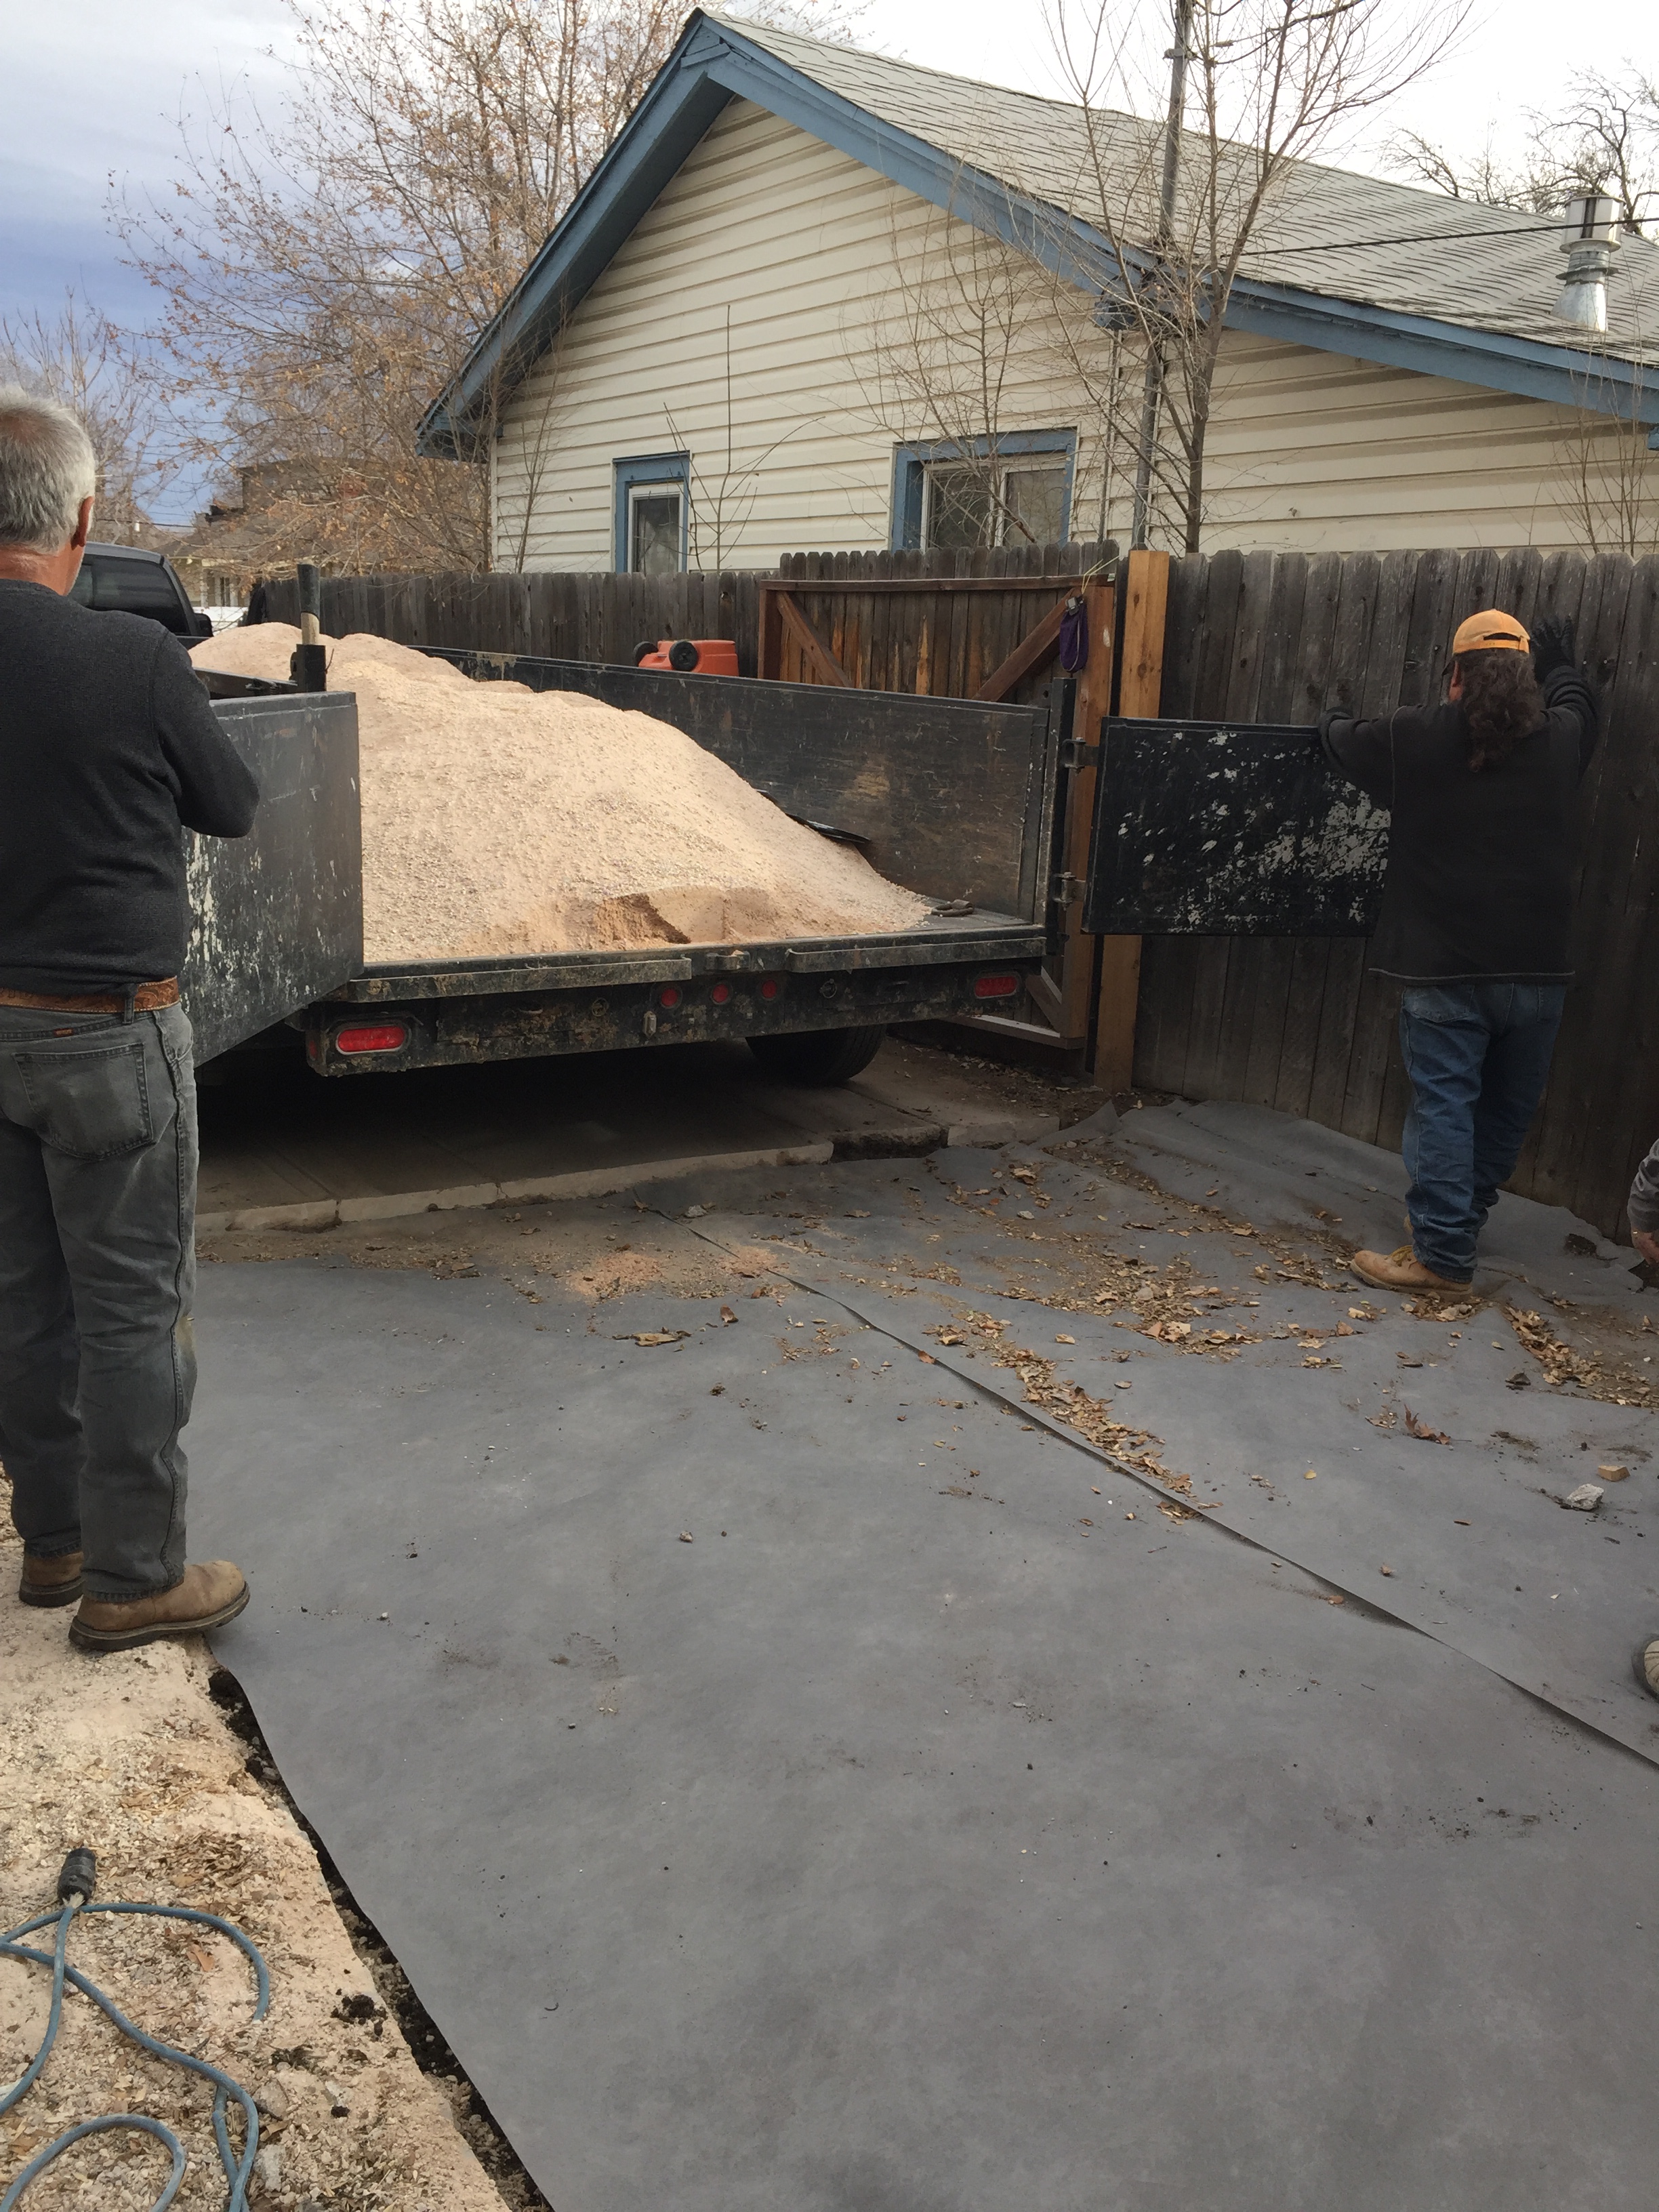
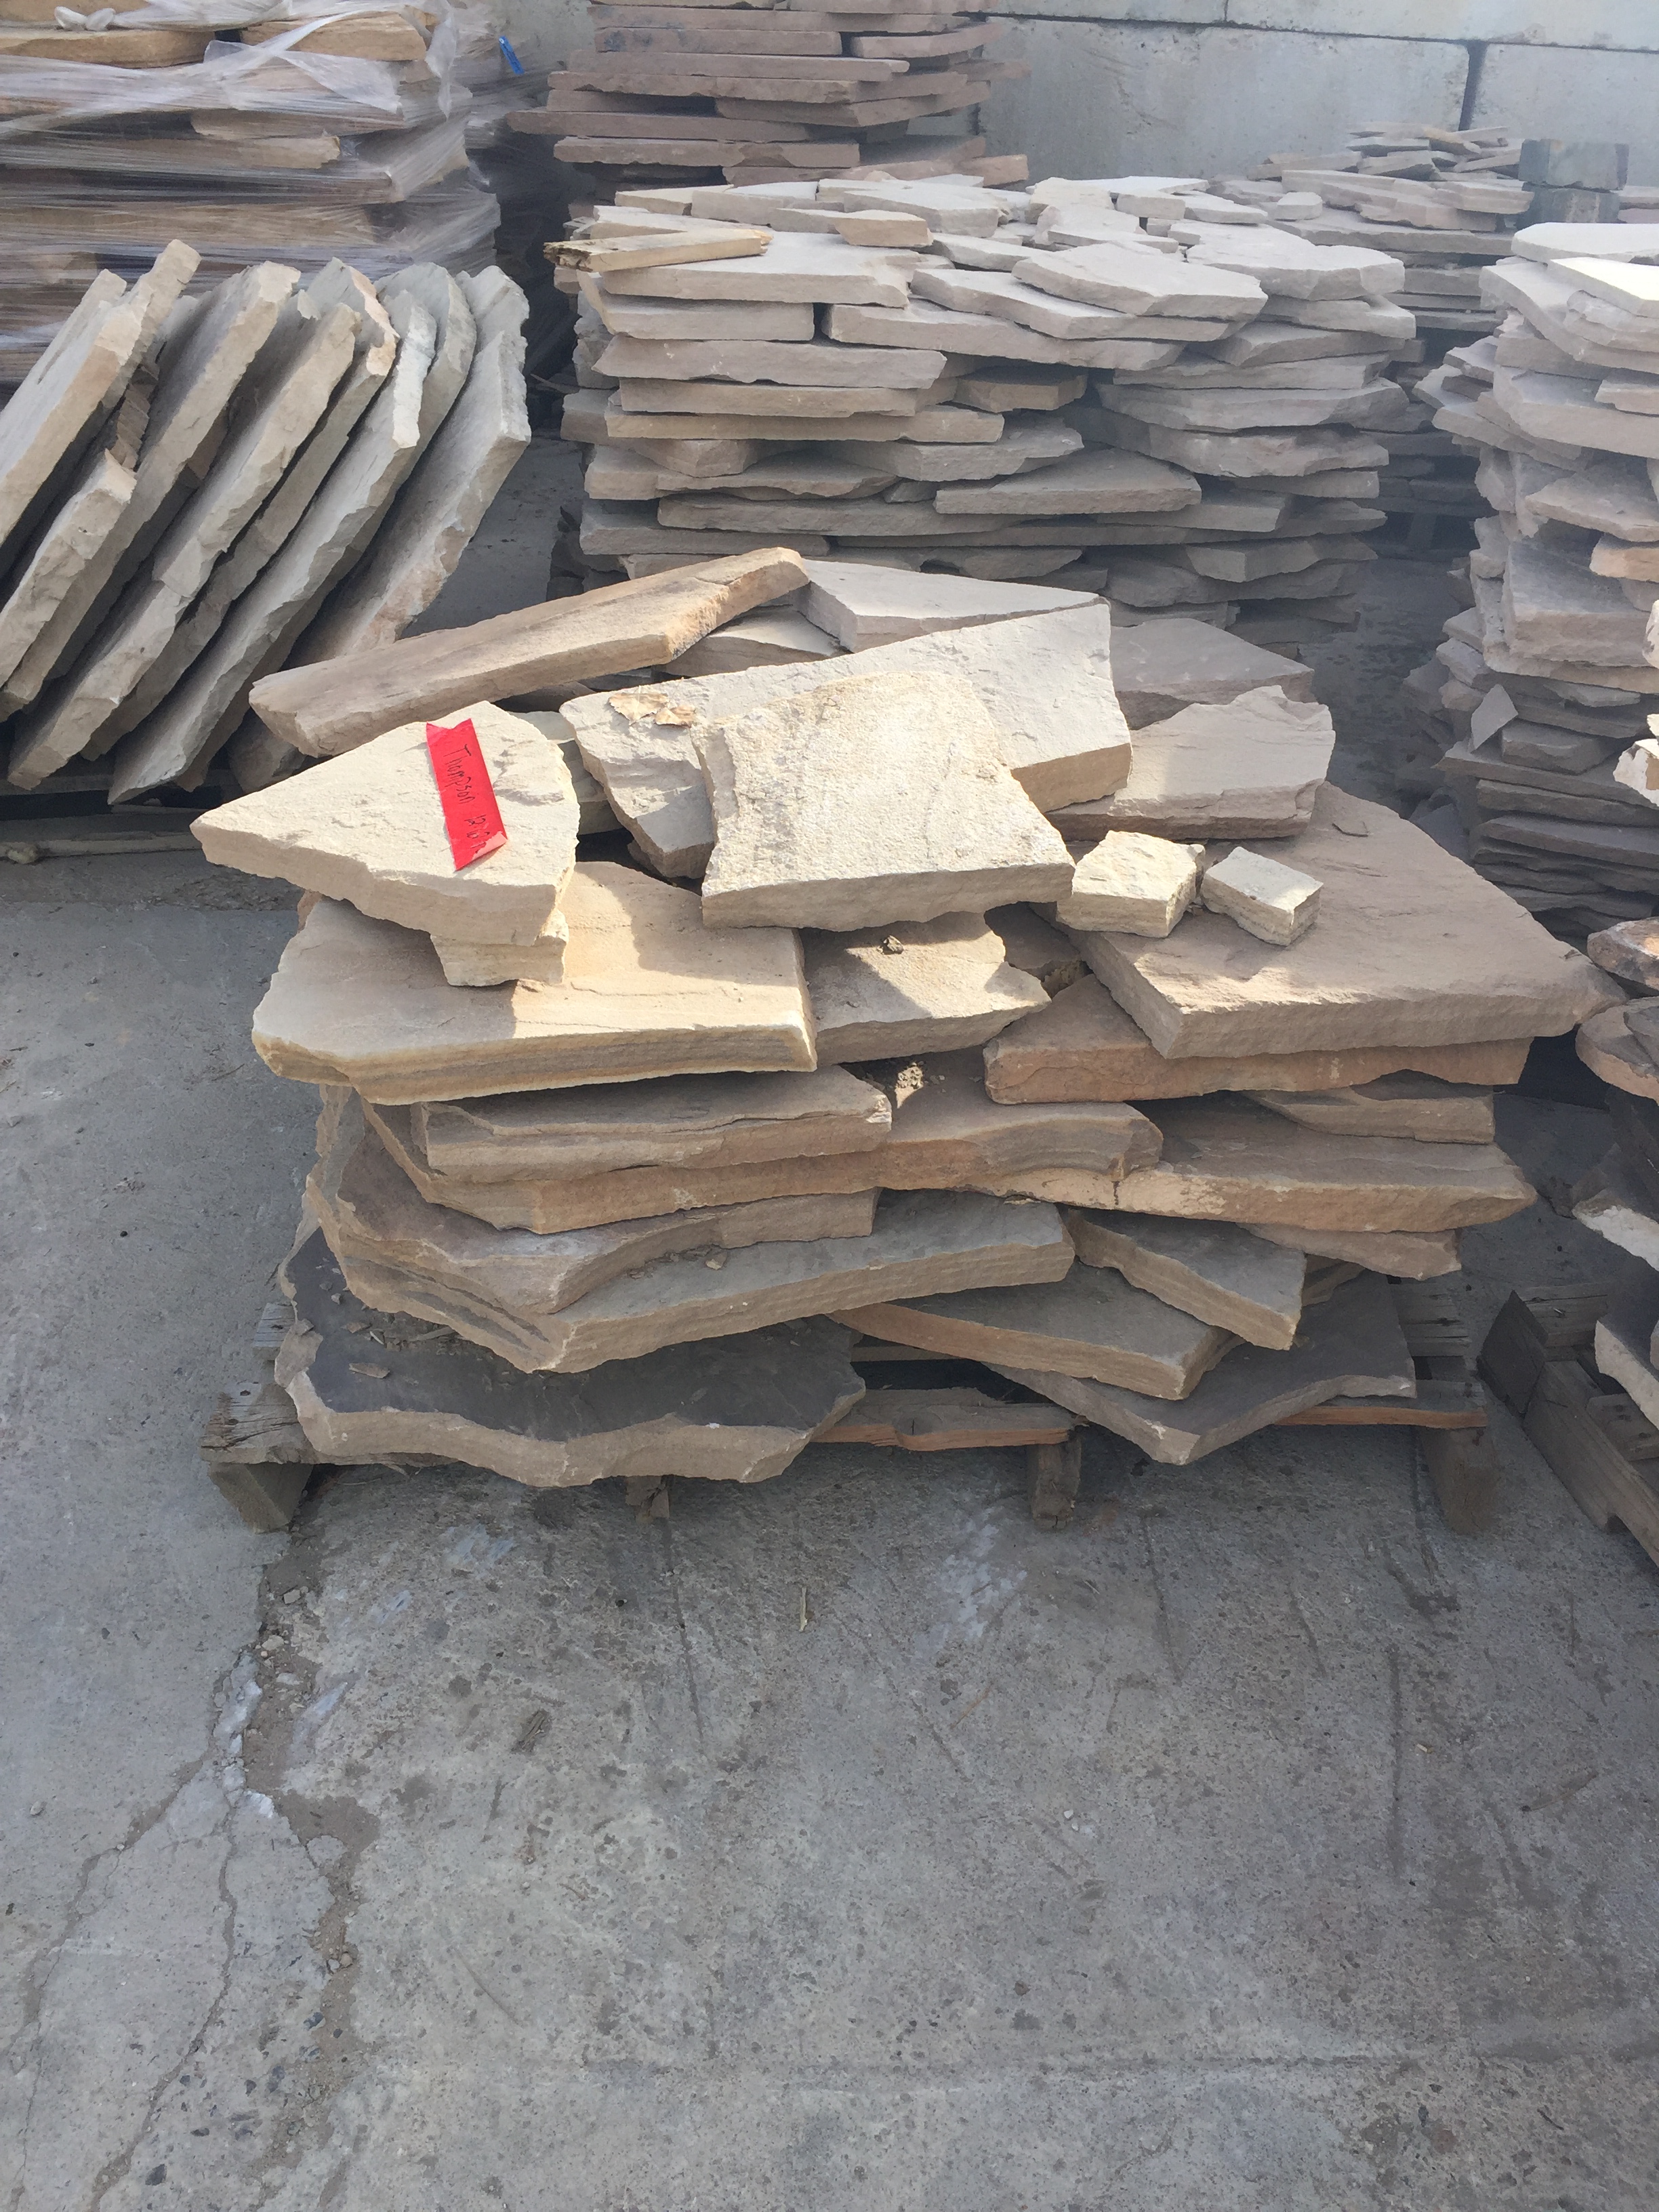
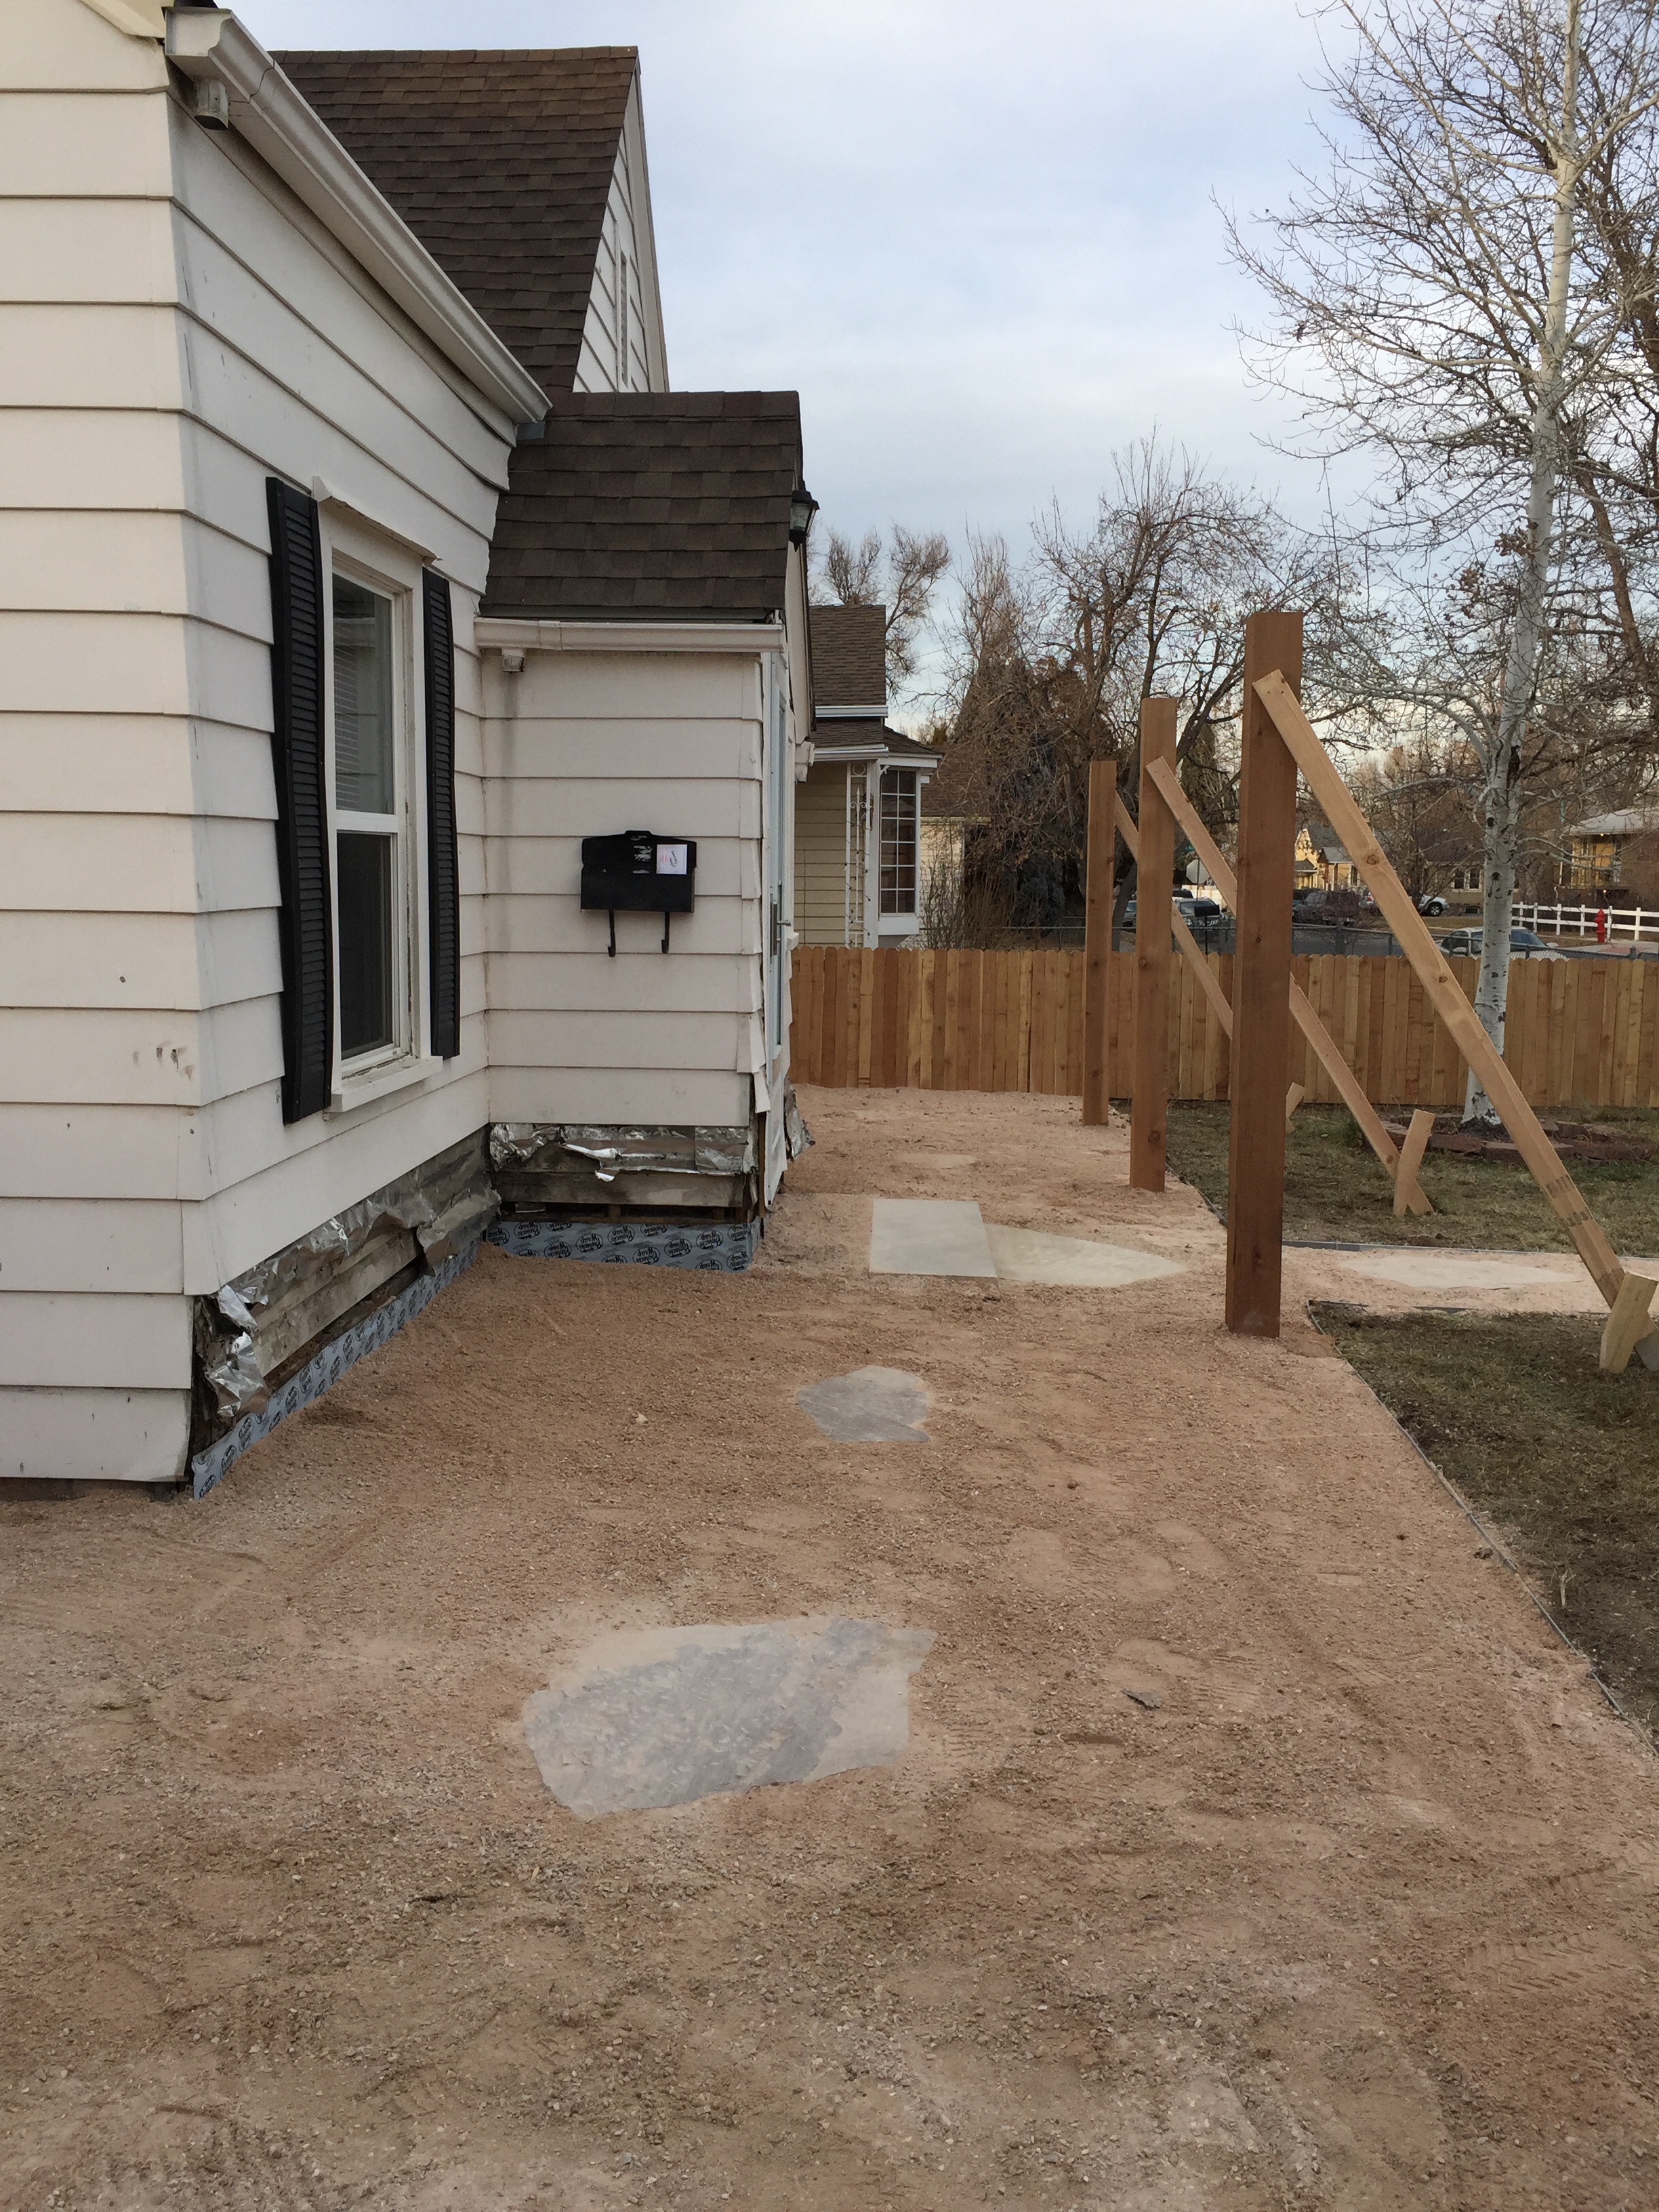
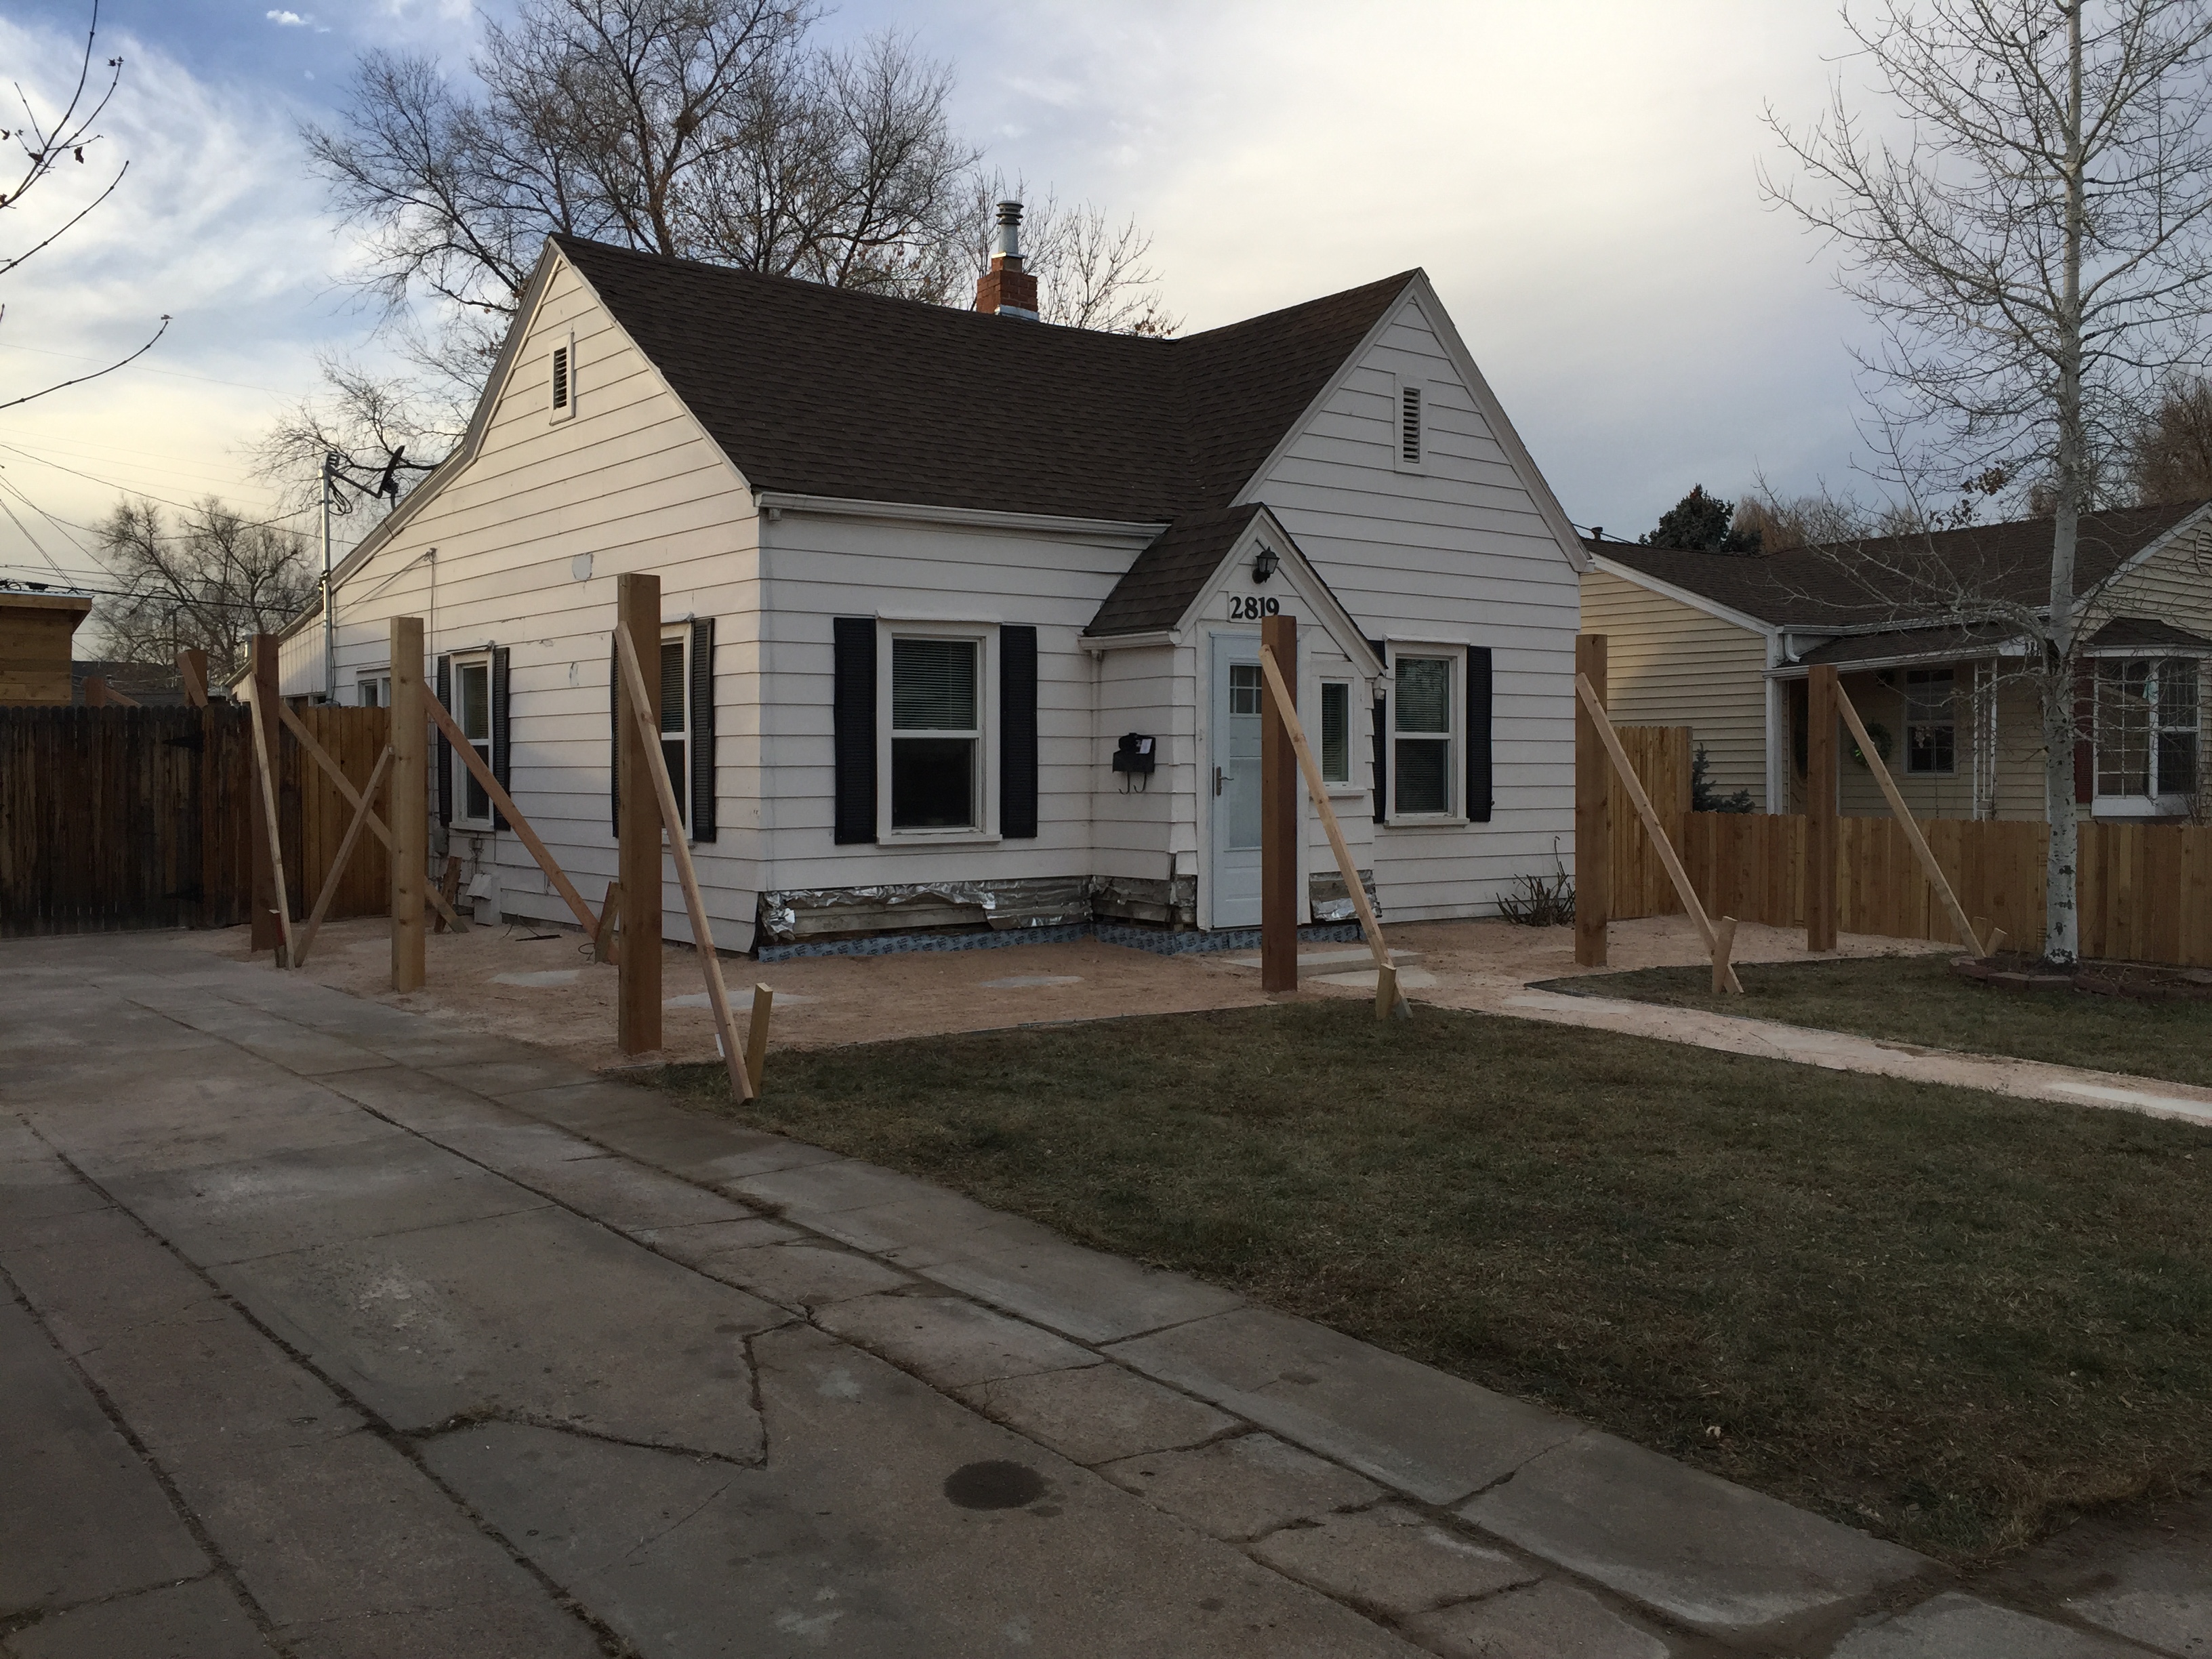
They got the breeze laid down and I didn’t like how the area where the concrete was taken out was higher than the rest of the space. Kinda like a bubble outside the front door. So the landscaper had to scrape the Breeze off of the weed barrier and take out a lot more dirt to make it level in front of the door. Then they put the barrier and Breeze back down. I used pieces of flagstone to make a walkway around the front and sides of the house. All the upside down recycling bins are covering big holes where the arbor posts will go.

After they removed more dirt, the whole front and side are level. The 2nd flagstone step is on order.

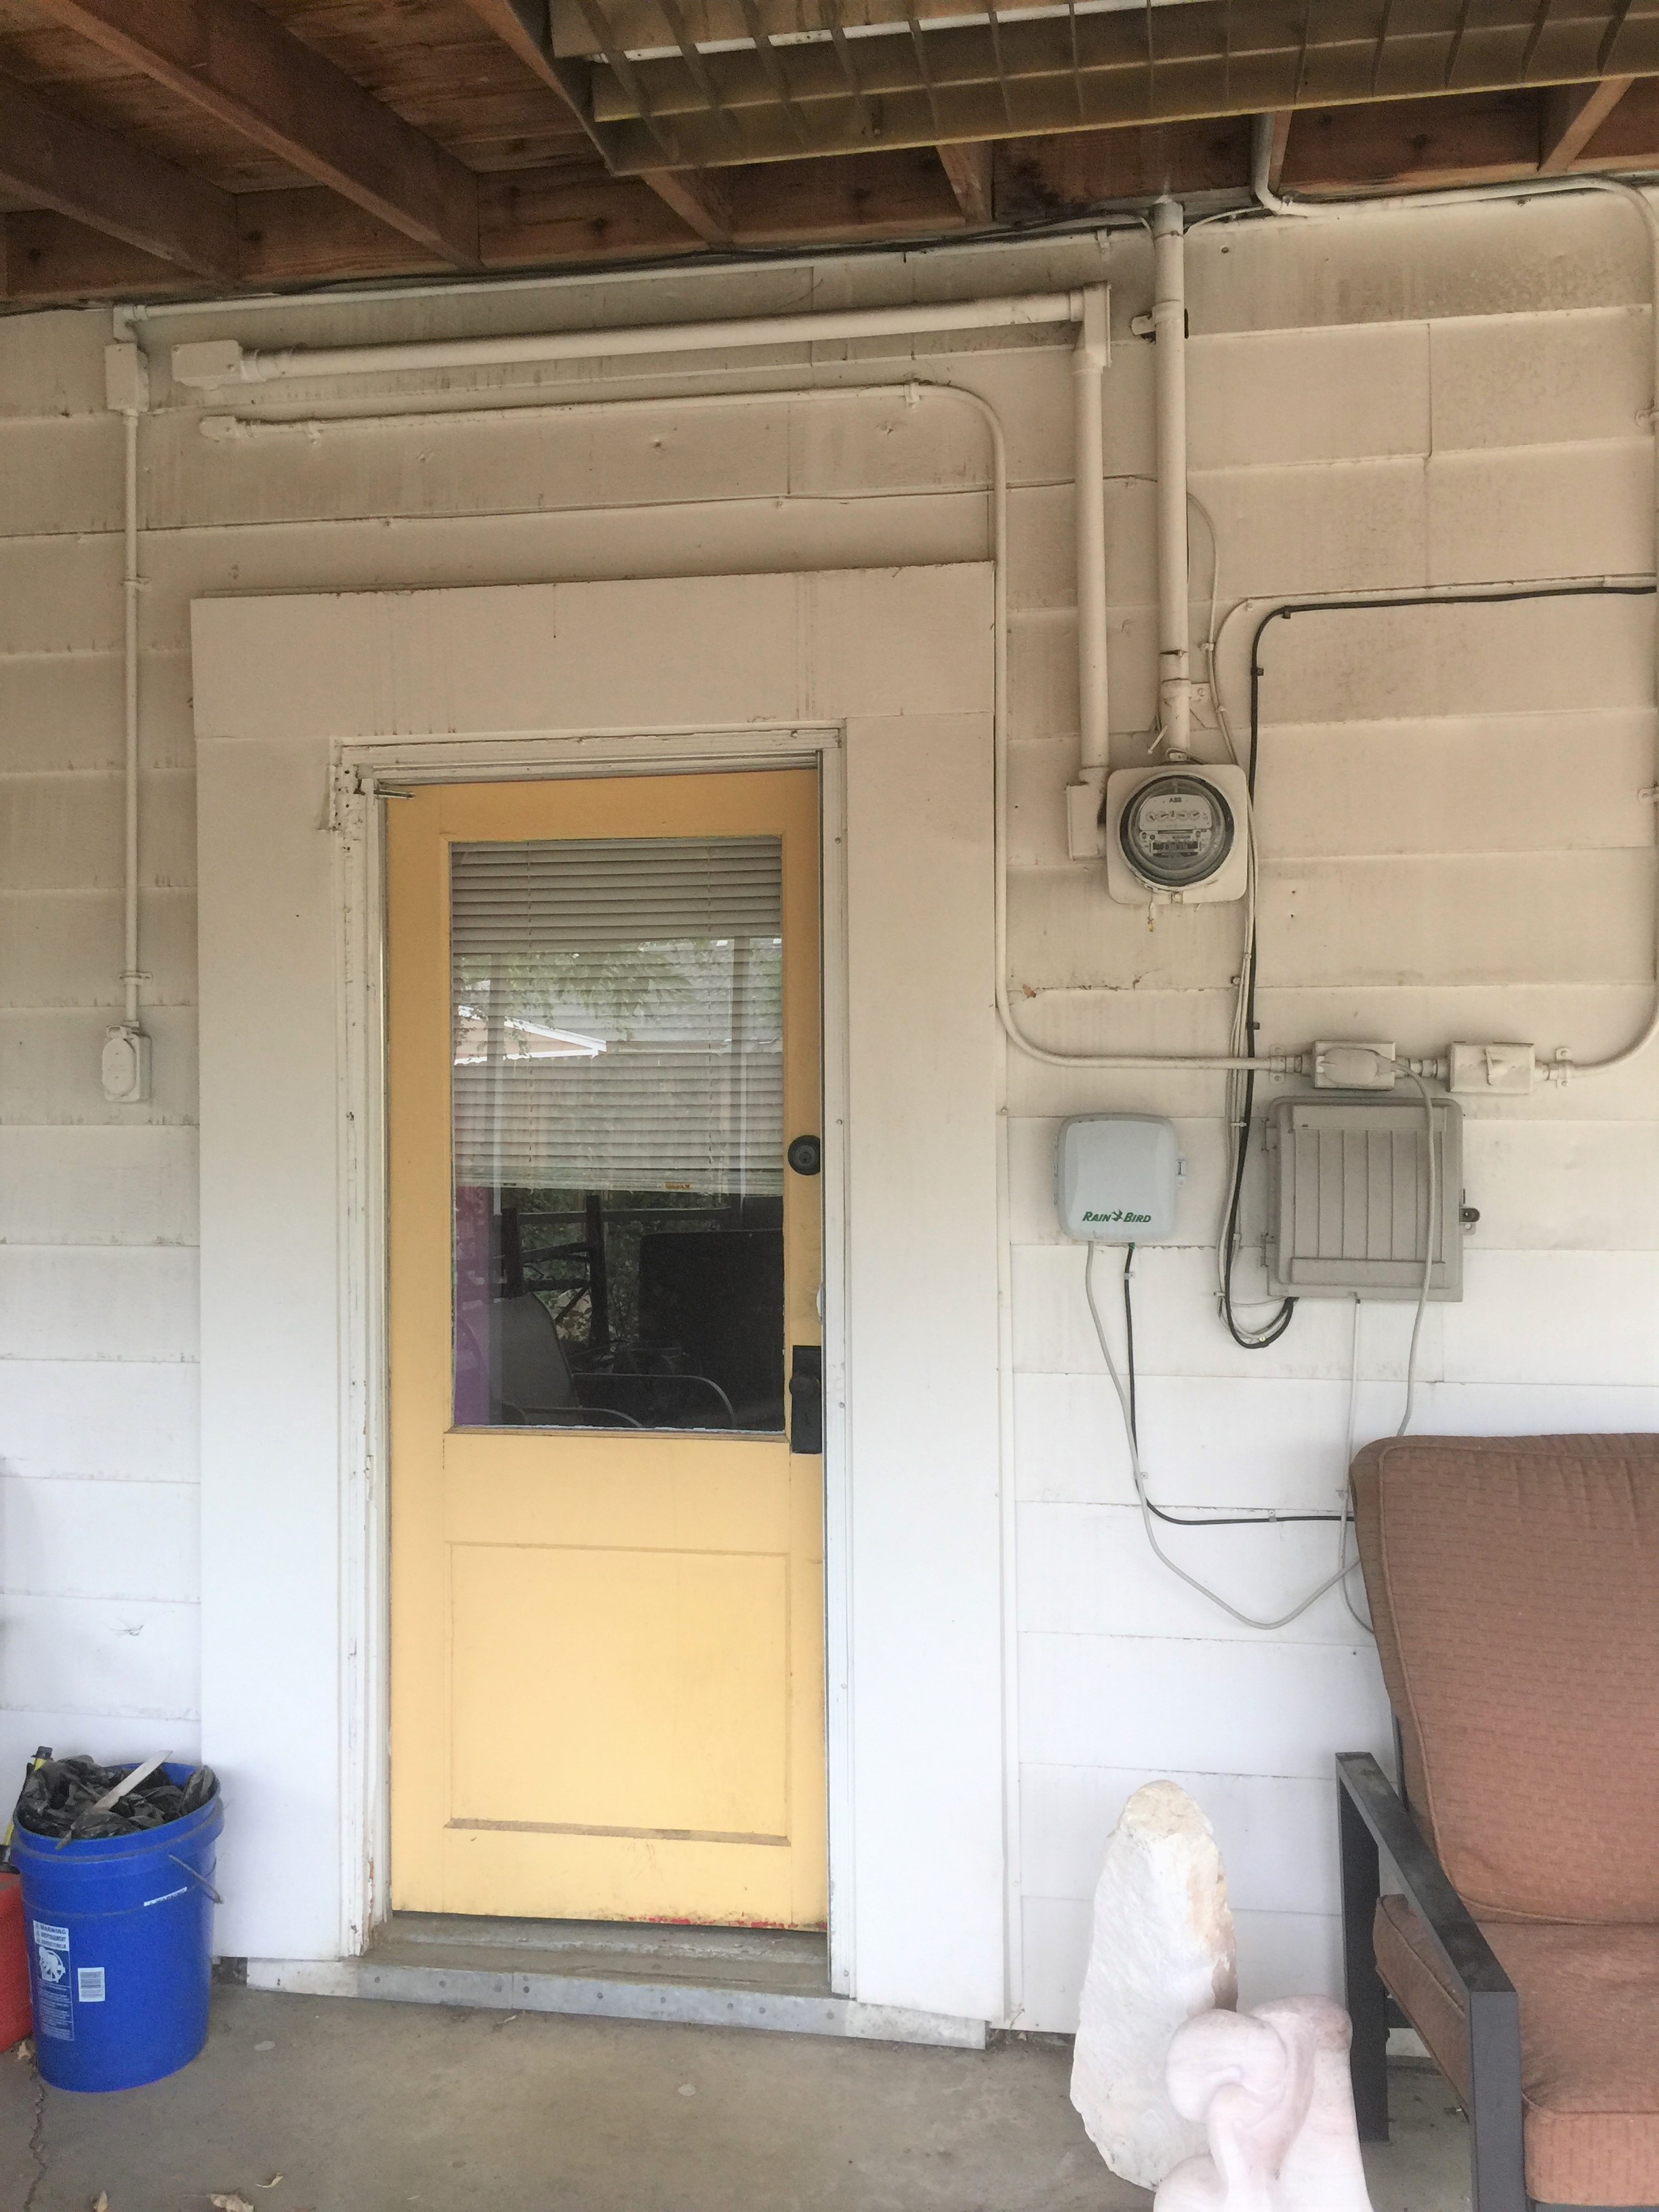
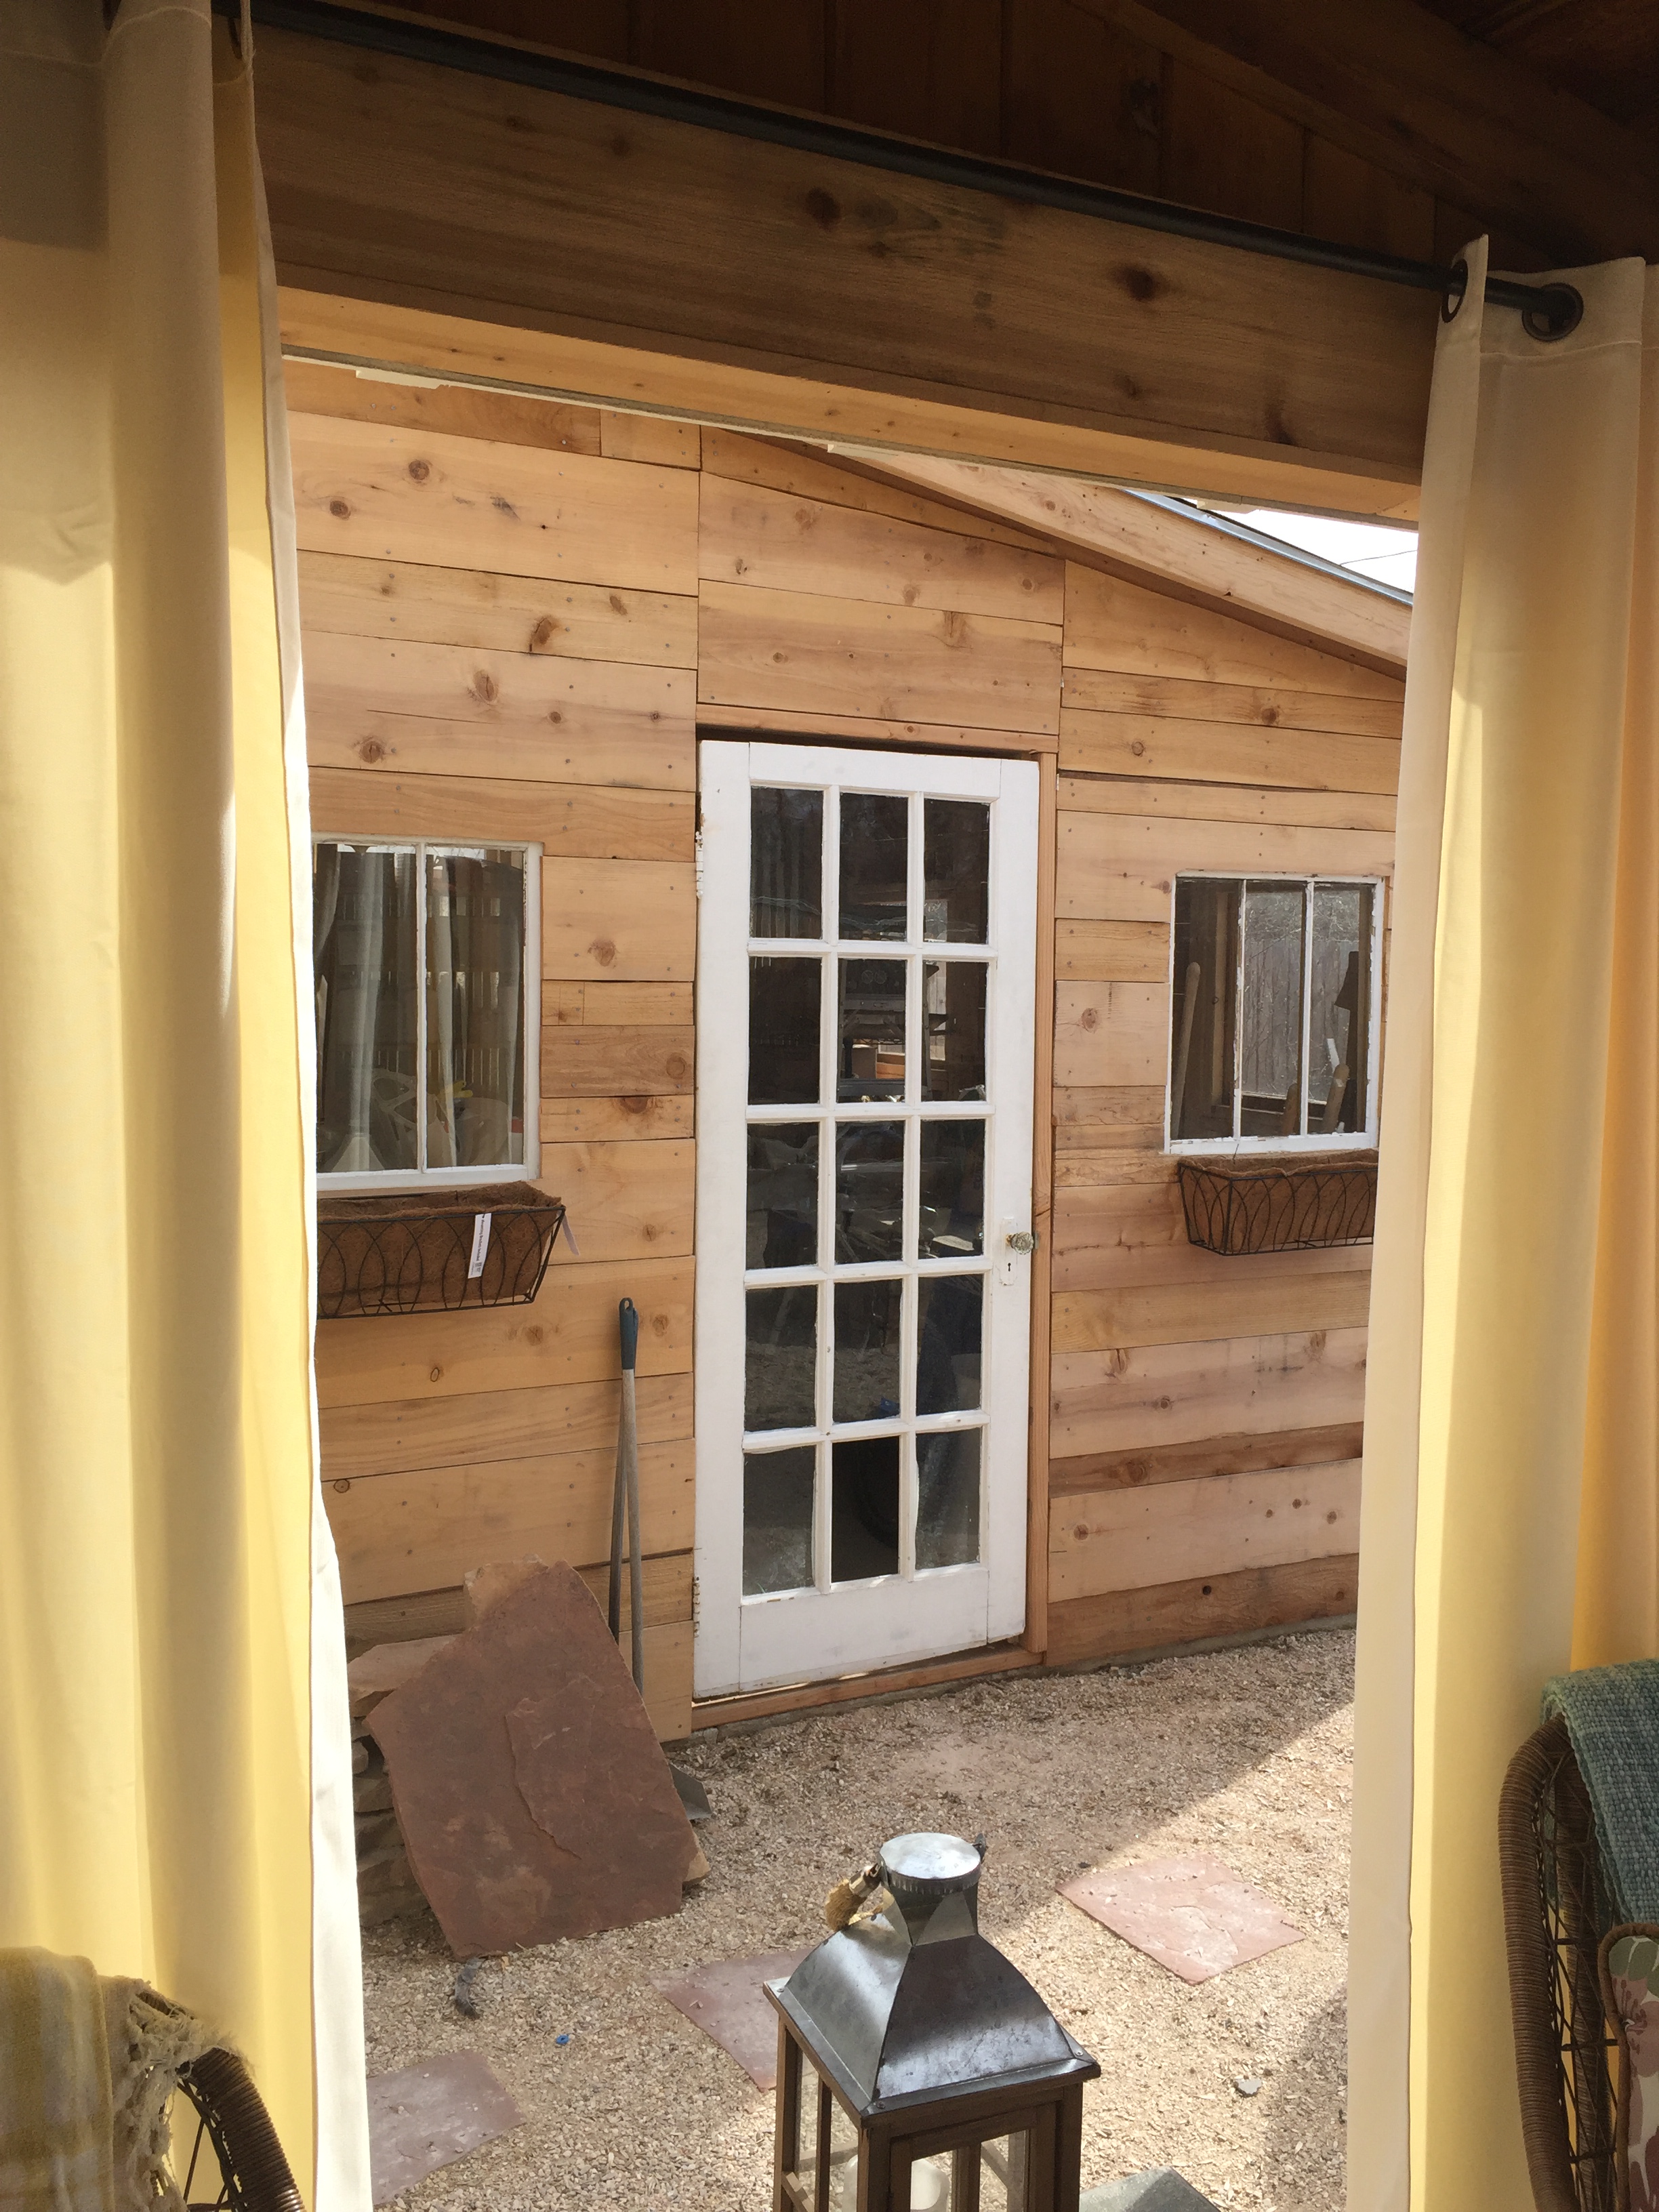
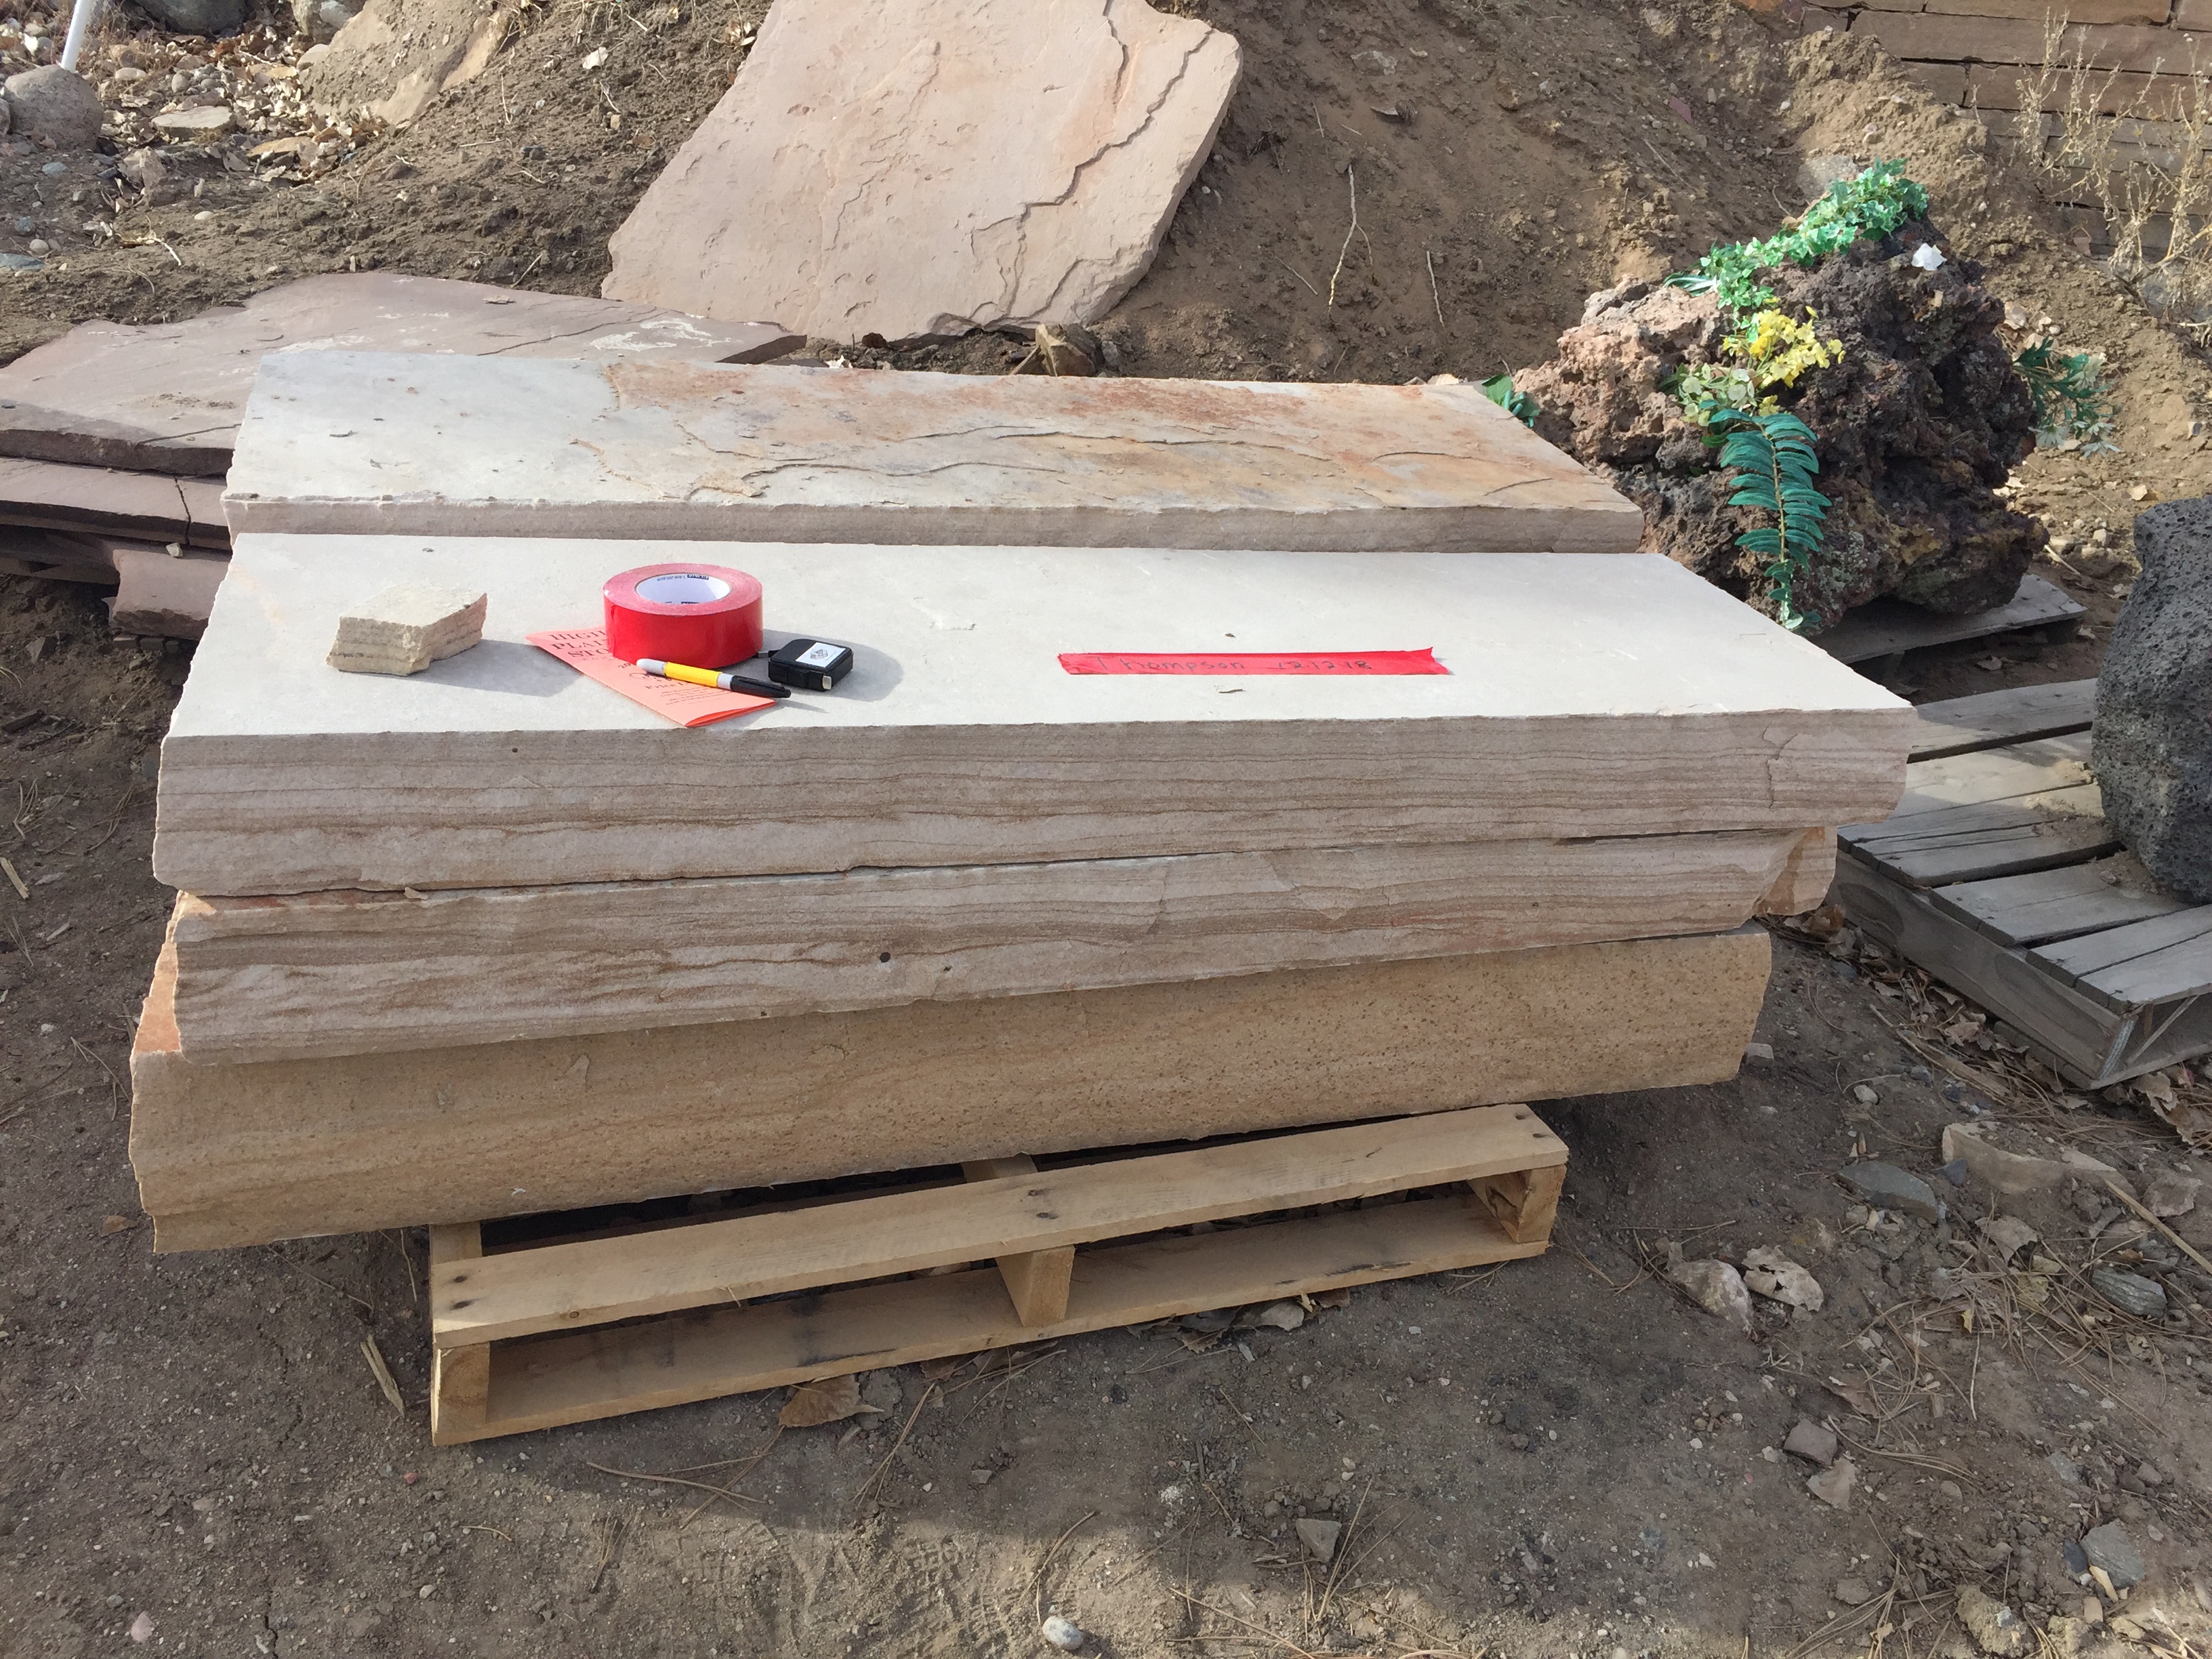
Because we removed so much dirt from in front of the door, I had to buy another Flagstone step, which I had to order and wait for delivery. This shows the landing where the 2nd step will sit, just outside the front door to the house on top of the first flagstone step.

Placing 6×6 cedar posts for the arbor.

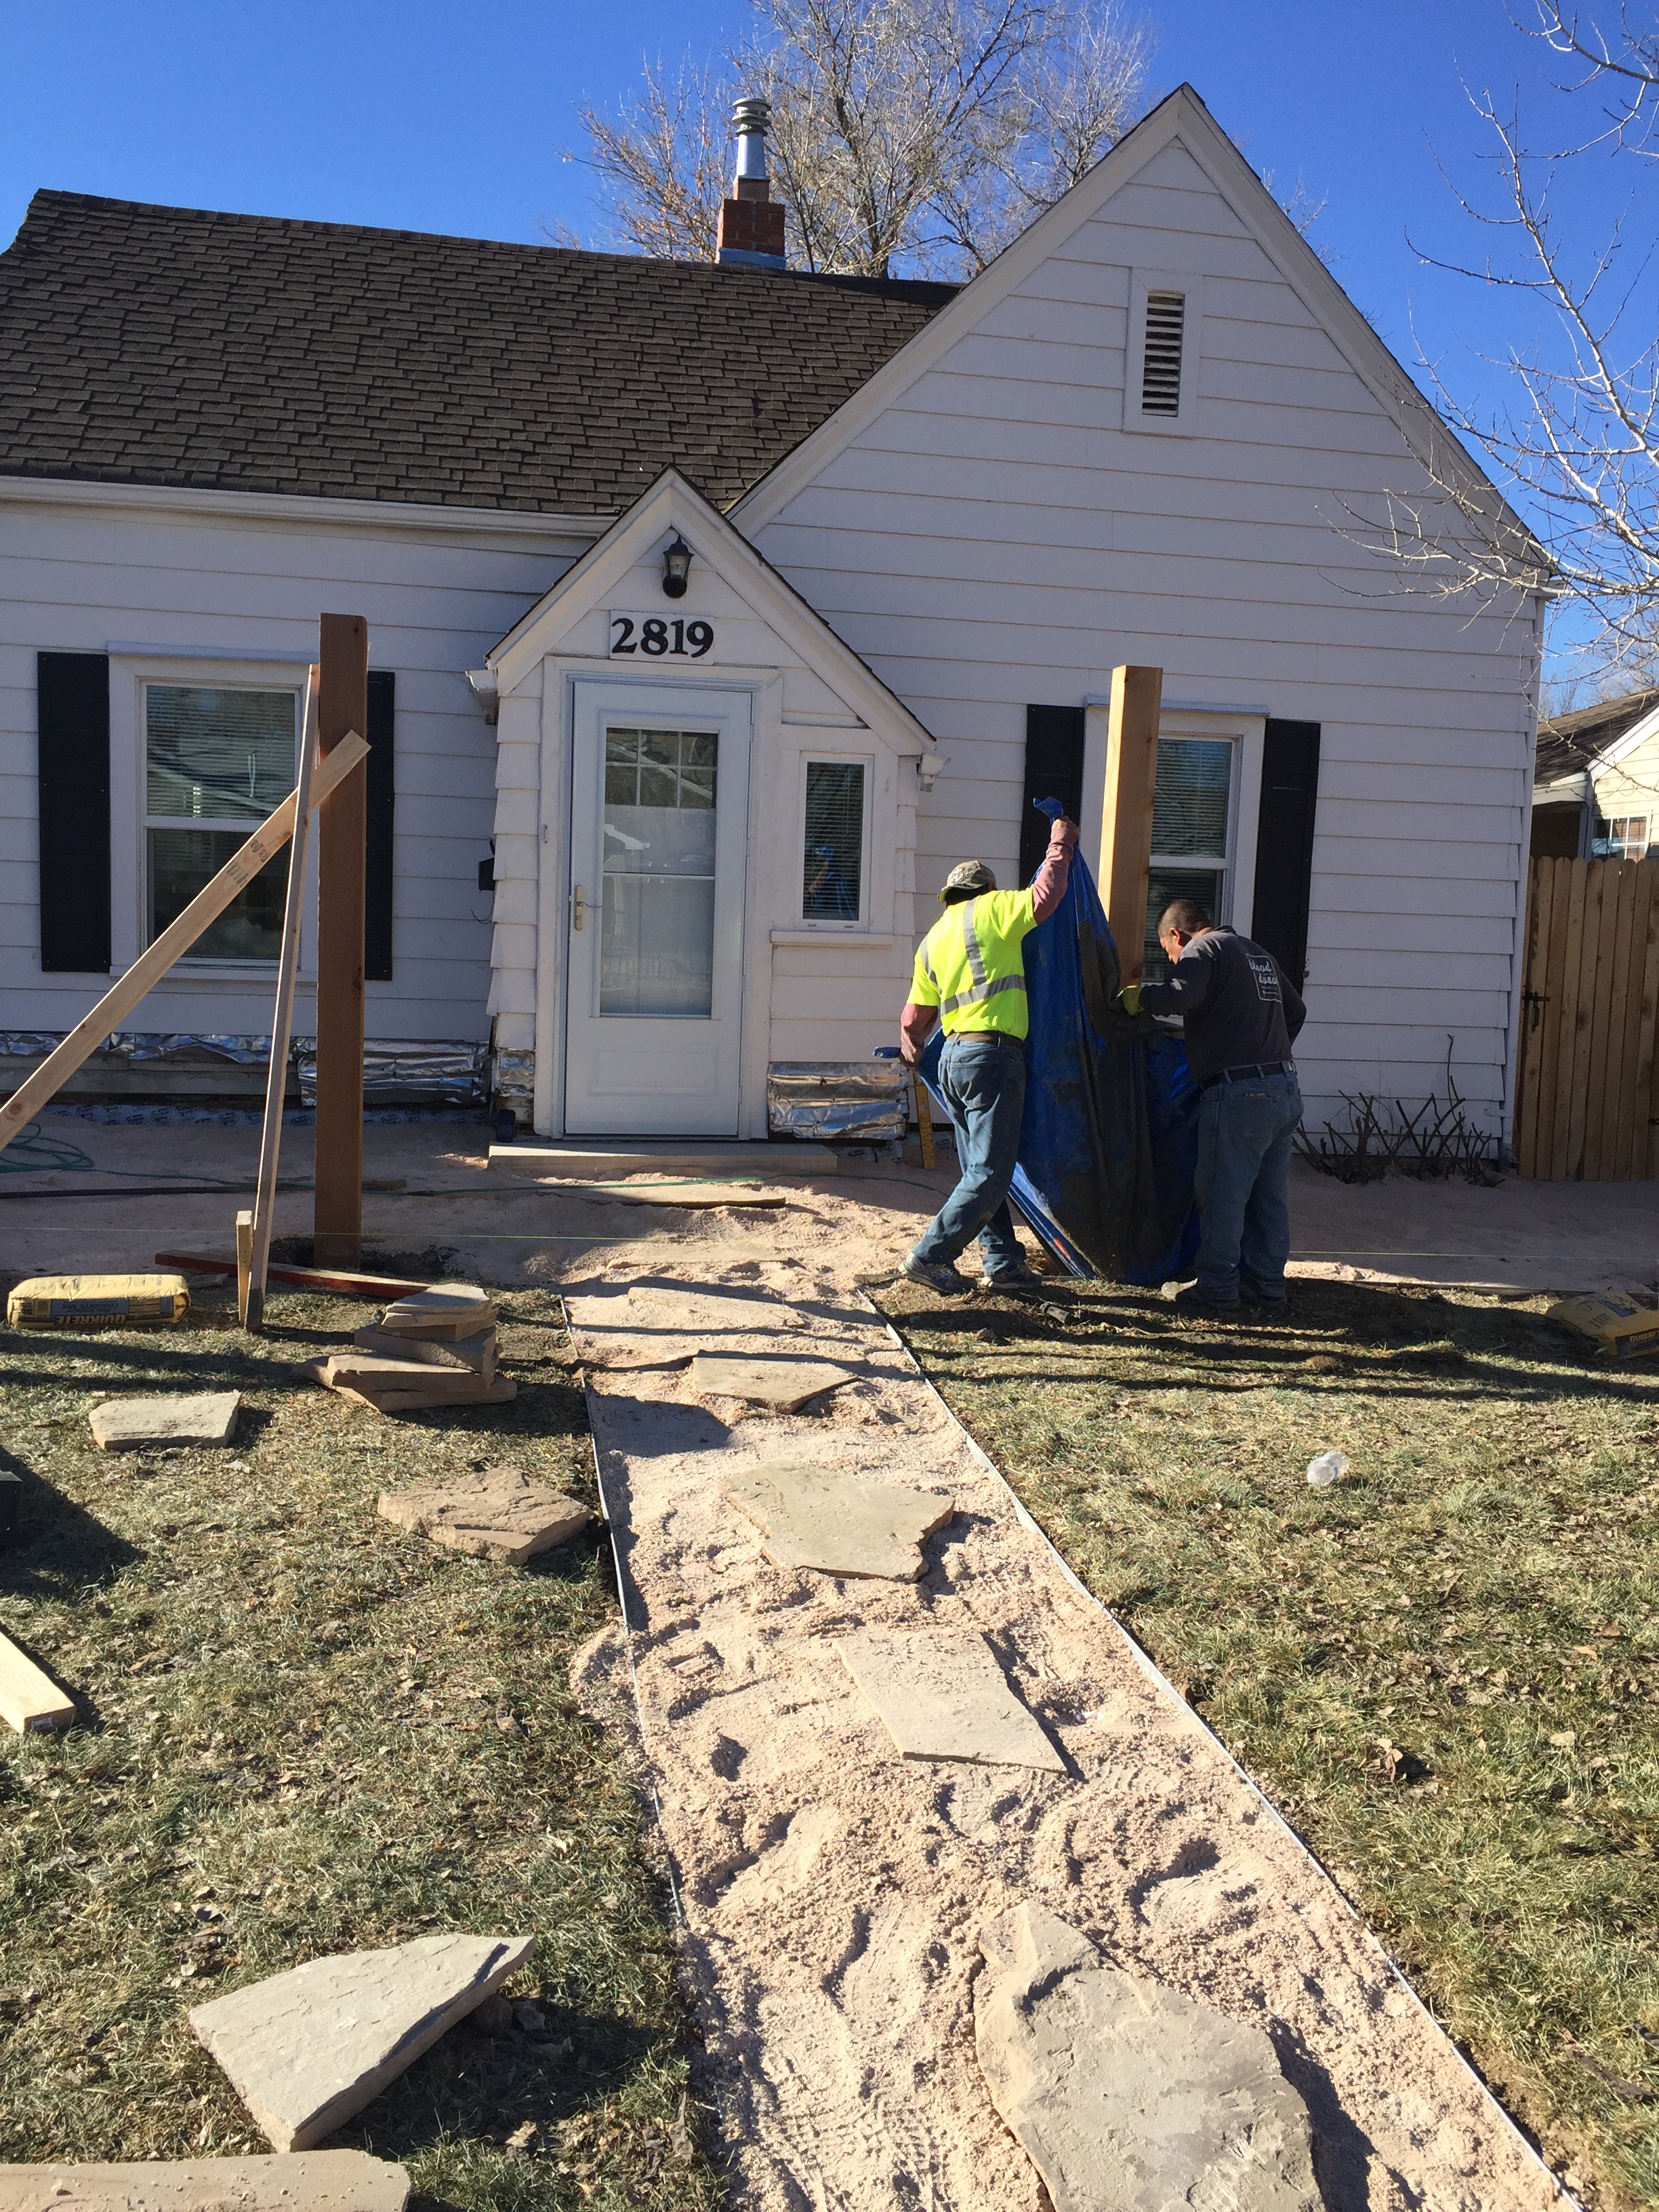
David had a great trick to pour dry concrete mix and water into a tarp. 2 guys would stand on both sides of the tarp and “mix” the powder and water by swishing it around in the tarp then pour it into the holes. Pretty smart!

Once the posts were in, they built supports to keep them straight until the concrete cured- overnight.
It already looks so much cleaner!
When the siding is removed you can see the back of the lathe and plaster interior walls. Very cool to see the way houses were built in the 1930’s.

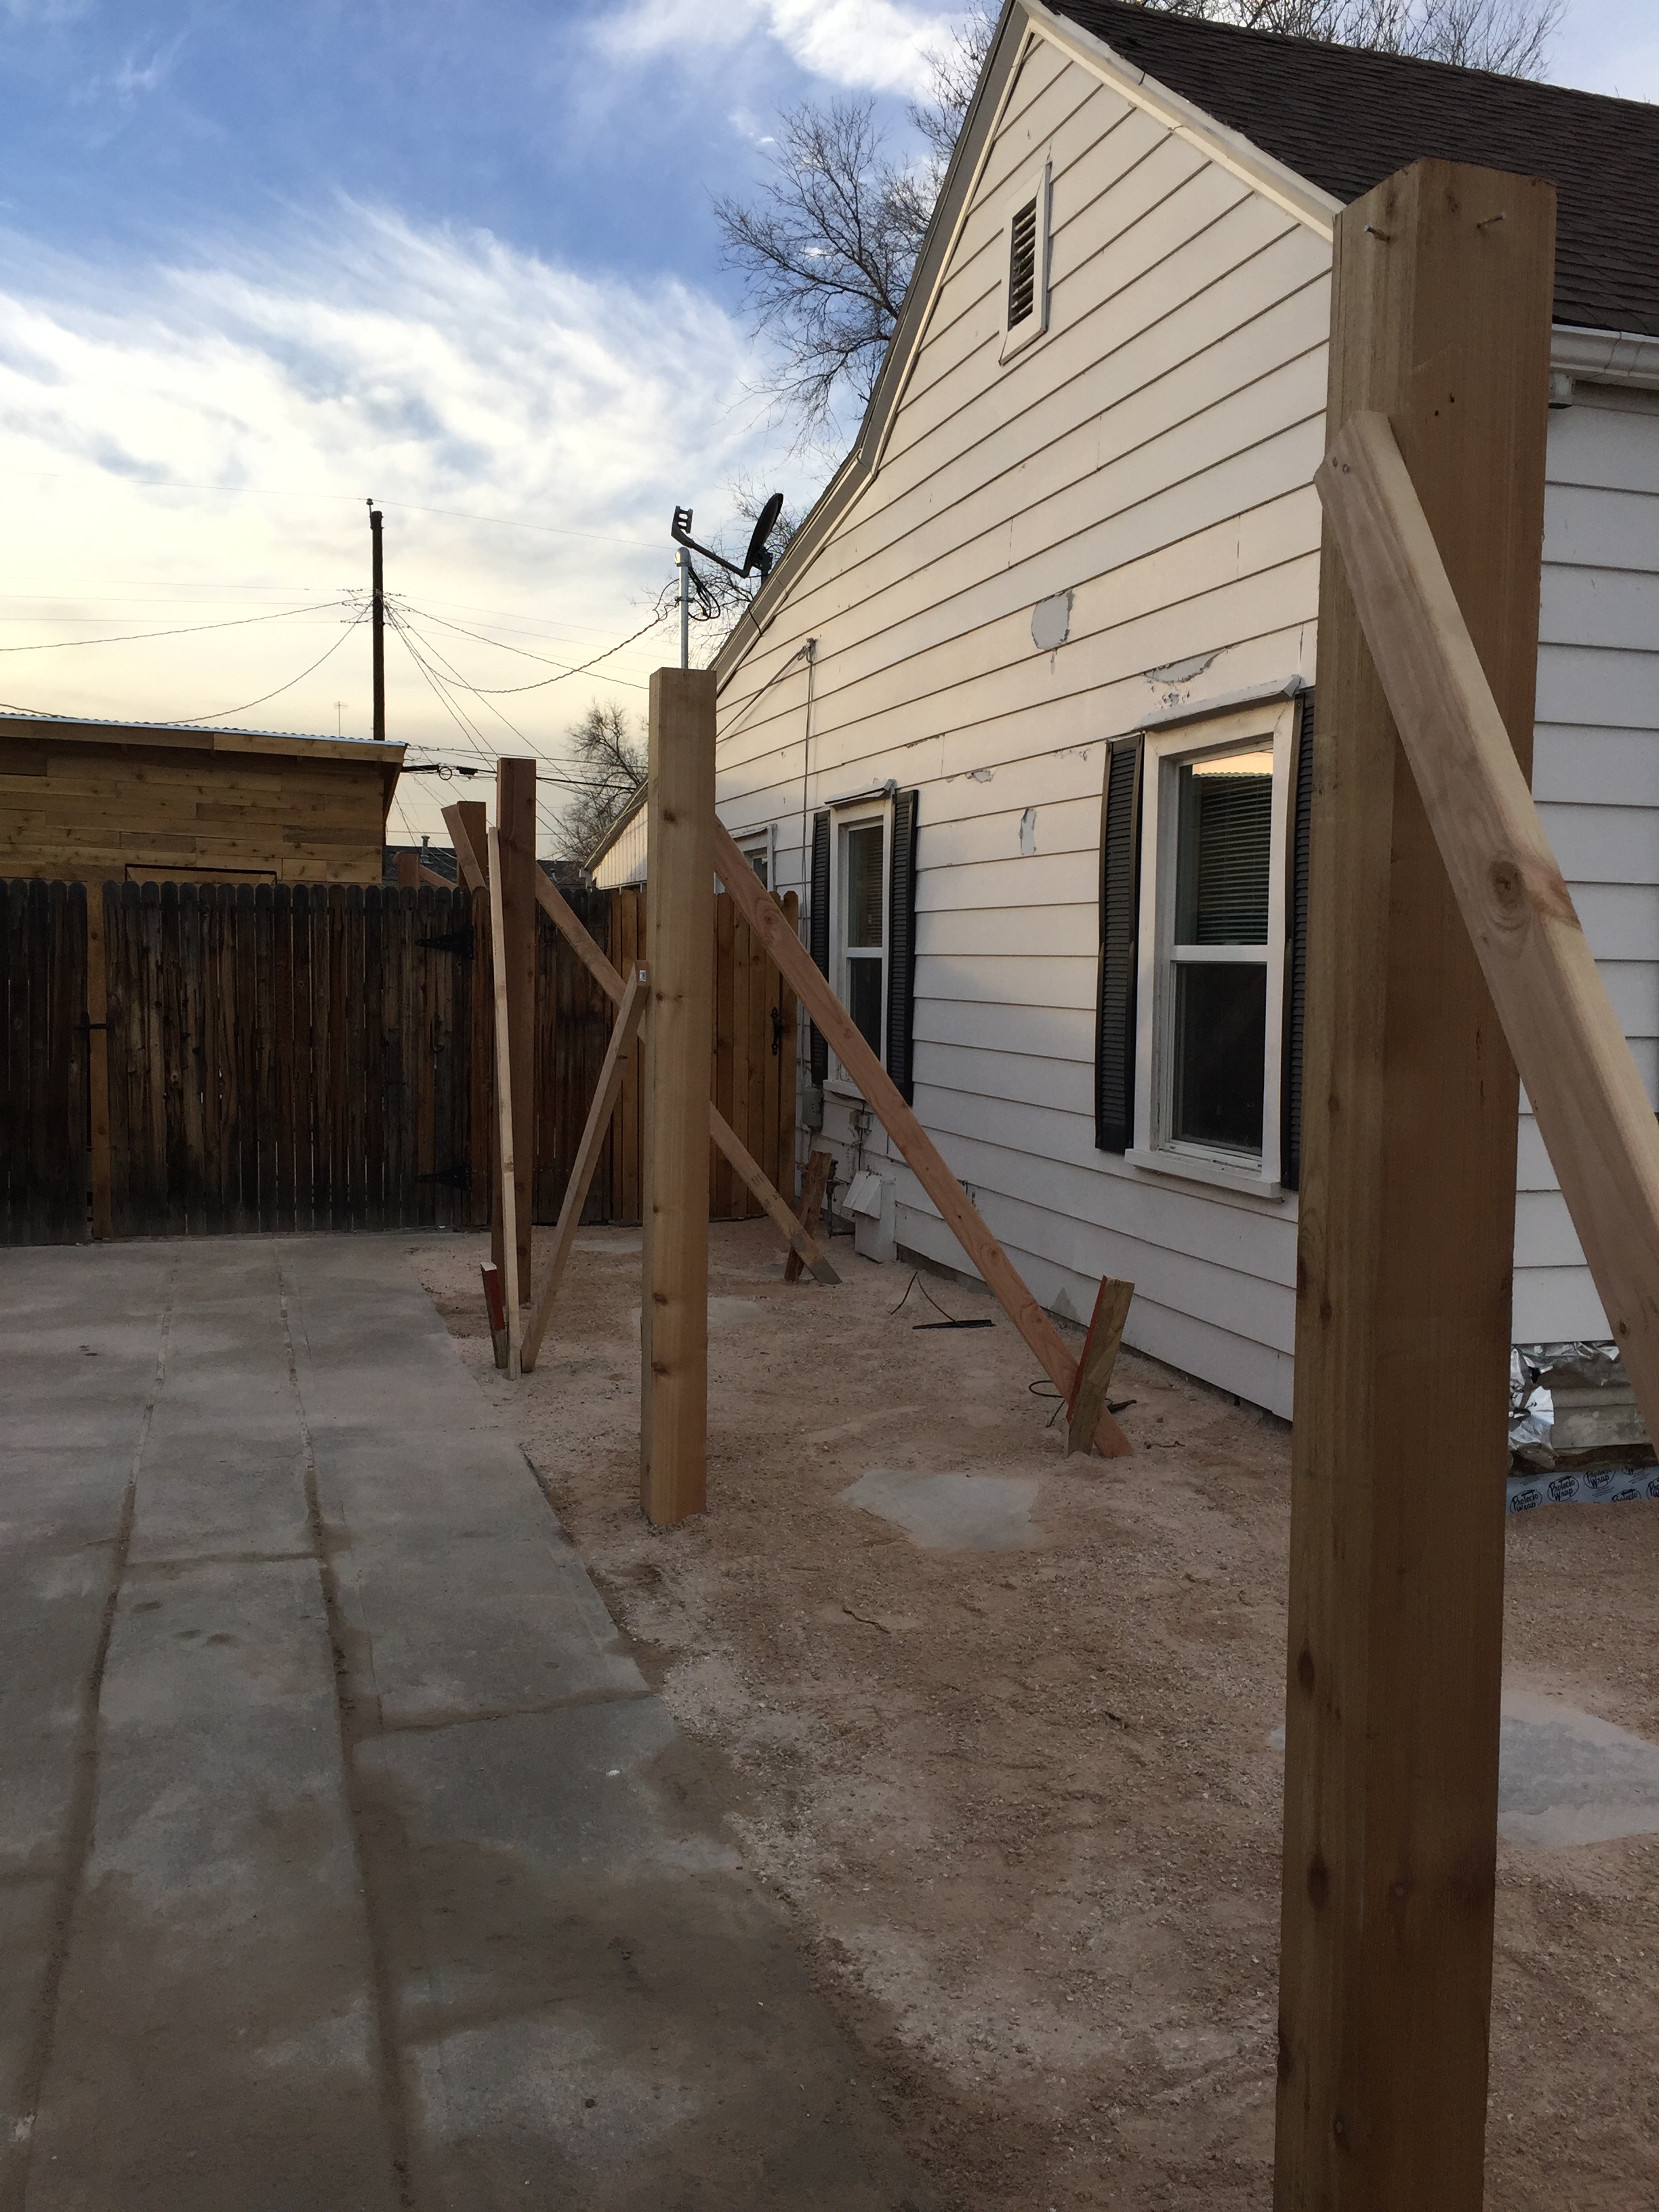
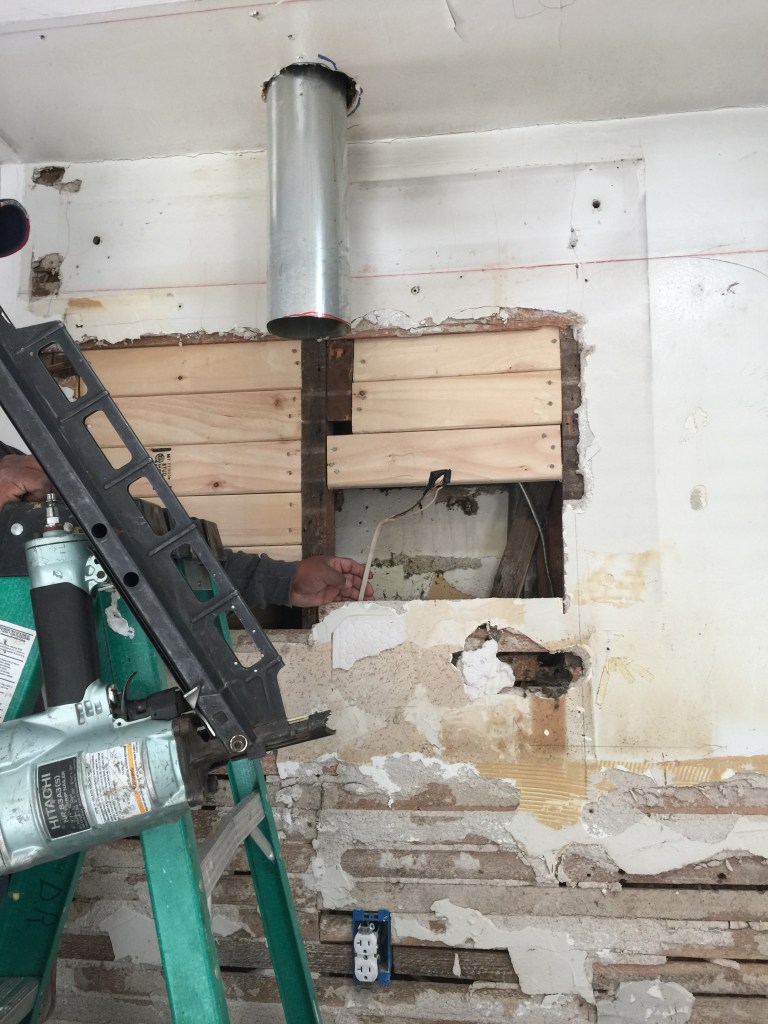
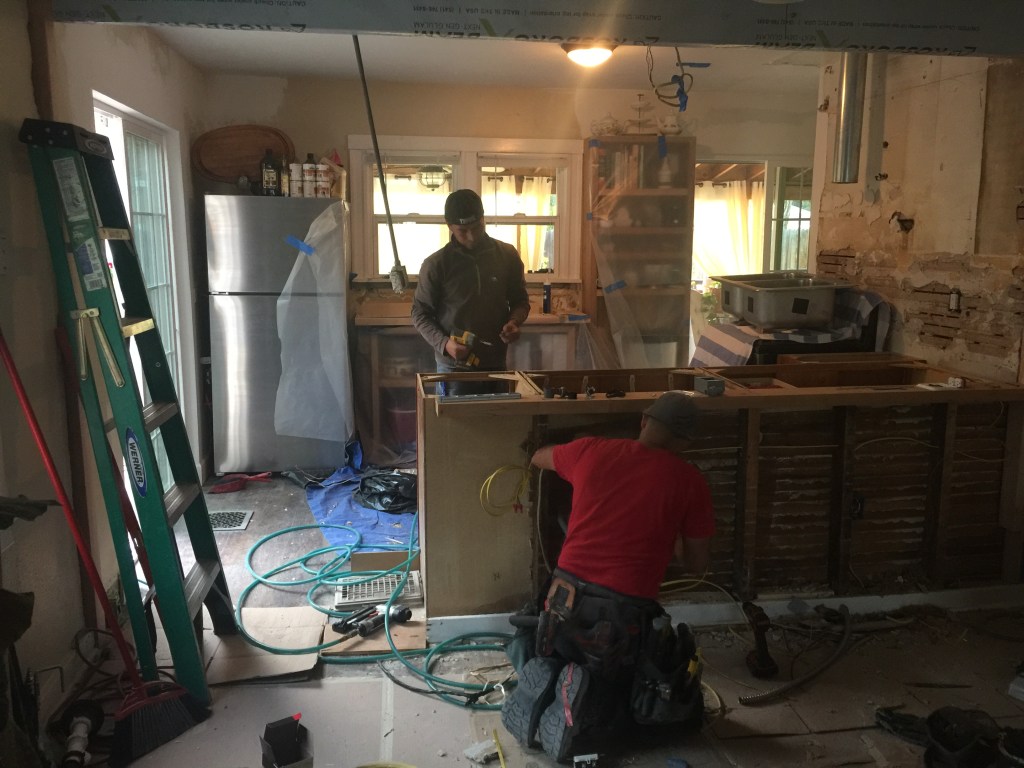
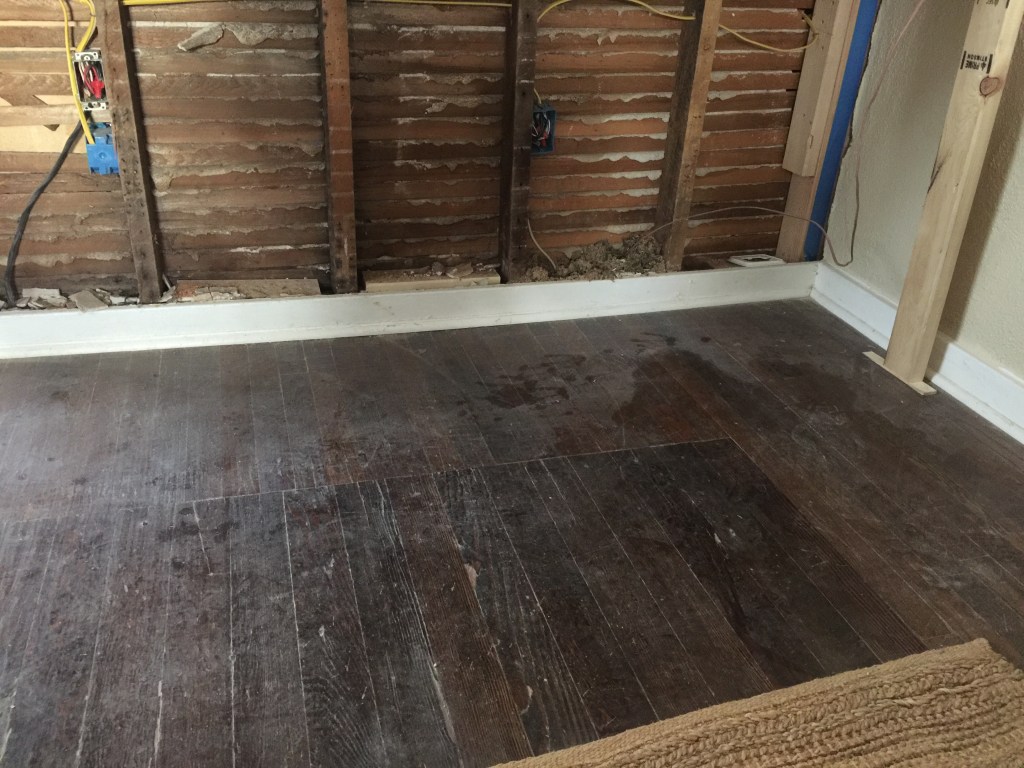
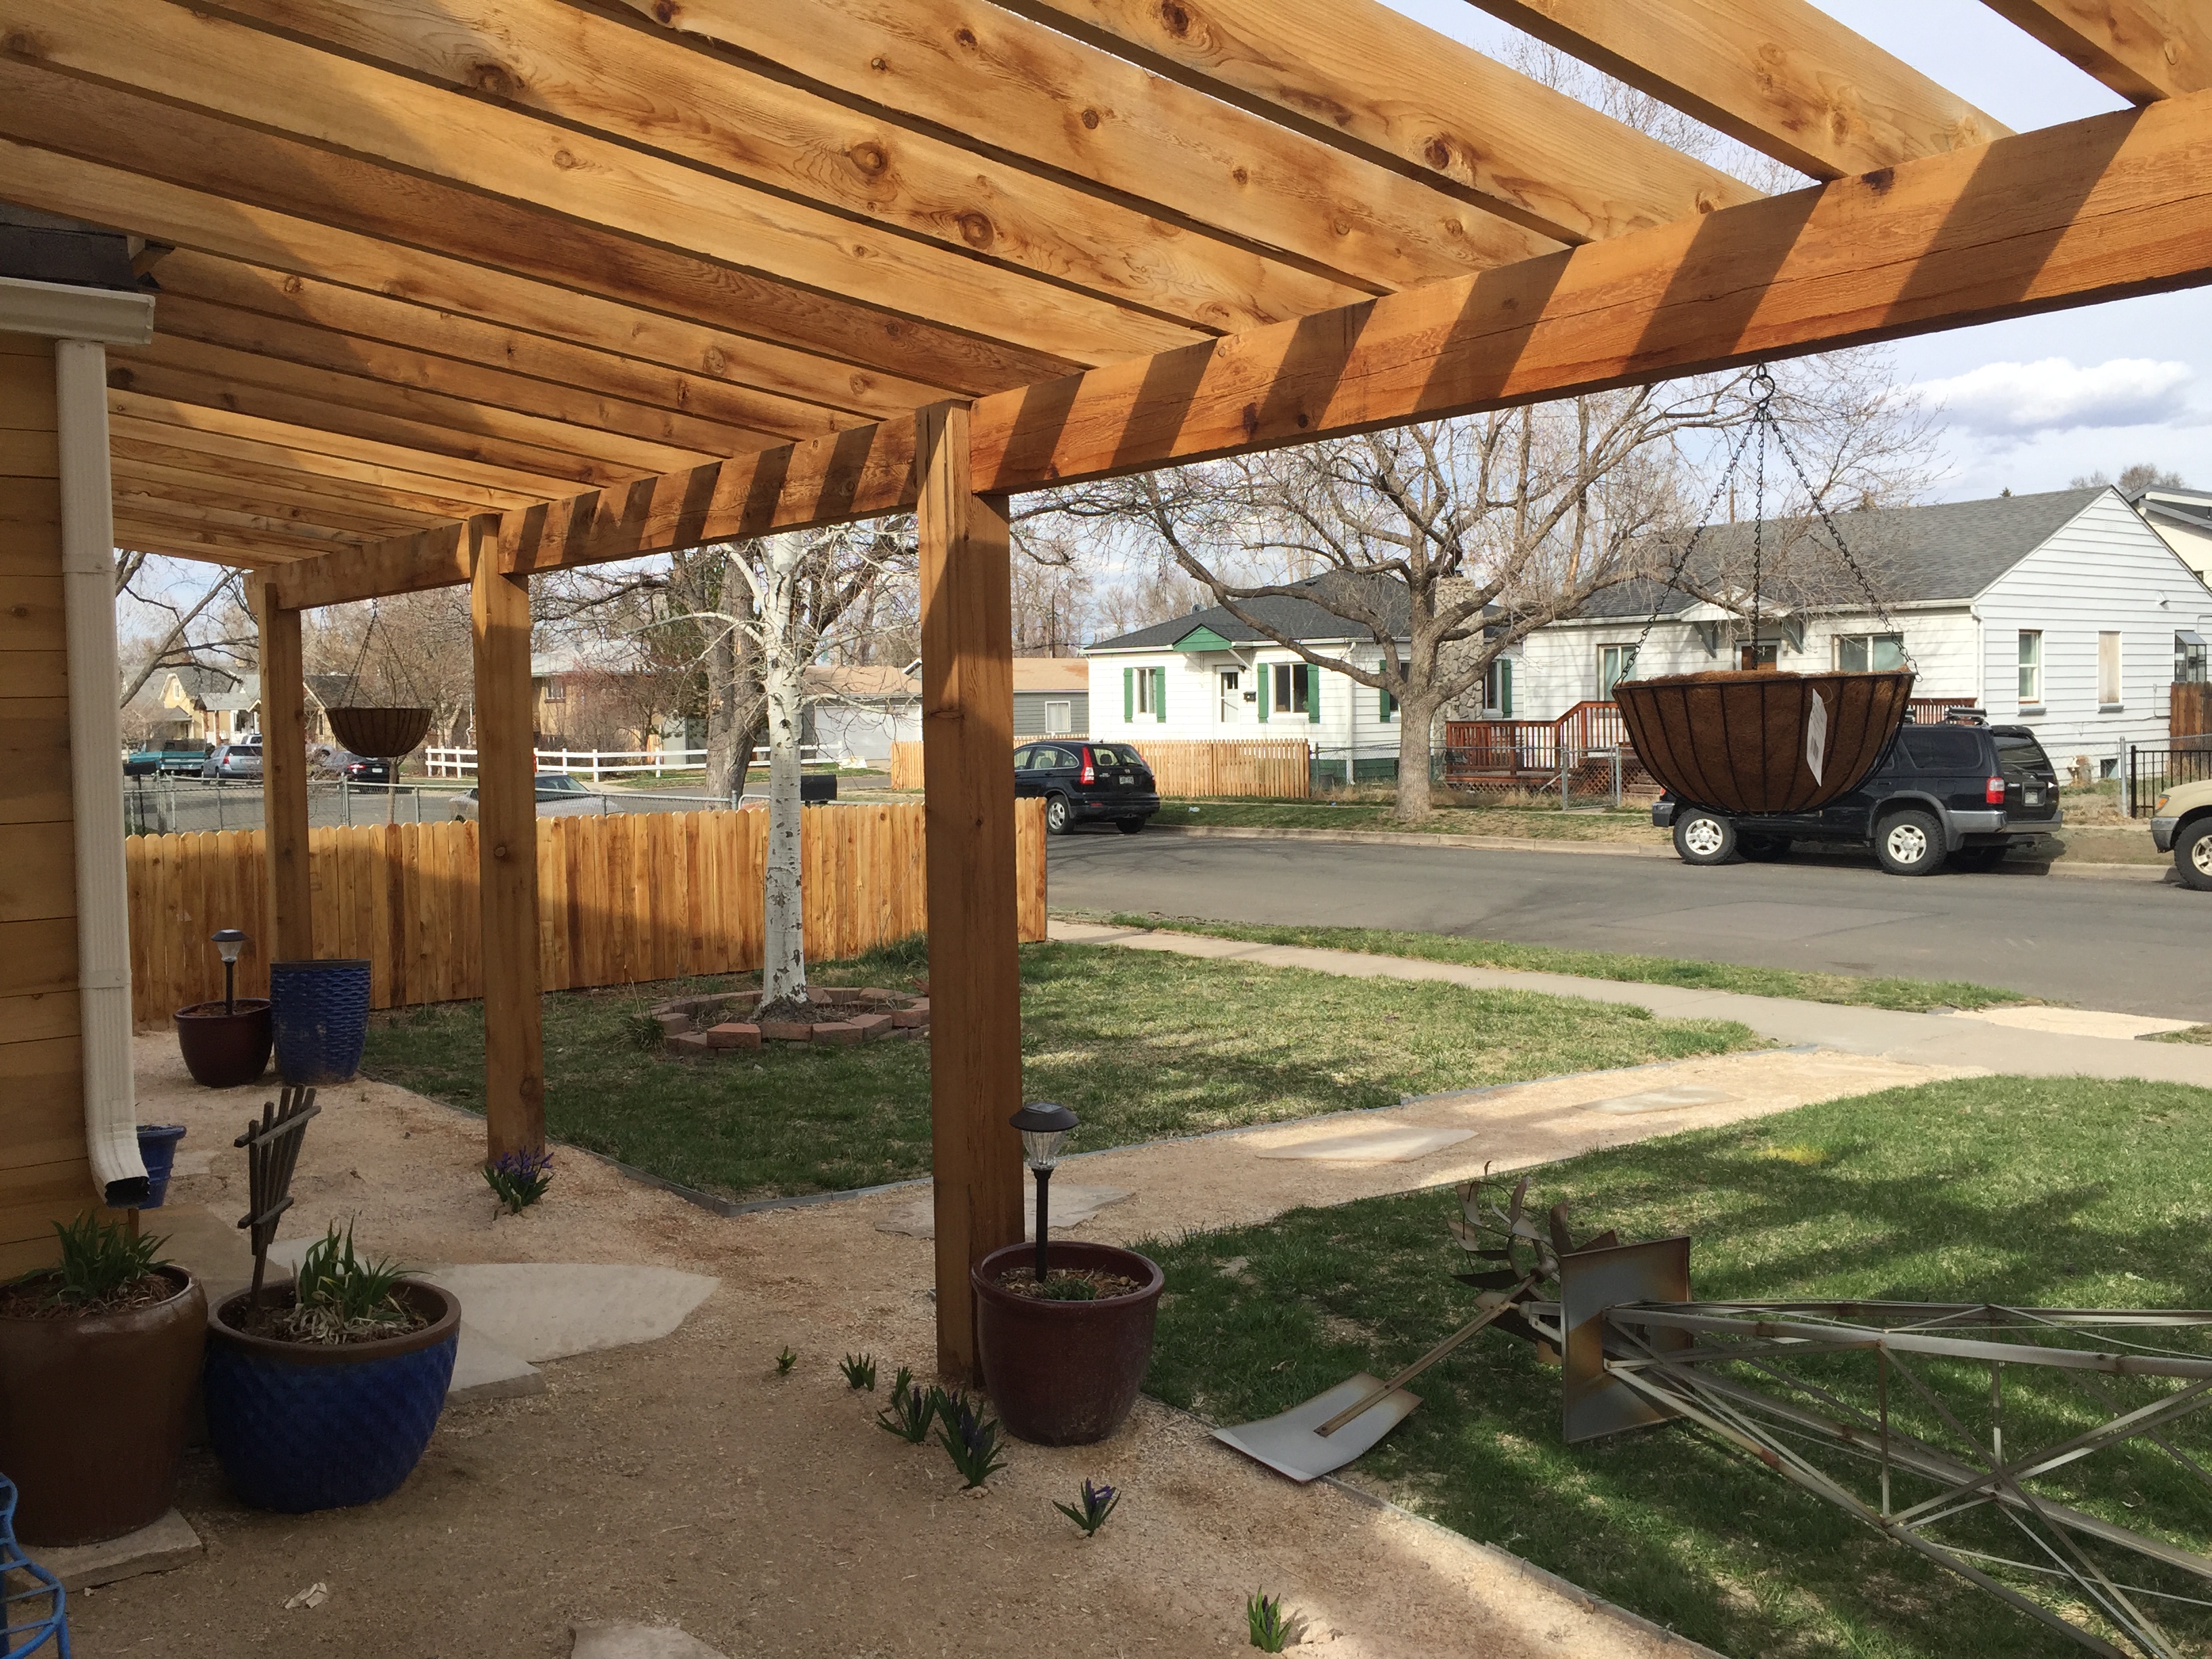
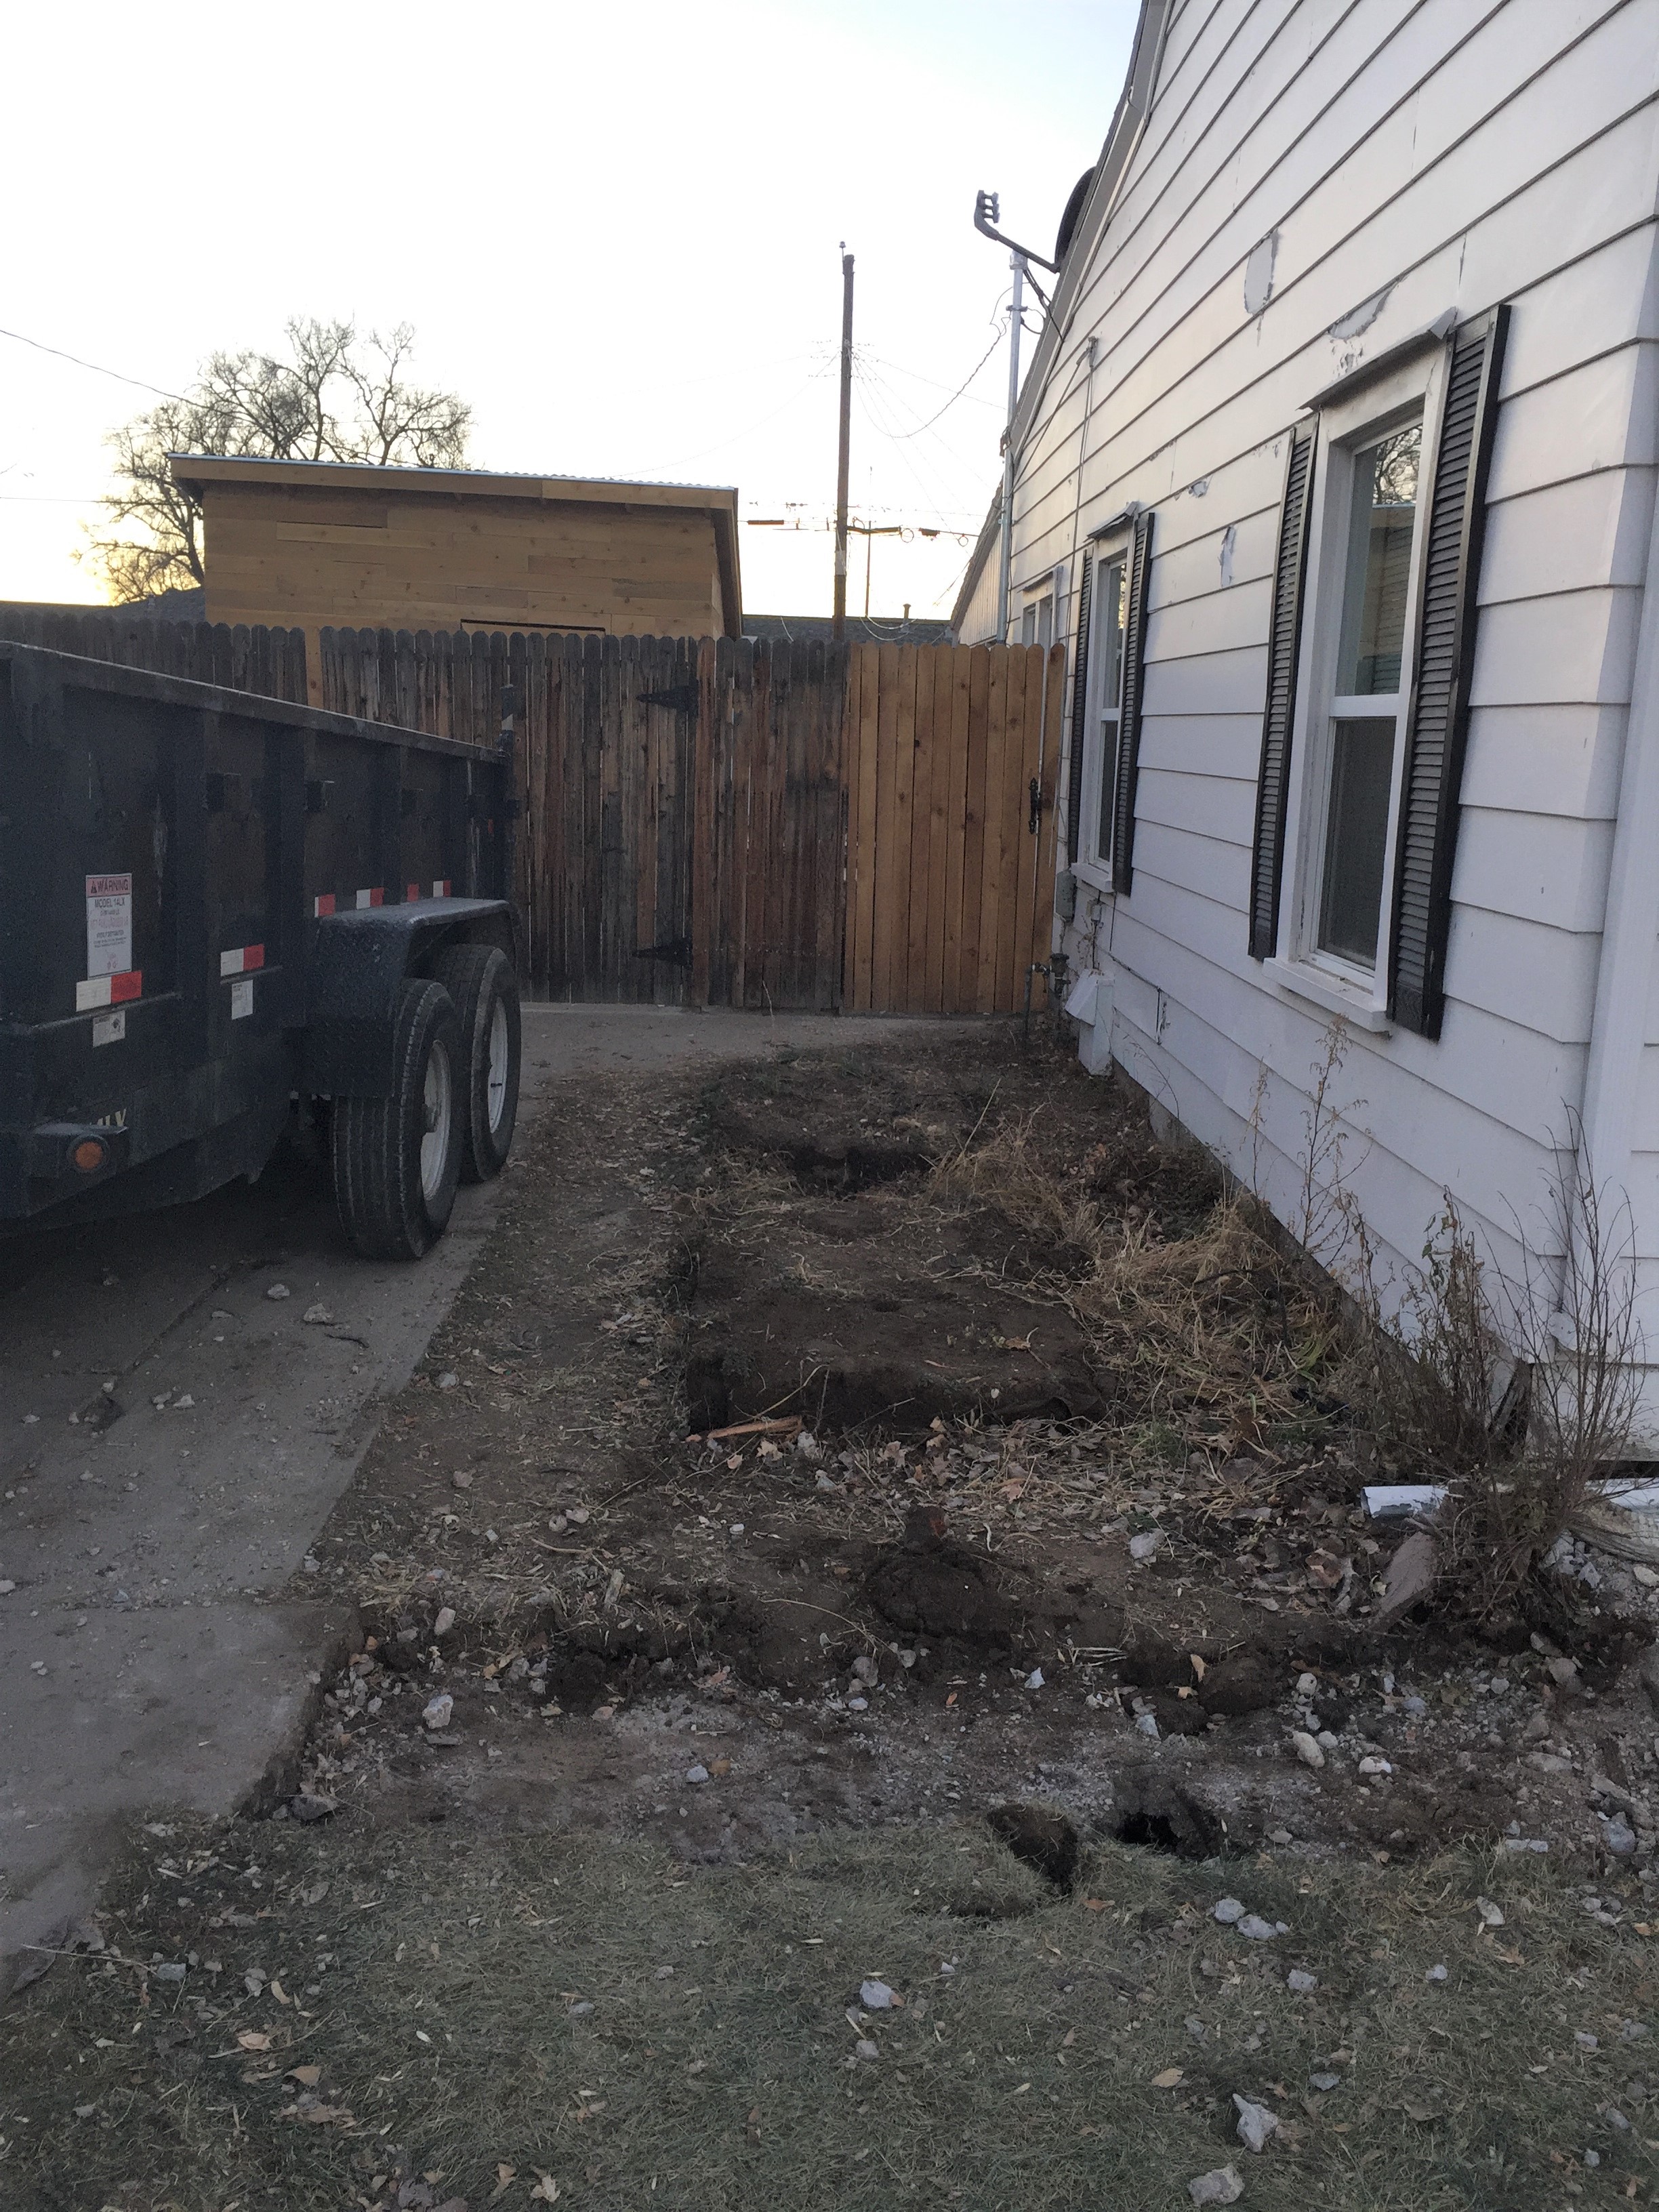
Headers for the arbor will be attached directly to the support studs of the house. When they removed the old siding we discovered very old and limited insulation in the walls. Another unexpected expense!

Once the headers where up, David began installing the rafters on the arbor.
All the hardware and brackets had to be sprayed Black as they were galvanized originally.
Finally, the space is fresh! It feels like a place to hang out. No more concrete pad, just breeze and cedar. Love it!
The arbor and landscaping are done in the front! Can’t wait for new siding!